Getting the transcript
Reading the captions from YouTube. A video nobody has opened here before takes 10 to 30 seconds; this page fills in on its own.
Getting the transcript
Reading the captions from YouTube. A video nobody has opened here before takes 10 to 30 seconds; this page fills in on its own.
Ali Dymock · @AliDymock
Where viewers went back to watch this video again, from YouTube's public Most replayed graph, lined up with what was said at that moment.
Most replayed moment #1
7:3912.2x the video's typical replay level
timbers lengthways my building is 6.5 meters so the two smaller sections are about 2.1 7 meters across and my larger sections are 4.33 meters which totals 6.5 meters to work out the joist lengths
Said at 7:32
Most replayed moment #2
8:509.1x the video's typical replay level
for each and this is how I marked up where each choice should be line up at the ends here so each one is parallel with the other and then because this is the last choice going across each a measure from there and measure our first
Said at 8:43
Most replayed moment #3
1:463.4x the video's typical replay level
if we look at my foundations again the largest unsupported gap is about two point three five meters on the trial dismantles for floor joists we can see that size of forty seven millimeters by a hundred and twenty millimeters will
Said at 1:40
The graph counts replays. It does not show where viewers stopped watching.
Words
2,412
Runtime
19:36
Speaking pace
123wpm
Reading time
10min
123 words per minute, below the 160 25th percentile of 349 measured videos. That distribution comes from the 349-video hook study.
Opening (first 30 seconds)
in the previous video I built the block foundations and leveled them in this video I'll show how I built the floor if you're like me and enjoy working with wood then this is definitely the fun part from the comments I've received so far and from those of you who've gotten in touch it seems that mixing the theory and the
62 words, the words spoken in the first 30 seconds at 123 words per minute.
Free, no signup. See how the first 30 seconds hold attention, with rewrites.
Sentence shape
| Measure | This transcript |
|---|---|
| Sentences | 1 |
| Average words per sentence | 2412.0 |
| Longest sentence | 2,412 words |
| Questions asked | 0 |
| Sentences containing a number | 1 |
Most used terms
Filler phrases
8 in total: like 5 · actually 2 · you know 1.
A literal whole-word count of the same phrase list the Prepublish browser extension uses, so a phrase inside another word is not counted and a phrase used in its ordinary sense still is. It is a count and not a judgement.
What this transcript is
Every word below is the caption track YouTube publishes for this video, pulled from the video itself and reproduced unchanged. It is not Prepublish's writing, not a summary, and not a re-transcription: it is the video's own published captions. English captions, generated automatically by YouTube, in the video’s original language. Source: the video on YouTube. A channel that would rather this page did not exist can ask for its removal through the contact page, and it is removed.
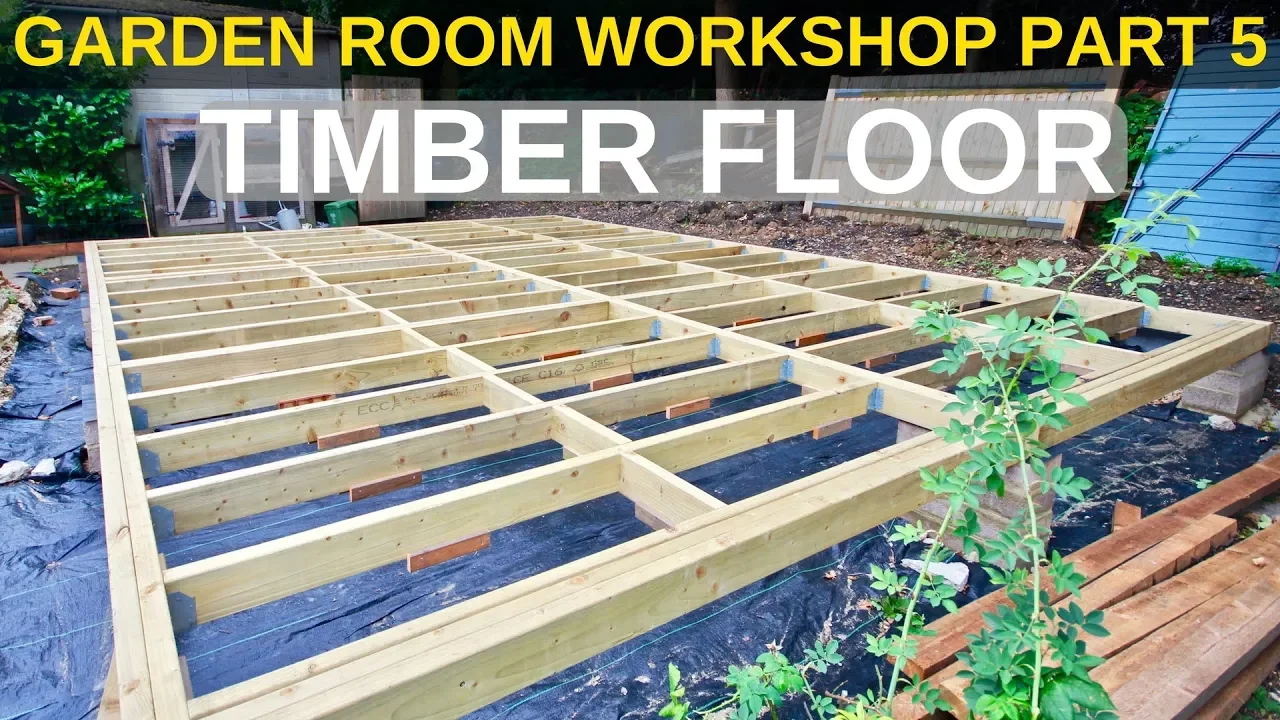
in the previous video I built the block foundations and leveled them in this video I'll show how I built the floor if you're like me and enjoy working with wood then this is definitely the fun part from the comments I've received so far and from those of you who've gotten in touch it seems that mixing the theory and the footage together is quite popular so I will carry on in that style there are a few things to know before we get started nearly all timber used for construction is softwood spruce fir or pine but there are many different types of timber available Wix has a great web page which I'll link to in the description which shows which each type is used for the top one is what I use for my build treated means that the timber has undergone a chemical treatment in a pressure chamber to force chemicals deep into the wood to prevent fungal attack and rot this is an absolute must for floor joists which are close to the ground it's not as important for wall studs or for the roof but often the price difference is negligible or a merchant only supplies treated timber regularize means that the corners are rounded over for easier handling and has a smooth plane surface and kiln-dried means that the timber has been dried out so it won't shrink too much over time the c16 label I'll get to in a minute as you can see there are a lot of different sizes available and to know the width to order will depend on the spans or gaps between the foundation piers or to put it the other way around the location and number of peers will depend on the thickness of the timber joists if we look at my foundations again the largest unsupported gap is about two point three five meters on the trial dismantles for floor joists we can see that size of forty seven millimeters by a hundred and twenty millimeters will support a span of two point six three meters if the joist is based 400 millimeters apart in the last video I mentioned that I'll be using a 16 inch spacing which equals four hundred six point four millimeters so it's important that the permissible span is over what I require this is just good practice too if the permissible span is close to your own span it's best to go up a size to reiterate why I chose to use 16 inch spacing an 8 foot sheet of ply or OSB is 96 inches which is divisible by 16 inches but not by 400 millimeters so using a 400 millimeter spacing can throw things off and lead to having to cut off slivers of sheet material as you can see a larger spacing can also be used but this means that the sheet material used for the floor surface needs to be thicker so is a trade-off as Timbers are cheaper than thick sheet materials it made sense to use a smaller spacing the span tables used to be freely available online but they seemed to have been taken down so instead they can either be purchased I'll leave a link in the description or alternatively your timber merchant should have them if not feel free to comment below the video with your spacing and maximum span and I'll let you know what size Timbers should be used I wasn't sure of the dead load of my walls and roof but my span was less than that permissible for up to naught point five kilonewtons per meter squared as you can see this table is for c16 graded timber there is another table for slower grown timber with fewer knots which is stronger called c24 grade for the same sized timber the permissible span is greater so that's another option depending on what your timber merchant has in stock the last thing to know is that the nominal sizes display when ordering are usually a few millimeters bigger than the actual size I ordered 125 millimeter by forty seven millimeter roughly five by twos which was actually closer to 122 millimeters by 45 millimeters so you can see the importance of not strength too close to the permissible span another consideration when choosing the depth of joists is that the insulate insulation that you use has to be equal or thinner than the joists I knew I'd be using 100 millimetres insulation so 122 millimeter Timbers were absolutely fine Timbers come in varying lengths as nearly all the lengths needed for my floors and walls were under 2.4 meters I ordered 4.8 meter lengths and was able to get two joists or studs out of each which is more cost-effective than buying two point four meter lengths the next topic to discuss is nails versus screws I won't go into depth about the difference as there are plenty of YouTube videos on the topic but to simplify nails don't snap as easily but they do work loose while screws snap much more easily but they tend not to work loose another advantage for screws is that they can easily be removed unlike nails I use both throughout the build but a general rule is to use nails when attaching things horizontally as the weight can snap a screw everyone has their opinion and preference but if you decide to use nails then it's highly beneficial to get a good nail gun which tend to be quite expensive if using predominantly screws then an impact driver is needed which are much less expensive I settled for the latter and then used a trusty hammer for nailing for good value screws and nails buy from screw fix if in the UK I use well over 3,000 in my build so I bought in bulk gold screw is a decent quality brand of screw and well priced DPM is an impermeable plastic membrane which is designed for use in concrete to stop water seeping up into the insulation and the surface above some builders use a DPM on a floating floor but this really isn't required most houses don't have a DPM and the floor joists have lasted for well over 100 years because like my garden room there is a cavity underneath which allows air flow to remove any moisture in the air in fact using a DPM can trap moisture between it and the floor and then cause problems down the line however damp can travel up through the block piers soaking from one to the next so I use sections of damp proof course DPC to act as a barrier to moisture entering the wood floor above I cut them a little oversized so they were a bit bigger than the blocks let's now get into the build this is a rough diagram of my floor the joists are doubled up along all four sides to give strength to the walls that will stand on top as mentioned each timber has a width of 45 millimeters so doubled-up equals 90 millimeters I knew that my timber for the walls would have a depth of 95 millimeters so they're reasonably equally matched the joists are also doubled up between each peer which again helps with the strength of the floor and also makes it easier to build the floor in sections my initial plan was to build four sections two smaller ones and two larger ones I used a circular saw or miter saw to cut the timbers lengthways my building is 6.5 meters so the two smaller sections are about 2.1 7 meters across and my larger sections are 4.33 meters which totals 6.5 meters to work out the joist lengths I took my building's width of 5 meters 5,000 millimeters and deducted 270 millimeters which is the sum of the 645 millimeter Timbers I divided this number by 2 as there are two sections which gave me the length of each joist of 2.36 meters which is how I worked out my maximum span earlier for the two largest sections I laid out the four lengths two for each and this is how I marked up where each choice should be line up at the ends here so each one is parallel with the other and then because this is the last choice going across each a measure from there and measure our first joist 60 inches from there 16 inches put a line and then we know just as that joist to the left is to the right of it we need to put a next right then we come along another 16 inches to make our mark and X the right hand side will keep on going like this and tape measure usually makes easy because we've got these little diamonds or something similar to mark off just keep on working your way over then 180 so our Lord last joint Joyce put at 80 it's very close to where we're having a double joist on our block the reason there's such a small gap between the two is because we need to maintain the 16 inches between this one and the last one so as we're moving forward we continue with this eighty ninety six and keep on going through and lastly a hundred sixty and we've got our last joist here at the end we're gonna have to double ones to full support for the walls then we need to transfer the milk away across all our boards so we can put the line across and extend it this is my speed square isn't quite long enough and then we have X's where all the joints are going to go next one and we do the same transfer the mark and then point out which side is a mark the joist is gonna go when you're deciding which way to place a board we need to check for the convex side so you decide which way is concave I think that side more concave and that side is more convex you want to put that side up so that when you walk on air it'll be compressed down on ways it was like that it would only get more exaggerated [Music] I [Music] this is a complete deck the noggins are now in but it's still in four sections for two small ones there's one here and a second one here now gotta watch for out walking as I speak and the two large ones are these ones one there and one here now I'm trying to square up the building and it seems quite easy to square these ones because they're quite small these ones even if I imagine I have two three four people it will be difficult so I think that the best thing to do is to cut them down the middle so cut each one here and here the same with the other end and to create six of the same size different pieces and then I can square inch ones are in six separate panels I'm going to square up this one like I have for these three here now the best method I bowed is instead of trying to find a right angled corner or yeah using the folding square of three four five method best method I found it is to measure across get those two equal then come back and just to make sure make sure the the corners are working with the folding square so three to five exactly in that dimension this way comes to three to nine or three to eight and a half as you can see that because this side here is longer I need to pull this side of the panel to the right let's move quite easily which means it's probably more square and I thought it will do that again doesn't matter which way you measure three to six point six three 26.7 not bad so then we need to put the braces on I'm done for that one so being careful not to move that out position these are actually from my garage if you saw part one and I was taking that down doesn't matter which way you brace it whether it's going that way or that way but diagonal is much the best and try and get it as wide as possible if you are going to act oh so placing it there and that looks good and then coming back with our screws and our impact driver get in the sense of the joist that's good to do one for each joist here I've screwed all six sections to one another and added the second timber to the two sides to double it up and to get to my buildings five meter width you may have noticed that I've broken my general rule from earlier which is to use nails not screws when attaching timber horizontally this is because the next step is to use joist hangers which are metal brackets with flanges for nailing into both Timbers with 30 millimeter square twists nails these are incredibly difficult to pull out once hammered in this gives the joist great strength and will stop the screws from snapping [Music] I then used wood preserver on all the endgrain that face the outside of the building technically this should be done wherever timber is cut as the chemical treatment doesn't penetrate to the center of the wood but the timber should stay dry under the building the last thing to do was to attach the floor to the foundation blocks I first tried a sleeve anchor but this blew out the side of my block so I switched to a concrete screw bolt together with heavy duty angle brackets [Music] thanks for watching and to those subscribers who keep their subscriptions public it's really interesting to see that we follow many of the same channels I've updated the previous videos with lists of tools and materials used so do check out the descriptions and also let me know what you think of this rather long video in the comments I wasn't able to get to the insulation and floor covering in this video but will do so in the next instead see you then you
The words are the caption track's own and nothing is reworded or re-transcribed. Paragraph breaks are placed between sentences so the text reads as prose.
Free tools for your own script. No signup, no login.
Paste your draft and see where viewers are likely to drop off, with a rewrite for each weak line.
Paste the first 30 seconds of your own draft for a hook score and rewrites.
Check your draft against YouTube's advertiser-friendly guidelines before you record it.
Read this channel's public videos and transcripts, and download a writing brief for it.