Getting the transcript
Reading the captions from YouTube. A video nobody has opened here before takes 10 to 30 seconds; this page fills in on its own.
Getting the transcript
Reading the captions from YouTube. A video nobody has opened here before takes 10 to 30 seconds; this page fills in on its own.
Axel Olsson · @axelflax
Words
4,421
Runtime
25:54
Speaking pace
171wpm
Reading time
18min
171 words per minute, between the 160 25th percentile and the 181 median of 349 measured videos. That distribution comes from the 349-video hook study.
Opening (first 30 seconds)
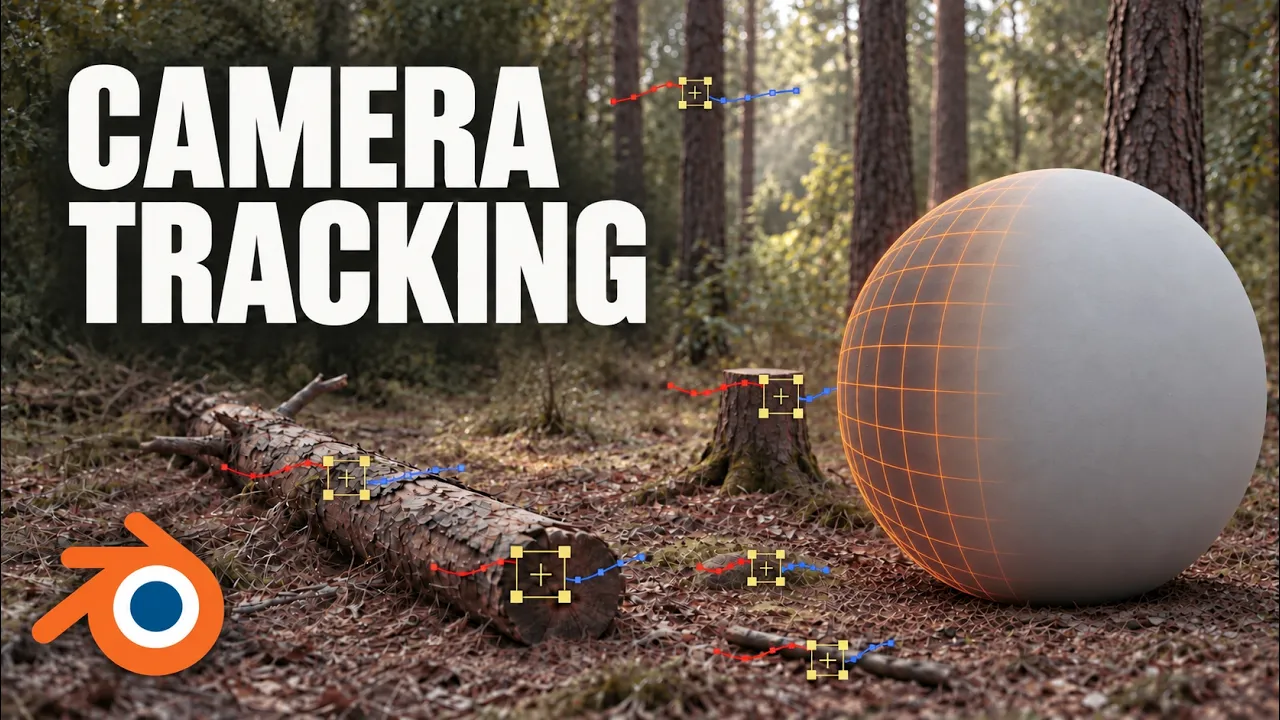
In this video, I'm going to show you exactly how to camera track your footage from filming the right camera shot all the way to integrating the effects objects into your tracked scene. We will start with what you need to think about when filming or choosing footage. Then think how you should actually camera track it and finally how you need to put in your 3D objects to make it look like they belong into the scene. But before we go into the tracking itself,
86 words, the words spoken in the first 30 seconds at 171 words per minute.
Free, no signup. See how the first 30 seconds hold attention, with rewrites.
Sentence shape
| Measure | This transcript |
|---|---|
| Sentences | 280 |
| Average words per sentence | 15.8 |
| Longest sentence | 45 words |
| Questions asked | 3 |
| Sentences containing a number | 38 |
Most used terms
Filler phrases
48 in total: like 17 · actually 16 · basically 6 · uh 5 · kind of 2 · um 1 · you know 1.
A literal whole-word count of the same phrase list the Prepublish browser extension uses, so a phrase inside another word is not counted and a phrase used in its ordinary sense still is. It is a count and not a judgement.
What this transcript is
Every word below is the caption track YouTube publishes for this video, pulled from the video itself and reproduced unchanged. It is not Prepublish's writing, not a summary, and not a re-transcription: it is the video's own published captions. English captions, published by the channel, in the video’s original language. Source: the video on YouTube. A channel that would rather this page did not exist can ask for its removal through the contact page, and it is removed.
No Script X-ray for this video: YouTube shows a Most replayed graph only once a video has enough views.
In this video, I'm going to show you exactly how to camera track your footage from filming the right camera shot all the way to integrating the effects objects into your tracked scene. We will start with what you need to think about when filming or choosing footage. Then think how you should actually camera track it and finally how you need to put in your 3D objects to make it look like they belong into the scene. But before we go into the tracking itself, there are a few things that you need to understand because the quality of your camera track is often decided before you even open Blender.
I am Axel and for the past four years, I've been developing camera tracking softwares specifically as add-ons for Blender. I have developed several tracking tools over the years, but my latest all-in-one add-on is called Motion Master 3D. It's a toolkit which allows you to track different kind of things such as camera tracking, tripod tracking, and planer tracking. But I will show you more of that later. But first, what actually is camera tracking?
Camera tracking is essentially the process of reconstructing how a real camera moves through the scene. Tracking software follows identifiable points throughout the footage and based on how these points move from frame to frame, a solver estimates the camera's position, rotation, and position of these points in 3D space. The result is a 3D camera that matches the movement of your camera you used when you recorded the original footage.
And this is what allows you to place something like a character, building, spaceship, or any other 3D objects into your footage and make them look like they actually were there. Without camera tracking, your VFX would essentially just sit on top of the video instead of existing inside the scene. So, with that explained, let's start with the footage. You can either film your footage yourself or you can use stock footage from websites like Pixels, Pixab Bay, or something similar.
But regardless where the footage comes from, there are a few things that you need to pay attention to. The first one is motion blur. The more motion blur you have in the shot, the harder it becomes for the tracker to follow the details accurately. And the reason comes down to how the tracker actually works. A tracker essentially identifies a small visual pattern in one frame and then tries to find that same pattern in the following frames.
But when you introduce heavy motion blur, that feature becomes smeared across images. So instead of tracking a sharp recognizable detail, the software is now trying to track something blurry and constantly changing. So ideally, you want to keep the motion blur under control. And I'm assuming that most of you have a phone you can record with. So, let me quickly show you how you can control this using the Blackmagic camera app.
The setting that we care about right now is shutter speed or shutter angle because that determines how much motion blur you get. Shutter speed controls how long the camera sensor is exposed to light for each frame. So, a faster shutter speed means less motion blurs, but there's a trade-off. You also get less light. And if you push the shutter speed too far, your footage can start looking unnaturally sharp and jittery.
A common middle ground is what's called the 180° shutter rule. This means your shutter speed is roughly double your frame rate. So if you're filming at 24 frames per second, you will use a shutter speed of around 148th of a second. Now the next point is probably even more important, and that is camera movement. Imagine these dots represent the tracking points in a scene. If the camera only rotates from one position, it becomes very difficult to determine which points are close to the camera and which ones are far away.
What the solver really wants is something called parallax. Parallax happens when objects at different distances move across the image at different speeds as the camera changes position. Something close to the camera might move dramatically across the frame while something far away barely moves at all. That distance gives the solver enough information about the depth. And that's exactly what we want. So when you're filming something, you tend to camera track.
Don't just rotate the camera. Actually move the camera through the environment. Now you can still track footage where camera remains in one location and only rotates. That's normally referred to as a tripod shot because it's similar to placing a camera on a tripod and pivoting it around a fixed point, but that requires a tripod tracking solution. The solver can calculate rotation, but it can't accurately reconstruct translation or depth in the same way.
The third thing you need to think about is lightning. Generally speaking, a well-lit scene is much easier to track. One reason is that better lighting usually allows you to record at lower ISO, which means less image noise. And noise can be a problem because it introduces random visual information that can interfere with the tracking. Better lightning also makes edges, textures, and smaller details easier for the tracker to identify.
You should also try to avoid dramatic lightning changes throughout the shot. Remember, the tracker is constantly trying to identify the same visual features from one frame to the next. If the lightning changes dramatically, those features can suddenly look very different. The next thing is fairly obvious, but it's still extremely important. Your footage needs trackable details. Camera trackers loves things like high contrast corners, textures, cracks, patterns, and distinct features.
What they don't like is a giant perfectly smooth wall with absolutely no texture. If there's nothing distinctive in the image, there simply isn't much for the tracker to follow. There are also a few other things that you should try to avoid. Some of them are strong lens flares which can interfere with the tracking, very shallow depth of field, and heavy background bokeh which can remove a lot of useful detail, focus shifts which can cause features to change dramatically during the shot.
And then we have moving objects such as people moving through the scene, moving cars, animals, trees blowing aggressively in the wind. Anything that isn't actually a part of the static environment can create problems. But why? It's because the solver assumes that the points you're tracking belong to one rigid scene. So if you start feeding it points from a moving car, for example, those points are following a completely different motion from the environment around them. and that can throw off the solve.
You can deal with this by masking moving objects during the tracking process. And Motion Master 3D also includes automatic AI masking to help with situations like this, but it's still something that you should be aware of when filming. Another thing to consider is focal length. Very long telephoto lenses can compress the image and make the scene appear flatter. And again, that's not ideal because one of the main things that we are trying to give the solver is clear information about the depth.
In many situations, a wider or more moderate focal length will give you stronger parallax and make the shot easier to solve. You should also avoid trying to track extremely flat log footage with very little contrast. But you can absolutely record in log if that's part of your workflow. But it's often helpful to create a rec 709 or a temporarily color graded version of your footage for tracking. That way the tracker gets stronger contrast and more clearly defined features.
You can still use the original highquality footage for the final render and compositing. And here is one extra tip that isn't technically a part of camera tracking, but it will still save you a huge amount of time later, and that is while you are on location, try to capture the lightning environment as well. Ideally, shoot a 360° HDRI of the scene. So once you start adding your 3D objects, that HDRI can help you recreate the real lightning and reflections from the environment, make your VFX integration much more believable.
You can use a dedicated 360° camera or even your phone with an app designed for capturing HDRI environments. Another extra tip I have is that if you want even more precise geometry of your set and you have a phone that has a lighter sensor, you can, for example, use Polycam and scan in your environment. You can also use other scanning apps, but uh either way, you can then scan in your environment and then use that as a shadow catcher and a reflector on your objects later in Blender.
So, to summarize, when you're choosing or filming footage for camera tracking, you ideally want controlled motion blur, actual positional camera movement, good lightning, plenty of trackable detail, minimal moving objects, a sensible focal length, and enough contrast for the tracker to clearly identify features. Now, at this point, you might be thinking, if I have to follow all of these guidelines, doesn't that mean most footage is terrible for camera tracking?
And uh yes, at least with traditional camera tracking workflows, a lot of footage can become extremely difficult to solve. And this is one of the main reasons I built Motion Master 3D. Because with traditional camera tracking, you often have to treat these guidelines almost like strict rules. You place trackers manually. You clean them up, you remove the bad trackers, you create masks, you solve, you adjust, you solve again, and so on and so on.
And depending on the footage, getting a usable result can take hours. Motion Master 3D is designed to automate as much of that process as possible. So, if your footage has some motion blur, difficult lightning, moving objects, or other imperfections, it doesn't automatically mean the shot is unusable. And instead of manually setting up and tracking every clip, Motion Master 3D can track an entire video with essentially one click.
You can even batch process multiple videos. So something that could traditionally take hours or sometimes days of manual work can potentially be reduced to minutes. But good footage will always make your life easier. software can compensate for a lot of problems, but the better the information you give the tracker, the better your chances of getting an accurate result will be. And now that you know how to choose and capture footage that's actually suitable for camera tracking, let's move on to the tracking process itself.
All right, now we can finally get into the actual tracking. Before I show you how to do it, I want to quickly explain what camera tracking actually does and how it differs from other tracking methods like planer tracking, tripod tracking, and object tracking. Because choosing the wrong type of tracker can make your life much harder than it needs to be. So, as I mentioned earlier, camera tracking works by following recognizable points throughout your footage.
These points are usually called the tracks or trackers. The software watches how these points move from frame to frame and then a solver tries to find a 3D camera movement that would explain that motion. In other words, it basically asks where would a real camera need to be in 3D space for all of these points to move across the image like this. And once your solver finds a good solution, you end up with an animated camera that matches your real footage along with the reconstructed 3D points representing the tracked features in the scene.
And this is what allows us to place a 3D object in the shot and have it move correctly with the camera. Now, that might already sound slightly complicated, and that's because camera tracking actually is fairly complicated, especially if you're doing everything manually. So, before we start solving anything, let's quickly look at other tracking methods and when you would use them instead. First, we have planer tracking.
And camera tracking tries to reconstruct the movement of the entire camera in 3D. While a planer tracker does something different. Um, instead of reconstructing the entire scene, it follows a mostly flat surface and analyzes how that surface changes over time. That includes its position, rotation, scale, and perspective distortion. So, imagine you have a shot of someone holding an iPad. You don't necessarily need to reconstruct the entire environment just to replace what's shown on the screen. you can simply track the surface of the iPad.
That's exactly the kind of situation where a planer tracker makes much more sense. The same applies to things like phones, signs, monitors, walls, or basically any relatively flat surface we want to attach something. Next, we have tripod tracking. This is very similar to camera tracking, but with one important difference. The camera doesn't actually change its position. It only rotates. So imagine placing a camera on a tripod and panning from left to right.
Because the camera stays in the same location, there is no positional movement for the solver to reconstruct. So instead of solving both position and rotation, a tripod solve focuses mainly on the camera's rotation. This is perfectly for shots where the camera is stationary but pans, tilts, or rotates. Another technique is object tracking. Instead of trying to determine how a camera is moving, we are trying to determine how a specific object is moving.
This is often done by tracking several points on the object and then using those points to estimate the object's position and rotation in 3D. For example, if you have a moving box, vehicle, or another rigid object in the scene, object tracking could be used to match a 3D position to that object's movement. So, the important thing is that these tracking methods are solving different problems. So camera tracking is trying to find how did the camera move, planer tracking, how did the flat surface move, tripod tracking, how did the stationary camera rotate, and object tracking, how did the object move.
For this video, we are focusing mainly on camera tracking. So let's actually start preparing our footage. If you're working with 4K, 6K, or even 8K, tracking the original resolution can be unnecessarily demanding uh because it takes much more memory. It is a slower process, and in many cases, you don't need that full resolution just to calculate the camera movement. So, it's common to create a lower resolution version specifically for tracking, but you can of course still use the original high resolution footage later when you render and composite the final result.
The next thing we will normally do is to convert the video into an image sequence. Instead of giving the tracker one compressed video file, we're giving it individual frames. This creates much more predictable workflows and avoids potential problems that can come from compressed video formats. Inside Motion Master 3D, I can basically handle all of this in one step. I select the original high resolution video, choose the resolution I want to track at, and motion master can create the lower resolution image sequence for me.
So now let's move on to the actual camera tracking. And first we will look at the traditional workflow. Once the footage is prepared, we can open Blender's motion tracking workspace. From here, we will load the image sequence that we just created. Then we can prefetch the footage so Blender keeps the frames in memory and playback become smoother. And this is another reason why downscaling high resolution footage is so useful because trying to load a 4K or 8K sequence entirely into memory can become very demanding very quickly.
Now we need to configure our tracking settings. You will see things like pattern size and search size. The pattern is essentially the small visual feature the track is trying to recognize. And the search area determines how large of an area Blender will search in the next frame to find the same feature again. If the camera is moving quickly, you might need a larger search area. If you're tracking small detail features, you might need to adjust the pattern size.
And then after that is done, we can start by actually adding trackers. We are looking for areas with clear and recognizable details such as corners and other high contrast features. We will also want to look for distinctive textures. So basically anything the tracker can easily recognize from one frame to the next. But Blender also have tools for detecting potential tracking features automatically which can give us a starting point.
But getting good manual tracks usually still requires a lot of checking. So you would track forward, some tracks will fail, some start drifting, you remove some of them, and then you need to add new ones, and so on and so on. And then you need to repeat this process. I'm going to speed this section up because depending on the footage, this part can take quite a while. And uh once we finally have enough tracks, we can try to solve the camera.
So I will click solve camera motion. And uh this is normally where the pain begins because our first solver probably isn't going to be perfect. One of the values we're looking at here is reprojection error. Basically, this tells us how closely our reconstructed 3D solution matches the original 2D tracks. If that error is very high, something is wrong with the solve. It's a rough target. People often try to use the average reprojection error below around one pixel.
But the number isn't the only thing that matters. You should also visually check whether the camera movement actually looks correct and whether your 3D objects remain locked into the scene. And now comes the repetitive part. We look for bad tracks. We remove tracks with unusually high errors. We add more useful tracks. We solve again. Maybe it's better. Maybe it's worse. Then we adjust some more trackers and solve again.
And you essentially keep repeating that process until you get a stable solution. There are filter tools inside Blender that can help you identify problematic tracks. But even with those tools, cleaning everything up manually can take a considerable amount of time. And this is the part and this is the part of traditional camera tracking that I really wanted to automate with Motion Master 3D. So now let's do the same thing using motion master 3D.
Instead of manually placing and cleaning hundreds of trackers, we can give motion master 3D the footage and let it handle most of the tracking pipeline automatically. I will select the image sequence that I want to track. Then I will open the heavy tracking panel, which is Motion Master's fully automatic camera tracking system. And from here I can choose a preset depending on how difficult the footage is. If the shot contains more motion blur, difficult lightning, fewer useful features, or other tracking problems, I can choose a heavier preset.
For this clip, the footage is fairly straightforward, so I will use either the fast or balanced preset. And then I just click start automatic camera track. And that's basically it. Up here, we can open the progress panel and see what Motion Master 3D is currently doing. And once the tracking process finishes, we get our solved camera. Now if I scrub through the footage, you can see that the virtual camera follows the movement of the original shot.
And this is the result we are actually trying to achieve. Because once our camera movement matches the footage, we can finally start adding 3D objects into the scene and make them look like they were actually part of the environment. And that's what we're going to do next. Now that we have a stable camera track, let's make our 3D objects feel like they actually belong into the shot. The camera gives us the correct movement.
Next, we need lightning that matches the footage, something our object can reflect and a surface that can receive their shadows. I will start with the 360° environment image I captured earlier. This uses the same world shader setup as an HDRI. In the shader editor, switch from object to world and add the environment texture node and load the image. Connect it through the background shader to the world output. Then add a texture coordinate node and a mapping node so we can control its rotation.
This surrounds the scene with environment image and gives us a starting point with the lightning and reflections. To see the original footage behind our objects, I enable transparent under film in the render properties. This hides the environment from the camera while still letting it contribute to the lightning and reflections. The footage in the camera background is our reference here. It still needs to be combined with the render for the final composite.
I temporarily turn transparency off while lining up the environment using the mapping node. I adjust the said rotation and compare recognizable features like this tree with the footage. Once the rotation looks right, I can hide the environment background again. But an environment image doesn't contain the actual shapes or distances of the things around us. Blender can see the image of a tree, but it doesn't know how the tree is standing right next to our object.
That's where a 3D reconstruction becomes useful. Here, I drag my lighter scan into Blender and import it as an FBX. Now, we have a geometry representing the ground, the logs, and the nearby trees. The scan needs to line up with our camera solve. I use the reconstructed tracking points as references, starting with the recognizable points on the tree. Then I adjust the scans position, rotation, and scale until it matches the footage through the tracked camera.
I will speed up this repeated adjustment, but the important check is whether it stays aligned as the camera moves. A match on one frame isn't enough. Look at several frames and compare both the nearby and more distant features. You don't need a perfect scan of the entire location. The most useful geometry is usually around the place where your effect will sit. for example, the ground beneath it and anything nearby that should appear in the reflections or interact with it.
If you don't have a lighter scan, Motion Master 3D can also give you other options. You can use the heavy trackers mesh generation or select reconstructed points and use the point cloud surface tool to create an approximate surface. The goal is to give Blender enough geometry to work with. Now I will add a simple sphere and use the rendered view in cycles to check the lightning. With the sphere and scan in place, I can fine-tune the environment.
Back in the world shader, I use the RGB curves and saturation to adjust the image and the background strength to adjust how much light it contributes. I'm judging this against the footage, so this value will depend on your shot. Next, I switch to the scan's own material. These adjustments affect the lighter mesh rather than the environment lightning. The scan looks too blue here, so I reduce the blue and bring up the red a little bit.
I also lower the specular level because the surface looks too shiny. This gives me a closer match to the ground, which is in the background footage. We want to keep the real ground visible in the final shot while still letting our 3D object cast a shadow onto it. For that, I select the scan and enable shadow catcher in the object visibility settings with a transparent background. This lets us combine the rendered object and its shadow with the original footage instead of covering the ground with a visible scan.
Now, I will add a sunlight to give the scene a more defined directional light and shadow. The environment already contributes light, some badly seen the sun against it. I increase the sun's strength while checking the sphere and the shadow on the ground. The shadow direction should agree with the existing shadow in the footage. Rotating the sun controls that direction. And the angle setting does something different. It controls the apparent size of the light source.
Increasing it gives softer shadow edges and decreasing it gives sharp edges. Here I increase the angle to soften the shadow and bring it closer to the look of the shot. The aim is to match the existing shadows. So softer isn't automatically better. Compare the direction, darkness, and softness with the shadows already in the footage. And finally, I move down the sphere onto the ground. That contact shadow helps it feel grounded.
And now we can judge the light and placement together. Before moving on, check the result through the animated camera. The object should stay attached to the scene and its shadow should stay on the surface beneath it. At this point, we have the main pieces in place. a tracked camera, environment lightning and reflections, nearby geometry, and a shadow catcher with sunlight to help match the shot. You can now replace the test sphere with your own object or characters and refine their materials and lightning for the effect you want.
And as a final tip, you can also use goos in order to match the light even further. For example, in this shot which was filmed in the forest, a goos with some animated leaves can make it more realistic. Across these three parts, we have gone from choosing footage that can be tracked to solving the camera to preparing the scene for a believable composite. A good camera solve gives us the foundation and matching the lightning and contact with environment brings the effect together.
I have used motion master 3D throughout this tutorial. It's my Blender add-on for camera tracking and related VFX workflows. And you can see more of its tools on my previous videos. And finally, if you have any questions about any of the steps, leave them in the comments. And make sure to subscribe if you like to see more tutorials like this. And thank you for watching.
The words are the caption track's own and nothing is reworded or re-transcribed. Paragraph breaks are placed between sentences so the text reads as prose.
Free tools for your own script. No signup, no login.
Paste your draft and see where viewers are likely to drop off, with a rewrite for each weak line.
Paste the first 30 seconds of your own draft for a hook score and rewrites.
Check your draft against YouTube's advertiser-friendly guidelines before you record it.
Read this channel's public videos and transcripts, and download a writing brief for it.