Getting the transcript
Reading the captions from YouTube. A video nobody has opened here before takes 10 to 30 seconds; this page fills in on its own.
Getting the transcript
Reading the captions from YouTube. A video nobody has opened here before takes 10 to 30 seconds; this page fills in on its own.
Land to House LLC · @LandtoHouse
Where viewers went back to watch this video again, from YouTube's public Most replayed graph, lined up with what was said at that moment.
Most replayed moment #1
10:414.5x the video's typical replay level
about 8t. So we're looking at probably where that knot is right up there. Um so let's go down to the pump now and see what kind of pressure we get. I believe that was enough time for this drive pipe to be full of water. Let's find out here. Woo! That was a lot of pressure
Said at 10:34
Most replayed moment #2
7:083.8x the video's typical replay level
the pump uh tomorrow. I have to go today. But, uh, almost done. After that's been installed, we will move on to rolling the poly pipe way, way up the hill. I now have all the drive pipe installed. It's time to start working
Said at 7:01
Most replayed moment #3
7:503.4x the video's typical replay level
and it's just a metal tape that I like to use here across the uh inline valve. And that just kind of will keep this in position. Because I'm using poly pipe for the
Said at 7:43
The graph counts replays. It does not show where viewers stopped watching.
Words
3,767
Runtime
23:45
Speaking pace
159wpm
Reading time
16min
159 words per minute, below the 160 25th percentile of 349 measured videos. That distribution comes from the 349-video hook study.
Opening (first 30 seconds)
Welcome to Land the House. I'm Seth. A friend of mine asked if it was possible to pump water from his creek right here to the top of this hill way over there. And he wanted to use the ram pump. The ram pump is a water pump that does not need fuel or electricity to operate, only flowing falling water. So, we have got approximately 2 1/2 gallons of water coming down this creek, which is just enough to
80 words, the words spoken in the first 30 seconds at 159 words per minute.
Free, no signup. See how the first 30 seconds hold attention, with rewrites.
Sentence shape
What this transcript is
Every word below is the caption track YouTube publishes for this video, pulled from the video itself and reproduced unchanged. It is not Prepublish's writing, not a summary, and not a re-transcription: it is the video's own published captions. English captions, generated automatically by YouTube, in the video’s original language. Source: the video on YouTube. A channel that would rather this page did not exist can ask for its removal through the contact page, and it is removed.
Welcome to Land the House. I'm Seth. A friend of mine asked if it was possible to pump water from his creek right here to the top of this hill way over there. And he wanted to use the ram pump. The ram pump is a water pump that does not need fuel or electricity to operate, only flowing falling water. So, we have got approximately 2 1/2 gallons of water coming down this creek, which is just enough to run this pump. There is somewhere around 22 feet of drop and over 120 ft of lift.
So, the ratios work out. Let's go ahead and install this pump and see how much water we get at the top of this hill. To get started with this installation, I have got the screened intake. This is a 2-in piece of pipe with lots of holes drilled into it. Some window screen on top with some zip ties holding that in place. cap on one side and this side has got the threaded output. So, the supply pipe will connect to this.
I'll put the screen in the water and it will pull water downhill through the pipe to our bucket for uh the next stage. But first of all, let's get this installed. This pool of water right here has a spring coming in from this side and one coming in from this side with an output of somewhere around 2 and 12 to 3 gall per minute, which should be plenty to run the 1/2 in ram pump. So, this little pool of water is where the screened intake is going to go.
After the screened intake, I've got a bucket. This is a filter bucket. It does two different things. It will allow silt to build up in the bottom so that the silt does not get to the ram pump. It also allows any air bubbles that come in from the supply pipe to exit out the top and provide a good stream of airfree water out this uh right here. So I have to have just enough drop from the screened intake to go into the bucket and then from that point I will have the drive pipe start from there.
So, I've got to work with some cold poly pipe here to get this downhill about one or two feet in order to get into the top of the bucket. The creek goes up under this tree. So, I'm going to have to find a way to sneak this poly pipe up through here and get this to the screened intake. So, uh it's probably going to take me a moment. So, I will spare you the agony of watching me do this. All right, that took me a moment longer than it should have.
I'm going to use this barb to thread fitting in the end of my intake screen pipe. And that's just going to adapt to the poly pipe. I can then take the poly pipe here and connect it into the end of this screened intake. Okay. And then that is simply going to be pushed down into the water. This should be enough drop right here where I have the bucket placed to pull water out of the source into the top of the bucket to then be used downhill.
So, let's go ahead and cut this poly pipe. If I do have to take it further downhill, I can uh reattach it here in a moment. Good news is there's already water coming out of the pipe. So far, this install is going well. I've got the screened intake here in the water. The pipe goes up and over and down, drops somewhere around 2 ft, and that is just enough drop to pull a sufficient amount of water through that supply pipe to the bucket.
Now you can see the bucket has a full flow of water coming out of it and there is still plenty of flow coming down the spring. So we are ready to move on to the next step which is the drive pipe to go from the bucket down to the ram pump. Now for the drive pipe I have 120 ft of/2 in PVC pipe. This is going to allow the ram pump to have the maximum amount of lift because of the rigidity of the pipe. So, I'm just going to use some cement and some of these couplers, and I'm going to put the pipe together.
And then we have the fun task of putting it through the cover and back up to that bucket. I've got a 50ft section of this 1/2-in pipe glued together. I've got to go through two coverts and a whole bunch of grass. So, I think what I'm going to do is do all that work without you so you won't have to sit there and watch me struggle and then uh we'll hook up the ram pump when I get this all run. It took a while, but I got the 120 ft of drive pipe through the creek, through the brush and the trees, and I have the water running through it.
Sadly, I don't think it's quite enough head pressure to reach the top of the hill. To see the head pressure, what I'm going to do is lift up this pipe, and I can see the water flowing out of it. Wherever the water stops flowing, it will have matched the height of the source. So if I lift this up, wherever it stops flowing, right there. So we're looking at about 12 to 13 ft at this point. I don't know why I was screaming.
Okay, so I've got somewhere around 13 ft of input head pressure, which is pretty good. But I need to have around 20. So to get that extra seven feet of head pressure, what I'm going to do is install a stand pipe, which kind of means we're going to have two supply pipes. One from the source to the bucket and then one from the bucket to the stand pipe. But the ram pump will see that uh stand pipe as the new water source.
And so what I'm going to do is go buy another uh well, let me walk this out. go buy some more pipe and then put a stand pipe in and then attach the ram pump. So, we are getting close, I believe. Here is a quick update. I was able to get the pipe connected in the creek right here. It goes under the last culvert, which goes over here. I have teed into the pipe to make a stand pipe. As you can see right here, it's going to climb up this tree.
I'm also going to add another 10ft section here. And that will just uh creep up this tree and be about 20 foot tall. So from there, the drive pipe that's going to feed the pump is going to go off in this direction. I was just looking down the hill and there is an additional 3ft drop. See if it'll show you way down in here. And so that's going to be where I put the pump uh tomorrow. I have to go today. But, uh, almost done.
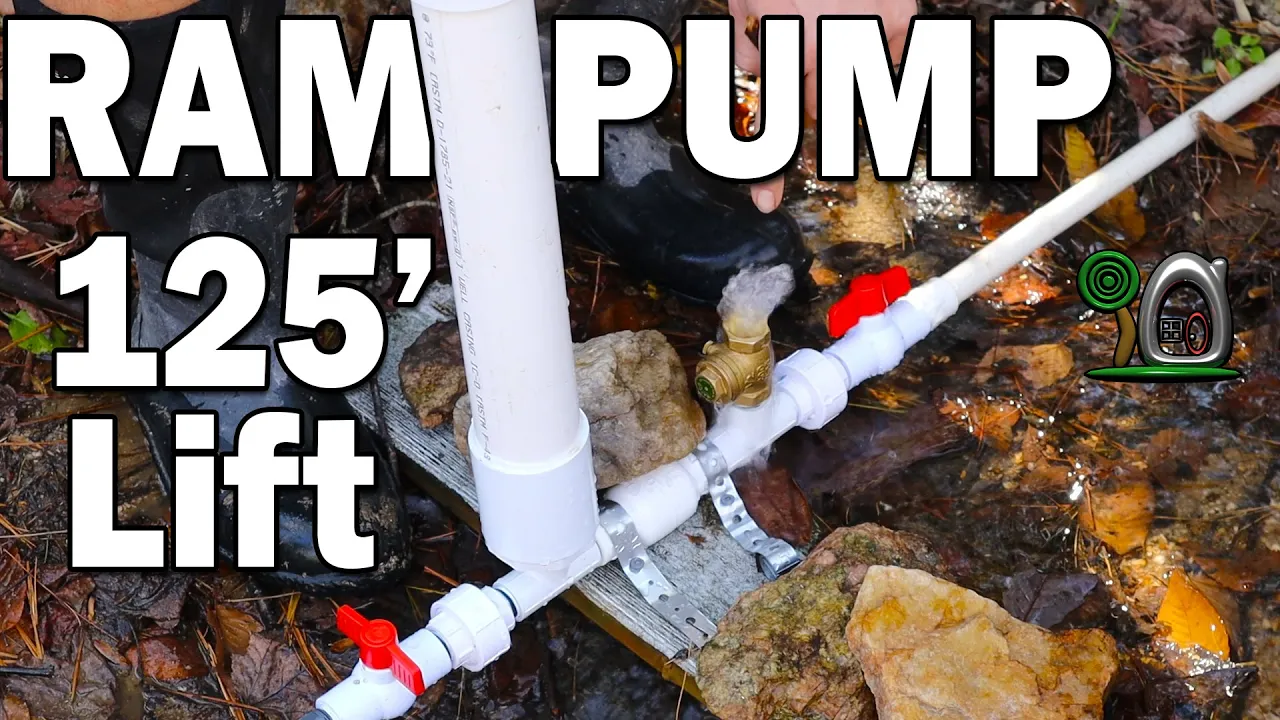
After that's been installed, we will move on to rolling the poly pipe way, way up the hill. I now have all the drive pipe installed. It's time to start working with the ram pump. Now, I do have four sizes available, links in the description down below. This is a decking board. It's a treated board that I'm going to use to mount the pump upright like this. And I'm just going to use some metal plumbers tape and some screws. and uh we'll be ready to hook this thing up and get to rolling out the delivery pipe which goes all the way up the hill.
This stuff right here is called plumbers's tape or plumbers strap and it's just a metal tape that I like to use here across the uh inline valve. And that just kind of will keep this in position. Because I'm using poly pipe for the delivery, I'm going to be using this barb to thread fitting. And I need to make sure this doesn't leak because it is going to have between 50 and 60 PSI behind it. So, I'm going to put some of this teflon tape on here to keep this sealed well.
Put it into this side of the pump. In order to get the pump installed, I'm going to remove this union and valve on this side. I can then screw this into position here. Now, the full uh supply pipe ended up being uh 220 foot long. The drive pipe ended up being uh 58 ft long. So, hopefully we have somewhere close to 20 ft of input head pressure. All right, now that I've got that done, I'm going to reattach this union. Now, it is important to note that the ram pump drive pipe needs to be locked down as possible.
So, I'm going to go back through here real quick, take some rocks, and place it on top of the drive pipe to make sure that doesn't go bouncing around, especially with the amount of head pressure we've got. I also want to take some rocks and lock down this board so that the pump doesn't go shaking either. That actually does make a big difference in the operation. Now that I have the ram pump all connected, the drive pipe laid, the stand pipe, the supply pipe, it's time to see if this pump will cycle with the amount of head pressure we've got.
I'm going to go up to the source bucket, plug up the supply pipe, and I want to check to see if water comes out of the top of the stand pipe first. That would be good. And then uh I want to close this off and see if it'll cycle without the delivery pipe installed. So I'm going to close this valve here and I'm going to close this valve here. And let's go turn on the water up creek. In order to start the supply pipe filling, all I have to do is connect right here.
Now this does not even have to be glued because it uh can be uh disconnected with the low pressure that it's got. All right. 220 ft of supply pipe is now being filled. I made the stand pipe super tall. It's actually 20 feet tall goes up this tree right here. And uh it's a little bit difficult to tell, but I think the water is higher than this point right here, which is good. That's about 8t. So we're looking at probably where that knot is right up there.
Um so let's go down to the pump now and see what kind of pressure we get. I believe that was enough time for this drive pipe to be full of water. Let's find out here. Woo! That was a lot of pressure behind that valve. Wow. All right, let me uh open this real quick. Woo! Let's see how long it takes. There probably is a bunch of junk in this water. Oh my goodness. I am not used to working with a pump with quite this much pressure behind it. some cold water.
If there are bubbles in the supply pipe or the drive pipe, it's going to cause this to stay closed. And so I've got to hold this valve open to get all the air bubbles out. All right. Well, let's just let the uh air bubbles trickle out of there. I waited a few minutes for all the air bubbles to find its way out of the drive pipe up the stand pipe. And I uh cycled this, got pressure in the tank, and now it is ready. So, check this out. cycling on its own.
Very cool. Pressure is building up in the pressure tank right here. So, check this out. Whenever I open this valve, it'll have a high pressure. That is what's going to push water uphill for us. So, I won't uh let this run full like that until we get the delivery pipe run up the hill. But, it is good to know that uh this thing is ready to cycle. It should take just a moment here again to get pressure in the tank. So, it'll run on its own.
Doesn't take long to prime with that much input head pressure. All right, we're ready to run that pipe up there. This is a 400 ft roll of 1/2 in poly pipe. I'm going to use it to run up the hill and take the water to where I want it to go. Now, when I got here this morning, it was 36° and so this poly pipe was cold. If you've ever put poly pipe out whenever it's cold, it can be uh quite an annoyance. So, uh I probably will not bring you along for installing this up the hill.
Um so, you won't have to suffer through that because I have to go through both culverts and then strike up the hill here. So, uh, anyway, enjoy a very quick, uh, time lapse of this. I was able to get the delivery pipe through all those culverts. And now it's time to get this connected. So, what I want to do is put one of these hose clamps on here first and then get this attached to the barb. Kind of make a sweep around here.
Get it connected. There we go. That should do it. I just got 475 ft of delivery pipe run up the hill. And honestly, I still need somewhere around 200 ft more to go. maybe even more than that. But let's go ahead and start filling up this delivery pipe. I'm gonna turn on the drive pipe. The valve is going to stop. I'm gonna open this up and it's going to fill the delivery pipe to match the input head pressure. So, somewhere between 18 to 20 ft is how far that's going to flow back up the hill.
After that's done, I can then start cycling the valve. It's probably going to take me anywhere from 100 to 500 manual presses to fill this quantity or length of delivery pipe. So, uh, once I know that's full, I will then start, uh, clicking this valve here in just a moment. All right, I'm going to find a stick that will press this valve nice and easy. Find a comfortable place to sit down cuz I may be here for a minute.
All right, I'll see you back here in probably about 10 minutes or so. Now, there is a different way you can do this. If you bring a drill pump, you could fill this line from the bottom down here. And uh mine broke sadly, so I can't do that today. After about 10 minutes of pressing the waste valve, I can tell that it's starting to get lighter here. and closer to working on its own. You can usually tell when you press the valve down that it gets easier to press.
Another thing you can do is when you close the delivery pipe, this starts in one or two cycles. Just like that. You know, the pressure is close to uh being what it needs. So, I'm going to keep pressing on this and we should be good to go here in just a moment. See, it's starting to work on its own there. I'm going to babysit this for a couple more minutes to make sure it's working on its own, and then we will head up the hill to see what kind of flow rate we have coming out the top.
Here is the ramp pump. Let me walk through the system real quick so you can see what all is going on as far as layout. So, here's the ram pump. Let's follow the delivery pipe up to the top. So, it's kind of difficult to get through the roodendran forest here. If you've never worked with roodendrin, this is the very reason I'm wearing uh safety glasses, cuz getting through there is quite the nightmare. So, here's the culvert.
The first culvert I was working with. It's where the stand pipe is located. Goes up this tree right here, 20 foot up. So both the delivery pipe and the drive pipe come through this cover right here and they circle around over there going to this next cover. Here is the second culvert goes under here. And you can see the delivery pipe and the supply pipe going up that way. Getting under that tree took forever with that supply pipe.
There is some great news right there. Look how much water is overflowing our bucket even with the ram pump running at full force. Very good to see. Let's come up here to where the screened intake is. And you can see there is still significant water in the creek passing by. That's also good. Now, the delivery pipe goes right here, all the way up the hill. Now, this homeowner that I'm installing for, he wants it all the way up there.
So, that's going to be a challenge, but let's see how much flow we have coming out at the top, right up here. The source is right about where this tree is here. And I'm guessing that's about 10 to 12t drop there. And then we're about to climb another 10 to 12t up here. So, I'm thinking we only have approximately 30 ft of lift at the moment. So, we should still have plenty of potential here. But, is it that much potential?
I don't know. I'll have to buy more pipe to find out. The output happened right as I was climbing up the hill. Very cool. I was going to show you that you can actually uh tap on the poly pipe and hear the hollowess and find at what point the water is coming out, but it beat me up here. All right, so check out that flow rate right there. That is pretty good for the 1/2 in ram pump at this height. So I'm looking forward to extending this up another goodness gracious, what is it going to be? 30 more feet of lift and probably 200 more feet of pipe.
So, I'll have to go buy that uh later. And uh we will give that a try. I just finished rolling out another 400 ft of poly pipe up to the very top of the hill right here as you can see. And uh since I missed it last time, I want to tap on the pipe and show you how you can hear the difference between a full pipe and an empty pipe as the water climbs up the hill. All right, listen to this right here. Now, if I move up here, you can hear that this is hollow.
Actually, hold on. Sorry. It's actually climbing up faster than I was thinking. There you go. hollow. So, we can find the water. The water's made it here. All right, it's right about here. He's climbing up pretty quick, actually. We're about 6 ft from the top. I'm not sure how well this is going to translate, but you can tell it's pretty steep, right? So, the source bucket is right down in there. And if I zoom over here, let's see.
You see that road going up right over there? That's where the ram pump is right down over there. So, it is approximately 125 ft of elevation change. And uh we had what uh four, five, six, what 700 ft roughly of poly pipe coming up this hill. Now, I do have some left over that the homeowner can use, but I want to wait till we see the water come out the top here. And the results are in from the ram pump 125 ft down there.
It has made it to the top up here. And we actually have a great flow rate for the halfin pump. So, check this out. Now, they that may not look like a lot, but for such a small pump, it actually is quite a lot of water. In a day's time, you're probably looking at at least 150 gallons filled up here at the very top. And no power is needed. It's just pumping away. Excellent. I am so glad to see that I did not bring my tripod up here, so you get to have a vlog style outro.
This actually was quite a good ramp pump install for me. Most of my installs don't lift to this height. Approximately 125 ft of lift uh based on Google numbers. I've not done any actual math here, but um yeah, the homeowner is going to be using water in a 500gallon tank up here at the top to then water uh some trees and grass uh in an area down over there. So, I do have four different sizes of ram pump available. I'll have links for those in the description down below if you want to check them out.
Uh so with this install, I used PVC pipe there for the drive pipe. And that is actually rather important for um having the maximum amount of um pressure wave size. Oo, windy up here. Let's step off this hill. So poly pipe from the source water to the bucket. From the bucket to the stand pipe was PVC, PVC stand pipe. and then the PVC pipe to the ram pump. That allows the best pressure wave strength because there is less bounce than whenever you use poly pipe as a drive pipe.
Now, the delivery pipe all the way up to the top here, it's totally fine to use um poly pipe all the way up. All right, I hope you enjoyed the video. Be sure to leave me a comment down below. Uh, this is actually one of the last um installs of the year um because it's starting to get cold. But I'll be back in the spring for more Ram Pump content. I'm Seth with Land House and I'll see you in the next video.
The words are the caption track's own and nothing is reworded or re-transcribed. Paragraph breaks are placed between sentences so the text reads as prose.
Free tools for your own script. No signup, no login.
Paste your draft and see where viewers are likely to drop off, with a rewrite for each weak line.
Paste the first 30 seconds of your own draft for a hook score and rewrites.
Check your draft against YouTube's advertiser-friendly guidelines before you record it.
Read this channel's public videos and transcripts, and download a writing brief for it.
| Measure | This transcript |
|---|---|
| Sentences | 282 |
| Average words per sentence | 13.4 |
| Longest sentence | 46 words |
| Questions asked | 4 |
| Sentences containing a number | 43 |
Most used terms
Filler phrases
76 in total: uh 44 · actually 11 · um 8 · kind of 6 · like 5 · right? 1 · you know 1.
A literal whole-word count of the same phrase list the Prepublish browser extension uses, so a phrase inside another word is not counted and a phrase used in its ordinary sense still is. It is a count and not a judgement.