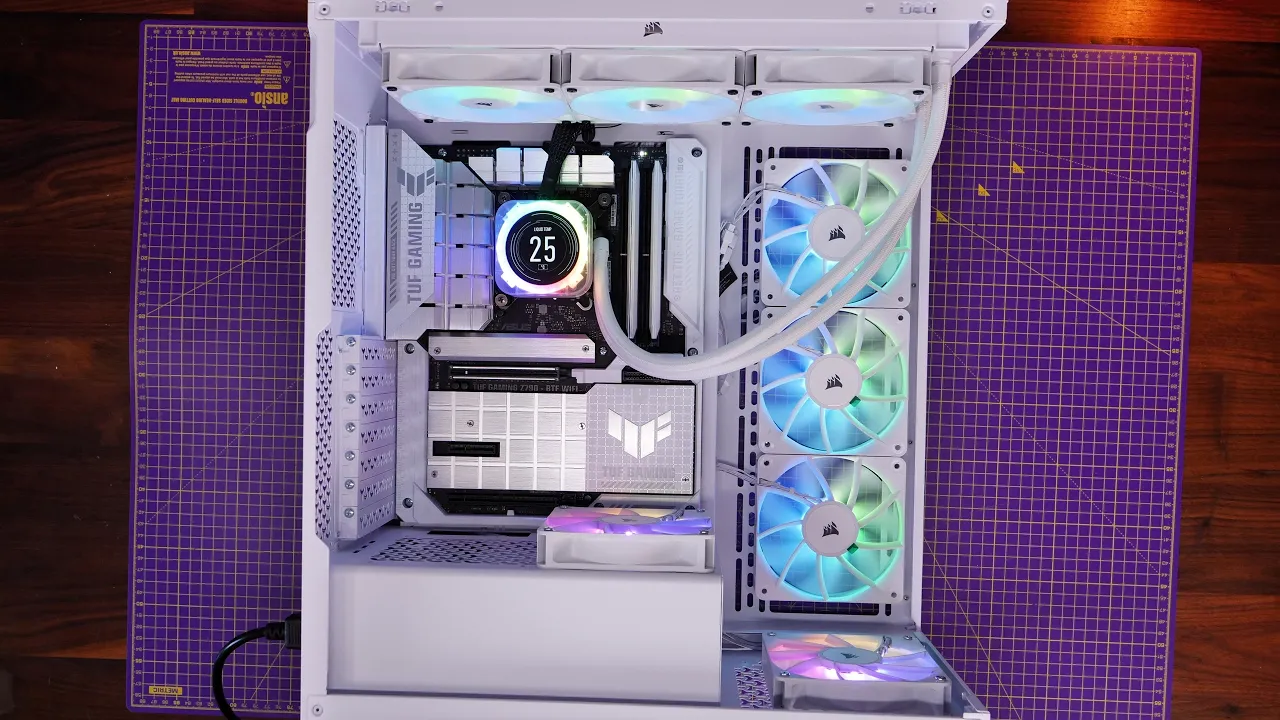
How to setup and wire Corsair RS120 ARGB fans transcript
The Provoked Prawn · @TheProvokedPrawn
Words
2,324
Runtime
11:15
Speaking pace
207wpm
Reading time
10min
207 words per minute, above the 201 75th percentile of 349 measured videos. That distribution comes from the 349-video hook study.
Opening (first 30 seconds)
hello this is the provoke prawn here to show you how to set up and wire corsair's rs120 argb fans these fans are included with corsair's 3500x argb case but are also available to purchase separately and they can be wired directly to the motherboard thereby bypassing corsair's IQ software and they're theoretically pretty easy to set up so I'm going to show you how to do that and how to set them up in your case along with how to mount them to an all-in-one cooler it's worth noting that these fans are significantly different to corsair's previous fans like the af120 RGB
104 words, the words spoken in the first 30 seconds at 207 words per minute.
Sentence shape
| Measure | This transcript |
|---|---|
| Sentences | 1 |
| Average words per sentence | 2324.0 |
| Longest sentence | 2,324 words |
| Questions asked | 0 |
| Sentences containing a number | 1 |
Most used terms
- fans49
- fan42
- motherboard28
- rgb27
- power22
- plug17
- cables13
- connect13
- connection13
- case10
- header10
- system9
Filler phrases
6 in total: like 5 · basically 1.
A literal whole-word count of the same phrase list the Prepublish browser extension uses, so a phrase inside another word is not counted and a phrase used in its ordinary sense still is. It is a count and not a judgement.
What this transcript is
Every word below is the caption track YouTube publishes for this video, pulled from the video itself and reproduced unchanged. It is not Prepublish's writing, not a summary, and not a re-transcription: it is the video's own published captions. English captions, generated automatically by YouTube, in the video’s original language. Source: the video on YouTube. A channel that would rather this page did not exist can ask for its removal through the contact page, and it is removed.
Transcript
hello this is the provoke prawn here to show you how to set up and wire corsair's rs120 argb fans these fans are included with corsair's 3500x argb case but are also available to purchase separately and they can be wired directly to the motherboard thereby bypassing corsair's IQ software and they're theoretically pretty easy to set up so I'm going to show you how to do that and how to set them up in your case along with how to mount them to an all-in-one cooler it's worth noting that these fans are significantly different to corsair's previous fans like the af120 RGB Elite fans scen here for example which required a RGB Hub or Commander core or Commander Pro in order to work properly these worked with corsair's IQ software and I've done a separate detailed wiring guide on how to set up these older versions of course there's fans that I'll link to in the description because you might find it logical and easy to use if you're going to use those fans instead of course there's now abandoned these so that Commander core will not work anymore these rs120 RGB fans in instead include a single fan connection that goes directly to the motherboard for power and one for RGB and I'll show you the logic for that in a second now there are some other things to note here you'll see on the side for example there's a couple of arrows here one pointing to show you the direction of air flow which is through the front and the other to show you which way the blades spin for the installation process and I'll talk a bit more about that in a minute the fan has two cables coming out of it or at least two connectors that will connect to the motherboard the 5f RGB connection which is three pin and the fan power connector which is a four pin power connector but you also have these extra cables here which are essentially daisy chain cables so you can see that this one has pins for example so this means that you can connect multiples of these fans together now quickly I want to show you the logic for how to connect a single fan so you can understand that so I'm going to show you all this outside of the case just so you can get an idea of it you need to connect your three pin RGB connection to a 5V RGB be head on your motherboard you can see that marked here this will vary from motherboard to motherboard but you're looking for a three pin connector usually has five volt markings next to it it might say something like J rainbow or ar argb and then you're also looking for a shaty fan header C or Cy fan header Sy and connect in that for fan power that way you're connecting both the RGB connection and the fan power connector directly to the motherboard and then you'll be able to control it with a bios and your motherboard software and I'll show you that later on now that's the standard connection for a single fan if you have three as I have here for example you connect the fans together first of all so you take the fan power connection and you plug it into the daisy chain connection from your next fan along and you plug that in and then you repeat that process with the 5vt connection as well so you take the adapter cable for the daisy chain setup there you remove the little plastic cap off the top of it and then you plug it into that adapter here here so that you're basically sending a signal for the RGB from one fan to the next fan the idea here is this will mean that you can then plug one fan into the header that I showed you on the motherboard while having the signal pass through to the other fans now logically you can easily do this with three fans you can connect the RGB for each of the fans together and the power for each of the fans together and then you connect that to the motherboard so you have a single connection from the final fan in that chain that then plug PLS into the motherboard on the 5 RGB header and the system fan header as I've shown you already pretty straightforward this is also good news if you only have a couple of 5V RGB headers on your motherboard because it means that you can easily plug in multiple fans so you can see here that I've got two groups of three got six fans in total both separately Daisy chained together so on each side right and left for example those three fans are connected together and then you have four cables two fan powers and two RGB connections that are connected to the motherboard now I wouldn't recommend connecting more than three fans fan power together so don't try and connect four or let's say six daisy chaining those together and then try and plug that single connection into the motherboard because they probably won't be enough power from the motherboard header to manage six fans but you could probably connect the RGB connections together from those fans and that will be fine and this will be useful because you might only have two RGB connections on the motherboard the alter alternative is to use something like the thermalite argb and Fan Hub now this Fan Hub controls both argb lighting and fan power and up to eight fans on a single controller so youd plug the cables from the fans into this instead of into the motherboard this can be useful because it means you don't need to worry about not having enough RGB headers on your motherboard but also that you can power these fans easily and keep the cables nice and neat because all of the cables are plugged in at the rear this controller can be hidden away and then that in turn is plugged into the headers that I've shown you instead so it's a simple system it doesn't require any software but it does require SATA power so you need a power cable from your power supply unit the same one you'd use for ssds and hard dis drives that's plugged into the power supply end and then on the left hand side of the thermal right fan controller it's plugged in there obviously it needs power so it can power all the different fans that are connected to it so you plug those in and then you have the 5volt connection and the system fan connection that come out the other end of the controller and those inter turn plugin the motherboard this then means that you're controlling the RGB and the fan power for all the fans connected to that controller from the motherboard software through this now you can still only connect eight fans to this it's worth noting but it does mean that maybe the cables are a bit neater maybe the logic is a bit easier and you don't have to worry if you don't have RGB headers on your motherboard or don't don't have loads of them cuz that will work for that solution so hopefully that logic is fairly clear now if you're using the corer 3500x you'll find the three fans that are pre-installed have these long cables here those just plug into the chassis fan header and the 5V RGB head as I've shown and then they'll have their RGB lighting but then what you want to do for example is to put a rear exhaust fan in a note here that you can see that I've got the fan blades facing inwards for this rear fan if the fan blades can be seen that's where the air is being pulled from so in this instance the air is going to be exhausted out of the back through this fan and also out of the top through the top of the radiator and I'll talk a bit more about that in a second but the cables for this then run to the rear now with the pre-installed fans as you can see here they're all connected together as I've shown so the logic for that with the 5V power and the system fan power is run through there and then you have obviously at the top of that setup those Daisy chain connections here so that you can plug in other fans so what I've done is taken that rear fan and run the five volt connection from it to that cable on those front three fans that means that you can connect the RGB together for four fans quite easily and then plug one of the connections into the motherboard so they have that all chained together nice and easily and then I chose to use a separate fan header for the exhaust fan on the rear and plug that into the mother motherboard here so you can see now I've got four fans connected up quite easily now for other fans you might want to put some intake fans on the bottom of your case so with intake what you want to do is put them face down so you can see the rear bracketing here this is pulling air from the below and blowing it onto your graphics card and into the case making the air rise through the case and Co things on the way through also what I'm doing here is I'm going to put exhaust fans on the radiator so this is an h150i Elite capix cooler which you can take and then replace the standard fans with the RS fans if you want to make them uniform throughout your case so I've mounted them here so that they face down into the case so they' be pulling air through from the case and exhausting out of the radiator and then I'm obviously tidying the cables up because there's a lot of cables and then running those cables to the rear of the case now with the same logic as I've just shown you you want to connect these fans together so all three fans are connected together in terms of power and RGB so one fan to the next to the next and then with the final connectors we're going to plug them in elsewhere now normally with the capix cooler you'd use the commander core for the power for the fans but we're not going to do that here what we're going to do instead is we're going to set it up in a logical way in the system so that the motherboard's controlling both the fans and the pump so I take the small pump cable that comes from the CPU block and plug that into the AO pump header on the motherboard and that will then control the pump speed and then with the CPU fans so the fans that I put in the radiator I'm going to plug them into the CPU fan header on the motherboard which is usually in the middle on the top or on the right hand side at the top and plug that in there and then that will mean that the motherboard's able to control the speed of both the fans and the pump and therefore keep the CPU nice and cool now it's important to go into the bios so mash the delete key when you first turn your PC on go into the BIOS and then find your fan utility on this isus bar it's Q fan tuning under the advanced settings in there that you can then select the chassis fan headers or system fan headers that you use and make sure you set the fans to pwm mode that allow you to control the fan speed of them from there you can then do other things like you can create a custom fan curve so the speed of the fans adjusts accordingly or select from the various different speeds there are other options of course you can use your motherboard software which you can get in Windows and download for example Armory crate in order to do this but doing it the BIOS level can be the most straightforward you can also use that to control the RGB lighting but signal RGB is a free alternative which is more powerful download this and you can then access a variety of different RGB lighting effects and it's really Universal so it's really easy to use with fans like this you can download various different effects and apply them to all the fans in the system really easy with a couple of clicks and therefore experience some really nice RGB lighting I'd recommend checking that out it's an easy download and it's really easy to use and then you should find that you've got yourself a nice system hopefully the fans run fairly quietly depending on how hot your system is or how much load you're putting it under and the RGB lighting is now nice and controllable hopefully you found this useful check out the links in the description to other related videos this has been the provoke prawn thanks for watching you've made it right to the end of the video you brilliant Legend you if you've enjoyed it click that subscribe button give me a thumbs up and drop me a comment down below below if you've got any questions if you really enjoyed it consider joining the channel and see the benefits of doing so check out these other videos you might well find them interesting or useful and most importantly have a great life
The words are the caption track's own and nothing is reworded or re-transcribed. Paragraph breaks are placed between sentences so the text reads as prose.
Use this transcript
Three free tools that work on the material around a video like this one. No signup, no login.
Hook Analyzer
Paste the first 30 seconds of your own draft for a hook score and rewrites.
Policy Pre-Flight
Check your draft against YouTube's advertiser-friendly guidelines before you record it.
Channel Skill Generator
Read this channel's public videos and transcripts, and download a writing brief for it.