Getting the transcript
Reading the captions from YouTube. A video nobody has opened here before takes 10 to 30 seconds; this page fills in on its own.
Getting the transcript
Reading the captions from YouTube. A video nobody has opened here before takes 10 to 30 seconds; this page fills in on its own.
Stefan 3D AI · @stefan_3d_ai
Where viewers went back to watch this video again, from YouTube's public Most replayed graph, lined up with what was said at that moment.
Most replayed moment #1
8:035.6x the video's typical replay level
Again, it's well covered in my other videos. So we're just doing a quick recap here. We go to set markers on the body. Then we go through each hands. You can control them out of fingers and then we'll wait as this process. So the result is already actually very nice,
Said at 7:55
Most replayed moment #2
1:454.5x the video's typical replay level
whole process with models like Nada Banana or GPT Image 2. That's really not a problem. Do hair separately, head separately, body separately and also dress separately because I'm about to do a physics on the cloth. So here you can see the process how
Said at 1:37
Most replayed moment #3
2:273.9x the video's typical replay level
Of course, the same goes for the hat. If it's separated, it will be easier to add new bones and set weights. Potentially, I can also animate this bow. So be guided by logic of your character. When that's done, it's time to generate 3D models. And for this, I'm gonna use, of course,
Said at 2:19
The graph counts replays. It does not show where viewers stopped watching.
Words
5,530
Runtime
34:57
Speaking pace
158wpm
Reading time
23min
158 words per minute, below the 160 25th percentile of 349 measured videos. That distribution comes from the 349-video hook study.
Opening (first 30 seconds)
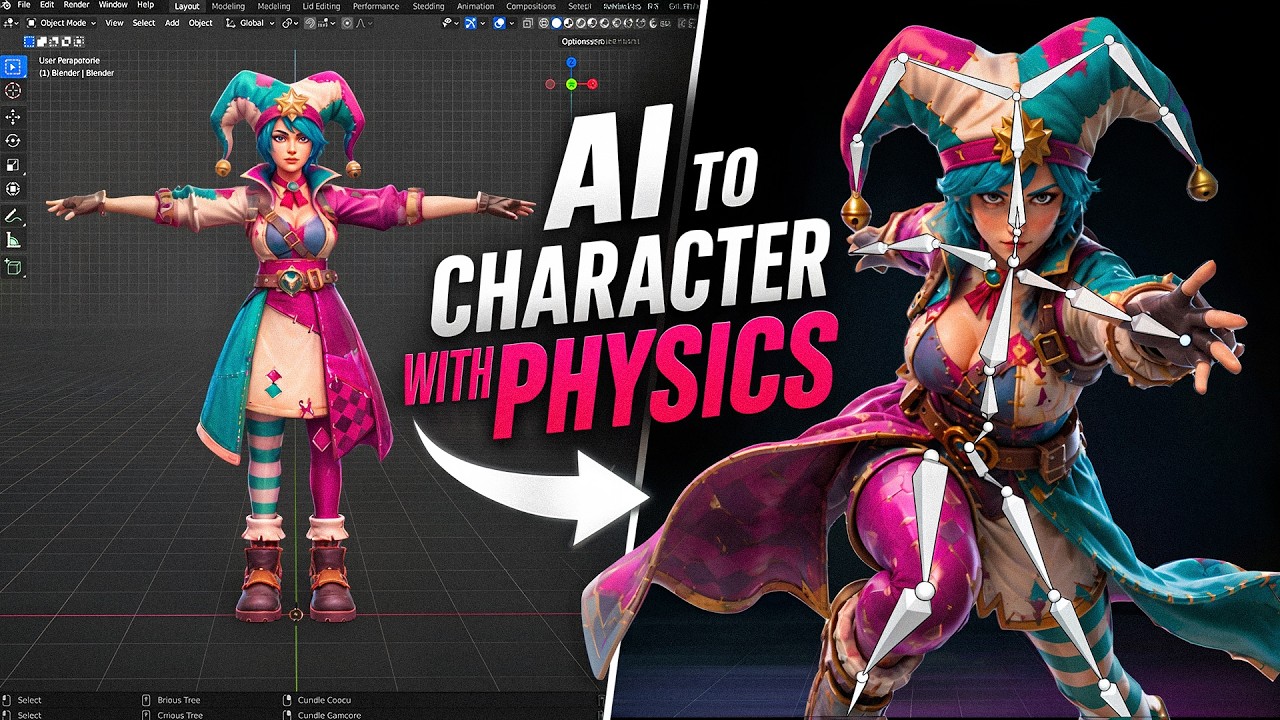
What makes a 3D character looks alive? Nice looking texture or clean model? Not really. What truly brings life is motion and not just skeleton animation. Standard rig only gets you halfway there, but until you add Jigglybone physics and cloth simulation, your character still will look stiff. Asking for it for quite a while, so here we go. In this video, I gonna show you the full workflow from how I create character with AI, concepting, 3D generation,
79 words, the words spoken in the first 30 seconds at 158 words per minute.
Free, no signup. See how the first 30 seconds hold attention, with rewrites.
Sentence shape
| Measure | This transcript |
|---|---|
| Sentences | 471 |
| Average words per sentence | 11.7 |
| Longest sentence | 57 words |
| Questions asked | 41 |
| Sentences containing a number | 24 |
Most used terms
Filler phrases
161 in total: like 72 · actually 39 · right? 31 · sort of 11 · basically 5 · I mean 3.
A literal whole-word count of the same phrase list the Prepublish browser extension uses, so a phrase inside another word is not counted and a phrase used in its ordinary sense still is. It is a count and not a judgement.
What this transcript is
Every word below is the caption track YouTube publishes for this video, pulled from the video itself and reproduced unchanged. It is not Prepublish's writing, not a summary, and not a re-transcription: it is the video's own published captions. English captions, published by the channel, in the video’s original language. Source: the video on YouTube. A channel that would rather this page did not exist can ask for its removal through the contact page, and it is removed.
What makes a 3D character looks alive? Nice looking texture or clean model? Not really. What truly brings life is motion and not just skeleton animation. Standard rig only gets you halfway there, but until you add Jigglybone physics and cloth simulation, your character still will look stiff. Asking for it for quite a while, so here we go. In this video, I gonna show you the full workflow from how I create character with AI, concepting, 3D generation, assembly in Blender and rigging.
Then we gonna bring it to Unreal Engine, set the physics bones and cloth simulation. I researched it and tested for a while, so I'm ready to show the fastest and easiest way to do that. Hit that like button guys and let's get started. The character of the day will be this lady named Violet. Why not? We do have some stuff to animate here. We do have this sort of bells and we're gonna add Jiggly physics here and we're also gonna do cloth simulation for the dress.
The same approach is scalable for different parts, different type of cloth and stuff. For purpose of tutorial, I have to find a balanced option. Well, now what is always true is that we need to split into the parts. Well, that works on many levels. First of all, it will be easier to control it. The second one, it will be easier to rig and add weights and in Unreal Engine, when we will do the cloth simulation is gonna help us a lot.
So first thing I'm gonna do is of course to go and split some parts. I'm gonna do the whole process with models like Nada Banana or GPT Image 2. That's really not a problem. Do hair separately, head separately, body separately and also dress separately because I'm about to do a physics on the cloth. So here you can see the process how I approach it. You can see the prompts that I use. Again, that's not a big deal. Just ask GPT to extract that.
Newest edit models like Nada Banana Pro or GPT Image 2 do that exceptionally. And here's the bunch of parts that I created. Again, it is guided by the logic of how I'm about to animate. Like, it really helps to keep body and dress separated since for the dress, I'm gonna apply cloth simulation. Of course, the same goes for the hat. If it's separated, it will be easier to add new bones and set weights. Potentially, I can also animate this bow.
So be guided by logic of your character. When that's done, it's time to generate 3D models. And for this, I'm gonna use, of course, Triple P1, which is, in my opinion, as absolutely gold. Just look at the wireframe and the results that I got from the generation. I mean, they're pretty much perfect. I just need to adjust, remove some parts, maybe fix a little bit the geometry somewhere. But overall, I'm extremely, extremely satisfied with the result.
Especially what I really like is how it creates faces. So here you can see the eyelashes I created as a separate geometry. And then we can texture this, look quite nice. Yes, it might require like a little bit of fixes. But to be honest, guys, just look at this. This is absolutely insane. We can do a little bit of touch up manually and boom, that's done. Now let me give you some tips. Now in Triple, you can also generate images.
There's like all edit models available here as well. And the process is exactly the same. You just don't need to pay for another subscription, especially if you're only into 3D. You can press generate model. And here, let me give you some tip. It's very important to set the reasonable amount of poly counts per object. There is no automatic, and I think that's actually great. So for hats, the reasonable amount can be like three, 3.5 thousand polygons, right?
For a bigger part, like hats, we can actually go like five, seven, maybe eight, depends on how many details. For hair, I can go like five to seven as well. Maybe for full body to not get it that much triangulated. You see, we can actually go for 10, 15,000, but that's fine. The limit here is 20,000, which again makes sense. And it will be always enough if you split into the parts and generate one by one. And also when you generate the mesh, first what you will notice, it's extremely fast here.
Here we go, just five seconds. And then we can go to texture and you can basically do the base texture, press generates, and you can also do the upscale or add PBR. I'm about to use TuneShader, so I don't really need PBR. But again, for realistic characters, definitely try it out. So here we go. And we can also preview in TuneShader. Huge time server, exceptional quality. And of course, guys, if you want to try it out, link and promo code in the description.
But of course, guys, you can generate 3D model in any other 3D AI. It's just gonna require a little bit more time for you to process. Now here, the advantage, I already get like quite optimized, nice 3D models. You can do that with Huion. It will require more steps. In Huion, you do that like high poly, then retopology, and then texturing. Again, I have quite a lot of videos on my channel, how to do that completely free.
The video will be somewhere here. The trade-off is very simple. Either you have more time to fix the models or you have some money to get better results. As a next step, of course, we're going to bring it all to Blender and start assembling. I do have quite a lot of tutorials, how to do that. We are not going to focus on that, but let's quickly recap. The main thing is to basically combine parts together. I usually create that body to actually have it as a main reference.
I'm going to just drop all the objects and set them in right position, apply, adjust. I really enjoy using sculpt mode and some simple mesh editing to adjust the shape around. Sometimes it requires some fixes on the mesh. Here you can see, I just remove some polygons. Also for the parts that you generate like hands, also can be useful. You can remove some part that it will be hidden, etc. If you're generating hands, feet or something that can be mirrored, better do it mirrored.
That will actually save on texture. If that's like same objects, I usually just delete one side and just do the mirror. Again, that's not only make it same, but also use the same texture map. That's quite a lot of benefits. Of course, depending how you plan your character, you can remove the parts inside. For example, I'm removing the body here because it will never be visible really, right? I'm going to cap it. I'm going to just make sure my legs go inside the dress and that's it.
And what's more importantly, I take care about the parts that I'm going to animate, right? Which is head, which is dress. So that pretty much make perfect sense. If you're new to this guys, this is extremely simple. There is just few tools like sculpting tools, some editing tools that will allow you to combine your 3D models into a perfectly looking character. Not an issue. I do have videos on my channel explaining it, how to do that with free tools.
Take a look. There are even lessons for blenders for very, very beginners. But if you are seriously into it, I have great news for you. I just recently launched my first ever 3D AI course that is focused on giving you 10% of 3D skills, such as this and knowledge about best 3D AI tools. So you can create professionally great 3D characters and props for your dream game. Links in the description. Okay. So cleanup passes done.
We have our character ready. Now it's actually time to start rigging. So I'm going to export character as a BX and just a small tip. When you export, if you choose pass mode as copy and choose it to pack, then you will export with textures and it will be easier to transfer. Okay. So we're going to export it like that and go to accurate. Now what's happening is accurate is well-known process. You set markers, set some lines, check out the character that everything works.
Again, it's well covered in my other videos. So we're just doing a quick recap here. We go to set markers on the body. Then we go through each hands. You can control them out of fingers and then we'll wait as this process. So the result is already actually very nice, right? But make sure that you set some offset if you have non -standard proportions on your character. But I do have like quite nice proportion. Wow. Look actually very nice.
And now let's export it for Unreal engine skeleton and bring it back to blender. Yes, to blender. We are not yet ready to go for Unreal engine. Now here's the thing. There are two main ways to do animation. The first one is jiggly bones or dynamic bones or physic bones, right? So there are bones that are affected by real physics, by character movement and stuff. And the second one is a cloth simulation. So we do have a loose clothing on the dress that we want to actually be controlled by a moment, like when the leg are moving.
So it's actually do some waves, which makes sense. There might be some ropes that also can use cloth simulation and stuff. So for cloth simulation, we just need mesh prepared and then we're going to add it in Unreal engine. But for jiggly bones, we need bones. So that's what we're going to add now, but we don't need the conflict of interest. So since I said I want to do dress simulated, I don't want the bones actually affected.
Otherwise it will be quite disrupted. So what we're going to do is we're going to select armature and object and go to the weight paint. Now with control shift, we are able to click on bones and we're going to see what this bone is affecting. What I'm going to do is I'm going to remove weights from this areas on this bones, right? So in here, in the weight paints, I'm going to choose the gradient painting. And this is like an amazing, amazing tool, especially for the beginners.
I'm going to set weight to zero and here's what I'm going to do. I'm going to just start dragging from bottom to top and trying to form the sort of line, right? So the bottom of the dress is sort of not affected. So you can control the strength to form sort of like nice gradients, right? So here's how I do that. Like I just like move from bottom to top. Here we go. Okay. You can check the other bones. Just make sure that we don't have the pink actually means that the bone is not assigned at all.
So yeah, I'm clicking on the bottom and there is nothing changing. Actually, we can also go to pose mode and we can try to move the bones and see like if they are actually moving the dress or not. So that was the first thing. Remember if you want to add close simulation to some part, make sure that bones do not affect it. Remove the weights from those areas. Now we're going to go to the second part and here we're going to need to add new bones.
All right. So how do you add new bones? So the easiest way is to add bones on top of one existing. So they are sort of connected. They must be connected to something. So what I will do, I'm going to go to heads and first I'm going to need to find the heads in Unreal Engine, Skeleton and Blender. For some reason, the head bone was super small. So, but that's not a problem. I'm going to go to Explorer and actually yeah, go to bones, open them and I'm going to find this head.
Okay. So it's selected and yeah, you can see it's not even showing in Blender, but that's not a problem. We're going to go to edit mode while skeleton is selected and we're going to press E. E button is for extrude. So boom. Okay. So we do have this bone. Then we later we can move it, but I'm going to set the front view and start the process again. Let's first move it a bit and then let's extrude it to form the line across our heads.
Something like this will do. So just with one tool, I made all these three bones and pretty much this works for many things like some appendices, like tails, hair, the process will be similar. Just make sure that later you can add weights nicely. And also don't forget to give reasonable names because later you have to find those bones in Unreal Engine. So in my case, it will be one L, two L, three L just for the simplicity, but you can add better names, especially if you have more than one jiggly bones.
And the main bone that I added is main hat. L basically stands for left because I'm going to do the same thing exactly for the right. All right. So bones are added and I also wanted to position them a little bit nicer. So they actually follow the hat. Again, guys in my 3D course, I explain more details like how to process that. And I also have videos on YouTube about the rigging. It looks complicated, but when you try it out, it's quite clear, right?
The bones are pretty much as human bones and the weights is like a skin. And it actually called skinning here in as well. So now when we added the bones, the time is to add weights because again, bone alone without a flesh will be bone alone, right? So what we're going to do, we're going to select the armature and the object and then go to weight paint. So we can click with control shift on the bones and see what weights are attached.
You can see the pink color means that they do not affect it at all. So what we're going to do, we're going to use gradients again. You can also use brush based same logic. And here's how I like to do that. And for me, I figured out it's like the fastest way. So what we need to do is sort of like draw the connection line from the joints of our bone, right? And we also wanted to make nice gradients. If it will be very, very hard, then it will look quite clunky.
So where the joints is, I tried to make it sort of gradients and more darker, like more red, which is represents a high affection in the middle of the bone, something like this. Then I'm going to click on the next one and pretty much do the same with gradient brush, especially in the case like this, or when you do tail hair and stuff, it's quite, quite easy to do it with gradient brush. It's pretty easy. Again, if your case is more difficult, you can always switch to brush and fine tune some areas similar.
Again, the red color means that this area of the mesh will follow this bone hundred percent. The blue color means that this area of the mesh will completely ignore this bone, zero affection. Okay, so that's done. So how about we give it a try? Let's go to the pose mode and try to move it. And here we can see it's something weird, right? Well, it's definitely not what's expected. So here is the answer. It's quite simple because initially the whole hat is already weighted and skinned on the head bone, right?
Or it might be any other bone. So let's go to the mode and try to find that bone again. So if it's difficult to select it here, we can actually go to this menu vertex groups. Vertex groups exactly is what each bone affects here. We're going to find heads and here's what we see, right? So heads hundred percent control our hat. This is not what we want. So we're going to set weight to zero and remove it from our jiggly part, right?
Exactly with the same brush like this. Oh, I mean, yeah, I really like this approach. Saves so much time. So now our head bone do not affect it and let's give it a try. Okay, now the movement looks exactly how I want. There might be a need for some additional cleanup and check that some shoulder bone, for example, do not affect it because it was automatically rigged. So just go through each bone and see that it only affects the desired part of your mesh.
Okay, I'm going to do exactly the same process for the left side. And now when it's done, we actually ready to bring it to unreal engine. So how we're going to export, that's pretty simple. We go expert LBS and here's very important thing. Like we pack textures like this, copy and press this button in armature. We need to disable ad-lib bones. And if you do not have animations, you remove, but especially important to uncheck ad-lib bones.
Okay, now let's drop it to our unreal engine. So I just created a simple third-person template. I'm going to drag and drop our FBX and import it with default settings. That's totally fine. Actually, the second step is to drop our skeletal. Okay, so we can preview our mesh looks good materials work, but we can adjust it. Now let's quickly replace the blueprint character with our character. We're going to go find ABP Manny and press retarget animation here from SKM Quinn simple.
We're going to read, find our character skeletal mesh, and we're going to just retarget it. We're going to choose all animation, except ABP Quinn and Quinn post -process. We can add custom prefix and boom, that will basically do the bunch of animations. So now we can go to the BP third person. Okay. Here in the skeletal mesh, we're going to need to choose our rigged violet. And in animation class, we're going to need to choose via ABP Manny.
And that should be enough to actually run the character in unreal engine. Right? So we can already go around. Okay. But yeah, again, physics will not appear by itself. Now we're approaching to the main part. So let's go to a physics assets that we have. We have it opened. So here we can see the colliders around each bones, but actually not around each bone, but about most of the bones. So first of all, we need to put it into some order.
The colliders are quite big where they are not. We want them to follow the body exact why this collider exists. They actually represent the body in simple shape. So this will be used in the physics calculation. So how the physical bones work and including the clothing as well, is that instead of like calculating the whole interaction with the mesh, they put this primitives on top of the bones. And when you do animation, this primitives also are animated and physics or any interaction is calculated around them.
So the first thing, what I gonna do is the existing colliders, I gonna sort of like rotate them and move them. So they follow the bones. Exactly. Luckily for me, some of them are okay in size and some I gonna replace to spheres, not capsules. It's a little bit annoying to get used to unreal engine controls, especially if you are pro and some other software. Okay. So here is my results. So now this colliders pretty much follow the shape of the character.
Now we can focus on our hats, right? So why I did focused on the bottom, because those leg colliders will be affecting the dress later. Now go to the hats. First of all, the heads collider head capsule, I gonna do smaller and put to the bottom. And yeah, we need to make these guys in order. So pretty much the whole setup will be based around this. We need to add this capsule to exactly how we have bones here in blend, right?
So, so my goal will be to do collider like this, like this, like this, and maybe for this one, let's do that. But before we start, you might see that here in skeleton tree, we actually don't see all the bones. We only see one L and two R the, which is strange. The unreal works like that, but we're going to go and find them and add colliders ourselves. So first I gonna go scale the existing one a little bit, because there will be more.
And we're going to go to the setting and select show all bones. Now, if we scroll to the bottom, we can see all the rest of the bones and only two got assigned collider automatically. What a pity. We're going to select them all and go to add shape and add capsule, right? I think for this purpose, capsule represents this area better. Again, depending on what you do, you can choose spheres and maybe that's chain or rope or anything else.
Try with different shapes. They are pretty much a collider, how they will interact with other part of the body. Okay. And now the most difficult part is to align them inside unreal engine. It's not really difficult, but that's quite annoying. I was really trying to find maybe easier way to create those capsules to follow the bones, but it doesn't seem there are some options. So we have to deal with this controls inside the unreal engine.
So guys enjoy the timeless me enjoying unreal engine transform controls. Again, if you are in the same situation like me, you can always refer to the blender, how you named the bones and try to put them in the same location. Okay. After the longest 10 minutes in my life, I got it set. Okay. So here, what you see colliders actually set like that to follow the bones. And of course, again, three R is this and stuff that you cannot put like one R bone here and expect it to act normal.
So they pretty much follow. Now we do have collider represent bones. We need to add constraints that represent joints. You can see those constraints as this red, green circle. They are added automatically to those two bones that were existed. Now we need to add them to the rest, to our colliders. Otherwise they will act disconnected. So how do you do that? You press on the collider and you can see the constraint added here, but on this bone, for example, there is no constraint.
So we're going to do right click constraints in here. We're going to choose the one L because it's sort of parented to one L bone, right? And here the constraint is created. We're going to default the constraint to allow any rotation and stuff. So we're going to just make sure it look, the green circle looks down like this. That will be the most default all sides rotation. Long story short, this constraint tell what is the allowed twist and swing of the bone.
Basically green represent swing and red represents twist. Like you can see the one on the head bone, green represent that head can only move this way. That's why it's like a cone and red represent this moment, right? If you're going to do some physics like I do, you can actually use default settings because I will set some dumbness that will return it to initial position. And I'm pretty okay with twist and swings, but in some cases that can be very important.
Like if you have a loose hand, right? You don't want the hands to go like and twist unnaturally. You'll want to set it to move in some reasonable area or knee, right? Knee only bends in one side. You cannot bend your knee to the left or right. But what you need to know for sure is that without constraints at all, it's not going to work because they also act like a joint, they connect one to another. So I'm going to do exactly the same here.
And also very important, the position of this constraint, right? It should be exactly where the bone joint is, or again, closer to that area. All right. And here we finally go, right? So I added colliders and constraints. My constraints are defaulted, but again, guys, depending on what you do, if you need more control over where this can go and it will be extremely loose, like again, chain that is always like doing something, you might actually play around with the setting of the constraint and limit the movements and allowed twist and swing.
It's not that difficult, but we'll definitely take some time. Now I'm going to go to the setting and finally hide bones because I already figured out all the bones I need. And we're going to select all bones, except two and three, then go to a physic type and assign kinematic. Kinematic will mean that will not be affected by physics. So only affected by our animations. The rest can be left default or specify that it will be simulated, but Unreal engine will understand that anyway.
Now we can actually preview that right away. We're going to press this two arrows and press simulate. And yeah. So here we can see already that something is happening, but we do not have any settings. So it looks a bit shitty. Now the last part with our hat will be to actually set the settings. We can press on bones on colliders and here in details, we're going to set mass. So it pretty much the same behavior, like in real life, I'm going to go and set the root bones more heavier, like three kilogram.
Then I go and set it like to two kilogram and one kilogram like that. And also for this sort of bones, I want them to quickly return in the original position. So Unreal engine recommend the following settings for linear dumping. It recommends to set 20 and for angular downplaying, it could be a hundred, right? It's how fast it go back to initial position after it's effect. Although for the roots bones, like, I mean, this bones here, I might actually want to set it to 50.
So there are more jiggly because that's like a roots of the hats. And one more thing for all the constraint, we're going to need to select them like this. We're going to need to go to angular motor and here angular drive mode. We're going to set to twist and swing and activate twist and swing. So this is actually what we allow in terms of movements, right? The slurp is just mathematical can be used for some non-organic stuff.
I guess a twist allows twist along the axis and swing allow swing, and you can control them independently might be useful actually. And the strength, the lower the strength, the more it will be affected. The faster it will be returning into original position. There are more settings depending on what you're doing. And I really recommend to just ask GPT. Like I want this sort of effects. What settings should I try? Man, this is exactly how I was figuring it out here.
You can see for the root bones, I was setting like 2 ,500 for second bones. It was 2,000 and for the last bones, it was 1 .5. So that's done. Now we can actually go and test it out. Now, if we go and hit the play, there will be nothing happening. This is because we need to do additional thing. We're going to go to animation blueprints of our character in anim graph. And here we're going to need to add rigidbody. And let's connect main states to the nodes like this.
Now press compile. And now if we go and try to hit play, we can actually see that something is happening, right? How cool is that? This is the whole thing. I'm going to be honest behind the scene, my settings are going to work only for this specific case. For tail, hair and anything else, play around with the mass, with the strength, with the dumping factor and stuff. And that could be it. But we also have to do a clothing simulation.
Okay, let's go back to physic assets and turn off preview animation. When that character was running, he was in preview animation, right? So let's click on this button and we got in the clothing menu. How to get this clothing menu open? It's quite simple. We can actually maximize it from here. Click on activate clothing pass. And here we have this clothing. So you can actually pin it here to the screen. So it's always here with all the loading data.
So now we do have this clothing, et cetera, back to it. Okay. So now let's maximize the bottom menu. And what we're going to need to find is to find our clothing that we're going to add to the loading simulation. So since we have everything actually in parts, it will be very easy for us. We have this elementary. I'm going to select the dress and you can also preview it here by click and isolate. Okay. I'm going to select the dress and we need to add it to a physic and I right click it and create loading data from selection and going to name it one for convenience.
But yeah, if you have more than one, definitely give it a reasonable name. Now we can actually press activate load painting. And here we are here. We do have like a configuration and we do have a clothing paint. We do have tool. We're going to choose brush tool. Then we do have brush radius. We're going to set it to seven. And there is also a paint value. The whole idea here is pretty much same to what we did with weights, but we're going to add it here.
So I don't recommend to start with a hundred value. I can, I recommend to do 15 as a paint failure and strengths are 0.5. Okay. So my whole goal will be to start in from the bottom. I'm going to add 15. When I do that, I'm going to decrease value in two times, seven, and to do the smooth transition like that. So here you can see I'm painting the line, keeping the most bottom and I can do the exactly same thing. Once again, we're setting it to three, making the radius smaller and just add one more line around the dress.
You can always get back to this step later, but this is what I figured out for dressing, right? So like how it is affected with the simulation. So it's more connected to original mesh from the top and the bottom is more loose. That's pretty much it. That's the solid base. Now let's deactivate clothe painting. Going to press this button. Now let's apply it. Let's right click and click this apply clothing data and choose the available assets is called like LOD01.
Wait for it. And boom. Okay. The simulation is actually started. This is pretty much how easy it is to add, right? Just paint some area on the mesh and we already have it. Now here is the thing. Why these colliders are so important? Because the physics is calculated around them. So here's what happened. If you gonna leave it as is, or they will be small enough, etc. Here, I intentionally replace it down by sphere to show you the example.
So of course, we're going to needs to do them as I showed in the video before something like capsule. So I'm going to recreate them back. And the better the colliders are, the more accurate physics will be. So they must represent.
The words are the caption track's own and nothing is reworded or re-transcribed. Paragraph breaks are placed between sentences so the text reads as prose.
Free tools for your own script. No signup, no login.
Paste your draft and see where viewers are likely to drop off, with a rewrite for each weak line.
Paste the first 30 seconds of your own draft for a hook score and rewrites.
Check your draft against YouTube's advertiser-friendly guidelines before you record it.
Read this channel's public videos and transcripts, and download a writing brief for it.