Micro Hydro Startup 2023 transcript
Land to House LLC · @LandtoHouse
Words
3,188
Runtime
20:54
Speaking pace
153wpm
Reading time
13min
153 words per minute, below the 160 25th percentile of 349 measured videos. That distribution comes from the 349-video hook study.
Opening (first 30 seconds)
welcome to the land of House channel I'm Seth this is my Micro Hydro System which typically runs between 100 and 500 watts depending on the amount of water I have it's been six months since I have done anything with this system and it's time to get it back up and running now because it's been so long I have no idea what we're about to get into we might find trees down or a washed
77 words, the words spoken in the first 30 seconds at 153 words per minute.
Sentence shape
| Measure | This transcript |
|---|---|
| Sentences | 2 |
| Average words per sentence | 1594.0 |
| Longest sentence | 2,617 words |
| Questions asked | 0 |
| Sentences containing a number | 2 |
Most used terms
- water22
- hydro16
- power16
- pipe15
- system15
- watts11
- pressure9
- grid8
- house8
- micro8
- micro hydro8
- side8
Filler phrases
35 in total: like 14 · uh 7 · kind of 5 · basically 4 · actually 2 · um 2 · you know 1.
A literal whole-word count of the same phrase list the Prepublish browser extension uses, so a phrase inside another word is not counted and a phrase used in its ordinary sense still is. It is a count and not a judgement.
What this transcript is
Every word below is the caption track YouTube publishes for this video, pulled from the video itself and reproduced unchanged. It is not Prepublish's writing, not a summary, and not a re-transcription: it is the video's own published captions. English captions, generated automatically by YouTube, in the video’s original language. Source: the video on YouTube. A channel that would rather this page did not exist can ask for its removal through the contact page, and it is removed.
Transcript
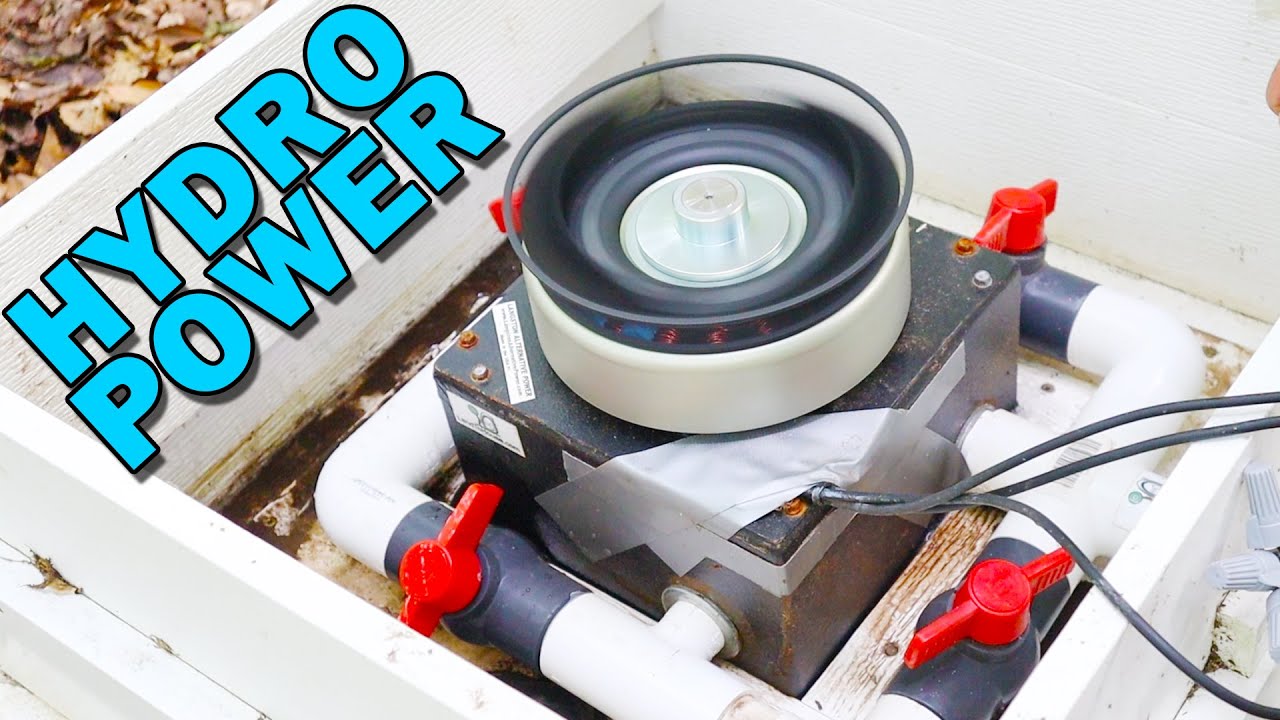
welcome to the land of House channel I'm Seth this is my Micro Hydro System which typically runs between 100 and 500 watts depending on the amount of water I have it's been six months since I have done anything with this system and it's time to get it back up and running now because it's been so long I have no idea what we're about to get into we might find trees down or a washed out intake or bees in the system I don't know let's go ahead and go up to the source and see what things look like up there and we'll work our way down all the way to the power system in the house all right so let's go ahead and four wheeler ride up the mountain and see oh the gnat in my eye anyway let's go up here and see what the source is doing around 62 or so PSI on my system and I've got a flow rate of typically between 15 and 30 gallons per minute which can supply up to about 400 watts in my system now that might not seem like much but I mostly designed this system to showcase the potential of what a Micro Hydro System can do here's a little bridge I built and that will keep the pipe from falling down into that Gap right there I think we got plenty of water to run this today that's good we've reached the highest spot that the four-wheeler can go to I wanted to show you here my Creek is in two different sections there's probably about uh I don't know 15 or 20 gallons a minute flowing right down there and then if you go over to this side there's typically about the same flowing on this side over here just wanted to see what we got that's about the same yeah so I would say we're working with between 25 and 30 gallons per minute for the hydro system today my two inch poly pipe came in 100 foot rolls and you can see how have attached these here I've got a Barb fitting in there with several hose clamps holding this down and then I've got some Unistrut or fence posts on that to further lock down this from pulling apart it's not quite as bad up here towards the top but down at the bottom when it has that 60 PSI in there it's important to keep those fittings from blowing out now poly pipe is known for shrinking and expanding in the different temperature ranges so when we get up here we may find that the black poly pipe has pulled out from the barrel and uh we are gonna have to put that back in so I brought a few tools and see what we need up here whenever we get to the top I've made it up to this 55 gallon barrel this does two things first it separates the silt out of the water so that the silt doesn't go down the pin stock and hit my turbine blades the other thing is it separates the air so as water flows in the top it makes air bubbles and those will have this much space right here to rise up out and not go down my pin stock so two important things now people are always concerned when they see my Barrel here versus where my source intake is I'm losing about two or three feet right here which is less than 10 watts so if you're concerned about having one of these here just put it pretty close to the top and don't worry about it now you'll notice that it has separated over the winter time so I have to pull this pipe back up the hill about six or eight inches and attach this right down here you can see how steep this hill is and where this pipe is connected so I have a little stand built to keep it up off the ground so that it will match up with the barrel and so what I need to do is pull on this to hopefully get it up another six or so inches and attach this Fern coat fitting to this ball valve right here and that will allow me to get the water in there then I have a clean out down here which I will reinstall this calendar and we will have the water fill back up in this Barrel all right I brought some tools so I can get this Fern coat fitting loosened up here there we go like I was saying earlier the pressure up here at the top is very little so I shouldn't have to worry much about that causing any issues just tighten this Fern coat down should be good now for the sake of seeing this thing overflow I'm going to try to close this ball valve here fun way it's always a long way all right there we go I'm going to close up this three inch pipe with the cap here wow this 55 gallon drum fills up let's walk up to the source up here and you can see the kiwanda screen that pulls water into the system this intake box is called a kawanda screen and it is a high dollar item but very much worth it so basically the water falls into this little trough Scrolls down here and then falls into these slits this is a self-cleaning box that can handle a lot of water and you can see I have not touched this in six months and this is all to debris that's on here so I can just basically wash all this off and get things back up and running so if I move this it's a little bit of debris off of here we shouldn't see much water escape the system whatsoever now I didn't get my box 100 level here so it's kind of going down a bit and that's why you see a little of this water skipping over here which is fine but if I got it totally smooth that would have been a lot better there so all right very nice well I'm pleased with that now over here on this side is my manifold it takes my two inch output and kicks it down to three of these inch and a quarter pipes just because I already had them and I didn't want to have to um buy new pipes so it's working just fine to have those three take this amount of water down to that 55 gallons run yeah the 55-gallon drum has plenty of time to overflow as you can see here now if you watch this right here you can actually see the bubbles come up that I was referring to earlier in this system so that's what's important to have a bubble out of here instead of going down and causing interference later in the system as soon as I open this A Rush of water is going to go down towards the turbine and then it will slow down because the pipe is not full so let's go ahead and open this and we'll make our way back down to the turbine and get that up and running [Applause] okay I'm back down here at the PMA or permanent magnet alternator let's see what issues we have going on first of all I need to reconnect my exit pipe right there to take the water back over to the creek that's the one thing that needs to be done I'm seeing the calf on the ball valve has popped loose so there it is right there put that back in all right there we go so I might open this up in a while so let's see what it looks like well no Bees or insects in there that's a good thing let's go ahead and close this valve so it can build pressure now this ball valves are pretty terrible I had a stainless steel valve that froze and broke but all right there we go let's see how well it's going to do when I reopen that not too bad okay I was just trying to spin the PMA and it's kind of I guess rusted but maybe it'll pop back up there pretty quick yeah there we go not too bad good I think that'll work now it just needs a jet of water to hit it get that thing going again cool all right so I do have a pressure gauge over here and I can see pressure is already beginning to rise up in here we've got somewhere around well it looks like 10 psi already in this line so it's going to take a little while for that to do its thing let's move over here real quick and get this exit pipe back together this is simply a three inch pipe that I use to ah take the water back to the creek ah there we go that should do it now when I started getting into Micro Hydro I really do not know where to start I knew I just wanted to do it so Langston's alternative power reached out and sent me this PMA and also has helped out tremendously with a lot of the questions I've had so I'll have a link to him in the description down below it's uh Spencer Langston from Langston's alternative power but he got all this set up for me and the amount of water I have isn't really enough to run this many nozzles and so I'm going to close off let's start off with all of them except for the main nozzle coming in which I think honestly was small like 3 16 or something so we'll start off with that one and then we will open another one to see if we have enough water in the Creek right now to run that so all right just for the fun of it since we have some pressure built up let me show you what this looks like whenever it spins up here I feel we may have some snails in the line which is never good let me open this one to see what happens [Applause] [Music] so there's definitely something blocking the line right here let me see if I can get that open and we will poke in there and see if it's maybe a like a snail shell or something these little grooves are just big enough to get the tool into it all right nice well that's convenient nozzle going straight into this side over here probably has one of those little snail shells in it and so if I can tip this up I might be able to get it cleaned out here you can see what the Pelton wheel looks like with those little Scoops or cups in there all right let me open up this one nozzle here hopefully tight enough see what's in this one [Applause] oh yeah look at all that muck in there see if I can find a stick to clean that out okay I got that muck cleaned out of there let's turn this back up and put it where it's supposed to be and we'll see if that single nozzle will now run this now I was trying to use some kind of inner tube or something to keep the water from splashing up out of this box um somebody else that I saw used a like a Rubbermaid tote that they cut of the bottom out of or at least just put some holes in it and it worked out really good so if this doesn't work out here in the future then I may try other things like that yeah well that should do it oh yeah looking pretty good okay I spent a few minutes cleaning out more of that muck and now I have the main nozzle from the pin stock going in there cleaned out so let me turn on this water real quick and we should see this spin up [Music] it's a little crunchy but uh hopefully it's still producing power all right let's go up and see the electronic side of things and while we're doing that this pressure will have time to build up here are all of my electronics now you can ignore the AGM batteries down here there are eight of those I have now got an EFG lithium iron phosphate battery under the house to keep it warm and that's what's coming out from right here so there's my battery breaker which goes up to a couple of these bus bars and so I've got switches here I can turn off my solar my hydro or my grid tie inverters so I've got let's see solar and hydro have their own Breakers over here and then I've got two midnight classic charge controllers to handle that input and basically charge up the battery that goes to grid tie inverters or this off-grid inverter up here which is a 6000 Watts now on my midnight classic 200 I accidentally sent 450 volts through it so I may have to send that in to see if they can't repair it so currently solar is going into the hydro unit we can disconnect the solar real quick and test out the hydro from outside so let's see the hydro is coming up from down here and goes into the breaker I just removed the solar from this midnight classic and put the hydro from right here on up into the box so now we're ready to go turn the Micro Hydro on and see what kind of Watts we have on that single nozzle I think it's going to be somewhere around 100 Watts but I honestly can't remember all right let's see what our pressure is up to now we've got about 52 or 3 PSI so it's not 100 but it's going to be good enough for us to get some power out of this so let me go ahead and turn this on I don't know if I can do it one-handed or not let's see definitely don't want to break that handle is spinning at four because it is not being affected by the charge controller let's go turn that on real quick and see what kind of power we can make 250 feet of 10 3 wire goes up under the road in this conduit and then sweeps around to the house so it is a good distance away from where the turbine is whenever I flip on this breaker we should get the power in here jumped up to about 160 volts this is a classic 250 so it will uh be able to handle that now it's going to adjust the volts and amps for a little while until it finds the best place for this to rest at so honestly it's probably going to drop this 134 volts down to about oh 75 80 something like that before it has found the ideal spot you can see it's now dropped it down into the 80s and the power is up to almost 100 here so I have 97 there for just a second now it's 75 so yeah I've seen it typically running around the 72 Mark in the past so let's see what it gets down to there's uh 62. so I'll give this just a second and we will see what it decides to uh set this at I've been watching the watt values here for a moment I've seen it anywhere from 85 up to 107 Watts so that mppt charge controller there will continue to play around with the volts and amps until it finds the correct value now I noticed that on the pressure gauge down there it wasn't quite up to full pressure so here in you know an hour or so as that water creeps up the pipe it will pick up the Watts and be pretty close to 100 running all the time now whenever I have more water in my Creek I've actually seen up to 500 watts okay there we go I believe that's going to conclude the startup of the Micro Hydro for this year like I said it's been months since I've been up the hill to see how things were looking and I'm happy to say that the intake looks fantastic after what three years and the pipe did separate by six to eight inches but that was a really easy fix just to pull that back together so if you are looking to install a Micro Hydro System I highly recommend that you use the kiwanda box at the top and then use those Fern Co fittings anywhere that your pipe could pull free that way it will just pull that loose and not break your pipe which is a real pain as far as my stuff down here goes I still have to connect my grid tied limiter inverters so I had those two blue grid tie limiter inverters over here in this corner and they were really hard to get to so I have now moved those over here as you can see see on this side now how these work is power comes up from the battery goes over positive and negative and positive and negative one of these is feeding out to one side of the grid and the other one is on the other side as you can see on these receptacles right here now I have CT clamps these go around the main power so both legs are the main and I will have those hooked up here to limiter switches so basically if these detect that power is coming into the house they will turn on and push power but if there's no power needed then they will not push power and they can push out up to about 800 watts between the two of them so definitely looking forward to getting those back up and running now if you aren't familiar the majority of my house is already off-grid but things like the dryer and the air conditioner and the well pump are still on grid power and so those will just supplement up to about 1400 Watts of my power consumption if you enjoyed this startup video on my personal Micro Hydro System then check out my playlist on Micro Hydro I have tons of content with other people's installs as well so you can see what others have done to get their Hydro powering their house I'm Seth Johnson with land a house be sure to subscribe ring the notification Bell and leave me a comment down below and I will see you in the next video bye
The words are the caption track's own and nothing is reworded or re-transcribed. Paragraph breaks are placed between sentences so the text reads as prose.
Use this transcript
Three free tools that work on the material around a video like this one. No signup, no login.
Hook Analyzer
Paste the first 30 seconds of your own draft for a hook score and rewrites.
Policy Pre-Flight
Check your draft against YouTube's advertiser-friendly guidelines before you record it.
Channel Skill Generator
Read this channel's public videos and transcripts, and download a writing brief for it.