Getting the transcript
Reading the captions from YouTube. A video nobody has opened here before takes 10 to 30 seconds; this page fills in on its own.
Getting the transcript
Reading the captions from YouTube. A video nobody has opened here before takes 10 to 30 seconds; this page fills in on its own.
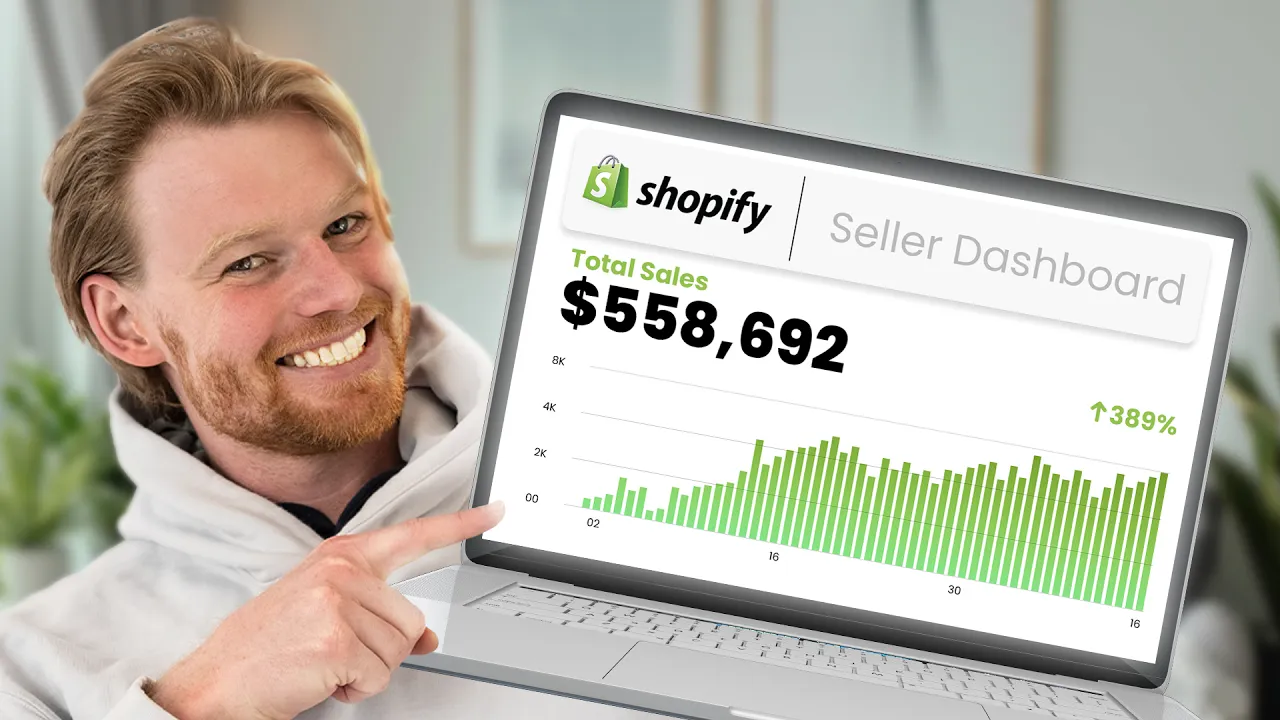
Davie Fogarty · @DavieFogarty
Where viewers went back to watch this video again, from YouTube's public Most replayed graph, lined up with what was said at that moment.
Most replayed moment #1
25:574.1x the video's typical replay level
theme in mobile version to begin with this is because the majority of your traffic that comes onto your website is actually going to be on mobile to edit our logo you can see there's a placeholder Davy's dog beds we're not calling that so to upload your logo you've got two options you can click the edit brand section
Said at 25:49
Most replayed moment #2
3:422.8x the video's typical replay level
just a domain which is about $9 to $20 per month hopefully you'll be able to get some initial sales in the very early week so that you can offset these costs and be profitable from the outset that being said if you do want to do some forms of paid marketing like on Facebook or Tik Tok it's great to have about $500
Said at 3:35
Most replayed moment #3
12:592.5x the video's typical replay level
Shipping and get selling right away [Music] so how do we find a good supplier it's
Said at 12:52
The graph counts replays. It does not show where viewers stopped watching.
Words
21,465
Runtime
3:05:22
Speaking pace
116wpm
Reading time
89min
116 words per minute, below the 160 25th percentile of 349 measured videos. That distribution comes from the 349-video hook study.
Opening (first 30 seconds)
in today's video we're going to break down exactly how to create a profitable shop advice store from beginning to end this video is going to be for beginners we're going to cover everything from how to design your store how to set up the settings how to launch Facebook ads and do organic traffic a lot of
58 words, the words spoken in the first 30 seconds at 116 words per minute.
Free, no signup. See how the first 30 seconds hold attention, with rewrites.
Sentence shape
| Measure | This transcript |
|---|---|
| Sentences | 8 |
| Average words per sentence | 2683.1 |
| Longest sentence | 9,406 words |
| Questions asked | 0 |
| Sentences containing a number | 4 |
Most used terms
Filler phrases
418 in total: like 96 · actually 89 · um 87 · uh 63 · you know 42 · kind of 33 · basically 8.
A literal whole-word count of the same phrase list the Prepublish browser extension uses, so a phrase inside another word is not counted and a phrase used in its ordinary sense still is. It is a count and not a judgement.
What this transcript is
Every word below is the caption track YouTube publishes for this video, pulled from the video itself and reproduced unchanged. It is not Prepublish's writing, not a summary, and not a re-transcription: it is the video's own published captions. English captions, generated automatically by YouTube, in the video’s original language. Source: the video on YouTube. A channel that would rather this page did not exist can ask for its removal through the contact page, and it is removed.
in today's video we're going to break down exactly how to create a profitable shop advice store from beginning to end this video is going to be for beginners we're going to cover everything from how to design your store how to set up the settings how to launch Facebook ads and do organic traffic a lot of the other videos out there at the moment are so old a lot of the courses out there that you can buy are just repackaged information that we are going to cover today you're probably wondering is it worth me launching a Shopify store a Shopify store can create passive income for you it can create your multi-million dollar business just like it did for me I'm the founder of Udi and over the past 4 years I've done $450 million in Revenue just on Shopify alone it's created an amazing life for me and it can for you as well you don't need to be smart you don't need to know how to do code all you need is a willingness to learn and just follow the step-by-step process that I outlined today one of the best things about what we're going to learn today is you don't need a family inheritance to get started you just need a couple coup of hundred bucks and the risks are very very low we're going to cover how to create a branded Shopify Drop Shipping Store and also how to just create a beautiful brand that you can be proud of so a lot of the old videos out there are talking about just using AliExpress to do Drop Shipping today we're going to cover how to create a branded Drop Shipping Store or just a brand in general using what we call a 3pl which is a thirdparty logistics provider in today's video we're going to cover each of these sections first we're going to cover common questions around Shopify next we're going to show exact exactly how to find the ideal product that's sure to work then we're going to show you exactly how to create and design your Shopify stores so customers trust it and use it to purchase we're also going to cover the best apps to use which can be super overwhelming for beginners we're going to cover things like fulfillment which is how your customers are going to get the product and their tracking number we're also going to cover shipping zones and payment methods we're going to cover both forms of marketing both free organic marketing for those that don't have a budget and then also paid marketing on the most powerful two platforms that exist right now Facebook and Tik Tok we're also going to cover the setup of Google ads which is another main traffic Source then we're going to cover some technical things like what is a pixel and how do you install it on your store we're going to do a beginner's guide to email marketing and SMS marketing which lots of people Overlook and is crucial to success unlike all the other videos out there I'm also going to cover hiring and customer service and finally we're also going to touch on wholesale and Retail because how good would it be to get the product that you create today on a shelf of something like Target while this might seem like a long video it's going to teach you absolutely everything you need you can skip to each section if you're already familiar with the section that I'm talking about but by the end of it I guarantee you'll have a great understanding of how to build your first profitable Shopify store so the first common question I get around Drop Shipping and building a Shopify store is how much time is it going to take me this is one of the main beauties of Drop Shipping it takes you about a day to set up your store about 7 days to coordinate with a supplier and you can be making money within about 8 Days the second question I get is do I need any prior knowledge I know lots of people that have created successful Shopify stores with very little knowledge prior it does definitely help if you understand how to log on to Facebook and how to create an email which most people now do asides from that everything is made very very simple and we're going to cover all the nuances that you need to know this makes this business model really appealing to anyone that wants to get started whether you just want to side hustle or you want to create a full-time job the third question I get asked is how much do I need to get started the only main cost that you're going to have to pay especially if you're doing free organic marketing that we're going to cover today is you need to shop store which is around $29 a month I'll put a link for a free trial in the description and also just a domain which is about $9 to $20 per month hopefully you'll be able to get some initial sales in the very early week so that you can offset these costs and be profitable from the outset that being said if you do want to do some forms of paid marketing like on Facebook or Tik Tok it's great to have about $500 to $1,000 another common question I get is should I be selling on Amazon versus Shopify these can be very very different things well it's great that you've got your own product that you could list on a Marketplace Amazon relies on search engine optimization this is where you need to rank really highly when you search the product on Amazon while this is possible it definitely is a different skill set to what we're going to cover today Amazon has a load of problems such as you never own your customers data so you can never remarket to them and expand your brand it's also really hard to figure out the logistics of it it can also be super competitive and Amazon can shut you down anytime that's why I much prefer teaching beginners how to do Shopify Drop Shipping as a first step so now you have that brief overview let's get into the most important part which is picking your [Music] product this is where a lot of people get stuck they're like I don't have any ideas I'm not Steve Jobs the good news is you don't need to be a genius and have lots of ideas you just need to follow this step-by-step process there are a lot of tools out there both free and paid that can find you the perfect product at the perfect time so let's jump onto the computer and walk you through them so first up I'm going to show you a free method on how to find winning products this is for those people that have a bit more time on their hands and don't want to invest too much money in the research process there are lots of benefits of using a paid tool which I'm going to get into in a second all you need to do is go to your Facebook feed and scroll down and you'll see that there's a lot of ads that are popping up from Brands if you want to just see ads you can go to the free tool turbo Ad Finder and download the Chrome extension click add to Chrome ADD extension then all you need to do is come up here you can pin it to the your extensions and click ads only now this will then filter your Facebook feed just to show ads and it will just speed up your research process now some fundamentals when we're looking for a winning product you need to be able to determine whether the trend is saturated as in it's been around forever customers have lots of options to buy the product such as they could just go down the street to a department store and purchase it themselves for much much cheaper or if it's a brand new trend this requires a little bit of time and thinking you also need to understand what an evergreen product is versus a new hot Trend an evergreen product is something that never really goes away for example these bed sheets here bed sheets are always going to be around versus maybe a hot Trend that you could do which is maybe this period pain belt which is has been trending for a while now this was probably going to get saturated and go away we're looking for a hot Trend that isn't saturated so let's say we wanted to research a little bit more about this period pain belt what we could do is we could just write it into Google and we can see how many results actually pop up for it you can see that so many people are selling the exact same product this is what I call saturated it's not the best product to go into especially if you don't have lots and lots of marketing experience because you are competing with them you need to outm Market them which if you're a beginner you really want to make it simple for yourself and verse very very few competitors typically with these Trends there's sometimes Market such as in Germany or Australia where that the trend isn't actually saturated whereas it may be in the United States where Drop Shipping is rampant this is when you can use a tool like Trend rocket all you need to do is go to Trend rocket. now this is a paid tool but it does compile a lot of Trends and a lot of marketing in one place you can click to start the free trial on the lowest plan you'll be directed to a page with some amazing brands that you can look at now asides from being saturated there are a few other things to consider when launching your product and this is why design Trend rocket so you'll be directed to a trending brand section where there's some great brands that you can look at you can click this search button down here to see thousands of Brands you can use the filters here to look at things like likes reviews and the amount of Facebook ads a brand has one of the most useful thing for beginners though is this trending ad section so when you land on the trending ad section you're going to see a wide range of ads at the top Shopify Brands you're going to see things like smart bird devices here you've got heart rate monitors and diabetes these socks this will really get your brain ticking around some trends that you could go after it does a good job at filtering out really poor Drop Shipping things where people are just grabbing AliExpress products doing no branding and selling them as you can probably tell that's not the best way to go about it because customers lose faith in the product and it is very very competitive alternatively there is another section called featured products now this is actually why I created Trend rocket remember how I just said that you needed to go to Google in each of these regions and really try to figure out is that Trend existing somewhere this is what trend rocket was designed for you can click this view product details here to get an extensive overview of where the product is getting sold and what suppliers are actually selling the product it also has something that's really important to consider which we haven't talked about yet which is gross margin gross margin is the amount that the product costs you to ship to the customer and buy from the supplier subtracted from the total revenue so if you're selling something for $100 and it costs $25 to buy the product and get it to the customer you've got $75 remaining which is your gross margin why is this important because the more gross margin you have the more you can spend on these advertising platforms to acquire the customer hopefully leaving more profit for you left over to take home you can scroll down to the supply information you can see the factory names and click up here to go to the supplier and go to the link to the product there should be a very similar product in Alibaba that you can then contact the supplier so while Trend Rocket's saying that this has a gross margin of $45 I think we want a little bit more than that the $59 price range probably isn't enough so we're going to come back to featured products and we're going to look at something that has a great gross margin so we can click through to this product here the O2 ring by wellu and you can see here that this has got a much nicer gross margin at $9 so now we know it's got a gross margin is it going to be a good product we really want to think critically about this one of the best things that I do to ask myself is does this solve a problem and can I make it unique in some kind of way the next step is to a bit more research into the product you can click here learn more brand details and you can see how that brand is tracking over time you've got these tabs here to really dive deeper into the brand the trend viability report will help you understand where they're running ads such as Australia us and Great Britain which is shown here it'll also show you the trust pilot reviews this indicates how satisfied customers are with the product is it solving their problem you don't want to sell a product that is getting terrible reviews because your days will be numbered you can scroll down you'll get some information about the brand you can check out their their traffic and their estimated Revenue as well which is a great indication and also see their entire text stack if you really want more inspiration you can click the Facebook ad section and really check out some of these ads to learn more about them this brand has multiple amazing products and you really want to make sure that they're running ads for that specific product because if they're not running ads for that specific product chances are that it's not profitable for them once you found a trend that you really like it's really important that you create some form of customization for the product for example is there a unique feature on this ring that you could create to make it unique to yourself so today's video we're going to use this product as an example now this product is saturated it's been on the market for a while while I haven't drop shipped a product we created a really high quality product and use a 3pl we did sell millions of dollars worth of it this is how I know that you can both Dropship and brand this product if you weren't using Trend rocket all you need to do is go into AliExpress and write incoming dog bed again I'd like to reiterate that if you are a beginner this isn't the product for you you want to find a brand new trend you can see here that there's a wide range of suppliers and if I went to Alibaba you could also see that there's a wide range of suppliers they would generally be a cheaper price but a higher order quantity if you're starting out with very little money you're going to want to use something like AliExpress I can hear you shouting through the screen hang on a second Alibaba and AliExpress what's the difference this is one of the common mistakes that I see a lot of people teach teing AliExpress is the main tool of choice for drop shippers this is because the suppliers on there Will Ship one unit to your customer Alibaba sometimes you need to convince the supplier to do Drop Shipping for you and buy larger quantities so you're probably wondering why would I use Alibaba if your product is only on Alibaba and not on AliExpress that is one of the most positive signals that the trend hasn't been saturated because as soon as it goes on to AliExpress hundreds of drop shippers flock to the product and start shipping it so while it's great that you found a trend that isn't on AliExpress yet you still need to convince your supplier on Alibaba to do Drop Shipping for you alternatively you need to buy a few units and ship it to a warehouse like a 3pl or fulfill the orders out from your house which will go through in a second if your product is on AliExpress and it's not saturated you can't find 100 competitors then great you should be able to set up Drop Shipping and get selling right away [Music] so how do we find a good supplier it's really important that we pick the right supplier and partner for our business if not there's going to be a range of problems such as long delivery times incorrect orders and poor product quality this is going to create unhappy customers which can get your Facebook ad account and your payment processing accounts banned AliExpress is generally pretty good at showing the reviews of these suppliers you can see that this has got 490 sold but it's only got a 4.4 star rating so you really want to scroll down and pick someone that's got a lot of units sold but also some good reviews so you can see this product here it's $16 AUD with a 4.7 with 1,200 units sold so this supplier seems relatively credible once you're on the product page make sure you scroll down and check out the product information you can just check out these reviews and make sure they're legitimate if there's lots of reviews without photos and really broken English chances are that they could be fake make sure you spend at least 5 to 10 minutes don't just spend 2 minutes like I just did and now you're ready to contact the supplier now if you're just getting started you don't technically don't need to ask the supplier when a customer places an order with you you can actually just go into AliExpress and fill out the ordered details the problem with this is it's going to rock up in Chinese packaging with no custom branding and you're going to create a very poor customer experience this is why you should be contacting your supplier and providing all of your logo and your branding and understanding about their delivery service their returns policy just all of those things that are really really important if you are a little bit confused about what supplier to use you can use a tool like zendrop this actually has vetted suppliers of 3pl in China as a lot of other tier one countries it also helps you within later stages like fulfilling to customers and tracking labels but there's no reason why you can't do it yourself all you need to do is create an account once you have an account you can just scroll over to the supplier's name here and click contact now once you've got your messages up then you're going to use this supplier template that I prepared for you it's really important that you stand out from all of the messages that this supplier is getting the supplier really wants to make sure that they're not wasting their time providing a premium service to you this is why you really want to increase your credibility and your communication by laying things out like this as well in a numbered format you're able to understand if the supplier answers each question and how well their communication is I'll leave a link in the description for this Outreach email the main things to point out is how many orders can they handle per day also do they have access to express shipping lines the typical time frame for a Drop Shipping delivery can be over 30 days unless you use one of these Express lines if you do 30-day delivery customers are going to give you negative reviews and your business is going to get shut down really really quickly you want to understand the shipping cost for the product so you can do that gross margin calculation that we talked about earlier and understand how much you can spend on ads this USA warehousing is really good for when you want to expand they can just ship the product from China to the USA warehousing and do the Fulfillment from there to shorten the times and increase customer satisfaction number four is really important which is what you guys are here today to understand how to custom brand your product number five for getting a sample is also really important because you're going to need to use this sample to shoot original content which we're going to cover today that original content includes photos for your website and videos for your ads well suppliers will have some images that you can use for your product I don't recommend it because lots of other people are going to be using those images as well as you don't understand if that supplier has actually taken those images what can happen is they can actually counterfeit the images themselves you then use them original owner such as you know the udie then reports that imagery and your Facebook ad account gets banned so it's much much better to own the copyright yourself and take the photos yourself the refund policy is really important as well you want them in writing to admit that they will refund faulty products that is their fault and finally you want to get the communication on WhatsApp or WeChat just to speed up the communication one thing I will say is that Alibaba does have some level of buyer protection but to get that buyer protection it's much better to talk on Alibaba so Alibaba has all of those records and finally you want to sign off in a professional manner with a proper business name once you've sent this to your supplier don't just stop there you want to send it to three or four suppliers so that you can compare the costs that the supplier is charging you can then use this to negotiate to get the price down and get the perfect supplier for your business so for those people that are wanting to use Alibaba rather than AliExpress maybe the products not available on AliExpress very very similar it's a similar ReachOut template and you are also are looking for reviews now the amount of orders that are generally placed through Alibaba are going to be less cuz they buy larger quantities but you can just have us skim through and find someone with a decent amount of reviews one thing you can do is use this filter up here for trade Assurance trade Assurance basically means that Alibaba will protect you if something goes wrong to use let's say you order a th000 dog beds and they all break all of the Zips are broken they the completely wrong color as well Alibaba will actually just let you send in photos and they'll give you a refund for that the main things to understand about that is to be very very specific on the order so you can use all of your communication through Alibaba through the the chat and make sure you know if you're going to use colors you want to be very very specific maybe you're going to get actual samples from the supplier and use them on the actual order so it can be a little bit confronting for new people the truth is the supplier wants you to make money you want to make money you want a good relationship so they'll generally look after you um I just suggest getting a sample before you get the product the other thing that you can actually do through Alibaba is get what's called a QC which is a quality control a QC will go to the factory and check the product based on what you actually ordered so you can send photos to the QC and be like look at the zip on the bed or look at the color make sure it's panone 319 or something like that and the QC will actually go to the factory and check the products before they get shipped to your customer the other thing you can do with Alibaba is you can look down here and it might say Trading Company you're not actually directly buying from the factory you're using what's called an agent this can be challenging for a few reasons firstly the agent's going to take a cut so your price not might not be as good as it could be second if there are any problems who's going to take responsibility for that so I generally try to avoid trading companies definitely do a bit of research have a look at the company profile have a look at their factory make sure they're all legitimate and they've got some good reviews and it should should work out fine so you found your supplier of choice you've got a sample that you've signed off that you're really happy with you understand the cost and the pricing of the supplier now it's time to set up your Shopify store you're probably wondering is Shopify the only platform that I should be using for my store there's only two Alternatives right now that you could consider and that's big Commerce and web flow web flow in my opinion just isn't quite there yet for e-commerce but they are making a lot of improvements over time big Commerce unlike webflow is designed for e-commerce but Shopify just has more apps more functionality and is more trusted with consumers in their checkout process so you might just get an increase in conversions I also think it's way easier to use when you're connecting to a 3pl or or connecting to an app so your supplier can ship the product Shopify has just got way way more options cuz it's the market leader so to get started on Shopify all we need is an email you can click the link in my bio it is an affiliate link they've got a free trial operational at the moment I think that is limited but they always generally have some kind of offer you can enter your email in here and say I'm just getting started and you can actually just skip all of these prompts now you need to fill out your Shopify name this is only internal so your customers aren't going to see this this isn't the domain name you just this is just an organizational thing for yourself so I'm just going to call this Davy dog beds and we need need to make sure that we select the correct country that we're going to be selling the product in this is going to help all of our settings in the back end so I'm going to start selling this in Australia but you could do United States or UK depending on where you're from and now we need to create the Shopify ID and it will just take a couple of minutes to build your store and you can see now you're set up in the Shopify portal this is where all the magic happens this is where you create your multi-million dollar shopified brand this can feel quite overwhelming this platform but we're going to break down every section that you need to know so you can see I've used Dave's dog beds up here that's internal only is that the best name that we can create for our business probably not I do think people overthink this step your business name will really shape around your product and your branding Google that is a completely madeup word there are a few requirements that you need to think about firstly you need to make sure it's not infringing on any other business's trademarks or copyright rights you can simply Google the name you're thinking and if you can see that there's a clear competitor stay clear of that you can also search the trademark Registries of your country the second thing is you really want to make sure that you can get the domain name or if you're selling in the UK get the doco doou or if in australia.com AU the final thing is you want to make sure that your name is easy to remember easy to spell and easy to hear when you're talking about your brand on a podcast you want the person to easily be able to go into Google search the exact name and You' be on the top of the search ranking to not waste too much time of this you can actually just go business name generator in Google and you can come to any any of these free tools and I can just write dog beds comfortable and it should give us a few options dog Lazar you can click on this and it will check the domains this do com is taken so we don't want that dog VI seems free we can just search dog VI and you can see that there's a Facebook for that product but it's probably pretty safe to use you can write dog vo trademark and I can't really see anything popping up here naturally you'd spend a little bit more time on this making sure that it's all clear but I think we can use dog vo.com the next step we can go to canva.com one of the most amazing free tools you don't even need to hire a designer anymore and all you need to do is write in logo and you'll get a ton of options here you want to pick one that's appropriate for you A Simple Text logo should be fine we can try this one we'll go more of a premium brand F your logo again is something that a lot of people spend a lot of time on initially which doesn't really matter all it needs to be is credible so people don't think you're a Drop Shipping scam and then it also needs to align to your product category you don't want it to just be completely let's say it's environmental and you're doing something that's completely not environmental it just won't make much sense if you want to spend a bit more time on this we're going to cover how to hire people using things like upwork where you can easily hire a $5 to $30 an hour graphic designer to design you a logo in just a few hours but I'm going to go DV just going to reshape this I think I'm knocking off the Dior logo and we can just delete this background reenter it and you can save this logo for free now you've got this logo there are a few steps that you need to do so this logo is going to be both on our website and it's also going to be on our packaging hopefully this will really give a custom branded feel to the product that you're shipping to customers so you'll need to provide this to the supplier they may give you something called di lines where you actually need to create the full packaging yourself and put it on the dial lines that that's if you want to get really technical about it but chances are the supplier is just going to grab your logo and put it on the placement you do want to get a photo of it before they start shipping to customers make sure the dimensions and the colors look [Music] good but the other place you're going to do it is you're going to come into the shop of f store and you're going to click this online store and this is going to give us all the options of themes and we're going to put our logo on this theme somewhere the default selection nowadays on Shopify cuz this is a recent video for you is the dawn theme this is a new Shopify 2.0 theme and it's free and very customizable if you wanted to you can come into the theme store which is just down here personally I think if you're getting started you need to save as much money as possible and you're just trying to get those first few sales you don't need to use any of these themes you can just use the dawn one you're just going to click customize up here and we're going to enter What's called the theme editor now this can feel a little bit overwhelming as well but trust me it is super intuitive on the left here you've got all of your sections on the right here you've got the preview and then up here you've got the changing of the screen so you can go to mobile desktop or full screen you see if I change mobile the preview is going to change as well I recommend actually editing your theme in mobile version to begin with this is because the majority of your traffic that comes onto your website is actually going to be on mobile to edit our logo you can see there's a placeholder Davy's dog beds we're not calling that so to upload your logo you've got two options you can click the edit brand section here now this is Shopify attempt to make your branding very consistent across your store branding is one of the most important things to have consistent you want it consistent on your Facebook ads your email and on your website so that when people see all of these bits of information they know they're in the right place they know you can trust it and it's credible you we all have that experience of getting this really poorly designed email we click through the website it's a different color palette and it's just really really confusing so this is shopify's new section but you can use the old way of doing it and you just click change here select and you can just upload any images that's in your download folder so you can see that's now added a lot of padding around here padding is also another really important design principle that we're going to talk about today all of these small things like design principles just build trust and if you've got this large section here it's going to take people longer a scroll it just looks Scrappy no professional website does it so to do this all we need to do is come into preview and we can go just select the logo and click crop and save that and then we can click edit and we can change the image upload the new image and the padding should be gone that looks much much better so once you've got your logo the next step is to just fill out the rest of this information you can change any of the blocks over here and you can remove them one of the best steps that I recommend at this stage is going to your favorite e-commerce website maybe not something as big as gym shark but someone that you know that's doing decent amounts of sales and really just have a look at how they've set out their layout things like videos probably isn't necessary for you to set up in the very early stages it's a very brand focused feature of a website and you don't really have that many videos right now copy their layer and get all of the things that you need so for example this section here there's multiple products that it's recommending and we're in only one product store we're only custom branding one product at this stage to get rid of the section you can just click this little eyeball here it will just hide it and we can also add sections down here depending on what you can see on your favorite e-commerce website the great thing about the theme editor as well is you can actually just click on these buttons to get the customer experience on what they would see next right now there is no products in here so that's the next step that we need to do to do this we just come into Shopify we can click this little X here we can go into products and add your product this is where we're going to add all of the information for our product now this is a big topic this separates the people that get sales any initially versus the people that drive a lot of traffic to their store and people just leave straight away cuz they just don't trust it this is where your inner marketer needs to come out you need to understand basic copywriting principles which we're about to go into you need to make sure your images are crisp which we're also going to explain how to do so I think this is a perfect time to start talking about conversion rate optimization a lot of people even if you pick the perfect product you're going to drive traffic to the website and you're going to get no sales I want you to get your first sale and get addicted to the process and conversion rate optimization encompasses a lot of things it's basically just a fancy way of saying how many people come to your store and actually purchase the product to show you a good example I'm going to go to another website that's selling this product so you can see that there's a few conversion rate factors that you can kind of emulate with your product again I wouldn't be doing this one the three main things we can break it down is imagery website hierarchy so basically the website structure and functionality and then also the copywriting which is really important so getting really really crisp imagery is important as I said you can use your iPhone you could go on Amazon and buy a really cheap black box you could also get a white sheet put it next to a natural light source like your window and take photos of the iPhone but if it's not going out crisp enough that you can compete with competitors you may just need to Google some e-commerce photography there's lots of services now where you can get your supplier to send the product to this photographer they'll edit images in 2 to 3 weeks and they'll come out really nicely you're also going to need these lifestyle images as you can see here this is the product actually being used if it all looked like this this white contoured background then your website's going to be quite boring so that's kind of your list you need some lifestyle imagery which again you can take yourself or and you need some white contoured shots but that highlight the product if we look at website structure we've also got these icons which are very very easy to download you can just write in icons here and you can come to something like flaton and you can just buy and download the licenses for these and that'll give you a really professional feel most businesses use those icons now we'll come to the actual product page to understand what kind of copy and photography we need you can see there's a mixed range of Lifestyle images influencer shots people showing how the products actually used another great thing that you can do and design is competitor table that shows your product versus other people on the market and another good thing that you can actually design is also a size guide this is especially important if you're going to do something like clothing or something where there's multiple options you customers the confidence to actually uh purchase the right product it's going to reduce returns as well the other thing that we should talk about is copyrighting now there's lots of Frameworks that you can uh Google and learn a little bit more about copywriting I'm not going to go into it now because it's a big topic I think I've done an hour video on it before but there's two Frameworks the there's the Ada framework which is awareness interest desire and action and then there's the pass framework as well which is problem agitate and solution you can use that frame framework to lay out the hierarchy of your copy so the problem for our product maybe um anxious dogs talking about that using a story to agitate the solution like the dog can't sleep and you're trying to do work and then coming through with the solution which is your product you can see how that's much more enticing than just saying this is a dog bed these Frameworks are great to use on your advertising platforms like Facebook which we're going to show how to set up in in the future for websites I do just recommend going to check out some of these uh some of the competitors but also people that that you respect in the industry um and making sure that you just kind of tick all the boxes uh that that are here these accordians that you can see on here are very very easy to set up with Shopify 2.0 themes and allow people to kind of expand to learn more because one thing you don't want to do from a conversion rate point of view is have big blocks of text that really stop people from finding the key information which is the price product um and then you know the the variant selector here and then the add toart button you want to make sure that that's very very easy to find so now you know all of that let's set up our first product and show you exactly how our new store is going to look so again you come over here onto the left tab and we're going to set up our first product here it's nice and easy click add your products on Shopify and it this is now in a draft stage so you can start typing this up this won't come active on the store until you click save but we can just call ours a uh um thir dog bed and this is going to be the title and that you're going to see now when you click that it's actually going to change this search engine listing so typically SEO for new stores is very difficult okay it's a skill it's an art form in itself and if you are going to want to run SEO you need to be an expert in that unless you're entering a less competitive space so you may need to also hire an agency to get your SEO right but in the early stages you probably don't need to worry too much about this this meta description will um be populated by up here the the one thing I do recommend is just checking this URL handle making sure that this isn't heaps heaps long because that can cause issues so if I did fa dog bed for poodles or something like this it could just make it really really long and that can cause cause you issues in the future so if I wanted to I could just go for dog bed and just keep that URL nice and clean but I'm just going do dog bet up here and now we've got the title we just need to um add the description so again you can come to your uh we could just uh let's just add some text here um test test and just show how that's going to affect us sore because I think it's really important to understand the actual design when you're considering copy copy is going to be laid out in a certain way on the store and we just want to make sure that we understand that before we go writing because it's going to determine how much writing we actually need to do if that makes sense so we're going to come to the view store you can see it's now available in our store there's no images or no pricing or anything like that and you can see how this layout's actually going to look to add the images we just click add files and you want to keep all of your images a consistent size so this might be something that you actually want to tell your e-commerce photographer um what size images you want generally images are in square format so we're just going to add a couple of these images that we've got now all we need to do is click save now you should upload and we can click preview and this will take us over to our Shopify store and you can start to see what the actual theme is going to look like Shopify has these accordion sections this uh theme this Dawn theme actually has these sections which is great this is editable in the theme editor we'll jump in and show you how to use that in just a second so really here all we need to do is call out some features and benefits so I can write something like that up so we're calling out the machine washable cover just the main things because people might not expand that category we're talking about some really strong benefits that our customer really cares about um where also you know using some social proof saying that you know we're the best dog bed in Australia so I can just save that refresh I can click preview here and you can see that's starting to look pretty good so to edit this section all we need to do is come back into the theme editor click customize and I want to look at the mobile version remember most traffic is going to be mobile I can come to this product I can actually just click there now and you see it's starting to shape up really nicely if we wanted to edit anything like this davies's dog bed that was just because that's the store I set up I can just click this little I here and it will vanish which is great um and then if I want to change this material section all I need to do is on this right hand side I could say um I probably wouldn't say this in these words but I could just say like 100% polyester um removable cover I've already said that but I'm just going to say it again for the example sake and we can expand that category and you can see that there's plenty of information there so I can just click save there now as you scroll down there are some sections you can change them depending on the the comparison website that you're using but I can just select image and I want to just add a size guide you can see that's now cropped wrong so all I need to do here is Click adapter image again everything's going to kind of be on this right hand side so Tinker with that or on the left hand side and we can see that our product page is starting to shape up nicely I can just check that on desktop and it's looking pretty good once there's a few more images here it will look pretty Fresh So to complete our product setup we need to do a couple more things obviously we can't give away the product for free so we're going to come into back into the product and we're going to complete the setup so I would definitely add a few more images now the pricing this again is going to be dependent on how much it costs to get it to your customer let's just say it's $99 for this one the compared price I'll just show you what that is it's uh let's say it's 99 and it's compare it 129 you can come in here and I'll just preview this and so this is what brands use to indicate that it's on sale you can see there's the original price and then there's the strike through price there and in terms of taxes I'm going to show you how to set up taxes and explain that a little bit because I think that that's one of the most confronting things for people so I would leave charge taxes on this product set up depending on where you're selling cost per item now customers won't see this it says it there cost per item is important for you to fill out because it's going to help you understand your gross profit margin Shopify has a range of reporting that they have in their back end and if you don't have the right cost per item it can throw that out a little bit I personally like to use this cost per item to include everything including the career cost to customers but not including marketing because that's variable depending on how much you spend on marketing it it's going to go up and down so you can basically then get this metric a daily basis like because if you sell 10 beds and it cost $10 it's going to be $100 you can get your total revenue minus this cost per item minus your marketing and understand close to your net profit there's obviously operating costs there so if you're struggling with the finance side of things just the best best thing I could say is you know just get started you can watch a couple of YouTube videos on um gross profit net profit those kind of things so I'm just going to put $10 here so then you've got inventory here now this isn't really going to affect you too much initially but I do recommend you fill it out now the typical way that we do you know SKS is you want to understand what it is but you also don't want to limit yourself in the future uh by making it kind of too simple it's a good organizational tool a typical thing that you do is the first two letters is going to be kind of the category of the product so this is going to be DB for dog bed um because if let's say I bring out um you know dog vests or something like that it would probably be dog vests or if I wanted to bring out cat beds it would be CB because then it's going to when we export all of the data this might be getting too granular but it's going to put all of those rows on the exact same row on a spreadsheet so it just keeps keeps things tidy so this might be dog bed gray so this is the unique element uh that will different differ this from the pink dog bed that we added onto our store in a different way so barcode this is again for your intern purposes uh I do recommend using a barcode just go to a free barcode generator that barcode is going to be used by your 3s if you're going to use that because they scan the product when it comes in and then it helps you track your inventory because you you need to hold the 3pl accountable to that inventory this can also be a little bit confronting but again I just recommend watching a YouTube video on how to set up barcodes so if I just click save this I should be able to show you what track quantity is tracking quantity is is really important if you're not just drop shipping if you're drop shipping from your supplier and and you're not ordering big batches at a time that they are holding chances are you won't actually need to track the quantity because there's kind of an unlimited amount but if you're ordering let's say 100 units from your supplier that's going to drop ship the product then with your logo then you do need to actually track the quantity because you can only sell those 100 and you need to place another order for another 100 when you start to sell out so I do recommend doing um tracking you can just edit this number here you can just add 100 units cuz I just bought 100 units click save and that should be absolutely fine it's going to actually make our product on our website if I click refresh here you might have noticed that that went from sold out to now on sale which is great we can start selling the product and then you've got weight now weight can be a little bit confusing for people as well now weight can affect a few things sometimes this Shopify data when an order comes through it gets passed to another software so that software could be a a shipping software that connects with a courier like Australia Post or Hermes or wherever you are UPS if you're not using any of these software chances are that the only effect that this shipping section is going to have is internal so and we can I'll show you exactly what that means in a second I do recommend just approximating it at this point this Customs information again it's a little bit Technical and when you're starting it's probably not going to be passed through to anything so you can just leave that blank this options thing definitely is important for me to to show you so if we wanted to add multiple size or multiple colors to this product we would need to create options now you'll notice I've only got one skew at the moment so when I add size now I can just add the multiple sizes medium large and I can click done and you can see that's instantly added these variants here and you can see that now there is multiple skews so I may need to change that organizational point of view and I may also need to change the name of the product and the pricing of the product so large might be 1 2 9 and this now needs to be DB gray large and I can click save and this is also going to throw out our inventory amounts because you just because you have lots of size in medium doesn't mean you're going to have size lots of size in large as well so you can see that that's what this number is here there's 100 units of the large let's say we got 50 and actually let me just leave that and show you exactly what that's done to the product page I can just refresh this product page now you can see that there's a variant selector I can select large but my large is sold out cuz I had no inventory or I can select medium and you can now add the product to the car so that's basically all you need to know that product is pretty well set up um on the front end a common mistake that I see is people just don't set up the back end of Shopify it's so so important typically people start driving traffic to a store and they're like why is nobody checking out I'm getting lots of traffic and it's because one the customers actually go can't even select the country to ship to to their country or two it cost a lot of money to ship it to the country so make sure you come into these settings and there's a range of options that you're actually going to need a step by step go through store details this is kind of your basic information such as your ABN or like your your currency so you can select the currency that you're selling in the plan is the Shopify plan you can upgrade to a certain plan to get certain benefits of Shopify I recommend just staying on the cheapest plan until you're prompted otherwise to to get a feature that you really need billing this is where you're going to add your credit card and uh get build users and permissions this is where you can add you know Consultants again I'm going to talk about hiring people soon payments is a really important one so you can see that there's already been a PayPal created for this store this default PayPal is actually going to be linked directly to the email that I used in the very first step when I set up the shop advice store so if you've got lots of businesses that are running out of maybe that one email it may be best to create a brand new Gmail for the the Shopify store so it it sets up with his Paypal alternatively all you need to do is Click manage and you can just uh you can change this account connected and set up a PayPal in a separate step I do recommend just setting up a brand new PayPal and then linking it just gives you a little bit more control check out now this one's important I like to click phone number and email it just prevents fraud and there is also a lot of cers that you use that really do need a phone number to actually contact the customer when the product is on its way so I'm not sure why Shopify defaults the email um but I I do recommend setting up phone number I also recommend require first name and last name again this is going to ensure that your product gets delivered with your criers which is one of the main problems the rest of these settings are absolutely fine now we get down to shipping and delivery over time this has gotten actually more complicated I think but it's just shopify's way of making it more versatile for you you can just click manage shipping rates here there should be default products selected you can see our third dog bed is already there now you can see all of these shipping options so this is again just going to be the default when we set up and you can see we've got shipping to Australia which is domestic rather than International has all of these default options now Shopify doesn't know what Courier you're using or anything like that so I highly recommend just editing these completely now there's a few ways we can do this I actually recommend just coming in here and deleting these you can change the country which is the Zone here for example if you wanted to add New Zealand to this because it's not too far away we can just select this country here and save it I'm not going to do that once you understand the the cost to deliver to this country we can just click edit rate and we're just going to add one shipping option here which is standard 2 to8 business days let's say you don't have an option that's either of these you'll need to create a custom flat rate I do recommend doing this because then you can actually change the rate name so standard sounds a little bit uh average if if that makes sense um so we can just do let's just say 2 to8 business day um let's do track sh shipping today business days in bracket and we can just click add let's do free that sounds way better than standard we'll make that $0 now these conditions are really important to get right and you may might remember we set up the item on the product before so let's say you know I set that to 1.5 kilos before let's say that I did 1.6 kilos here now when a customer goes to my checkout they will not be able to purchase his product because there's no shipping option for it so you we really want to just make sure that there is no limits on this zero you can also do price as well let's say if you're going to buy uh if you're going to do a free shipping offer over $100 you could set this order price as $100 like this and now customers can get free shipping on certain orders but I'm just going to do this click done and save now we've got rest of the world shipping if you're not able to ship to the Middle East for under $20 people can buy lots of products and it's automatically going to ship and you're going to lose lots of money so you need to be quite confident in um shipping internationally before you set it up so I'm just going to delete that so now customers in Australia when they add any of these products if added a second product it would automatically populate here they should be able to see this free track shipping option at checkout I'm going to keep working through the settings just making sure that we've covered everything sales tax is highly dependent on the region that you're based in so you know the UK has that Australia has GST so you want to collect sales tax from your customers because you're going to need to pay that back to the government minus the cost of import in that product so when you import let's say $10,000 worth of dog beds to Australia you're going to pay a certain amount of GST bringing that product in you're going to have lots of other GST expenses as well like let's say you know buying office equipment they maybe be sales taxes on that you're going to charge your sales tax to your customers and then you're going to deduct all of those other GST expenses from that so it's really important that you are collecting that and you're also communicating that to the customer cuz they may need to claim those funds back as well if it's for business use the tricky part is is this section down here which is include tax in prices if I do not if I set this Australia to um collect GST you'll need to add your appropriate ABN number here but now I have um selected this what's going to happen is this actual this added GST is actually going to be added on the product let's say we're selling it for $100 there's going to be about 10% added onto to that for the customer that can be a really jarring experience because the customer is expecting to pay1 and then it's saying $110 at the checkout so typically what you want to do is include tax in the prices and click save customers are going and they're only going to have to pay the 100 that you originally planned for and then you need to handle sales taxes on your side if you're still confused about that I recommend just looking up Drop Shipping taxes you can search that on YouTube and just get a full um understanding of that depending on what countries you're shipping to the next thing in settings is locations now this isn't too important this is if you have multiple warehouses like you might have one Shopify account but you might have five warehouses around the world a good example is if your factory in China is holding some inventory for you but then you've also got a warehouse in the United States maybe it's run by the same person but you might want to be clear in Shopify where that inventory is actually held typically this isn't for beginners cuz you're only going to have inventory in one situation gift cards you're not going to need to worry about that but that's where it is you can set up a gift card offer um for Christmas and people can go and and purchase them and give them to people um markets this is where you can manage uh having multiple regions and selling to one thing I will say about this is if you're setting up a uh you know if you want to create a global brand that's really loved I do recommend setting up just brand new Shopify stores for each region that you're going to sell in the reason for this is is it helps you control the information that the customer is seeing you might have different types of products or marketing tactics for each country it'll also make customers very very confident that they're shopping in the right country if you have the localized domain so the do.uk for UK and. com.au for Australia so you can then drive traffic and control the traffic sources to go to each of those stores just with more ease it just gives you more control but if you wanted to set up multiple AG this is kind of way with a one store you can use something called a currency converter which is an app and you can also use this as well to get get more flexibility so then you've got apps and sales channels we're going to cover that in a in a second um you've got domains so I think this is a a good place to talk about setting up your domain so we can actually purchase a product and and show you everything that we've we've gone through so far you got two options here you can use something like name sheep and then link name she back to Shopify which is really really easy I do actually recommend this option because then you have the domain of Shopify which it can be a little bit difficult let's say if you ever wanted to move away from Shopify I haven't done this but to move the domain that you purchase with Shopify to something like another big Commerce or something like that might be a little bit more difficult whereas if you've got it on name cheap and you've got it completely separated it just gives you a little bit more flexibility in the future and I I think the price is is probably cheaper as well so but if you wanted to you can just uh buy it through Shopify with just a few clicks so all we need to do is put in our domain here and click buy this is then going to prompt you to add all your credit card details in and also your address which I can do and I can click buy now again my shipping options are all for Australia but you just need to make sure that you set that up to the UK as well now this should give us the option to check out now you do want to select auto renew the last thing you want is your website going down because you get to uh renew it and you really do want the Privacy option as well that's selected here now that isn't going to be applicable for certain Regional domains but this is just going to stop you getting 5 million uh random phone calls of people trying to sell you shopice stores so I can now just click buy domain and that should link up so now I've set this up it should actually be operational but it can just take a little bit of time so you can see the SSL is pending once this goes all green it should be ready to go and you can preview your store so I'll give that an hour or so could take up to 24 hours now we've got Customer Events here pixels I'm not going to do anything in this section because it's a big topic and we're just going to cover that when we go over Facebook marketing brand I've already talked about you can add your colors there to get make sure that it feels consistent notifications now this one is generally important when the person places an order with they're going to go through all of these automated emails so you can Custom Design these to be much much cleaner but one good way you can preview them you can add some more information you might want to reiterate you know your your shipping policy or your refund policy here but you can change a lot of these things in our email marketing software that we're going to cover in a little bit which is called clavio meta Fields you don't need to worry too much about this files this is just where you can add all your images um and you can pull them into that theme editor you can also download some images uh maybe you can use them for Facebook ads store languages isn't too important but then you got policies now Shopify does have the ability to create a refund policy and a privacy policy um and a terms of service now I do recommend you uh do this and change it accordingly if you do get to a relatively large size for your business it is going to require you to go to a lawyer and actually set up these properly if you're in Australia you can use something like legal Vision just use a really cheap lawyer to go over it and make sure you're all covered but until you're doing decent volume I don't think you need to worry about this too much now there's going to be a couple of places that I recommend you put this privacy policy and terms of service one is in the footer of your website which I'm going to show you how to do but then also it's actually going to be automatically placed in the checkout of your website so when they're checking out they should be able to see this as part of their process so now what we're going to do is we're going to go into plan I want to set up a PID plan so we can actually previe our website and go to the checkout and show you some of the things that we've set up so I'm going to click choose plan now Shopify do have an offer at the moment for um $1 per month for 3 months so I'm just going to select that I don't think that that's going to be around forever just pick the cheapest plan initially and we're going to do monthly billing click confirm and start plan so now we've got all the settings set up let's go through the rest of these columns on the left so we've gone through products customers you're not going to use this that much uh because you can generally use the search and the orders to to find information about your customers but this is is just going to have all of the data what they've ordered their address and everything in case you need it analytics again until you drive a bit of traffic to the store you're not going to need to use this too much but it's going to have sales all of your sessions your conversion rate which we touched on a little bit earlier so this will eventually become kind of you know what are you doing is it working and everything like that um we will show you how to set up Google analytics which gives you a lot more data than this we've also got marketing really you're not going to use that to much either I think Shopify is trying to become you know a bit of a hub for the marketing side of things but you're generally going to rely on the other platforms like Facebook's in inbuilt platform to help understand your marketing discounts you will be using this a little bit to create a discount uh you can create one for you know influencers you might want to say you know 10% off or let's say you've got a Black Friday sale or a Christmas sale you can just click create discount here and you've got multiple options so the amount of product product is going to be and the amount of order is generally going to be what you use most buy one get one free or buy one get one 50% is a great offer as well and then free shipping is pretty easy but to show you how to create a product discount let's say we want to give 10% off of our beds we could just do 10 off and we are going to use this in when we set up our emails I'm just going to do 10 off there we've got fixed amount or percentage we need to be very clear if it's 10% off or $10 off I'm going to make make it a percentage uh for this one so we'll just do 10% off now you do it's really really important that you select the products that you want this to be applied to because what can happen is if you add more products that the discounts not allowed for this could then automatically be applied for that and you might start losing money on those so it's really important that you keep your discount codes nice and organized otherwise you're going to get scammed out of lots of money you've got lots of other options like minimum Pur purch required um and customer eligibility but I don't they're not going to matter too much you can limit it to the first purchase or um you know one per person if You' like but people generally can get around those kind of things with different emails and and whatnot the other thing that you do need to be cons considerate of is the combination so Shopify now allows the stacking of discount codes you really I I highly recommend not letting you stack discount codes initially just again trying to keep organized so I'm going to save that one and we're going to use that again in our email shortly now we'll keep working down the list we've gone into the online store before when we selected our themes but you do want to also come down to uh these sections so blog post is if you wanted to create a blog post this is important for SEO purposes or maybe you want to educate your customers and send traffic to a specific blog post I don't recommend I think this is a bit of a waste of time unless you really know what you're doing initially pages from a structural point of view are quite similar but Pages can be something like your contact form or an order tracking form or an about us page now these are the things that you're going to see on the top of your website so you can see over here we've got this page already the contact form in the top of our navigation so customers are generally going to click on this there are a few pages that every shoply store really needs to have so that customers have trust and they're able to purchase the contact form is great but I like to make that an FAQ page this is where customers have to click to educate themselves around the product the shipping Services just getting more information than they can get on your product page and generally you can put your contact page in within that information so that customers can generally answer their own question that's going to reduce the amount of customer service that you're actually going to get the about us if you're trying to build a really great brand is important generally if you're just starting out and you don't have this revolutionary idea you're not partnering ING with any celebrities or anything like that there's not that much you can say and it's a controversial opinion but customers generally don't really care that much about you they care about what the product is going to do for them so you can write write a little bit of information about it to create a new page let's say I was going to make an about us page I'll just click add page about us and I could just paste all the information here and the only other thing that you could consider is changing the SEO but you can see our domain is um relatively clean there and I can click save now if I wanted to preview this page I need to remove the password from the store so they'll automatically apply a password to your store so I can just click remove password here and you can see our store is now open of the business I can actually preview this page if I wanted to now come here click view page and you can see there's an about us page already got a contact form in it but you can just put an email there and I don't use contact forms the other section we've got under online store is navigation now this is this section up here this is called a navigation and this is another navigation so this is the header this is the footer if we come back to this section we've got the main menu this is the header and then the footer menu you can see Shopify is all already defaulted to that those menus now let's say I wanted to add my privacy policy here I could add menu item I could do privacy policy and I can then click policies and I can just add privacy policy and when I click add now and save menu and I come back to my store and I refresh this you can see now that this privacy policy has been added recommend adding all your terms and services and everything into that now if I wanted to add our about page about us page that I just added it's the exact same Pro process and I'll just write about us Shopify makes it nice and easy to add this and I can click save and this should populate at the top right here the final section that you do need to go into is these preferences now why this is important is because if someone texts this store in using iMessage there's always going to be that little preview that pops up now you don't want this to just be the default because who knows what kind of information it's just going to pull from the store and try to automatically populate it so we do want to sell ourselves in this so premium dog beds in Australia the number um cing dog beds to help your pet sleep free delivery and just add some information there and we can click save we can change this social previe preview image from our logo as well if we wanted to add a dog bed now there's a few more sections here Google analytics Facebook pixel which we're going to cover you've also got your customer privacy which is also important and then you've got you can change your password in this section as well but we've already removed that [Music] so the final thing that we've got on this left hand side is apps now these are the superpower of Shopify a lot of the other providers like big Commerce just don't have as many apps and they really can supercharge your store they can increase average order value so how much every person spends on your store as an average and they can also you know increase conver version rate which we've already talked about they can uh you know communicate to customers to improve customer service as well there's just a whole range of apps a lot of these apps will work on a free trial and then there will be a monthly billing after that or they might charge per usage like every since time time places or do they take a small fee one of the main mistakes I see with new entrepreneurs is they install a ton of apps thinking hey this one will work this one will work but you don't need that many I'm going to give you the absolute key ones that you need to ensure that you can be profitable on Facebook ads or you know running organic social as we as we're going to talk about in a sec so if you add way too many apps it can actually slow your website down and have a negative consequence for you so you need to be really selective around the apps that you add to add one all you need to do is click this app section and you can actually search the apps up here now and we're going to download a review app so if you wanted to you could just write in reviews now reviews are the things that are going to be on on the bottom of your website everyone's going to review your product and it's going to increase trust you can see there's a lot of review apps there 923 that have popped up there's a few that I could recommend so Luke is the main you can see how many reviews it's got Luke is probably the main one that a lot of drop shippers use that is good and bad it's quite cheap and easy to use but because so many Drop Shipping and scamming websites use it they I do feel like it's losing a little bit of trust within the IND and for consumers because when they see it they're like oh this is a Drop Shipping Store I'll just show you how much it costs and how it looks so you can see that there's photo reviews on the product page this allows people to really see how it looks on Photo reviews are far more trustworthy than text reviews which people kind of just uh don't even read anymore the only thing better than photo reviews in my opinion is video reviews at this stage cuz people are really going to trust them so looks is pretty cheap at $9.99 14-day free trial the other that I will show you that we are now using is okendo now I think that this is just a little bit more robust it is more expensive but they are doing some really really cool stuff they actually have the ability you can see here to kind of create customized features this is a makeup or a deodorant or something like that and you can see that they um can add Effectiveness and scent so for AI we could say uh size true to size with a fit or something like that so if you've got a clothing brand I think okeno can be a really really good option as well so I'm just going to add that to the app and we can click install here and we've just added our first app ever now review apps if you pick one that isn't new there's a chance that there may be some installation process that uh you need to use a developer to install or if you know basic HTML but um the good thing about using one that is rather robust is that you can generally just click Auto install and all you need to do is click this and enable it on your website you can see that's already enabled which is all good so now you can come to your website you can see we've got this little reviews tab finally over here you can open this up this is where customers will populate their reviews typically you can add the reviews onto the product page that's kind of best practice at the moment which is pretty simple to do sometimes it'll actually do it automatically this will be fine for now as we get our store set up the next app that I wanted to show you is a postp purchase upsell app so if we just write post purchase now what a post purchase is is after your customer purchases your product they'll get a one-time offer for another product now this may feel like you're being very intrusive but providing you make the offer very uh enticing for people it's a win-win because if you think about it when you ship you know one product to someone adding a second product into that package is not going to be as expensive as shipping two individually so you actually have more ability to Discount your second product because the Courier cost from your supplier or from your Warehouse is actually a significant part of the product overall so adding a second offer is is really really good way to increase average order value increase customer satisfaction and everyone kind of wins this allows you to spend more on marketing and make more money you've got a few options here you've got after sell which I've used before and it is quite nice and simple you've also got zipper fire which is oneclick upsell as well I've used that as well it's great and then we've got a honey this is all what we're currently using and it uh is is quite good so I'm just going to add this app it's got great analytics and great customization when I say analytics it's can you have the ability to split test certain offers so sh giving them an extra $30 discount versus $20 discount on the second purchase and how much does that affect the um uptake rate so I've understood that offer and we can just go thanks and we can create our first funnel now it's telling us what to trigger so what happens is we generally want someone purchasing our fur bed and we select post purchase I'll just quickly explain what some of these are this card page is when people are have added to the cart and they're about to check out they might get another offer here product page is on product page offer so it would be like buy one you know get one 50% off you can also do that with the developer the thank you page is U the actual confirmation page where they'll get showing their tracking number that order summary and whatnot and blog page you probably don't need that so to do this we actually need to come into the checkout settings and allow them to use it so you can scroll down here post purchase page click honeycomb click save come back here so now we need to set up our actual offer I do recommend setting this up all manually so you can understand what what offers are going to happen we can show for all purchases for this product then we can select our third bed because that's our only product at this stage but if we added more now we can select the amount of discount they're going to get on their second product so let's say they're going to get 30% off their second offer you might want to limit it one per person which uh could make sense if you you know you don't want people taking too many of these offers and giving them to friends or something like that and then you should be able to click save and activate you can see that little preview on the right hand side there so I'll just go back to that preview so you can see what it's going to look like so this is the offer that they got to get special offer add this product to your order offer will expire in 5 minutes it's a bit of urgency they can select their size still um if that had stock that would work but the medium is in stock they just one click there and they'll be charged immediately and it'll be added to their order so that's operational now I should get a little bit of an aov increase from that how a play with that you can really customize this offer you could run split tests on it as well and uh try to get it uh to the highest uptake possible this is the conversion rate here if you ever need to see the analy antics you click on analytics and you'll be able to see all of your data um in this section if you wanted to change the design these designs over here they've got a couple of other examples for you as well that you can update on so a couple more essential apps that you're going to need is postcript now postcript is an SMS app there's a couple of others that people uh recommend such as SMS bump you can see it here um postcript I think is the best from a compliance point of view I think they're very supportive in compliance now there's been big lawsuits against brands that um haven't done SMS compliance properly and have have been soed so you do need to understand the compliance side of postcript and what country you're in mainly most countries the main thing is to ensure that there is a double opt-in so people can't be Auto automatically subscribe to SMS otherwise they can technically Su you so you can add this you also want to make sure that your um terms and conditions and your privacy policy is set up correctly postcript will actually support you with this so you can actually just reach out to them um and get it set up so I'm just going to add this sales Channel and show you exactly how to set up SMS now we're going to show you email marketing in a second and SMS in a second because both of them are essential to ensuring that you're getting as much money from from the traffic that you're driving to your website there's no point pouring water into a leaky bucket you want to optimize it as much as possible so you can go through the welcome series for uh postcript then they actually prompt you to understand the the compliant if you don't go through this step they might actually not appr proove you so go through all of that process so to do this you can just copy this to your clipboard and click update your terms of service it'll take you to that legal panel that we've talked about before this under advertising now obviously I'm rushing this through this there's lots of things that need to be updated in this privacy policy before it's completely compliant and I do recommends you can use a really cheap lawyer in your area if you um yeah if you're expecting a big amount of traffic you should be completely compliant and click continue here you can add your branding if you want we could add our logo and we want to change this shop name as well to dog beer and you can see this needs to be save 10 which is our discount code before so people can subscribe get $10 off now we've got dog VI subscribe as well so what happens now is you can actually text this number to this number and they'll actually subscribe to the offer so you could put that in your Instagram bio or something like that this isn't what we're going to use postcript for we're actually going to use postcript for for a banon cart so when people go to the cart add products to their their cart go to check out but then they don't they input their phone number we're going to text them and follow them up with a with a text message so this is what this one is for all of these other messages are a great uh form of of marketing as well but we don't need to set them up today we're going to use email for that um eventually I do recommend that you set all of this stuff up just be really considerate you know mobile is a very intimate um thing you know you've got all your data there it's a 90% open rate you don't want to be spamming people and annoying them with uh you know if they just go to your website and randomly bounce off or something like that so be considerate now to build your mobile list we've got a mobile popup which we're going to talk about in a second that's just where a popup comes in and they can enter that their mobile um we're going to turn all of this off at this stage because we're only going to be using it for abandoned cart um so I'm goinge and turn all of this off we're also going to be using that popup for an email popup and show you how to do that so I just will show you how to kind of finalize the the messaging setup here come over to messaging and down here we've got automations and you can see that there's already populated some abandon cards it's actually active because that's what we selected before in the process and we can see that this is the message that they're going to get it's going to be customized their first name with our uh store name um our 10% discount coupon as well um so to edit this all we need to do is click edit we can just change this to save 10 which we know is our discount code and we can click save Automation and you can see the preview down here [Applause] [Music] so the next app that we need to install is one of the most important things do your Shopify store it's going to increase your lifetime value so how much people shop with you it's going to be allow you to launch new products and tell all of your customers I'm sure you can guess what it is it's an email marketing software so uh it's called clavio so k l a v i y o and you can see it's here it doesn't add that many good reviews because it is a relatively complex software but at this point in time there is no better email marking software from a segmentation point of view segmentation is deciding what audience sees what and I'm going to show you exactly how to set up everything that you need to be successful in your early stages email marketing is a very very big topic and there's a ton of things that you can do with it but I suggest just staying really focused on these core things that are about to teach you now you can set up your sender name so this will be dog via beds now this Senter email address is where it's really important you have a custom branded email to send from because otherwise if it's coming from a Gmail it will probably go into their spam folder email marketing is all about ensuring deliverability and less people marking your as spam to create your custom email address there's a few ways that you can do it with Shopify when you set up your uh domain they will create this info at do. and then it will actually forward to your other email that you use to to set up the Shopify account or you can click switch to email hosting so you can actually set up with Gite and it will allow you to manage all of your emails actually in Gmail from a custom branded account if you're going to use this I suggest using G suite and setting it up and having an email like support at. you can also use something like Dy dog.co to create a personalized response then you can put this email in here so it just be Davy dog.co now I haven't actually set this up but once you have any replies to the emails that you're sending it from at davy. dog. code will actually come back to you in that Gmail account so you can click through all these prompts as you can see clavio does have SMS marketing but I suggest using a different service at this stage I just don't think clavo is there yet and this should just bring you to the clayo dashboard now you can follow these prompts here because we do need to set up these things so we've got grow your list with a sign up for this is what I was referencing earlier where we have a popup that people can enter in that that email so we can click create sign up form and they have multiple options here you can pick one that's custom branded for you but I think we're just going to go with this one which is a basic email sign up form we can go the name that's internal use only now this is important this email subscriber list this is is lists are certain characteristics of people so you might have a list of people that are in a certain region they're just in Australia or they've signed up through a certain popup on your website or maybe they've signed up in a completely different area like they in store or something like that so the lists are just like an organizational tool for you and the reason why it's important is when we set up automation so when someone signs up to a list they will get the certain emails that we've set up for that list so we can go into that in just a little bit but we're just going to use the newsletter the default uh list you will have a a default lists actually in your clavio account and click create form and now we get a nice little preview here um our discount is only 10% off this is the discount that we set up earlier the main purpose of this popup is to really just get people to enter their email quickly without too much thought so you do really need an offer to entice them do want it to be consistent with your branding as well so we're going to replace this image upload an image that you're using try this one and we're going to change the colors to be more in line with our brand colors and as always I recommend you clicking the mobile version and making sure it looks okay with mobile the other thing that we need to also ensure that we do with the popup is make sure that the discount code isn't um the discount code is actually shown after they enter their their email because we don't want customers having to wait you know 2 hours let's say that that email gets blocked or something like that to get the discount cuz otherwise they're just going to lose interest and not shop so to do this we actually click these are the stages up here of the the opin so there's the email opin that's what we're on currently and then there's the success stage so this is what they're going to be shown it's also really important to change this image that would look really really silly if that was a backpack so we can say success and then we can just change this to use code save 10 to save 10% off your tog bed and now we can actually click act live up here and then click publish and this should Now activate actually on our Shopify store the integration is really good with Shopify and clayo so now the main thing to realize is this uh app embeds needs to be on and you actually need to click save just make sure you click save and that should activate it we can come back here verify installation and that is now operational we should be able to come to our website refresh it and now the popups come up we can test this just at gmail.com click unlock offer and that's now uh come through there so that's all operational a few other things around the popup that's important to understand is we need this targeting and behavior one of the the main mistakes that I see people make is show on page load like that's going to pop up straight away and it can be really intrusive for people we might just want to show you know 5 or 10 seconds even after they enter the page so it's not going to pop up straight away we do want it on both desktop and mobile and we can just click publish changes there now that's all done we can come back to clavo and understand where those emails are going on the left hand side here we've got campaigns now I'm not to cover campaigns today that uh because as a beginner you don't really want to be creating too many campaigns campaigns are good for creating you know new product drops or something like that but every time that you create an email considering you are just a startup you probably want to get as much leverage from that email as possible so every single campaign you create you can probably just put that in this section here which is called flows flows are are automated so rather than just sending one email that one email to the list that you currently have at that time every single email subscriber that you get over the period is going to get these email so you just get a lot more out of out of your work so you can see we've got these um automatic emails these are all the basic ones that you're going to need and I do recommend setting up most of them so we're going to set up a welcome series we're going to set up an abandon car browser banon is less important um but I do recommend setting setting it up as well a customer thank you is after purchase after the person has purchased they will get an email and I do recommend setting that up as well um the product review SLC cross sale I think uh you probably don't need to set that one up purely because you're going to set up a customer thank you email chain and you can sell your products and ask for reviews within that um email and then customer winback uh as well can also be handled in the welcome series and if that's if that's a little bit confusing I'm going to I'm going to show you how to do it um so going to go ahead and click get started with the uh with a welcome series email and now you can see here when I click this we've got these lists that we just uh set up in the popup before this welcome series needs to match the popup list that you've selected I selected newsletter so I'm just going to click continue there this means that every time people go to your website and fill out that popup form they are going to get these series of emails so to read this we've got the trigger this is the action when they subscribe to the newsletter list through the popup they're going to get this welcome series email one they're going to wait 3 days they're going to get the welcome email Series 2 and then wait 4 days and welcome email Series 3 that's how you read this all of these emails are in draft so until you change this to live they're not going to automatically send then on the left hand side you've got all of your analytics as well which you're most definitely going to be uh looking at so to change one of these emails all we need to do is click here and click edit now this first section is where you're going to change the subject line so it's remember customers are expecting their 10% discount code here so it would be like your code is attached and then we can add a preview text save 10 for 10% off and the sender name's fine sender email is also fine and then we can click edit email to actually edit the design and this is where we can edit the design make it on brand remember if a customer gets an email like this they're instantly going to think that you're a scam and they're not going to purchase from you so it needs to make sure that there's a consistent design so I will show you exactly how to set up an email with this drag and drop editor the main thing that I recommend for all beginners is just making sure that you have a really really good template um to make sure that you are copying something rather than just trying to completely innovate and create a brand new design simply because when you're new you just need to get you know you need to understand the best practice and then you set it up and you can iterate over time so to do to find some good templates you can just go to something like really good emails just Google that and this website has some great templates they might not all be Drop Shipping but um you can just copy one of these templates or you can just copy what I'm going to do today which is a pretty common setup with uh with just a a massive feature image at the top some text and then pushing to it so welcome series email number one is the first email that they're going to get after signing up to the popup on our website so we want to be offering them a discount code maybe um some scarcity as well um truthful scarcity then you're also just wanting to sell the product and educate them a little bit more the truth is not many people read emails to be honest they um kind of skim it at at the most so it needs to be very very digestible to edit the the thing um we've got this section here where if we click it's going to change the left section where you can go into more detail and and change it the other thing is to know is it's a drag and drop which is very convenient um so we're going to first edit this image now I highly recommend using canva to create any of these images that I'm about to show you um we can go and add We'll add the logo first and then we can easily come over here and change the sizing of this I'm just going to go over here and click fixed width and I'm just going to make it a nice small logo so people know exactly what I'm looking at I'm going to Center that so people are going to have some trust there's a bit of branding there I'm going to then upload a couple of more images so you have kind of two options if you want to add text you can either add text through an image which you've done on canva or you can type the text it's important not to have just all images and design everything everything in canva because it can actually get picked up on the spam filter um and some people can actually have trouble viewing it as well so a nice mixture of images it's much easier design on things like canva but you do want to add some text so I'm also going to add a second image just by dragging this over here browsing it uploading another image like so and you can see this uh Blends quite nice ly so I've got some text that I prepared earlier you can copy this if you like and I'm just going to delete all of this first and paste it and that's starting to look pretty good now you can see this name section here what you're going to want to do is you're going to want to change this to add personalization and then you can just add the first name and you can get rid of this and now BAS basically it's these double um brackets here and whatever's in in there now the default means that if there isn't the first name let's say they sign up from the popup and you don't have their first name that you don't have that data this is what it's going to default to so you need to fill that out to something like hey there now if you're wondering if this works you need to make sure that you you check it I'm just going to click preview and test this profile here doesn't actually have a first name it only has the email so but this is how it's going to look and you can even check out your mobile as well because I've used that image it's formatted quite nicely now we've got a discount code here making them feel quite special like it's a kind of unique code um we obviously need to come back into our theme and create this discount so um we might just quickly create this for 10% off as we did before always check your discount codes and make sure they're functioning and I can click done there now obviously this is quite a scrappy email that I've just kind of put together but you would want to spend a lot more time on making it feel quite professional you need to make sure that there is an unsubscribed so this template here while this is looking a little bit ugly you do want to make sure that you have it you can actually drag it a little bit lower and also make the style which to change kind of like the background text and whatnot come back here and you click Styles and now this is all kind of like the master email section and then you've got the template background which is over here I don't recommend you change that but if you wanted to change just one section which I do I just want to change this one I'm going to change this to just a light gray and so it's just a little bit less intrusive there um one other thing that you can do is you can add more buttons just to get more of a clickthrough rate make sure that people can shop your website to do this we can just go Um shop now is fine we want to try to keep our colors relatively consistent so we might just pick that orange you probably want to follow your brand colors for this um but that's fine there and we'll just grab our URL here and for to make sure the button working the URL just goes over here and we can click save and exit so one thing you'll notice here is my home address please don't visit me um one thing you'll notice here is this Avo branding down here when you add a payment plan to it you'll be able to go into settings and remove that so that's the only thing that's really ugly there so I can click done now you're wanting to set up three basic flows and you can come just back to this flow section you can see these down here a banon cart is incredibly important some best practices of banning card is again using a discount code to there's these Dynamic fields which I'll just quickly show you where that you need to make sure that your actual product is showing on that so we can just click edit and you can't see it here but when I click edit email you will be able to see that you've got this product here that is exactly what you need make sure that you keep that because people are going to see the exact product that they added to their cart here it's clavo and Shopify perfectly integrated so get that set up and as I said you know look at competitors look at the OD what we're doing here to copy it and and that's just the best practice the other thing that we want to do is making sure we want to get our brows abandonment flows so what that is when people have signed up via the clavio popup we actually have their details from that point forward we can actually see them going onto a product page and then leaving that product page and we'll actually be able to send them an email so this is really good for you know someone like the udie because will come back another time and shop and they they go and look at something like uh pajama set or something like that and we can actually email them about that pajama set going forward you definitely also want a customer thank you flow this is an opportunity to ask them for you can see that there's a product review SLC cross sale here but I use the customer thank you flow just as one flow and I you can ask people for a review you can try to sell them a different product you can try to sell them the same product at another discount or something something along those lines so really important that you have all of these customer win back is important but only probably after you've uh focused on there's a lot of other things I'd be focusing on before the customer win back so set up all of those flows and uh yeah you'll you'll start getting a fair few customers it's really important to have email set up because if you're going to be spending money on ads you need to make sure that you're converting as many of those customers because if you don't do it your competitor is going to to do it they're going to be able to spend more on ads and they're going to out compete you now if you found that all too overwhelming and you just want a really simple you know t-shirt to get started and you don't want to invest Lots into inventory then print on demand could be an option for you print on demand is where you use a app to stock a product on your website and then as soon as a customer buys the product on your website the factory will print it so let's say they're printing a smiley face on a t-shirt they'll print it and then ship it to directly to the customer and you don't need to touch it at all to get the best print on Demand app all you need to do is go to the App Store and write printful and you can just click add app install the app so all you need to do is sign up with your email address and your name and this should automatically connect now we're in the dashboard all we need to do is add a product and you'll get a range of options here so when you're in the product section there's a few things to take note of you've got your reviews here and you've got your estimated delivery time you've got some color options and then this is the price that it's going to cost you so if you're going to sell a product this t-shirt for $100 you're going to have about $99 profit there note the delivery time is 6 to 9 days often much much better than what you're going to get for uh delivering from China doing Drop Shipping this is why print on demand can be quite attractive the reason for this is I think printful has over 10 almost up to 20 warehouses um so if this isn't getting dispatched from Australia localized Warehouse in Australia it's probably very very close to it so that's one of the main benefits um to customize a product let's say we're going to do a nice tote bag for our pet store I think printful is definitely is the best option for any kind of clothing um brand if that's what you're going to launch there isn't a huge amount of pet products but um they are expanding it so all we have to do is add our logo and upload it and we should get a preview now there is affiliate link for printful in the description so now to add the logo we can just click apply now print on demand can work really really well if you've got a bit of a community already and you're trying to you know let's say you've got a YouTube channel or you've got a Tik Tok growing print on demand can just be a great way to monetize that audience just a little bit better so now we've added this logo um we can select the colors that we're going to sell it in so White's going to look a little bit better for that logo um and then we can just go to the design as well we can click here for product info to understand a little bit more about the product info so we could add this to the description in our store but let's say we're all happy with that we can go proceed to Media so that's the back of the bag so we could actually make it both sided if we wanted but we can see that this is the front here and this is what it's going to look like so so that's pretty much all you need to know proceed to details you can customize all of the copy proceed to pricing now we're on pricing we can do the retail price let's say we're going to sell this for $49 we can see how much revenue this is going to bring into our store this is how much we need to pay printful for every single single order so someone will come to our store buy it from our store Shopify they won't go to printful this order will get sent to printful to fulfill and then we will just get sent this money then we can just click submit to store and this should integrate and add across to our store so now we have this product in printful we can actually come back to our store click on products and it should be sitting right here you can see that they've got a large amount of stock this is because it's print on demand you don't need to pay for that stock until you sell the product which is fantastic we can click preview and we can see this is starting to look quite nice so now we've set up our Shopify site we've got our supplier we've got our emails ready we can actually start driving traffic to the website now there's a lot of ways that you can start getting audiences to your website and it really depends on your skill set what you're wanting to grow in and also it really depends on the product there's something called Product Channel fit some products that are viral products lend themselves very well to something called organic growth whereas there's some products that work very very well with paid growth the difference between that is organic growth is where you're just creating really engaging content and because it's so engaging Instagram and Facebook and Tik Tok will allow virality for that content because it's it's engaging the audiences on those platforms so therefore it's you know making them more money through ad Revenue the other thing is paid ads where you're B basically going into a bidding war against every single Advertiser on the platform the more relative that add to um the audience is the more that you'll be competing with that person with with similar Brands and you just need to make sure that your ad is converts at at the highest amount and doesn't feel too spammy those kind of things will allow you to spend more on Advertising you'll get cheaper customer acquisition costs and you can just have a little bit of net profit left over so if that sounds a little bit confronting we're going to go into some examples now we're going to set up ads I'm also going to cover organic as well so we can um you know I've had plenty of uh viral Tik toks as well so I can break down exactly how to create them if you don't have any budget for advertising then we've got you [Music] covered create a um Facebook ad account you can come into preferences and click set up Facebook pixel here I don't recommend doing that from the I do think you should just come to business. face.com and you can just log in to your Facebook here click log in with Facebook and you'll create a new business manager for your account so a business manager you might notice that you could have created an ad account in your personal name but it is very very wise to set up a business manager there's plenty of other features and it's just a little bit easier to use as well to come when you're in your business manager you should be able to just click add accounts and you can create a new ad account here so I'm just going to do that and you just want to name it like your store so this is St Au store time zone make sure you set this to the time zone in in my opinion should set this to the time zone that you're advertising to so if you're selling in the United States and you live in Australia you should still set this to the United States but because I'm selling in Australia there and it should Auto Select the currency I think that that the time zone is or maybe that's based on location but make sure you um select the currency that you're um going to be selling in as well so now we have an ad account within our business manager The Next Step that we need to do is link this uh this ad account and this business manager to our Shopify store so this is done through what's called a pixel and you can just come back into this section now and you can click set up face Facebook because everything's been set up in in Facebook it's uh you should just be able to link both of the two now and always with this technical setup just make if you're getting stuck you can you can either Google The Google or YouTube the error name or you can just Google or YouTube the thing like so how to link Facebook with Shopify and just sort the YouTube videos by most um most recent as well just to get a really upto-date thing CU these things they always stay pretty similar but they can just kind of change week to week so I'm just going to add this app and it should allow me to select login through to my Facebook so we start setup and now I can just connect my Facebook so you can see I've linked my Facebook now so the next thing that we need to add is is called a page so we need two things we need an add account and we need a page so I can just click on pages here and it's pretty much exactly like setting up the uh ad account so I can just do dog via and just set up a new brand should be pet supplies create page and now we've got that page we can go back to Shopify and Link the accounts and I can just select this page the one that we set up before now you can click maximum here but you do need to make sure that the Privacy policies reflect the uh requirements for this this is referred to as cppy this setup here so if you ever hear someone saying that let just copy so now we have two options we can create the new pixel Within Shopify or we can just go back to our ads manager and exactly like we created the page and AD account we can come here to data sources and click pixels and create a new pixel and I'm just going to call it dog VI pixel and that should allow me to just kind of refresh here and you can see our pixel is there now so I can click connect and agree to Facebook T server so let me just explain what what we've just done so we've got the paid basically like an Instagram accounts or wherever someone can search our name and they can go see everything on our page this is also what our ads will be running running through so whatever you set up on your page you know the logo the bio some of those things will be available after people click your ads then we've got an ad account which is kind of going to be our technical setup process where we upload images all through that portal and then we're going to spend a bit of budget behind it and it's going to go out to the world of Facebook then we've got our pixel now the pixel is embedded on our website that speaks back to the ad account and every single action that customer does on our website it speaks back to their ad account account so it can optimize accordingly so for example if someone purchases our pixel is going to pick up on that purchase and then it's going to allow us to maybe retarget them later on and all of those good things so we've got all three of those set up I can just submit this may take a little while to get approved but in the meantime we can most definitely come into our ads manager over here and we can start setting up our ads I'm going
The words are the caption track's own and nothing is reworded or re-transcribed. Paragraph breaks are placed between sentences so the text reads as prose.
Free tools for your own script. No signup, no login.
Paste your draft and see where viewers are likely to drop off, with a rewrite for each weak line.
Paste the first 30 seconds of your own draft for a hook score and rewrites.
Check your draft against YouTube's advertiser-friendly guidelines before you record it.
Read this channel's public videos and transcripts, and download a writing brief for it.