Getting the transcript
Reading the captions from YouTube. A video nobody has opened here before takes 10 to 30 seconds; this page fills in on its own.
Getting the transcript
Reading the captions from YouTube. A video nobody has opened here before takes 10 to 30 seconds; this page fills in on its own.
Ali Dymock · @AliDymock
Where viewers went back to watch this video again, from YouTube's public Most replayed graph, lined up with what was said at that moment.
Most replayed moment #1
3:584.2x the video's typical replay level
the last stud on the 16 inch spacing and started again with a new top and bottom plate and another stud. The two ends of the wall are structured with two studs with blocking inbetween. This provides a surface to attach the plasterboard to internally. Another option for corners is to rotate the
Said at 3:51
Most replayed moment #2
5:152.9x the video's typical replay level
Said at 0:00
Most replayed moment #3
4:412.8x the video's typical replay level
to ensure it was square. Once square, I screwed the wall to the floor to prevent it from moving.
Said at 4:36
The graph counts replays. It does not show where viewers stopped watching.
Words
1,953
Runtime
14:10
Speaking pace
138wpm
Reading time
8min
138 words per minute, below the 160 25th percentile of 349 measured videos. That distribution comes from the 349-video hook study.
Opening (first 30 seconds)
In the last video I completed the floor of my garden room; in this video I make a start on the walls. I decided to have sloping joists for my roof. The decision to do so is a little complex and in order to keep these videos on topic, I’ll cover why I made that decision in my roof video. However, the repercussions of having sloped joists are that
69 words, the words spoken in the first 30 seconds at 138 words per minute.
Free, no signup. See how the first 30 seconds hold attention, with rewrites.
Sentence shape
| Measure | This transcript |
|---|---|
| Sentences | 96 |
| Average words per sentence | 20.3 |
| Longest sentence | 63 words |
| Questions asked | 0 |
| Sentences containing a number | 28 |
Most used terms
Filler phrases
9 in total: like 9.
A literal whole-word count of the same phrase list the Prepublish browser extension uses, so a phrase inside another word is not counted and a phrase used in its ordinary sense still is. It is a count and not a judgement.
What this transcript is
Every word below is the caption track YouTube publishes for this video, pulled from the video itself and reproduced unchanged. It is not Prepublish's writing, not a summary, and not a re-transcription: it is the video's own published captions. English captions, published by the channel, in the video’s original language. Source: the video on YouTube. A channel that would rather this page did not exist can ask for its removal through the contact page, and it is removed.
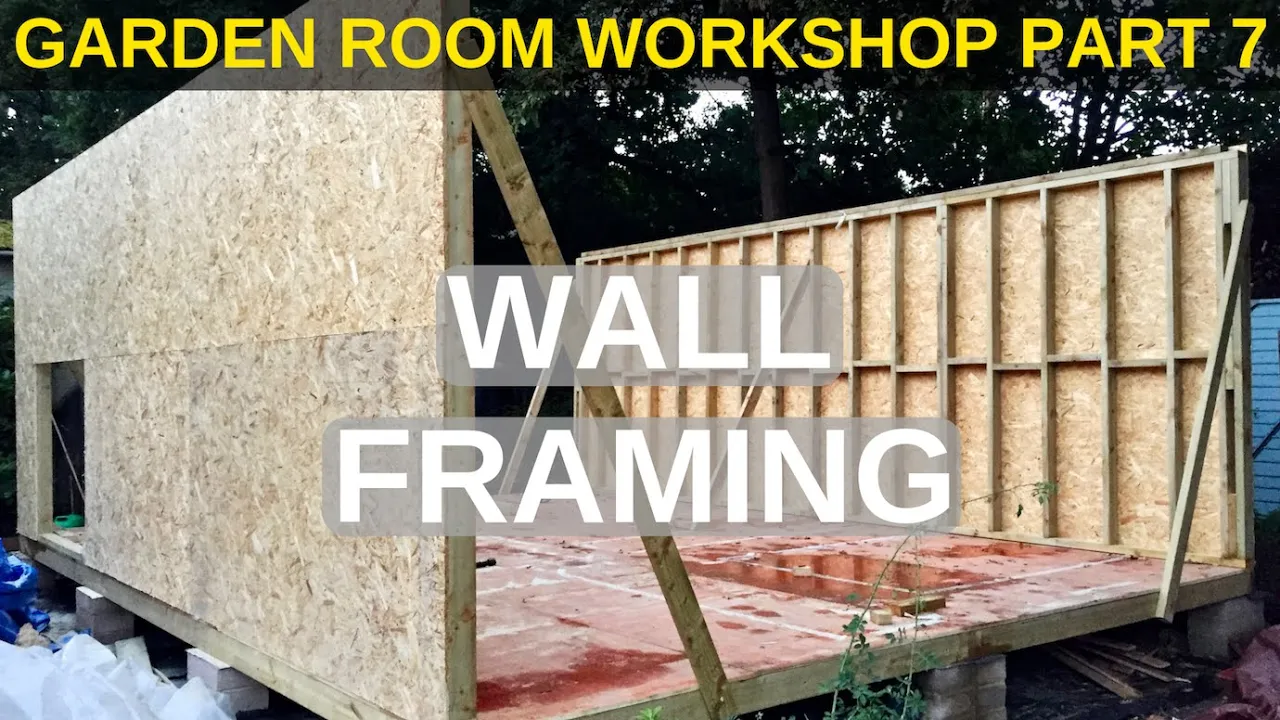
In the last video I completed the floor of my garden room; in this video I make a start on the walls. I decided to have sloping joists for my roof. The decision to do so is a little complex and in order to keep these videos on topic, I’ll cover why I made that decision in my roof video. However, the repercussions of having sloped joists are that my front and back walls need to have a difference in height of 8cm and the two side walls will need to have different length studs to compensate for the slope, which is tricky.
It’s important to have a fully thought out roof structure before starting on the walls, even if your roof joists are flat, as at this stage, you have most control over the height of the building. I decided to start on the back wall as this was the simplest due to not having any windows or doors. When it comes to wall framing, you have to hand it to the Americans; everything I learnt came from watching videos from over the pond and I’ll link a couple of great channels in the description.
The basic structure of a wall is much like the floor construction. There is the bottom plate, top plate and studs in between, with noggins to help stop the studs flexing from side to side. Again the noggins are offset from each other to allow nailing or screwing from each side. My top plate is doubled up for three reasons. 1. for extra strength for the roof joists. 2. It helps connect two sections of wall and 3, by leaving a gap at the ends, it allows the front and back walls to interconnect with the side walls.
For my studs, I stuck to my 16 inch spacing for ease of attaching OSB and plasterboard. Like with the floor, we mark up where the studs will go on one of the two plates. This next step took me a while to understand and is a little complicated to explain but I’ll try. If we imagine this to be our stud wall and we’re looking at it from the exterior and the right hand side is the end of the wall. If when marking up, we hook the tape measure over the end of the plate and then mark every 16 inches, draw a line and put an X to the right hand side, like I did in Part 5 for the floor, then when we put the 8 foot OSB sheathing on, it will sit half way across on Studs 1 and 8.
Now, that’s good for Stud 8 as we want to have the other half of the stud free to attach the next sheet of OSB but on Stud 1 we want the OSB to go all the way to the edge, like this. We can achieve this by changing how we mark up our plate. First we need to know the width of the timber being used. Mine are an actual size of 45mm wide. Half of this is 22.5mm or more easily remembered as 7/8ths of an inch. Therefore we need to pull back from every 16 inch interval by 7/8th of an inch, draw our line and mark an X to the right.
In effect what we’re doing is reducing the spacing between Studs 1 and 2 while keeping the 16 inch on centre spacing for the rest of the studs and this allows the OSB to go all the way to the end. If you want to avoid having to pull back when marking each stud position you can relocate the tape measure to left side of Stud 2 and then you can carry on marking at 16, 32, 48 and so on and mark each stud on the right of these lines like I showed in Part 5.
If any of this isn’t clear, I recommend watching a few framing videos and eventually it will click like it did for me. I then clamped my two plates together and transferred the marks across. My top and bottom plates weren’t long enough to stretch the 6.5 metres so I cut them after the last stud on the 16 inch spacing and started again with a new top and bottom plate and another stud. The two ends of the wall are structured with two studs with blocking inbetween.
This provides a surface to attach the plasterboard to internally. Another option for corners is to rotate the second stud 90 degrees which is useful if you’re framing with larger timbers. When laying out the studs, I put the convex side up, for no other reason than to stop them rocking, two screws per stud. I then added my second top plate leaving a timber's width space at each end. Once this was done, I measured diagonally across the entire wall in both directions to ensure it was square.
Once square, I screwed the wall to the floor to prevent it from moving. I then moved on to my front wall. This is more complex as I have to frame a french door and 2 windows. So first a quick lesson in framing windows and doors is needed! On the outside of the openings stand the King studs. These are full length timbers which help keep the opening aligned and hug all the other timbers. Inside of these are the trimmer studs.
These run from the bottom plate to under the header. The header is made of two thicker timbers turned 90 degrees which distribute the weight of the roof down through the trimmer studs. I used wood glue between the two timbers and, as I was using 2x6s, I attached them with 3 nails every 16 inches. Under the window is the cill plate, this doesn’t need to be that thick as it only supports the weight of the window. This is a regular wall timber turned horizontally.
Above the header and below the cill plate are the cripple studs. These are set out on 16 inch on centre like the rest of the studs in the wall. Extra cripple studs are needed on the two sides under the cill and also on the two sides above the header. The King and trimmer studs should be screwed to each other with two fastenings every 16 inches. You can alternate the side from which you attach them for extra strength if you like.
The header should be nailed through the king studs as well. I used 6 nails per side. You don’t need to nail the cill plate from the side as it’s screwed into the two side cripples and these cripples are then screwed into the trimmer studs. Moving to the door, this is framed exactly the same way as the windows but without the cill plate or lower cripples. As my opening is larger I decided to add an additional timber to the header for extra strength.
A general rule is up to about 5 or 6 feet, 2x6s are fine and above 6 feet, 2x8s should be used for the header. If you are having a very wide gap, the trimmer studs should be doubled up on either side to better support the header. If you’re ordering your windows and doors then you can make your openings any size within reason and just order windows to fit whatever opening you’ve made. If however you already have your doors and windows ready to go, make sure to add at least 5mm to each side to be able to get the windows and doors into the opening.
Now we know all this, we can start marking up our plate. Because there are no studs where the door is it’s best to mark up the top plate first, not the bottom plate. I started marking up from the left side which is the same side I started with on my back wall. This will keep the studs directly opposite each other to support the roof joists. Regardless of windows and doors, we still need to keep our 16 inch centres so I first marked these up.
I then marked up where I wanted my door adding 1cm to the width. Any studs that I’d marked with Xs that fell within the door width I changed to a C, which stands for Cripple stud. At the edges of the door I marked a T/C which stands for trimmer/cripple as this will be a trimmer stud on the bottom plate and a small cripple at the top. On the outside of the T/C I marked a K for the king stud. I then did the same for the my 2 windows.
Worth mentioning is, if you’re not too fussed about the whereabouts of your doors and windows you can use existing stud locations that fall within the 16 inch on centre spacing as your king or trimmer studs. I could then transfer all my marks with the exception of the cripples within the door width to the bottom stud. I first cut all my full length studs including my King studs. I then cut my trimmers for the door. The bottom plate is left in place while the wall is being constructed but will be cut out before the door is installed so to work out the length of the trimmer stud, I took the height of my door, 2100mm, added 5-10mm for room to install it and then deducted the width of the bottom plate, 45mm.
As I want the top of my two windows to be the same height as my door I cut a total of 6 trimmer studs the same length. I then cut my cill plates, headers, cripples and noggins. I first constructed my doors and windows before screwing to the bottom and top plates and adding the rest of the timbers that make up the wall. For the really eagle eyed of you, you may notice a couple of extra studs. This one is where two sections of wall meet and this one is located where I will be attaching a shower screen in the future - if I have my measurements right.
I then sheathed over the wall with OSB like I did for the back wall. The windows and doors will be cut out later on. I added an extra brace in the middle , this is attached to a block which is in turn attached to the floor joists. It’s important that there is room either side of this middle brace to build the next two walls on the floor. The wall at this stage is not perfectly plumb. Instead it leans out a few degrees which will enable me to lift the next two walls without scraping against the front and back walls.
I also attached the bottom plate to the floor with a few screws to stop it from slipping but will fasten it more securely once all the walls are up. So that is the front and back wall done. This was a difficult video to edit as there is a lot of information to get across. For those of you who are particularly keen I have uploaded another video with all the raw footage from this stage and I explain things in more detail.
It won’t form part of the main series but can be found on my channel page and I’ll also leave a link in the description. In the next video I construct the remaining walls, with a couple of design changes and then tie all the walls together, ready for the roof joists. Thanks for watching and see you then!
The words are the caption track's own and nothing is reworded or re-transcribed. Paragraph breaks are placed between sentences so the text reads as prose.
Free tools for your own script. No signup, no login.
Paste your draft and see where viewers are likely to drop off, with a rewrite for each weak line.
Paste the first 30 seconds of your own draft for a hook score and rewrites.
Check your draft against YouTube's advertiser-friendly guidelines before you record it.
Read this channel's public videos and transcripts, and download a writing brief for it.