Getting the transcript
Reading the captions from YouTube. A video nobody has opened here before takes 10 to 30 seconds; this page fills in on its own.
Getting the transcript
Reading the captions from YouTube. A video nobody has opened here before takes 10 to 30 seconds; this page fills in on its own.
Stefan 3D AI · @stefan_3d_ai
Words
2,671
Runtime
14:24
Speaking pace
185wpm
Reading time
11min
185 words per minute, between the 181 median and the 201 75th percentile of 349 measured videos. That distribution comes from the 349-video hook study.
Opening (first 30 seconds)
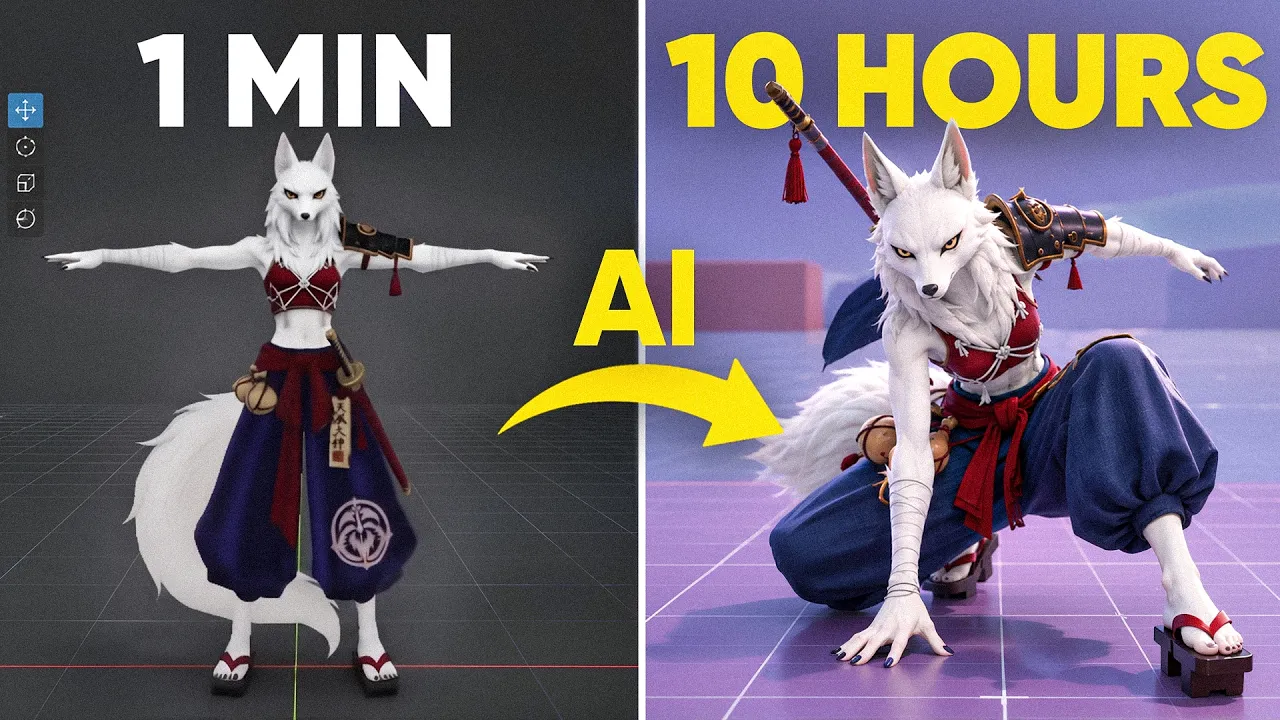
In this video I gonna challenge myself to create a character with AI in limited time. We gonna start with 1 minute, then 1 hour, and then 10 hours. Well, actually 10 hours was too much and 6 hours was enough to get it perfect. Anyway guys, you always ask me like if we can create character faster or someone actually ask how we can create it better. So it's a perfect opportunity to introduce a few approaches and see what quality we can actually reach. Let's start with 1 minute. Well, 1
93 words, the words spoken in the first 30 seconds at 185 words per minute.
Free, no signup. See how the first 30 seconds hold attention, with rewrites.
Sentence shape
| Measure | This transcript |
|---|---|
| Sentences | 228 |
| Average words per sentence | 11.7 |
| Longest sentence | 42 words |
| Questions asked | 6 |
| Sentences containing a number | 32 |
Most used terms
Filler phrases
106 in total: like 72 · actually 17 · I mean 12 · right? 3 · you know 2.
A literal whole-word count of the same phrase list the Prepublish browser extension uses, so a phrase inside another word is not counted and a phrase used in its ordinary sense still is. It is a count and not a judgement.
What this transcript is
Every word below is the caption track YouTube publishes for this video, pulled from the video itself and reproduced unchanged. It is not Prepublish's writing, not a summary, and not a re-transcription: it is the video's own published captions. English captions, published by the channel, in the video’s original language. Source: the video on YouTube. A channel that would rather this page did not exist can ask for its removal through the contact page, and it is removed.
No Script X-ray for this video: YouTube shows a Most replayed graph only once a video has enough views.
In this video I gonna challenge myself to create a character with AI in limited time. We gonna start with 1 minute, then 1 hour, and then 10 hours. Well, actually 10 hours was too much and 6 hours was enough to get it perfect. Anyway guys, you always ask me like if we can create character faster or someone actually ask how we can create it better. So it's a perfect opportunity to introduce a few approaches and see what quality we can actually reach.
Let's start with 1 minute. Well, 1 minute is not enough to even generate a 3D model. But let's say we can generate 3D model within a minute. It will take around 2 -3 minutes. I gonna use Tripo and the recent P2 which is like the best low poly possible. It also generating quads etc. So we gonna generate character there. Here we can see the mesh. I mean like if I see this mesh like year ago I would say like this is like most perfect mesh etc.
But what we gonna do later will be even better. And the second step will be to actually texture it. When you do it with P2 it requires 2 step. Okay, after approximately 3 minutes here is our result. Well, it is indeed a 3D model but we can definitely spot some blurry spots like eyes etc. I mean there's quite a lot of things that we definitely want to improve. And since we Do not have any time to do the rigging like if we bring it to Unreal Engine it will be like this.
Alright, let's take things serious. One hour. And to increase the quality in one hour generation most important thing where I gonna invest my time is to generate my model in parts. I mean we gonna use the same Tripo P2 with the smart mesh but I gonna approach it part by part and set different settings for the mesh. The good thing about P2 is that it generates meshes very fast and you can iterate like usually takes like 1 -2 max retries with the different polycount settings to get the right polycount, right stance, you know like right wireframe etc.
I mean it's insanely good model. Here by the way you can see what parts are extracted. Again, usually I go like this. Like there is the body, there is head and again like all the separately of course like weapons and stuff also separate. I mean it just works better that way. I mean you don't need to go like crazy splitting every single detail. I would say like think about like some detail that fit like within 500 to 1000 polygons, right?
Here you can see all parts on the screen which I decided to go with. And again in terms of wireframe most of the cases again I was extremely happy from first trial. I mean with this approach it is crazy how good. This wireframe look like. I mean of course it can break and there are some edge cases. I would say like with some realistic garment etc. It might not work that well. I did a video about it but overall for characters specifically especially styled characters.
Such as mine it works extremely good. You see what you see. I remember someone was asking in the comments if I. Don't do realistic characters intentionally but I mean I actually like styled character more and I think they are more creative. But don't worry I already working on the video showing you how to do realistic characters and in my opinion that's actually easier. To generate. All parts I actually spent more than 30 minutes.
So now I don't have much time left and I need to assemble them in. Blender quickly and get some time to rig it and put to Unreal Engine so it finally actually moves. And the good news here that. I will be able to do that really quick. So process here quite simple. Cut some duplicating parts and assemble things. Carefully together. With Blender sculpting modes or Blender proportional editing that is like super super easy.
Again like you just. Need like few brushes. Anyway 20 minutes later I have my character assembled and now it's time to rig it. And. There's two ways that we can do that. Like you can drop all together without weapons of course and just rig it all together. Or you can separate the parts that will be static anyway. Like accessories again they are not bending right so they are signed 100 % to some one bone. So I gotta do quickly the aqua rig like because I don't have a lot of time and quickly for some rigid objects like the waist accessories I'm gonna need to set 100 % weights to some specific bones.
That's pretty much it I don't have time to anything else. Quickly bringing my character to Unreal Engine and I have to quickly set some materials and target the animation to the controller. So it was a little bit more than an hour like hope you forgive me like for this extra three minutes. And here we go my character is in Unreal Engine and so we can actually walk around and it actually looks not bad right. But what do we see here we of course see the lack of any physics.
We do have tail we do have some stuff around like I mean that is absolutely rigid and definitely we can set materials better right. Okay so moving to the 10 hours. So what's gonna be different now? Well actually for generation we're gonna use exactly the same approach. I still gonna go with PPP2 maybe just spend a little bit more time generating parts because I learned what parts are missing like while assembling it last time.
So I'm gonna generate few more parts. There was some back. accessories. I also gonna give few retries to some of the objects I was not really happy and I was forced to move fast last And if. You're a professional 3d artist you might ask me but why if I have 10 hours I don't choose to go with high poly to low poly. Well that's a good question that is actually possible if you will have quite a lot of detailed measures and you want to bake normal.
Maps You can generate something high poly then retrypology etc. But at this very moment I recording this video PPP2. Produces much better low poly especially with quads than any retrypology. Well for retrypology we. Have options such as Tripo retrypology and also Hunyuan retrypology. And I must say quality of mesh that Tripo p2 provides is so. Much better that I just prefer to move along with this low poly models and add details on texture and I gonna show you how to do.
That And also I say sometimes skipping retrypology baking all that stuff. Not completely there will be few things to. Do but still. And by the way guys if you want to try Tripo itself you can try it for free and by my link in the description you gonna get. 500 credits if you are a new user. Now I gonna bring all these parts again to Blender and start assembling. Actually it will. Be pretty much the same base so behind the scene I.
Actually can reuse what I already did in one hour but I gonna just pay more attention to how accurate details are. And as I mentioned it still can produce some artifacts there might be some issues with the mesh etc. So I gonna take my time to address all of them. There are not a lot but again there can be some stuff that you just want like to smooth or fix or maybe update the wireframe. You'll see all the timelines that I did.
Altogether assembling, fixing some geometry somewhere it was a bit spent I had to straighten that or some small that. Altogether it took like around 40 minutes. And yeah I also had to fix some holes, cap some polygons or optimize mesh a little bit. For example I added an accessory a scarf and I want it to be a single plane because I want to add the cloth physics later. Like when it's double sided like it's not that convenient so I gonna just cut it.
Okay now it looks much better and it will be easier for me to add physics. When I finalized my mesh it's about time to do the unwrapping. And it's never been easier to do the unwrapping for AI generated mesh as when you work with cheapo P2. Because guys this mesh is logical and you can go and compare it yourself. Like it's so much easier like first of all logical means that you can easily manipulate. With some separated parts within the object.
Second it's so much easier to work with seams and set the. Seams for UV purpose. To completely unwrap my character it took me only 30 minutes which I think is crazy. And. Why do you need that right UV? Well good UV give you some benefits. Like you can do nice baking, pack texture nicer in lower. Resolution It is way more editable. It has less artifacts. When you have like thousands of islands it's very difficult to. Avoid small artifacts.
And I want to get best quality so we need to care about optimization. And later I also gonna add materials. So all these things matters. So after doing UV unwrap I re -baked the color in one bigger texture space and started. To address some texture issues. Like I mean there are plenty of ways how you can do that. You can try to do that in Blender like with the. Clone brush just addressing some issues like again like depending like how lazy you are.
Or you can take it to. Modi for example. It's one of my favorite tools where you can actually generate texture from image reference and apply, fix some holes. Etc But most of that approaches only really work for color texture and little bit for normal map. There is a normal. Painting and motif. If I want to get the best possible quality it means also adding some nice PBR stuff. And I. still. Have one paint software in my list that is hard to replace but I'm really looking into it.
It is substance painter for. Materials Also can be used for baking like baking ambient occlusion normal maps etc. And going here with good UV really. Makes sense. Without good UV you might have less access to all what substance painter can offer. Right the whole idea. Here is that you can define some zones and quickly apply some materials such as for example fur material. I can apply it. On top of my color texture and again really quick it will do the good job.
So I'm here not really to do the painting but. More to adjust the materials because overall I was really happy with the For some gold ornaments I. Did assign the material here but again that was like easy because I got like really nice UV and also it's like a. Really good mesh. So even without UV I was able to just click on the polygons and assign the material nicely because it. Is logical. It's so cooler I mean to work with it.
Okay you can spend a lot of time there. I'm gonna bring material texture to Blender and connect. Them here. And also I completely forgot stuff I need my eyes done. So I actually had to. Rework a little bit the eyes and the good news it was quite easy. I just created a sphere and put them внутри the. eye. Space and generated some cool texture with nano banana. So here you can see connected to the eye. Boom! I think looks so.
Much better right now. And here's my character ready to be rigged. I still gonna use Aku rigged to start with because again. Like that's just like a good starting point like it provides really good quality. So I'm gonna put my character there alone. Without accessories again and do the rigging as the previous time. Now it's time to assign all the accessories. We're. Also gonna take care about stuff like tail etc. Why?
Because we're gonna set the physics. So here's the final result. I even. Added like a small bone here to do the animation of this part. For this scarf part. I left them again without the skeleton because I gonna apply clothing physics in Unreal Engine. And the tail. Of course. Yeah you can see like the bunch of bones here and all things here. They also do have some bones. Here One, two, three, four. Okay. Hope you can see it nicely.
Well I think that's enough. I'm pretty happy with. My character. Other settings can be done. Altogether at this stage I spent 5 .5 hours. And if you guys also want to learn fastest way how you can. Create your own 3D character combining AI tools with base minimum of 3D skills you most welcome to join my 3D. AI course. We already have more than 100 happy. Students creating their characters. All links will be in the description.
And I recently also launched environment course. So now you can create character and a world for this character. In Unreal Engine I spent some decent amount of time setting materials. Because Blender materials are of course not really exported to Unreal Engine. And I also gonna use that preset for this cool parkour animations. Right? Just retarget the animation into one of the character presented in this template and you already can run around.
I don't know why everyone still surprised that it is so easy. Epic Games team actually made it so easy to use and But that's only the moment and I still have to spend some time assigning the physical bones. I still don't get it like why they cannot make this tool more convenient like because it's really a nightmare like to set all these colliders right here in Unreal Engine. They did an update to clothing however so it should be easier but I don't know like I still sometimes use the old way for clothing especially if I need to add it like just once.
Maybe used to it like over time. But there's a new workflow that allow you to you know like do it once and reassign easily the same clothing physics presets etc. So count another hour in Unreal Engine and here we go. Pretty amazing right? I'm really really happy like how my character ended up. And speaking Of my 10 hours title it was indeed the plan and I was planning to use that high poly to low poly baking and approximately I think I would end up like 10 hours or so.
But when I tested retopology and compared it with the P2 I just changed my mind and decided like I better show you like the faster workflow that for me now works better. The only case when you don't want to use it if you have like really detailed high poly that you want to start with and preserve a lot of details like baking normal maps etc. That can make sense and then I would say okay go with that longer pass. Other than if you have like styled characters or simplified characters just go with P2 like low poly right away.
It is just amazing how cool it works now. That was Steph. and Please don't forget to subscribe to not miss more of these amazing videos. See you in the next one.
The words are the caption track's own and nothing is reworded or re-transcribed. Paragraph breaks are placed between sentences so the text reads as prose.
Free tools for your own script. No signup, no login.
Paste your draft and see where viewers are likely to drop off, with a rewrite for each weak line.
Paste the first 30 seconds of your own draft for a hook score and rewrites.
Check your draft against YouTube's advertiser-friendly guidelines before you record it.
Read this channel's public videos and transcripts, and download a writing brief for it.