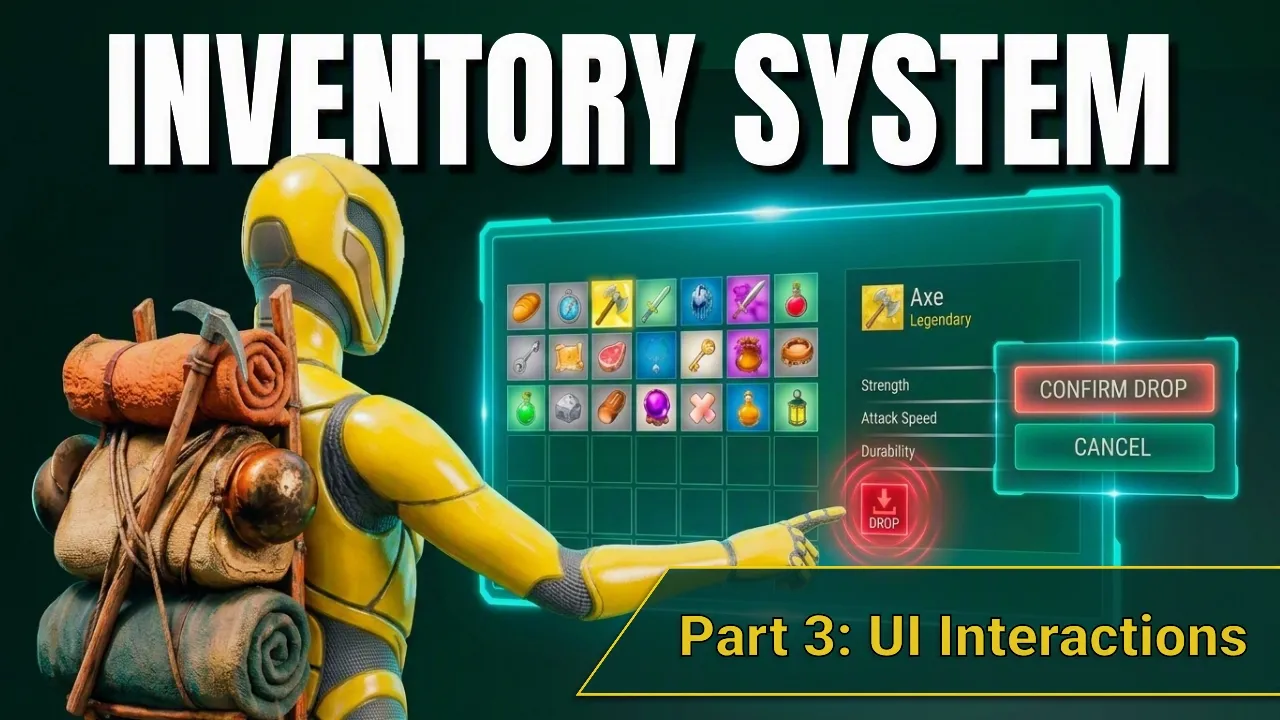
Data Driven Inventory System (Part 3: UI Interactions) | Unreal Engine 5 Tutorial transcript
Ali Elzoheiry · @AliElZoheiry
Words
5,847
Runtime
34:55
Speaking pace
167wpm
Reading time
24min
167 words per minute, between the 160 25th percentile and the 181 median of 349 measured videos. That distribution comes from the 349-video hook study.
Opening (first 30 seconds)
In part three of the inventory system series, we add the ability to interact with our inventory by dropping items in the world when we right-click them. We will also be improving the UI of our inventory by displaying the available empty slots. And we will also learn how to send events between the component and the UI so that the interface updates when the inventory changes. And finally, if you want a polished version of this UI with custommade materials, buttons, icons, and
84 words, the words spoken in the first 30 seconds at 167 words per minute.
Sentence shape
| Measure | This transcript |
|---|---|
| Sentences | 478 |
| Average words per sentence | 12.2 |
| Longest sentence | 76 words |
| Questions asked | 24 |
| Sentences containing a number | 22 |
Most used terms
- inventory98
- item93
- empty48
- drop47
- index41
- event34
- slot34
- items33
- add32
- create28
- click26
- uh24
Filler phrases
96 in total: uh 24 · um 23 · like 21 · right? 12 · actually 10 · basically 4 · literally 1 · sort of 1.
A literal whole-word count of the same phrase list the Prepublish browser extension uses, so a phrase inside another word is not counted and a phrase used in its ordinary sense still is. It is a count and not a judgement.
What this transcript is
Every word below is the caption track YouTube publishes for this video, pulled from the video itself and reproduced unchanged. It is not Prepublish's writing, not a summary, and not a re-transcription: it is the video's own published captions. English captions, generated automatically by YouTube, in the video’s original language. Source: the video on YouTube. A channel that would rather this page did not exist can ask for its removal through the contact page, and it is removed.
Transcript
In part three of the inventory system series, we add the ability to interact with our inventory by dropping items in the world when we right-click them. We will also be improving the UI of our inventory by displaying the available empty slots. And we will also learn how to send events between the component and the UI so that the interface updates when the inventory changes. And finally, if you want a polished version of this UI with custommade materials, buttons, icons, and a professionally crafted user interface by someone who has been making interfaces for 15 years, that's me.
Then check out the extended tutorial on my Patreon where I teach you how to make your inventory UI look better and you can download the custom assets that come along with that tutorial. And of course, you would be directly supporting the work that I do here and making all of these free tutorials on YouTube possible. So, thank you for that. And now, let's get started. All right. So, the first thing we want to do is add a new function in our inventory manager component to be able to drop an item.
So, right now we have add items, and we're going to add so many things in the future. Destroy item as well. But now, we want to add drop item. So, I'm going to create a function drop item. Now the drop item is different than the add item in one key difference. Right? Now the item itself that we add is based on its item definition. But when we drop an item, we don't drop an item based on its item definition. Right? So if I say I want to drop um this item, I don't say drop the item with definition health potion because I could have multiple health potions.
See, I can just duplicate this one. So, when I want to drop an item, I want to drop this specific health potion, not this health potion. Right now, they're both essentially the same, but later on they might have differences. So, when we drop an item, we're not going to say drop health potion. We're going to say drop item at index 4. Well, actually, this is index three because it's 0 1 2 3 or drop item at index zero. So that's how we're going to drop an item based on its index.
So its location in this array. So the drop item will take as input the item index which will be an integer. And the first thing we need to do is check that it is a valid integer. If I say drop item five and the index well the inventory only has three items then this won't work. So the any array has a function called is valid index. You can call this on any array. So I can say if the past index here is a valid index. We'll do a branch.
Then we can continue. But this is not the only condition. Remember we also added something in our item definition here in the world representation fragment that says can be dropped or not. If it doesn't have a world representation fragment or can be dropped is false, then we can't even drop it. So let's check as well whether it has a fragment or not. So how do we get this fragment? Well, we need a reference to the item definition at this index.
So we're going to get our inventory items array again and say get get a copy of the item at this index. I can just search item index. This is just the same as pulling here. So now I have the item definition itself and I know it's valid because this is a valid index and I can say find fragment by class world representation fragment. So now I need to check if this is valid. Does it have a world representation fragment right?
Because if it doesn't have a world representation fragment then it can't be dropped. And if it is valid then I need to check can be dropped is true or false. That is the final condition. then we can proceed. Here is when we drop it. So this needs to be a valid index. It needs to have a world representation fragment and can be dropped needs to be true. In this case, what I want to do is create a pickup item out of it because when you drop an item in the world, you replace it with a pickup item and then remove it from the inventory.
So I'm just going to say spawn actor from class and here spawn the pickup item, right? And the item definition is just going to be the same one that we got here. Now, the spawn transform is going to right click and split it. I'm just going to spawn it like 200 units in front of uh my player. So, I'll just going to create a function to help me get this uh spawn location. I'm just going to get a function here. Call it um get drop location and it's going to return a location that is going to be a vector.
And what it does is it just gets the owner. So this is the player. Remember we are in an in an actor component. So the owner is the actual person that owns the component. gets their actor location and adds to that gets their forward vector. So I want to drop it forward to where my player is and multiply that multiply the forward direction which is just a direction. We need to multiply it by a value 200. This means 200 units in the forward direction.
Adding that to the existing location gives us the end location that is 200 units in front of me. And this can be a pure function meaning it doesn't require any execution pins and doesn't have any side effects. So here I can just say get drop location. All right. And just to make things cleaner, I like to add these things in categories. So these are helper functions. These are helper function categories. And the add item and drop item, they're like interaction.
So um interaction with the inventory. So I'm just going to put both of these in the interaction category. This in the helper functions category. All right. And after doing all that, now we want to remove this item based on this index from our inventory items array. So we just go here and say remove index. And the index is the item index that we passed as input to this function here. And that's it. It's also usually good in these cases to return um success or not because when you try to drop an item maybe when you call it you want to know did it succeed or not.
So I'm just going to add an output here and call it success as boolean. And here we're going to have success true. If we don't return like in this case we don't return we don't return we don't return this usually means success is false. Uh you can add u success false um like manually here if you want uh just visually for it to be clear that this is a success false. But if you don't return anything it you should usually default to false.
Now let's test this out. Right now we don't have interactions with the inventory. So I can just I can't drop or interact it by right-clicking or pressing R or something. Uh so I'm going to just hardcode this interaction for now. I'm going to go to my third person character and when I press keyboard one, when I press one on the keyboard, I'm going to get my inventory manager and call drop item. Okay? And drop whatever the item at index zero is.
So the first item right now, if I don't have anything, I'm pressing one. Nothing happens and it shouldn't give me an error because we check if it is a valid index or not. Then now I can pick up some stuff and I can press one. So, right now the first item is wood. If I drop it, boom, there's wood. Now it's bread. Boom, there's bread. Potion. And another potion. Great. So, this works nicely. But now, let's add an interaction with the inventory.
I want when I actually right click on a specific item to drop it. Right now, we're going to keep it at right click, but we're going to uh add more interactions later on and have them based on the keyboard and not just clicking. But right now, we're going to start simple with just a right click. So for that, we want to go to our inventory system UI folder where we have our widgets. And here we have our inventory slot widget.
Right? So this is for a specific inventory item. I can just have it default by the way here to um like I don't know a sword or something. This gets overridden on construct anyway. So this is just a preview. So, what I want is when I right click on this item to drop it. So, how do I do that? Well, it's really simple. I'm going to show you the simplest way and then show you a slightly better way. So, in my inventory slots uh graph, I can go under override here and find mouse uh button down.
This is when this specific inventory slot is clicked. Okay, mouse button down. And out of the mouse event, I can get the um what was it called? Get button and check if this button is equal to click here and do right click. So if this is equal to right click, I can just drop the item. Now let's do a branch. How do we actually drop the item? Well, this is the way that I don't really like, but I'm going to show it to you first.
Uh, well, I can get my owning player pawn because I know this one has the um inventory and then get component by class and search for my inventory manager component. Check that it is valid and if it is valid then I just call drop item. Now this item needs to know what its index is inside the array. Right now it only knows its item definition. If you remember we only pass item definition to this inventory slot so that it can display the icon based on this definition.
It is the only instance editable variable we have here. But we also need to tell it what its index is in the array. And we do that when we create the widget from our inventory widget. So if you recall in the graph here, we loop over all the inventory items and create the widget and pass the item definition. Well, we know the index as well because we're looping over it. So we can just pass in the index. But first, I need to make it back in my inventory slot here.
I need to make it a variable item index integer and make it instance editable and expose on spawn. All right, this is complaining because we haven't finished this one yet, but we'll see in a second. So, back here now in my inventory where I create the widget, I can refresh. And now we can pass the index. All right. So, back to my mouse button-down event. Now, when I want to drop an item, all I say drop the item with the item index that was passed to this widget when it was created.
And here when you handle any input you have to say handled otherwise it doesn't uh otherwise it keeps bubbling up to the uh outside widgets as well. Great. So this is the approach that I don't really like but let's see if it works. If I pick up some items now and I right click. Boom. You see it dropped the wood but it didn't update in the UI. That's another problem we're going to fix. If I close the inventory and open it again, it's updated.
Right click, drop the bread. Here's my bread. And I have to close and open for it to update. And we can also make sure that it's dropping the right one by picking up here. So now I have potion in the one position and potion in the four position. So I'm going to drop potion in the one position. Now if I close it and open again, that is correct. It dropped the right one. So, we have to fix two things. The inventory update and also this approach that I told you I don't like.
Why don't I like it? Well, let's start with this one. Right now, the inventory slot itself is responsible for getting the inventory manager component and deciding what to do on rightclick. I don't want this to be the responsibility of the slot itself because this slot shouldn't care where it is. If I put the slot in a action bar, so for example, we create a um quick action bar here with some uh inventory items, maybe right clicking on them when they are in this bar does something different than right clicking on them when they are in the main inventory.
Right? So the action that you do based on a button press depends on where it is. So, I don't want the inventory slot to be responsible for that because it's going to change based on where it is. Instead, I just want it to say I was clicked or I was right-clicked and someone else will handle that event. Someone in this case being the inventory. In this case, the inventory knows that when an item is right-c within me as the inventory, then it should be dropped.
But someone else can say if the item is right clicked within me as a quick action bar then it should be I don't know used or opened or displayed or something. So this means that back here in my inventory slot instead of calling drop item here I'm going to delete all of that. I'm not even going to write get a reference the inventory manager or the player. All I'm going to do is dispatch an event. say on right click and I'm going to call this event but this event alone is not enough we need to say which widget was rightclicked so we are going to click on the event dispatcher again add an input and this input will be the inventory slot widget and it will be of type w inventory slot object reference If you don't realize why we're doing this, I'm going to show you in a second.
But what is the value of this slot widget? Well, we are already in the inventory slot. So, the value is just self. It basically says I was right-clicked. This is useful because we're going to listen to this event in the inventory and the inventory will need to know who was just rightclicked. We do this when we create it. So on begin, we loop over all the items and we create them. We create a widget for the inventory slot and then we add it.
What we're going to do extra is we're going to say assign on rightclick. Assign basically binds and creates an event. So this means that whenever the on rightclick event is called, this other event will be triggered. I'm actually going to move this somewhere down here and change its name to handle um slot right click something like that. And then here I want to call drop item. We already have a reference to the inventory manager.
So I'm just going to make this a variable inventory manager components. And now I'm going to get this inventory manager component. Right click and convert to validated get. Always good to make sure it's valid first. Then I'm going to say drop item. Great. What item is it that we need to drop? Well, the item index is in this reference that we passed. So this is the inventory slot widget that already has an item index variable.
Technically, I can just pass the item index here instead of passing the slot reference. But this slot reference will be useful in case we want to know more things before you drop it. um I don't know play an animation or something. So it's good to have the whole reference and you will see that later on. But that is basically it. So now we bind to an event. Oh, of course when we bind to an event we have to say which event is it that is triggered.
You can do this but this whole line is ugly. So instead what I like to do is pull off and say create event and then search for your handle slot. Right click. By the way, this create event only searches for events with a matching signature. Matching signature means has the same inputs. This event expects an input of inventory slot widget. So if I create another custom event here called I don't know test, it's not going to show up in the search here.
But if this test has an input of type inventory slot in slot, this is now matching signatures. It will show up here. Okay, so that's really important to know when binding to events. They need to have the same signature as the event that you are dispatching here. All right, so now what I do is on every item I create a widget. I add it to the UI and I bind to its event. Great. So, let's see if this works. Now, I'm going to pick up some things.
Drop. Nice. Dropping is still working. This is perfect. So, we have just inverted the control. Now, the inventory is responsible for handling what happens on right click and the inventory slot is just responsible for saying right click happened. Now, we need a few more things. We need to fix the update issue that I mentioned that the UI doesn't update when dropping things or when changing it while it's open. I have to close and open it again.
So, let's start by fixing that and then we're going to end by improving the whole UI. So, why does this happen? Well, because in our inventory, what we do is on construct, we just create the inventory by looping over all the items, adding the slot, binding. We do this once on construct. And when we close the inventory, we destroy everything. When we open it again, we do it again. But we want the inventory to update when something happens.
So again, we are be we're going to be communicating through events just like the event dispatcher that we added here. But this time it's the inventory manager component that is going to be sending events on drop item. So when the item is dropped successfully just over here, we want to dispatch an event. So we're going to add an event dispatcher here. Call it on inventory changed. Something changed. Doesn't need any inputs.
We just pull off and call it here. We will be reusing this event whenever anything changes in the inventory. When an item is added, removed, blah blah blah. Actually, we can already add it to item added. So over here, when an item is added, also call inventory changed. Now in our inventory widget, we can listen to this event. So what I'm going to do is I'm going to move all of this stuff, the populating the inventory stuff, looping over the array and filling it.
We're going to move this into its own separate event, right? We're going to create a custom event here and call it update inventory. And it does all of these things, right? It loops over the inventory items from the inventory manager component. So, let me just get that here. Uh, again, good to make sure it's valid. If for any reason becomes invalid, we don't want any errors. So it loops over the inventory items and fills it.
Now on construct, let's just call update the inventory. So right now it shouldn't do anything different. We just moved it to a separate event. On construct, it updates it. And when I close it and open it again, it updates. Now the difference is we also want to listen to this event. So go here and say again assign on inventory changed. Now it's going to create this event. I actually don't need it because this is going to be our uh update inventory event.
I'm going to delete that. And I'm going to create event again here and say this one is update inventory. So whenever the inventory changed dispatcher is dispatched call update inventory which will do these things. All right just doing some cleanup here. Now there is one crucial thing as well. uh every time the inventory updates, it will just keep adding things, but it should also delete the old ones. So, we're going to refresh the whole inventory, meaning that when anything changes, just delete everything and then add it all over again.
It's not the most performant way because if you have hundreds of items, then deleting all of them and creating a new widget every time one of them changes can be a bit expensive, but we're going to fix that later on as well when we go into item instances. But for now, let's just do the quick way of getting our item container wrap box. This is this box where you put items in and say clear children means delete everything and then proceed with updating everything.
All right. So now let's see if this works. I'm going to go pick up some stuff. Drop them. Beautiful. See the inventory now updates without me having to close and open it again. Nice. Now the last thing I want to do is improve our inventory UI. I want to add empty slots when we open the inventory. So technically right now there are there's an inventory but it's not filled and only when I move and pick things up then it starts filling.
But I also want to show uh the empty slots here. Now, this is useful whether you're creating a fixed size inventory or an infinite inventory. You need to show um the slots. Personally, I'm going to be creating an infinite inventory but with a minimum number of visible slots. But it can grow beyond it and will just keep scrolling. U but making it a fixed inventory is just by adding a check. If you reach the limit, you can't add anymore.
So, it's very easy. But let's consider first the UI of an empty slot. How do we do that? Well, I'm going to have the inventory slot itself responsible for having an empty state. So, when it has an item definition and it has an item index, then it's not empty. If either of those are missing, no item definition or no item index, then it is considered empty and it's going to have an empty state. Now, to improve it a bit, I'm going to first add a border around it and then have the empty state be a border with an empty uh with like a black opaque background.
And if it's not empty, it's just going to have the icon. So, go over to your item icon, right click, and say wrap with border. Right? This is the same as searching for a border element, dropping it, then putting the item inside it. This is just faster. Then click on your border and go down to brush and say draw as border. We just want it to be a border. It won't be visible yet. You need to add margin. So go to margin and say one on each side.
Okay. Now you have a border. Now the last thing is I want you to go to your item icon itself under padding. Replace all of it with two. So have two padding around all. And later on, we're going to add item rarities like a common item, an uncommon, an epic, and they have different backgrounds depending on if it's legendary. The background will also be moving and things like that. Uh, but for now, we're going to start simple again as always.
And what I want to do is first create a material for this empty state. I'm going to create a very basic material. So, under UI here, I'm going to create a new folder, call it materials. And inside, I'm going to create a material. Call it uh empty inventory slots. Open it up. Change the material domain to user interface. Change the blend mode to translucent gray transmittance here. And we are going to press four on the keyboard and click.
This generates a uh color with an alpha. And this color again I'm just going to make it black and maybe like 60% opacity or something. And I'm going to plug the RGBA to the final color and the alpha to the opacity. Right? Very very basic material. So if you look at it here, this material that we added, empty inventory slot, then it's going to look something like this. Of course, right now, if I open, we don't see anything because we only add slots after they have been filled.
Right now, we can see the border that we've added. Actually, maybe it's good to also add some space between them. So, I'm going to do that first before continuing. Uh, we can do that just by adding padding on the border itself. So, go to the border, add, I don't know, padding of two. Is this enough? Yeah, I think it looks fine. You can add more if you want. Four, I don't know. Add padding till your heart's content. I'm going to keep it four, but I'm actually going to make this item a bit bigger. make it 100 by 100 instead of 75 by 75.
All right. So now I want to fill empty slots here in this widget to a specific amount. So I'm going to say the minimum display amount is I don't know 36. I want um 6x 6. So the way we're going to do that is in the graph here. So in the graph we uh we fill all of the inventory items. So let's say there are four items. We fill them here. Then if I say I want there to be um yeah 36 items, then I first subtract the four u and then the rest which will be 32.
Then I'm going to fill in 32 um empty items. So I need a function first to create these empty items for me. And then we're going to call it on complete here. So let's go over here. create a new function call it fill empty items and it does a for loop not a for each just a for loop from the amount of items in the item container wrap box. So the actual inventory items that are not empty. So get um children and length. Okay.
So this gets us how many are in here. So if there are four then we start at index four. Then the last index will be a number, an arbitrary number that we set that we want to display. So I said 36. So I'm going to create a variable here. Call it initial number of slots and make it an integer. And I'm going to have it default. So compile and down here in default have it default to 36. Now the reason I call it initial is because like I said, I won't be limiting the number of items you can have in the inventory.
It can grow to however many items you have, but this will just be the initial slots that we create. Oh, just make it a regular integer, not 64. Now, I'm not going to plug this right here because the for loop, if you see here, it says from start to end inclusive. Okay, inclusive that means that this first number is included and the last number is included. So here we need to subtract one first because from um 0 to 36 is 35.
Remember the first index is zero and here the first index is however many are here. So from this to last index minus one. Then what we're going to do is create a widget the inventory slot widget but we're going to keep things empty. So the item definition empty and the item index negative -1 negative 1 means it's always invalid. All right. And then we add it to our items container wrap box. Here we don't need to bind to any events because um the rightclick event is not useful on an empty container unless you want to do something with it on an empty container.
But here we won't bind to anything. Right? So now we just need two things. we need to implement the empty state on the widget and we need to call this function. So back here when the initial loop of filling the actual inventory items is complete, we're going to fill the empty items as well. Now if I do this, you'll see here there are empty items, but they're showing this white. Why this white value? Well, the error is pointing to exactly where the problem is.
It is in our inventory slots where we try to set an item. Well, we don't have an item definition. So, it's trying to get the texture of nothing and thus defaulting to a um sort of default texture, which is just the color white. So, instead, what we're going to do, I'm going to in my inventory slot here, create a new function, call it is empty, right? And this can be a pure function. And what it's going to do is check if is item definition if is valid and if item index is um greater than negative one.
So if both these conditions are true then it's not empty. Actually let me invert that. So if item is not valid and item index is less than zero then it is not then it is empty. So I'm going to return a value here of this or this. So if either of these conditions are true then it is empty. Okay. So if item definition is not valid true then it's empty. If item index less than zero true then it's empty. either or. Now I'm going to use this function here and instead we're first going to check um if is empty.
If it is empty, we want to do a select. So I'm going to select a different texture based on if it is empty or not. So if is empty is false. It's not empty, then use this. If it is empty, then we want to use our material, this empty inventory slot. But I can't just use it here because this is a material and this is a set brush from texture node. This not a texture. So instead I'm going to replace this. There's a function that does basically the same thing.
Set brush resource object. All right. So resource object. This can literally be any object whatsoever. So this is what I'm going to do a select on. So do a select and we're going to select this one. and plugin is empty. So again, if is empty is true, then we want our empty inventory slot. And if it's false, then we want the icon. All right. So now if I play, here are my inventory slots. Looking great. There's one, two, three, four, five, six, seven.
I'm going to make this a bit smaller because there are seven on each row. Uh each one has a width of 100 plus actually plus the padding or minus the padding. I think the padding is uh built into it. So let's go to our designer and make this by 630. Let's see. Yeah, there we go. Perfect. 6x 6. Nice. And as I drop things, empty items are added and filled items are removed. Now our inventory shows empty items. Now there is one thing um maybe a good thing to do depending on your game.
But in my inventory slot, I have the on mouse button that whenever right click is called, I dispatch it. Maybe you want to check here as well if um is not empty. Maybe you don't want to dispatch this rightclick event if is empty. So I can say if the mouse button is the right mouse button and is not empty then dispatch right click. If you want to right click on empty slots, don't do that. Keep for your game right click.
But I'm just going to do it so that this right click doesn't dispatch any events when it doesn't need to. All right, looking good. Great. So now you've learned how to interact with the inventory, how to communicate between the component and the UI, but our items are still very basic. And a big reason for that is that they don't stack. So next up, we're going to be discussing how to make items stackable. So you can, for example, hold 20 potions in one slot.
And we're going to be doing that through a stackable fragment. This is a fragment that you can optionally add to an item to make it stackable or don't add it if you don't want it to stack. And finally, I do want to mention though that moving forward, I'm going to be using the polished UI that I created in the extended tutorial of this part that's on Patreon, mainly because it looks nicer and also marketing for the assets that I make.
But if you just want to follow along with the free tutorials on YouTube, then rest assured that all the functionality will be the same just minus the polish. And if you do want the polish and you want to support me and the channel, then check out Patreon where you can download the assets and learn more things. That is the best way to support the work that I do here. And the second best way is to like, comment, and subscribe on my videos so that they reach more people like you.
Thank you, and I hope to see you in part four.
The words are the caption track's own and nothing is reworded or re-transcribed. Paragraph breaks are placed between sentences so the text reads as prose.
Use this transcript
Three free tools that work on the material around a video like this one. No signup, no login.
Hook Analyzer
Paste the first 30 seconds of your own draft for a hook score and rewrites.
Policy Pre-Flight
Check your draft against YouTube's advertiser-friendly guidelines before you record it.
Channel Skill Generator
Read this channel's public videos and transcripts, and download a writing brief for it.