Getting the transcript
Reading the captions from YouTube. A video nobody has opened here before takes 10 to 30 seconds; this page fills in on its own.
Getting the transcript
Reading the captions from YouTube. A video nobody has opened here before takes 10 to 30 seconds; this page fills in on its own.
Ali Dymock · @AliDymock
Where viewers went back to watch this video again, from YouTube's public Most replayed graph, lined up with what was said at that moment.
Most replayed moment #1
2:543.3x the video's typical replay level
the cap-over kind but you could just miss out having the board and get the thicker type of uvpc fascia. As you’ll remember my roof depth was 350mm thick but I couldn’t find any fascias that were the exact width in the colour I wanted.
Said at 2:52
Most replayed moment #2
4:532.0x the video's typical replay level
Now, on the three sides where I would have EPDM edge trims I had strips at the top which needed to be flush with the fascia. To remedy this I ripped some 9mm external grade ply on the table saw. I attached and everything was nice and flush and ready to go.
Said at 4:47
Most replayed moment #3
2:051.8x the video's typical replay level
timber batten flush with the top of the roof and then I could attach the first of the two-part gutter trim. As UVPC expands it’s important that 5-10mm spacing in included between all the trims.
Said at 2:00
The graph counts replays. It does not show where viewers stopped watching.
Words
1,470
Runtime
10:22
Speaking pace
142wpm
Reading time
6min
142 words per minute, below the 160 25th percentile of 349 measured videos. That distribution comes from the 349-video hook study.
Opening (first 30 seconds)
In the last video I completed all the layers of the warm roof and in this video I’ll add the finishing touches with the fascias and roof covering. There are various options for flat roof coverings and this is by no means an exhaustive list but I simply looked around at what the garden room companies were using and nearly all of them seemed to use EPDM rubber roofs. These were
71 words, the words spoken in the first 30 seconds at 142 words per minute.
Free, no signup. See how the first 30 seconds hold attention, with rewrites.
Sentence shape
| Measure | This transcript |
|---|---|
| Sentences | 63 |
| Average words per sentence | 23.3 |
| Longest sentence | 75 words |
| Questions asked | 0 |
| Sentences containing a number | 18 |
Most used terms
Filler phrases
4 in total: like 3 · actually 1.
A literal whole-word count of the same phrase list the Prepublish browser extension uses, so a phrase inside another word is not counted and a phrase used in its ordinary sense still is. It is a count and not a judgement.
What this transcript is
Every word below is the caption track YouTube publishes for this video, pulled from the video itself and reproduced unchanged. It is not Prepublish's writing, not a summary, and not a re-transcription: it is the video's own published captions. English captions, published by the channel, in the video’s original language. Source: the video on YouTube. A channel that would rather this page did not exist can ask for its removal through the contact page, and it is removed.
In the last video I completed all the layers of the warm roof and in this video I’ll add the finishing touches with the fascias and roof covering. There are various options for flat roof coverings and this is by no means an exhaustive list but I simply looked around at what the garden room companies were using and nearly all of them seemed to use EPDM rubber roofs. These were developed in the 60s over in the States and have a life expectancy in excess of 50 years and that was good enough for me.
As it’s quite a specialist product though, I checked out some reviews online and found a company called Rubber4roofs in the UK which has an excellent website with plenty of information about the product as well as a host of installation videos as well, just what I like! The calculator automatically works out everything you need. First I input the exact size of my roof, added 3 kerb edge trims to stop rainwater from running off the front or sides and a gutter trim at the back where I want the water to flow over.
You also have the option of upgrading to a 1.5mm membrane which I decided against and I also had what I needed to install it but you can also purchase the kit if you need to. This took out all the headache of having to do research and I was actually really impressed with the experience so I got in touch with team at Rubber4Roofs about this series and they were excited to work together so they’re busy creating a calculator with a discount for the viewers of this channel and I’ll cover that in a separate video when it’s ready.
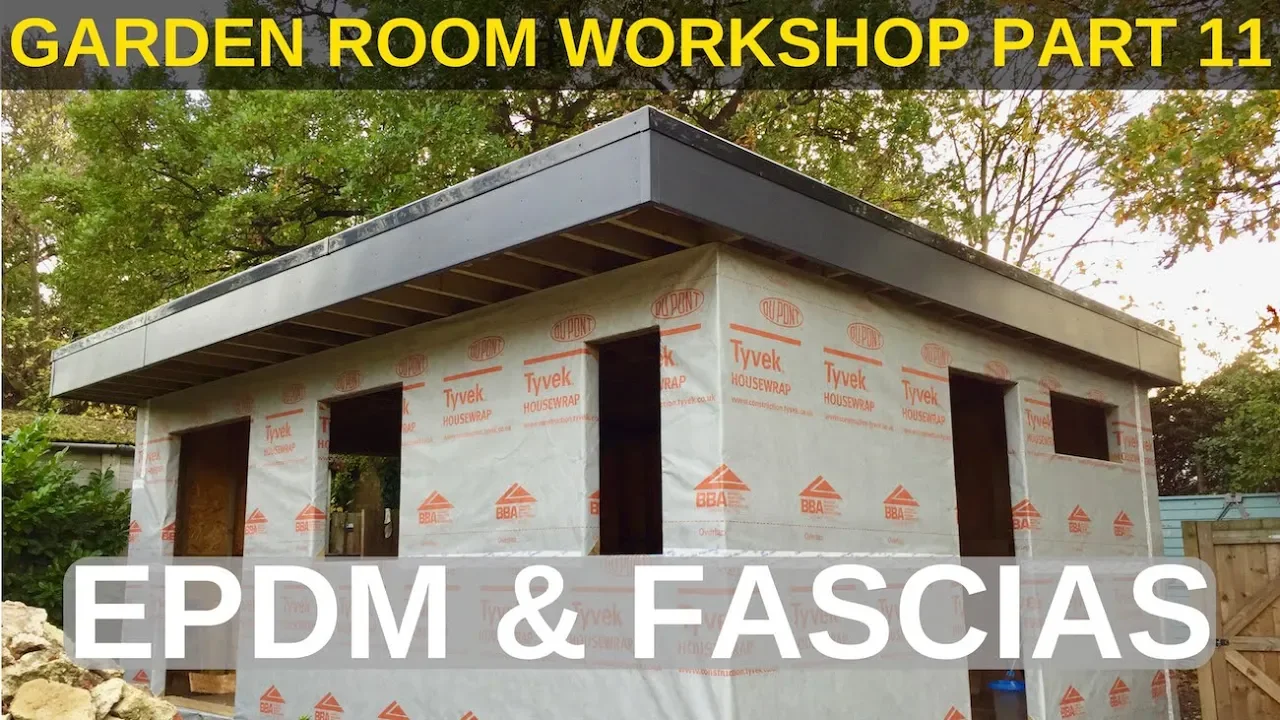
The one downside to a rubber roof is it is ridiculously heavy but credit to my girlfriend, once I’d gotten one edge up, she helped with the rest. We gave the roof a final sweep and rolled out the rubber roof. I laid the EPDM out overlapping equally on all sides. Because it comes so tightly rolled, it needs a few days to relax and let the creases work themselves out so in the meantime I could move on to other tasks. The gutter trim needs to protrude out so that water runs into the gutter, rather than down the fascia so to create this protrusion I attached a treated timber batten flush with the top of the roof and then I could attach the first of the two-part gutter trim.
As UVPC expands it’s important that 5-10mm spacing in included between all the trims. This is even more important for darker coloured UVPC which absorbs more heat and therefore expands more. I could then move on to the fascias. There are various options for finishing the fascias. If you don’t have a warm roof or firring strips then the fascia timber can be left bare if you like the look of the wood or it can be painted.
An alternative is to clad the fascia to match your walls. As I wanted my windows and doors to be anthracite grey in colour, I decided that my fascias should match that rather than the cladding. There are two types of uvpc fascia which you can get, full replacement and cap over. As I already used timber boards I just needed the cap-over kind but you could just miss out having the board and get the thicker type of uvpc fascia.
As you’ll remember my roof depth was 350mm thick but I couldn’t find any fascias that were the exact width in the colour I wanted. I therefore had the choice of getting either 400mm and cutting them down to size or to go for 300mm and try to make up the difference somehow. I went for the latter as the price difference was quite significant. To mark where I wanted the nails, I scored along the plastic protector with a tape measure 10cm in from the top and the bottom and hit nails partially in.
You can see the score lines and nails here. Under the overhangs of my roof, I knew I would have a soffit of some kind so I wanted the leg on the fascias to be about 9mm lower than the overhang itself to later accommodate the soffit. To get this right I cut some small pieces of 9mm plywood and attached them under the overhang which I could then remove later on. As I was working by myself I also made a quick jig to support one end of the fascia while I attached the other side.
I attached the fascias to all four sides in the same way and used joint trims where two fascias met. I used a few pin nails and glue to attached it to one fascia only and as before, the gap allows the board to expand. For the corners I cut notches where the two fascias met and used corner trims. Again these are glued to one side only to allow for expansion. Now, on the three sides where I would have EPDM edge trims I had strips at the top which needed to be flush with the fascia.
To remedy this I ripped some 9mm external grade ply on the table saw. I attached and everything was nice and flush and ready to go. I could now turn my attention back to securing the rubber membrane. It had been about a week since I’d spread it out so it was about as relaxed as it was going to get. I pulled it back to the half way mark and did one final sweep as it doesn’t adhere so well if there is a lot of dust.The glue needs to be applied at a temperature no less than 4 degrees celcius which was something I was aware of throughout my summer build as a deadline before temperatures dropped in Winter so if you’re using a rubber membrane too this will be your deadline as well.
I could now attach the second part of the gutter trim. It’s important that this is level or slightly below the top of the EPDM so as not to act as a barrier for water to pool. I attached with the supplied nails which pierce through the EPDM, first part of gutter trim and then into the timber batten. I sank them partially in before taking off the polythene wrapper and then hammering them home. The last section is easily cut with a wood saw.
I then trimmed off the excess EPDM along all four sides with a sharp blade leaving a 50mm overlap on the 3 sides with kerb trims. For the corners I folded the EPDM neatly and stapled them in place. The kerb trims are designed as a barrier to rainwater to stop any flow over the front and 2 sides. It achieves this with a sponge-like material which creates a seal between the trim and the EPDM. When attaching I compressed the kerb trim about half way to create that water tight seal.
The spacing between trims is covered by joint trims but unlike those used for the fascias these just clip on and there’s no need for glue. The last thing left to tackle was the corners. These are done in a similar way to the fascia corners and I used a product called mitre bond which has a spray component and the glue itself. The spray takes a few seconds to dry and the corner trim can then be held in place for a few seconds before it sets.
And so that completes the roof. I was really satisfied with the finished look of it. By now it was late October and I’d been working pretty solidly on the garden room for the past 7 weeks. It was now reasonably water tight and this is how I left it over winter while I focussed on other things including finding a new job. The roof held up really well and, unusually for London we got some quite deep snow which is a heavy load for a flat roof to take but there was no movement in it or the foundations at all.
One thing I did tackle is something which has been omnipresent in these videos - the massive pile of rubble from my garage demolition in Part 1. It was a good job for winter as it’s very labour intensive so kept me warm and it took about four 8-yard skips to get rid of the lot but it after it was done it was great to see the garden room properly from the house. In the next video I’ll discuss what this tyvek house wrap is all about and install the windows.
See you then!
The words are the caption track's own and nothing is reworded or re-transcribed. Paragraph breaks are placed between sentences so the text reads as prose.
Free tools for your own script. No signup, no login.
Paste your draft and see where viewers are likely to drop off, with a rewrite for each weak line.
Paste the first 30 seconds of your own draft for a hook score and rewrites.
Check your draft against YouTube's advertiser-friendly guidelines before you record it.
Read this channel's public videos and transcripts, and download a writing brief for it.