Getting the transcript
Reading the captions from YouTube. A video nobody has opened here before takes 10 to 30 seconds; this page fills in on its own.
Getting the transcript
Reading the captions from YouTube. A video nobody has opened here before takes 10 to 30 seconds; this page fills in on its own.
Chong-U — AI Oriented Dev · @AIOriented
Where viewers went back to watch this video again, from YouTube's public Most replayed graph, lined up with what was said at that moment.
Most replayed moment #1
14:172.8x the video's typical replay level
what you want to do here is just tell your AI to extract out the character from the output image, and then relay it out into a proper grid that you see over here, okay? And once you do that, then you have an evenly spaced out spreadsheet. Okay, so because, this is really important because if you don't
Said at 14:11
Most replayed moment #2
2:422.5x the video's typical replay level
attack in all four directions as well. all of these techniques should work regardless of which AI tool you're using. But I just wanted to call out that if you already have a chat GPT subscription, you probably want to use Codex and the reason for that there is this
Said at 2:37
Most replayed moment #3
3:122.4x the video's typical replay level
something called F AI because it provides me with a single API point for me to do all of my experiments, whether it's using Nano banana two, whether it's using image just 2.0 or whether I'm using a video generation model. So let's go start off with the first step here.
Said at 3:07
The graph counts replays. It does not show where viewers stopped watching.
Words
5,569
Runtime
24:36
Speaking pace
226wpm
Reading time
23min
226 words per minute, above the 201 75th percentile of 349 measured videos. That distribution comes from the 349-video hook study.
Opening (first 30 seconds)
hey everyone. what you see here is a new game that I've been working on Now, Everything has been AI generated. and yes, I mean everything. From the backgrounds to the individual sprites and also the sound and music as well. so in addition to white coding, the game logic one of the biggest things that people are always asking about is, can you use AI to create your own original game assets and the answer is yes, as long as you know how. by the end of today's video, you will see how I managed to get this entirely new wizard character created from scratch, all the way to being integrated into
113 words, the words spoken in the first 30 seconds at 226 words per minute.
Free, no signup. See how the first 30 seconds hold attention, with rewrites.
Sentence shape
| Measure | This transcript |
|---|---|
| Sentences | 341 |
| Average words per sentence | 16.3 |
| Longest sentence | 68 words |
| Questions asked | 28 |
| Sentences containing a number | 23 |
Most used terms
Filler phrases
70 in total: like 31 · actually 22 · right? 10 · kind of 3 · I mean 2 · basically 1 · you know 1.
A literal whole-word count of the same phrase list the Prepublish browser extension uses, so a phrase inside another word is not counted and a phrase used in its ordinary sense still is. It is a count and not a judgement.
What this transcript is
Every word below is the caption track YouTube publishes for this video, pulled from the video itself and reproduced unchanged. It is not Prepublish's writing, not a summary, and not a re-transcription: it is the video's own published captions. English captions, published by the channel, in the video’s original language. Source: the video on YouTube. A channel that would rather this page did not exist can ask for its removal through the contact page, and it is removed.
hey everyone. what you see here is a new game that I've been working on Now, Everything has been AI generated. and yes, I mean everything. From the backgrounds to the individual sprites and also the sound and music as well. so in addition to white coding, the game logic one of the biggest things that people are always asking about is, can you use AI to create your own original game assets and the answer is yes, as long as you know how. by the end of today's video, you will see how I managed to get this entirely new wizard character created from scratch, all the way to being integrated into the game as And just to make it concrete, I will be taking you step by step through the entire workflow including how you can create animations using spritesheets like Idle and Attack.
But more importantly, how to get walk cycles working correctly. if you've been looking around things like GPT Image 2.0 and nano banana two have been really good for creating game assets. but they still really struggle with walk cycles. with the workflow that I'm showing you today, you'll be able to make use of these techniques to generate all kinds of animations, so if you've always wanted to know how to create your own game, character assets, this video is for you. before we jump in, if you'd like to follow along with today's tutorial, I've made this entire cheat sheet with all of the prompt templates and the reference images available for free as part of my Insiders Club. it, you'll find free resources from all of my other videos, including source code, skills, plans, and other prompt templates to help you on your AI game development journey.
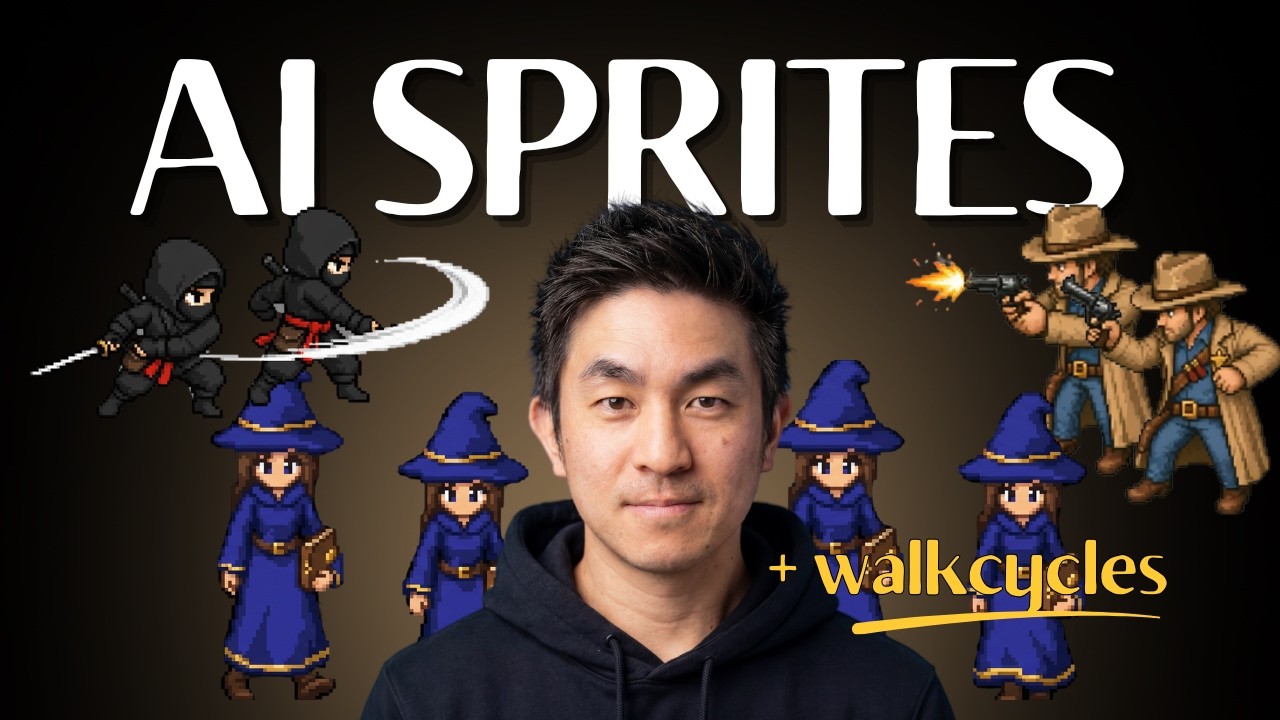
But if you like to take things a step further, check out vibegamedev.com. It includes things such as specialized game development skills that I've been working on. for example, in today's tutorial, everything that you see here be automated and accelerated Thanks to these two skills that you see here for animating and creating game spreads. Vibe Game Dev also includes many other things to help you on your game development journey, the full source code of projects along with prompts, skills, templates, and more. there's also an exclusive Discord community you can hang out and share tips and tricks with other game development vibe coders. my goal is to provide you with the resources and everything that you need to build that dream game thanks to the power of AI. on over to the links in the description below, and without further ado, let's get started with today's tutorial. so what we'll be doing today is, effectively creating from scratch this wizard character that you see over here. and this will include all four facing directions, the idle animations. also the walking animation and then we will include the attack animation as well. this was pretty much the same approach that I used to do this cowboy character that you see here.
So you can see we have all four directions, and then we have the attack in all four directions as well. all of these techniques should work regardless of which AI tool you're using. But I just wanted to call out that if you already have a chat GPT subscription, you probably want to use Codex and the reason for that there is this inbuilt image generation skill that is part of Codex and it also doesn't use the API, so it just piggybacks off your existing Codex subscription.
And this is very useful so that you don't have to spend extra money. I have my own image generation skills, that I use here, and I make use of something called F AI because it provides me with a single API point for me to do all of my experiments, whether it's using Nano banana two, whether it's using image just 2.0 or whether I'm using a video generation model. So let's go start off with the first step here. And this one is entirely optional, but I wanted to show you the process that I go through when I'm building games And the first thing I wanted to do here is that I wanted to create box art, for this new character.
And this is the prompt that's optimized for GPT images 2.0. so lemme just jump in here to show you what I mean. So you can see I actually generated a bunch of box art for the various different characters within my game. and whole idea here is that you wanna just capture the concept and feel of these characters and when you're doing say the selection screen, you're able to showcase these box up characters as part of the game as well.
All right, and like I said, this is completely optional. the real first step that you want to be focusing on is creating something called an anchor. And this is the most important image that you have to generate. And the reason for that is that Every single image that comes after that, including all of the animations, will all be generated based on this first image. So you want to make sure that you get this right and I got this wrong, which I'll show you why very shortly.
So what I like to do is get a south facing anchor because This gives you like the main key features of the character that you want to be focusing on. Now you can see that I'm going for a pixel lot style. So that is a trick to get images 2.0 to get something that resembles this a lot more. So lemme just show you the prompt over here. this is the prompt structure for images 2.0, and this is the prom template that I use.
Which means that you can actually swap this out and use it for any other character that you might have in mind. And I'm sharing all of the prom templates, the images and everything as part of this repository. and I've also released the prom templates and some of the resources from today's project so that you can get hold of them and also play around with them the key thing here is that if you wanna get this pixel art lifestyle, the trick is to not only provide your prom, but to provide an input image which is effectively a grid of black and white squares.
So you can see here, this role of this input image, over here along with the prompt is intended to enforce a. Pixel art block, like discipline. Okay. and this is a tip that I got from Kimmo who's building an AI Sprite generation tool. So you should definitely follow this account and check out the tool as well. I've learned so much from just following people and looking at some of the tips and tricks that they share. once you put this in, this helps you to get the pixel art style that we are looking for. now one of the things that you could do is provide your box art image as a second reference image, right? but the thing here is that once you do that you will see that, the image generation will be influenced quite a lot by your box image, and sometimes can end up with an end result that it still picks a lot, but it's a lot more high fidelity.
But I wanted to go for this, like lower fidelity 16 bit ish, art style. So I decided to stick with this one, and not include the box art as well. I think it's worth pointing out at this time that there'll probably be some of you up and arms and say, this is not real pixel lot and you are right. I'm gonna explain this very quickly now so that, you understand the point that's being made. So if you zoom in onto this image, okay.
You will notice that these pixels are not really pixels, right? I dunno whether you can see on the screen. But these pixels are effectively made out of like smaller pixels and these are not really pixel art characters. You can see this is like just very blurry lines. So this is what people like to call mixels, and it's not true pixel art. And I'll just show you very quickly over here. So this is a new tool that I've been working on that helps to solve this problem.
I'll save this for another video. But there is a way for you to be able to snap the pixels so that it's no longer this blurry mess where you can see there's all this little square blurry pixels. whereas for this one, that I scroll into over here, these are real pixels, right? there's no fake pixels making this up. this is real pixel art over here. and when you have real pixel art characters. they just look a lot better. there's a way to solve this, and I'll be covering this in a follow up video, But lemme just say, I think for the purpose of building games, especially games that you see over here where you're playing on a computer and you just want to have a bit of fun and you are still iterating on ideas. there's not really necessary for you to actually get real pixel lot, you can get away with it like this version that you see over here these, sprites are using the fake pixel lot, that I talked about earlier and you can get verify of this and I would highly encourage you.
Unless you really need pure pixel lot games, you don't need to, waste too much time, at least initially on how to make your art, true pixel lot. and depending on who, some people may not even notice. Some people will notice. But, I think There's a lot more to concern yourself with when you are whiteboarding games, and I think if you're just trying to get some art going, get the style going, I think the main thing is to get something up and running.
Get your game, get it working the way you want it, playing the way you want it, and then you can make those fixes later. Okay, I spent quite a lot of time on this because everything else follows on top of that, but make sure you get this first south facing anchor looking correct, and then you should be on your way to be able to do everything else that comes after. Now, one of the things that I will, advise you as well is try to keep your self-facing pixel up neutral.
Okay? and so this is just one step that I did, only after I learned my lesson the hard way. And the reason is that you will notice that this one has this. fireball magic, in their hand. And this one doesn't. if you're doing a walk animation and you don't want 'em to continuously carry that fireball with them, it's gonna be quite difficult. this is just the next advice that I'll give you, which is use a neutral poll. So, this is the prompt that will help to avoid. any type of things like holding a weapon that you don't want them to be holding all the time, right? 'cause most of the times you want 'em to swap weapons out or you want 'em to cast magic or whatever.
So if you need them to not hold anything that you don't want 'em to hold, this is the updated prompt. Same technique you pass in this, grid of images, and then you use this prompt and it should give you a south facing anchor that is neutral post. and then later on when you're doing your attack animations, which I'll show you very shortly over here, you can then ask it to include it. But for your main, reference, you always want to start with a neutral post self-facing anchor. so now that we have our neutral post anchor, we're going to use this and then generate all of the other art assets in the other directions as well.
Alright, so here you can see that, the prompt that we're gonna use is, over here. Okay? And what we're gonna do is that we're gonna put in two images. We're gonna put in the neutral anchor as the first image. And then once again, we are gonna put in this, pixel grid. As a guide And the main thing that you want to do here is that you just specify what direction that you want. so now we've really got the south facing one.
I want one that is west facing. And then I have, I want another one that is north facing. what I found is that, oftentimes, just to save, costs on image generation, you can simply flip the left one, so that you can get the, east facing, anchor over here. And this will allow you to have all four anchors. you have to be careful, okay? Because you can see that this character is holding a book and then when they flip it over to the back, sometimes the image model can make a mistake.
You can see when it flipped the character to the back, it. Put, the book in a wrong position. So when this happens, you will need to prompt the model to not let artifacts, appear at the back. So this, is something to just look out for, whenever you're dealing with these kind of models. Okay, So just jumping back into the game over here, so you can see once you have the four anchors, north, south, east, west, you're going to be able to then just animate, each of these anchors to perform the action that you want. so basically getting to this place is the most important thing and as part of, my experiments, I've been working on a tool given an input image, it will, get you that self facing, anchor And then after that, it'll give you all the north, south, east, west facing characters as well. so this tool is something that I've been working on my plan is to initially release this tool maybe for testing As part of the vibe game dev vault, so that I can better test it and see if it actually is useful and I might convert this into a web app in the future. now that we've got the four directions, we're gonna go into the meat of today's tutorial and here is where a lot of people trip up.
Because one thing to realize is that while the image models are very good at generating stills like this, when it comes to generating animations. You tend to have a lot of problems with consistency, weird kind of animations. and if you don't do a bunch of tricks, you will end up with very odd behavior. I'm sure you've seen people posting, out there where they're having problems with walk cycles. They're having problems with, things getting out of the frames. this is what I found to be able to work for me, to be able to get to a stage where you have fairly consistent, characters and you don't have any weird, scaling issues or any weird, walk cycle issues as well. there are two ways of doing animation, so the first one is doing animation using image generation.
And the way that I like to do it is that when you have your anchors, you want to give the model as much guidance as possible. If you're working with GBT Image 2.0, there are a bunch of standard sizes that it supports and quality settings, and I found that this works best for me. So what you wanna do is get this to a, large enough size. Okay? 10 24 by 10 24 is a really good size For your anchor. And then after that you should be targeting, a frame size within your game of 2 56 by 2 56.
And the reason why I say that is that, for this kind of game at this resolution, you don't want it to be too small because if it becomes too small and if you're not using pixel perfect, pixel art you will end up with a very strange looking asset. Alright, so I found 2 56 by 2 56 as a really good size that makes it look really good in game. So you can see here, there's these I animation and the attack animation. Okay?
And this is like 2 56 by 2 56. So what you wanna do is very simple. So this is the prompt that you want to use into the image model, and you pass in two images. So the first one, like I said, is the anchor. Anchor, and the second one is a canvas that already is pixelated. that is anticipating the animations to be five by two. Okay. Or two by five. Doesn't matter. So this will be, 1280 by five 12. And this are the two images that you wanna pass in.
This is the, prom template that you can use and you can specify the frame sequence. And this really helps to guide the image model to do things correctly. you can get AI to generate this pro for you. Just say this is the template and, specify things frame by frame and you can get really good results, just by doing this. So you can see here, that's the i animation. Alright. Then, here is one for the attack animation, and this works really well.
So if I jump into the game, You can see the I Animation is here. you can use this, approach for the other directions. So you can see here, this is the attack animation and this works correctly as well. Now one thing to highlight is that even though you pass in a guide like this, when you get back your results from your image model, More often than not, it will not actually be evenly spaced out. So you will actually find that some of the.
Frames are actually like this, in your generated result. So meaning that your character, is not, completely sent within a 2 56 by 2 56 frame. I dunno why this is the case, but this still helps guide it. And what you will do later, which I'll show you, is that you just normalize it and you can just extract out the, animation frames by yourself. what you want to do here is just tell your AI to extract out the character from the output image, and then relay it out into a proper grid that you see over here, okay?
And once you do that, then you have an evenly spaced out spreadsheet. Okay, so because, this is really important because if you don't do this lemme just show you. Can you see this? Okay. So this is a broken implementation that you see over here. Can you see like it's flickering around, because it's not correctly normalized, so it's actually sliced it wrongly. so what you wanna do is to actually fix this What I've done is I've actually created my very own animated spreadsheet skill, this is also part of vibe game dev.com and this one, will automatically do all of this for you.
So you'll be able to extract out the, the sprites and then lay it out in a even grid for you as well. there are many other things that this, skill is capable of, which I'll talk about very shortly. But just do note that this is something that you need to keep in mind. So this technique over here, using image generation works pretty well. Okay? the only other thing that you want to be aware about is that sometimes, you may not want to use all of the frames that it generates.
I'll give you an example here. this animation. The eye is blinking here, and then for the rest of the frames, they may not have actually, changed that much. So you do not need all the frames. Another one is over here, for example. So maybe, you want to drop the first frame so that you go straight to the hand being raised. And then after that you just want this frame, and then. Maybe this frame. And you don't want to have this one where the fireball is actually part of the spread as well.
So you may have to drop some of the frames in order to make this work. And this is especially, true when you're doing walk cycles. Alright, which is what I'm gonna talk about next. generating spreadsheets works pretty well, but you will never, ever get walk cycles looking correct, right? No matter what you try to do, you try to pass in a reference, you try to prompt your way out. it just doesn't work. Just trust me. I've spent so much time on this. instead this is the technique that works.
However, wanting this is an expensive approach. If you just do it naively, which is how I'm gonna show it to you today, which is what I've been using, it's more foolproof. but is quite expensive, because it's going to use a video generation model. And I'm still investing in ways to get this down, but I thought I'll just share it anyway. you just want to pass in that same, anchor image that you want. So whether it's not southeast or west, and what you wanna do is just use this prompt over here, okay? this prompt is really important.
To ensure that your character stays within the frame. Lemme just jump very quickly to, one of these other Sprite that I've been working on. Okay. So you want the character to be running and jumping in frame because. Otherwise, if they jump and they jump out of the frame, you can't use it. Okay? So you need to prompt it correctly in order for the character to be running in place so they're not running across the frame and they're not jumping out the frame as well.
Okay? So this is really important, this is the prompt template that works, really well for me. the other thing is that never, ever pass in any guides or canvases, okay? If you pass in a guide, you would think that, oh, maybe it helps it to be more pixel art like. It doesn't work. Okay. It will actually blend this thing into your model and you have very strange results. So do not do that. You just need one image And then from here, this will actually just generate you a movie file. here's an example of how we will turn out.
So You will get a walking animation, And this is the only way that I found to actually get a walk cycle to look correct. so the answer correctly alternating between the right leg and the left leg and everything else works fine. now the problem that you will face here is that it will be about 80 to 90 frames usually. Alright, because, most of the times the animation will be about, four to five seconds long. the model that I'm using is Sed Dance 2.0 image, the video.
And I think the shortest, video is. four seconds. So no matter what, you're gonna end up with a lot of frames. just from this animation, you end up with. 121 frames, Which, is not great because you don't want to create a spreadsheet with 121 frames. And secondly, most of the animation is actually just repeated, right? So the manual way of doing this is that you just jump through your frames and you say, okay, This is the frame that I want.
And then just do one complete cycle frame one, frame seven, frame nine, frame 12, or whatever. lemme just show this to you in practice here. So you can see here we've got all of the, hundred or so, frames. And this is also yet another tool that I built and I'm planning to release as part of Vibe Game Dev. Dot com. And the idea here is that, if you want to do a walk cycle, if you just scrub through. Alright. So he does one leg.
In front. And then he does the right leg, left leg, and then right leg. So all we really need is just the first couple of frames. what I'm gonna do is, this looks like a good, starting frame. and then I'm just gonna scrub through and say, okay, this is about one cycle. Alright? And I'm gonna set the end, and then I'm gonna set the number of frames that I want. Okay? And then you'll automatically distribute it between this. let's just say 10 frames.
I just click this and this will now automatically just evenly, find the frames that will allow me to have a smooth walk cycle. And it's a bit hard to see with this one, so I'm gonna do it with yet another example just to make this clearer because, the wizards wearing a cloak so it's not that easy to see. So lemme just do this again. So if we assume that this is the start of the animation, right? So they go left leg. Right leg.
And then this is looks like the, same as the first frame that I had, right? So the first frame is frame two, right? And then frame 29 was just about coming into the start frame. So that would be the end. And then maybe I want this to loop over eight frames I do distribute, and then I do select it only. And then now let's just play it. You will see that this will give you a complete walk cycle with just eight frames. And effectively, this is what you need to do.
So from the 80 to 90 frames, you pick, eight to 12 frames that you want for your animation. Select it and then you merge it all into a single spreadsheet. so I'll just show this to you how it looks like. So let's just go to one of the characters and then there's the wizard. And then I'm just gonna do a walk west. Alright. And then you can see here, it's just stitched this together into a single walk cycle. Okay. And then you can then very easily, integrate this into your game. so that's your spreadsheet.
And so this will be game ready already. And so once you get to this point, you just repeat this process for each of the animations that you want and you pretty much can get to where I got to, which is effectively you get all your walking animations and then you also can get your attack as well. Okay? And so the last thing that you will need to do is something called the Sprite Normalization process. And there are many reasons why you wanna do this.
I actually did a whole video on, why normalization is important, but the main thing here is you want to extract out the character. You want to remove the background to make it transparent, because remember, images 2.0 does not support transparency. and nano banana two does not support transparency as well. However, you can use, many different ways of removing backgrounds. I used to use this thing called remove do bg, and it works really well. and it also has an API as well.
So I built a skill for this. But then if you're using file, you can actually use, Bria background remove as well. So you can just use a single skill and then just specify that you want to use this model to remove the background. and you will see that all of my images have a chroma background, which is, this, very bright purple, which I actually glossed over a little bit in my instructions, but yeah, you always want to specify a chroma. as part of your prompt so that you can then very easily remove the background later.
Okay? Then the next thing you wanna do is just measure the bounds of your character. This is something I mentioned before. You wanna measure the bound, make sure that your character sits, within the bound alright, and then you wanna do a height correction. when you're doing something like, cusing spells or jumping, you may end up in with a situation where the character ends up taking less of the image. And so you want to just normalize the heights across all of the frames as well.
So this is height correction, and then you want to anchor and pat them. So this is a really good example of all of it, not working correctly. So if you do not anchor the lakes. It just jumps across all the frames. So you will see your character, moving around within the game. So I'll just show it to you here so you can see The character's moving all around in the game, which is not what you want. whereas if you look at the cowboy here, he still stays in place. so you wanna adjust the height, anchor it, and then finally you want to, rebuild it into your SmartShip and integrate it into your game.
I actually wrote an article on this entire process, And, the feedback I got is that, oh wow, it sounds fairly complicated. it sounds complicated, if you had to do this manually. But thanks to the power of ai, you can actually just create a skill for this, which is exactly, what I've done here. for example, all I have to do now is just say, let's generate the updated work cycles and attack. And then I say animated spreadsheets.
Okay. I want to use, file AI video for the work cycle and then GBT image 2 1 0 for the attack. And that's pretty much it. once that's done, it just goes ahead and does everything for me. It does all the reference images, it does all the facing, it uses file video, it extracts out the image and effectively, it's just a single prompt, right? And then you can see here, I say, let's just do the idles now. And then I just pass in GPT image 2 1 0 saying that I don't want to use, a video model.
And you can see right, the results just come out, just like that. And then finally, the whole thing about. making sure that the scale and everything is correct. You can see I'm just using the game Dev asset seal, and I just say, make sure to use game dev assets to normalize the assets to be consistent and that will ultimately go ahead and solve all of the issues so that you can get a normalized, set of, characters working within your game. so now your Sprite assets are all ready to be integrated in the game.
And this is where I use the technique, which I always recommend in all of my videos. for all of my assets that I have, I always have something called an index J. And this index, Jason, is something that you can ask your AI to generate that will know exactly which frames, which assets exist, what are the frame sizes, how many frames they are, and knows whether it's an attack, animation, and which facing it is using. in short, this index do, Jason identifies what resources you have. all I did was update index, do Jason With the new spreadsheets that I generated.
And then after that I said, Integrate the box out so you can see over here And that, from that point on, was it just prompting and just getting into the game? I think it was just one or two prompts and everything was working fine. Alright. So that's it for today's tutorial. I think we have all these image models becoming better and better. it's just a huge unlock because, if you're like me, I can't draw art. but I love making games.
This has allowed a lot of people to now unlock their creativity and get game assets. that are really to use within the game. And like I said, these assets may not be pixel perfect, but they are definitely good enough for you to get rolling and fulfilling that dream game of yours. So I hope you found today's video useful. Don't forget to give it a, like, hit that subscribe button and also turn on notifications so that you always be the first to know when new content like this drop.
If you haven't seen my previous video where I actually outline how to make a multiplayer game that allows you to play your players all around the world using a single library, you wanna check out this video that I did over here? Alright. So till next time, I'll see ya
The words are the caption track's own and nothing is reworded or re-transcribed. Paragraph breaks are placed between sentences so the text reads as prose.
Free tools for your own script. No signup, no login.
Paste your draft and see where viewers are likely to drop off, with a rewrite for each weak line.
Paste the first 30 seconds of your own draft for a hook score and rewrites.
Check your draft against YouTube's advertiser-friendly guidelines before you record it.
Read this channel's public videos and transcripts, and download a writing brief for it.