Getting the transcript
Reading the captions from YouTube. A video nobody has opened here before takes 10 to 30 seconds; this page fills in on its own.
Getting the transcript
Reading the captions from YouTube. A video nobody has opened here before takes 10 to 30 seconds; this page fills in on its own.
Stefan 3D AI · @stefan_3d_ai
Where viewers went back to watch this video again, from YouTube's public Most replayed graph, lined up with what was said at that moment.
Most replayed moment #1
4:513.3x the video's typical replay level
it to a few more images and let's run it. And here we go. One of the image is exactly what I need. One image actually failed, but that happens all the time. Let's take this image for the katana. When we have parts extracted, it's time to start creating 3D models.
Said at 4:43
Most replayed moment #2
9:573.2x the video's typical replay level
parts guys in one place. Look, how cool is that? Like we can see all the process. We can go back. We can iterate. Everything is connected and logical. I think it's quite an amazing tool. And if you guys want to try this amazing tool, the link and all the details is of course in
Said at 9:49
Most replayed moment #3
2:093.2x the video's typical replay level
we gonna need to do. We gonna upload the image that we prepared. Here we go. Whenever we upload the image, image better to be in A or T post. It works better that way. And when the image is uploaded, let's press start 3D production. And it will start processing. So, you see, it
Said at 2:01
The graph counts replays. It does not show where viewers stopped watching.
Words
4,940
Runtime
26:54
Speaking pace
184wpm
Reading time
21min
184 words per minute, just over the 181 median of 349 measured videos. That distribution comes from the 349-video hook study.
Opening (first 30 seconds)
AI can generate 3D characters, solid and static. But can it actually create modular character systems like different outfits, weapons, accessories and all interchangeable? Sounds interesting, right? In this video, I gonna show you my exact workflow, how I take one concept image and turn it into full modular character system, step by step. I also gonna show you a new tool that makes this process insanely faster. It takes one image and breaks it into parts automatically. Then we gonna generate variations and turn them all into 3D with best 3D
92 words, the words spoken in the first 30 seconds at 184 words per minute.
Free, no signup. See how the first 30 seconds hold attention, with rewrites.
Sentence shape
| Measure | This transcript |
|---|---|
| Sentences | 441 |
| Average words per sentence | 11.2 |
| Longest sentence | 46 words |
| Questions asked | 17 |
| Sentences containing a number | 24 |
Most used terms
Filler phrases
77 in total: like 36 · basically 20 · actually 14 · right? 4 · sort of 3.
A literal whole-word count of the same phrase list the Prepublish browser extension uses, so a phrase inside another word is not counted and a phrase used in its ordinary sense still is. It is a count and not a judgement.
What this transcript is
Every word below is the caption track YouTube publishes for this video, pulled from the video itself and reproduced unchanged. It is not Prepublish's writing, not a summary, and not a re-transcription: it is the video's own published captions. English captions, published by the channel, in the video’s original language. Source: the video on YouTube. A channel that would rather this page did not exist can ask for its removal through the contact page, and it is removed.
AI can generate 3D characters, solid and static. But can it actually create modular character systems like different outfits, weapons, accessories and all interchangeable? Sounds interesting, right? In this video, I gonna show you my exact workflow, how I take one concept image and turn it into full modular character system, step by step. I also gonna show you a new tool that makes this process insanely faster. It takes one image and breaks it into parts automatically.
Then we gonna generate variations and turn them all into 3D with best 3D AI available right now. And of course, we gonna bring it to Unreal Engine and how to interchange outfits, weapons, accessories in real time. This is probably one of the fastest and most practical workflow that you can use right now. Steph here, let's start. As always, it all starts with the idea. Luckily for me, I already brainstormed some idea with ChatGPT and I got something like this.
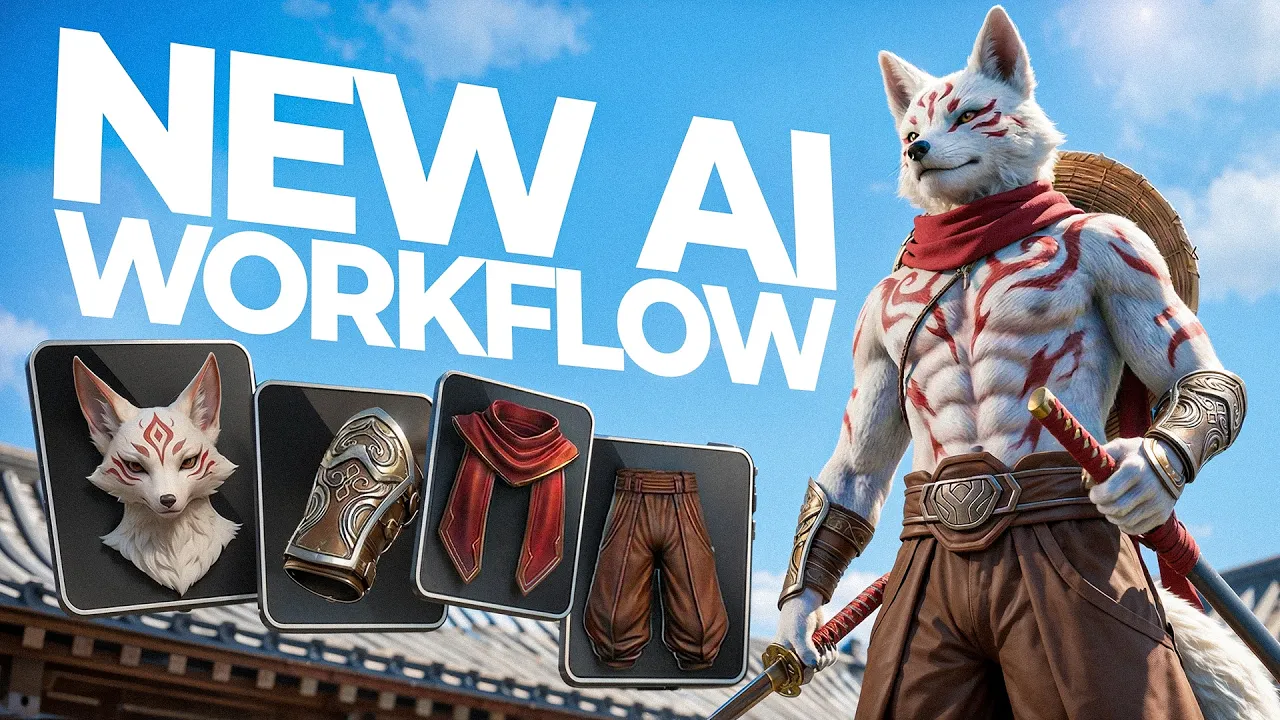
So, first of all, I'm absolutely enchanted by Japanese culture and there is a kitsune, you might know, this white fox with plenty of tails. We gonna take this concept and we gonna create some variations of top outfit, bottom outfit, gonna create two bag accessories and two weapons. Sounds cool? Let's get started. One thing I did before start is that I made cleaner version of character sheet and I do have a dedicated video about it.
The link will be somewhere here. When we do have it, we gonna jump into next stage. And today, I gonna present you one really, really cool finding. The name is AssetHub and these guys created a really usable tool or I should say, workflow, putting all the best tools in one place. Let me show you how it works. So, let's go to workflows, create new workflow. Let's call it Hero Assets, simple, create. And now, it suggests to upload the assets.
And that's exactly what we gonna need to do. We gonna upload the image that we prepared. Here we go. Whenever we upload the image, image better to be in A or T post. It works better that way. And when the image is uploaded, let's press start 3D production. And it will start processing. So, you see, it already is starting to detect post. And this tool works best with A or T post characters. Okay, we gonna give it some time.
And here, you can also choose the allowed models. This will be basically needed for the later stage. We gonna leave only 3.3.1, but maybe we gonna use 3.3.1 actually. You can change it later. Okay, so we can see A post detected and it actually started to do analysis. Analysis basically means it actually extracted some parts that you can see here. And I'm pretty happy with that. We gonna press confirm and start. And voila, instead of doing all of that manually, prompting through not a banana, as I was usually doing, we creating this at one click of a button.
How cool is that? I don't know. This is absolutely must have feature everywhere. And these guys are first to introduce it. So, after a while, we do have all parts. And they are amazing. Not all of them, but that's easy to address. So, let's say I'm not happy with the head. I gonna press reject. And here, I gonna drop the prompts that will contain ears. Or you can simply also say like, fox head with ears. And that will also work.
And then press regenerate. Other than that, I'm pretty happy with the result. We can go accept them. Everything cool. Okay. Also, while we're waiting for a head, let me show you something cool what you can do more here. You can actually take any image, drag this line, and add a node like multi-view generation and create a multi-view for a specific asset. There is option to select two or four multi-view. We're gonna go with two for now.
And here, you can see the results for a build. How cool is that? Just one node and you create multi-view images. You are not happy with it. You just recreate it. All in one place. Forget about prompting. Moreover, you can use split images, which will basically split already created part into some sub parts like that. That might be very, very useful if you want to create some specific element and be flexible how you control it.
Also very useful. Now, you can see that from my image, the katana wasn't generated. So you can rerun this process, but you can also do that easier. We can go and create node called generate image, which is basically nano banana. So you don't need to go nano banana from here, which is for me already a lot of time saved. And I'm gonna drop the prompt I created with GPT to extract the katana alone. And here in batch size, I'll just set it to a few more images and let's run it.
And here we go. One of the image is exactly what I need. One image actually failed, but that happens all the time. Let's take this image for the katana. When we have parts extracted, it's time to start creating 3D models. What we're gonna do is that we're gonna select with shift all the parts that we're happy with. I'm gonna choose outfit accessories first. Then we're gonna need to press this button, this cube, which will basically create 3D generation nodes from all of them in a batch.
For all these parts, I'm gonna choose 3 .1 just to preserve more details on geometry. And on asset hub, it will not create like millions of polygon. It will suggest optimal amounts. Let's press generate. And here we go. It automatically created all the nodes and I can run them all at once. That's amazing time save. In reality, you don't need to create two shoes, two bracers. This is only for demonstration. But we'll be able to choose the best one and use it later.
All right. And we're gonna do the same exactly for the head and for the body. But here we're gonna choose a triple P1 because shape of the head and body is simpler and I want it to be a low poly right away. And let's review the results. Here we have all the models generated and the body with the head. And I think the result is amazing. The head is awesome and it's already low poly. Cool. You can preview the mesh here.
Just an amazing job. There is some problem with normal map, but I think we can address that easily. Okay, here we can preview the pants and you can see it's not million of polygons. It's like around 100K and we'll be able to reduce that later. Or maybe I'll just recreate it with P1 and see which version I like more. If you don't know guys, triple is right now definitely the best model. It is really cool that asset hub already integrates them.
By the way, there is a full video review on my channel about triple. Take a look if you missed it. It's insane how good it is. And it all already available in asset hub as well. So just like that, we created all the base assets and they look quite well. We don't need to jump to another tools. And the next step, of course, we're going to need to create some variations as I promised. So how are we going to do that? Like there's multiple ways to do that.
I could have basically used nano banana, but I will do that right here. Can I go generate image? And here we're going to drop a prompt that will create a variation. Of course, the prompt was created with JGPT guys. No magic, no hard skills. Just explain what you want, the variation, how it should look. And let's create a lot of variations and choose like the best. Okay, let's run it. And here we go. Pretty nice options.
And I'm going to choose this one. Okay, so and from this one, we're going to extract the top and shorts, right? We can actually try to do that with this split image. And we can also try to generate multi -view image. Also, I'm going to need another weapon. So we're going to add another node image generation. And here I created a prompt that will create a sickle stylize it that fits my character. So here you can see the prompt preview.
Pretty much what GPT gave me. Let's increase the batch size and let's do that. So here are the results. Okay, we do have some cool examples. I think I'm going to choose this one. Okay, we're going to take it and we can create 3D model of it right away. We select node image to mesh. And of course, we're going to choose triple 3.1 or triple P1, up to you. And here we can see the model. We can preview that. And the result is amazing.
Result is amazing. But there's quite a lot of polygons because it's set to polycount adapter. So we can easily fix that. How do we address it? We press here and we choose the polycount. Let's say for this object, I think 8K will be enough. So we're going to recreate in 8K. And after it's done, we can take a look again. And yeah, that's exactly what we need. 8K for this asset is okay. The similar way you can process all the assets as well.
Okay, let's go back to where we did a split image of our character. And here's one very interesting image that we want. I already used it and split image into three parts. And I got exactly what I need. I got the top and the shorts. That will be my variations of top and bottom. And we're going to create 3D models as well. Lastly, I need a variation for a back accessory instead of a hat. So we're going to take a multi-view image that we just created.
Form that second variation. We're going to go and use generate image node. The prompt says generate only a stylized travel backpack as a standalone 3D asset. That will fit my character, blah, blah, blah. Instead of a hat. Always ask GPT to help you with the prompting. It's really good in that. And just like that, we do have the backpacks. Okay, here are the results. And I really like this one. So we're going to go and create 3D model from it.
Image to mesh, choose the right model. We can try P1 in this case and just run the node. All right, so it's time to review results. Here we go. And just like that, we created all needed parts guys in one place. Look, how cool is that? Like we can see all the process. We can go back. We can iterate. Everything is connected and logical. I think it's quite an amazing tool. And if you guys want to try this amazing tool, the link and all the details is of course in the description.
When that's done, it's time to download all the assets and bring them to Blender. Okay, so now it's time to cook in Blender. So first thing first, we're going to assemble body. That will be our base. So let's drop head, body and bracers to the Blender. So I just gonna drag and drop them. And here we are. Of course, it makes sense to name them properly to not be confused. And let's actually start positioning them. So if you watch my previous video, you already know that there are a few things that you always need to do is to merge vertices by distance.
Especially if you exported it as GLP. So basically select all mesh, go edit modes, press M on the keyboard and choose by distance. Another thing might be is to fix the shading. So you can see it's sort of like flat shaded. We're going to go add modifier called normals, weighted normal. And that we're going to fix it. And we're going to choose copy to select. Basically to add the same modifier for all of the objects. Now we can apply modifier by control A.
And let's do some positioning. So I do use some hotkeys, but you can do the same thing exactly with the transforms here. I of course have a video explaining the bare minimum that you need to know about controls in Blender to be able to do exact same thing in no time. Okay, when the objects are positioned, we might need to use sculpt modes. And there is like an amazing elastic grab brush, which is absolutely amazing. You just grab some parts and extend helps to align objects.
We're going to use it pretty much all the time today. And you can see like the things getting better and better. I also spot some issue with roughness map. So I'm going to disable roughness map and set it to be more rough called mate. Okay. Then of course, we're going to go select all objects, press control A and select rotation and scale, or even all transforms. We will basically say that this current position is the new original position.
Now we can add mirror modifier, choose Y axis and mirror object as a body. And here we go. We already have mirrored our bracer. So pretty much we are happy. I'm going to go remove some polygons that are intersecting on the head. I'm going to select them with the hotkeys or you can select them otherwise. Boom, removed. And just so we don't have some hidden stuff. And again, in sculpt modes using the same elastic grab, just adjust the shape a little bit.
When that's done, let's join all objects by selecting them and pressing control J. And that will be our new object called body. Let's also position it at above the ground. And now first step here is done. And guys, before we continue, I really want you to ask to like and subscribe to my channel because more than 80% of viewers are watching without subscription. Please press that button. So more people can watch this amazing tutorials and I have more motivation.
Now it's time to add all the assets to the scene and start aligning them. So this will be pretty much exactly the same process. So always remember a few things that you need to do. Usually you're going to need to fix shading. Like you can do that with shade out the smooth or weighted normals and stuff like that. When that fix it, if you import as GLB, don't forget to go and merge vertices. You go and edit mode, merge vertices, merge by distance, usually with default settings.
And lastly, when you position the object correctly, press control A on the object and apply rotation and scale at least, or maybe apply all the rotations. And also, if you want to work with mirror modifier or you want correct export to any other software, you might need to set the origin to 3D cursor, which basically located in the word origin. And it will make sure that all objects are showed the same way in Unreal Engine, or we're going to use accurate for rigging.
Make sure you follow all the simple steps. And of course, there's more videos on my channel, explaining this in more details. So as you can see, I'm just using sculpting to adjust the shape. There is a brush called elastic wrap, one of my favorite. You just basically drag it as you do it in real life and fix the alignment. How cool is that? There's also like clay brush that you can like add or remove a little bit volume.
Always with most of the brushes, you can press control and while holding control, it will be inversed. You cannot inverse elastic wrap. It basically moves mesh where you move it. And so just like that, I basically adjusted every part that we created. Luckily for me, most of them was fitting almost perfect. So I didn't need to spend too much time. A bit troubles with shorts, but that all also manageable. Let's also position weapons in right place.
And of course, we're going to need to position the variations of top and bottom outfits as well as back accessories, such as hat, backpack, and also later we're going to need tail of course. This whole step all together took me around 20 minutes of real time. The next step will be is to optimize our mesh a little bit. So what I want to show you is that in game, usually if there is a parts that are covered and never seen, like let's say we do have shorts and long pants and there will be a part of legs that will never be shown.
So we can actually remove it. So in my case, I will remove this parts under the pants and we can technically remove this parts under the scarf because it will always be covered. It's not only optimization issue, it's also that you'll have less problems with rigging. Imagine like the knee will never go through the pants because there is no knee physically there, but it will look the same. However, if you intend to show him without shorts or pants, it is of course making sense to keep it.
So the logic here is simple. I'll just remove the polygons that are covered. So here's the results. You can of course cut it more nicely, but we're not going to spend more time on this. This is just an example. All right, now it's time to actually do a rigging. So many people think that you can rig one object at once, but you're actually not. You can rig as much as object as you want or the limit of the software. So in my case, we're gonna export all objects that needs to be rigged except rigid objects.
What is the rigid object? This is a katana, a seat, a hat. Why? Because katana are not moving according to the leg. Is a rigid object that is usually stick to one point, to the belt, for example. Same as hat. We can keep backpack because backpack is not rigid. Okay, let's select all the parts and we're gonna export it as FBX. Here in export setting, choose selected objects only. And in armature, don't forget to uncheck add leave bones just in case for later.
Now we're gonna go to AcroRig, which is a free software, but some of the advanced asset packs, like animation packs are paid here. So I think that's a fair model. You are not forced to buy them. You'll have a basic animation pack available after you rig the character. And you can map another animation for the skeleton in Unreal Engine, for example. So the process here is simple. This software will guide you through all the steps.
Put the character in the right pose, set the points where they should be. There are more than in Mixamo. So it's like more accurate. You set the points for the body. Then you do same thing for the hands and rig it. When it's rigged, you can calibrate it. This is quite important step. Sometimes you need to adjust bones so the movement look natural, especially it is valid for characters that might have fat belly or non -standard proportions.
So here you can choose the pose and adjust the bone movement a little bit until it look natural. So this is exactly what I did. And we have nicer look. When that's done, there is one cool thing here that will save us time. That we can actually export it as Unreal Engine skeleton. That's exactly what we want. Let's export it as FBX. Then continue in Blender. Okay, now we do have an armature. And this is the time to add last pieces like tail and rigid accessories.
So behind the scene, I also generate a tail because I forgot to make it. And here's how the process look. We'll basically need to add this tail to the armature. And here I show you some advanced technique. I'll add bones to this tail and then attach these bones to a base armature. Those will not be animated but we're gonna animate them in Unreal Engine with physics. So we're gonna not focus on this part in this tutorial.
This is an extra. You might not have a character with tail but let me know if you want more details on that. For now, it's gonna be time-lapse. So we save time for another stuff to not make this video too long. So the final result of this step is that tail connected and each tail has its own bones. They are not animated yet. They're static. They just connected to one bone of main skeleton. That's exactly what we need to set the physics.
But one thing that you need to know is how to add a static objects like rigid one. So here's the simplest way to do that. First of all, make sure all transforms are applied with control A, rotation, scale, transform A, all transformation, all of that. Now with shift, I selected all objects and then I selected the armature. We're gonna press control P and choose with empty groups. That will basically parent all these objects to armature but with no weights assigned.
That's cool because now we can go to data tab and here in vertex groups, we're gonna need to find pelvis. That's the center bone that's usually represent the base of a character. See that katana is now selected and then I can go to weight paint. Here, we're gonna choose gradient paints and we'll just need to make sure this katana will be now red. So what's happening right now, I selected pelvis bone and I assigning like 100% weight to that bone of the katana, which means that katana will 100 % follow the pelvis movement.
So you can see if I press on any other bone and it will be blue, which means zero. Same exact thing we're gonna need to do for sit. Okay, make it red. But for the head, we're gonna need to choose another bone. First of all, let's align it a little bit better. Make sure all transformations are applied and here we're gonna choose neck 01 bone. Apply the weights with gradient painting and now if we go to the pose mode and try to move this neck one, you can see how it works, right?
So like whenever neck is moving, on head is following neck exactly and same will happen with four pelvis. If we move the character moves, weapons follows. Now we're finally ready to move to Unreal Engine. What I'm gonna do now is I'll assign proper names to all objects to be able to manage them in Unreal Engine, of course. Then I'm gonna export them one by one by logical parts. So if you're gonna use selected objects, make sure the armature and the object on it is selected.
So object is expert with armature. So we're gonna export main body, backpack, we're gonna export hats. We're gonna export top outfits alone, weapons and so forth. Pretty much the same logic. Technically you can also export them all together but it will be a little bit more difficult to manage in Unreal Engine. So here's the final list of objects we have. Main body to top outfits to bottom outfits to weapons and to back accessory.
And it means it's finally time to open Unreal Engine and create a third person template. Let's do that. Okay, so here we're gonna do some Unreal Engine match. We're gonna not go into every detail, but of course, guys, if you want me to go deep into this, let me know in the comments and maybe consider a video how I do that. The whole thing here will be to import the body first and we're gonna replace default third character to our character.
How it's done, we basically import main body first. Then we're gonna also assign some shaders and stuff. I use here the same toon shader that I used in my video where I created the whole scene. You're gonna definitely want to take a look on that one. That's a toon shader script that you drop it here and it allow you to create toon material, quite easy. Okay, so here we can preview this. And the first thing we're gonna need to retarget animation and skeleton.
So we're gonna go find ABP many, retarget animations, choose our main body and basically try to retarget everything. Since we exported skeleton from acrylic, we should have everything all fine and we're gonna need to export all the animations. We'll just need to set prefix as Fox, I think. All right, and we do have all animations. So now we go to characters, Fox. We see all the animations export, which is cool. And we might see like one animations is broken and I figured out that you can fix it.
If you go here, you can go here, you can go to compression error threshold, set it to zero and then set it to one again and it sort of fixes. Later we go to find the BP third person, which is this one. You can create a child blueprint or we can replace it right here. So here in skeletal mesh assets, we're just gonna select our skeletal assets. And for animation class, we're gonna select Fox ABP many, which we just got from retargeting.
And here's the result so far already. So we already have something moving. That's the long story short. After that, we need to start adding the rest of the accessories. So we're gonna just import them, create them, make sure we have the right shader, then add all the objects on same blueprints, basically parenting them to main mesh. And to make sure the animation works together, we're gonna go to main mesh, the blueprints and find set leader pose, drag and drop this Katana here and set it to a target.
So basically it will all take the animation from main body. The same way I will add all the assets and connect them in the blueprints, right? Just like that. And if you did everything right, we can actually preview the results and go play around. How cool is that? And of course the tail is not working. That's okay. I will add the physics to them. This is a little bit advanced, but it's easy to learn. We'll basically go to the skeleton, find those bones and add a physics to them.
You're gonna enjoy the time-lapse and I'm gonna do a sip of water. So it took me a while to figure out and set the best configuration, but here we go. Here's the results. I think it looks really cool, guys. Guys, I think I deserve like for it. Please hit that button and also subscribe to this channel to not miss out the very cool content that I'm doing for you guys. And now how do we interchange the assets? So the logic here will be very simple.
We're just gonna drop some assets across this scene and then we're gonna create some sort of podiums for them. My logic is simple. Since all the assets are already on the character, I'm gonna make some of them invisible. There is a visibility flag on that blueprint. And when we're gonna collision to a podium or cylinder that is near to some asset, one asset will be set invisible and other asset will be visible. So this simple logic, here's how I did that.
On the character, there's a blueprint that makes one asset of the same group invisible if one become visible or change the invisibility. So let's say we have shorts. Maybe there is definitely a better way to do that, but this is the only thing came in my mind while recording this video. And there will also be a simple blueprint that will detect the collision with the character. And then we're gonna change the parts. So that was actually a lot of things to do.
From the concept, we extracted a lot of parts, created models for them, created variations all in one place. Then we brought that in Blender, simply align objects to the body. Then we rigged that in Acro Rig. Well, rigid objects, we assigned it right in Blender since they need to be attached to one bone only. Then we set it in Unreal Engine, applied Toon Shader, retarget animations for our character and replace a default character with our character in the base blueprint.
And now we did simple logic on collision with some objects. We're gonna change them. We're gonna show, hide them on the character. Let's review the results. Hope you enjoyed the video. More content coming soon. Like and subscribe and see you in the next one.
The words are the caption track's own and nothing is reworded or re-transcribed. Paragraph breaks are placed between sentences so the text reads as prose.
Free tools for your own script. No signup, no login.
Paste your draft and see where viewers are likely to drop off, with a rewrite for each weak line.
Paste the first 30 seconds of your own draft for a hook score and rewrites.
Check your draft against YouTube's advertiser-friendly guidelines before you record it.
Read this channel's public videos and transcripts, and download a writing brief for it.