Getting the transcript
Reading the captions from YouTube. A video nobody has opened here before takes 10 to 30 seconds; this page fills in on its own.
Getting the transcript
Reading the captions from YouTube. A video nobody has opened here before takes 10 to 30 seconds; this page fills in on its own.
Ali Dymock · @AliDymock
Where viewers went back to watch this video again, from YouTube's public Most replayed graph, lined up with what was said at that moment.
Most replayed moment #1
5:114.7x the video's typical replay level
that I require. My timber merchant only had a nominal size of 47 x 225mm timbers but they were
Said at 5:12
Most replayed moment #2
9:352.5x the video's typical replay level
Okay so at this point, along with the previous videos, you should have all the information you require to design your own building so let’s get on and do some building work.
Said at 9:29
Most replayed moment #3
11:572.0x the video's typical replay level
it really like I was inside a building. Next I set to work on the noggins. If the span of your joists is less than 2.5 metres then you don't need to include any noggins. Up to 4.5 metres one row of noggins at mid- span is needed. And Above 4.5 metres, like my span, use two
Said at 11:50
The graph counts replays. It does not show where viewers stopped watching.
Words
2,042
Runtime
15:43
Speaking pace
130wpm
Reading time
9min
130 words per minute, below the 160 25th percentile of 349 measured videos. That distribution comes from the 349-video hook study.
Opening (first 30 seconds)
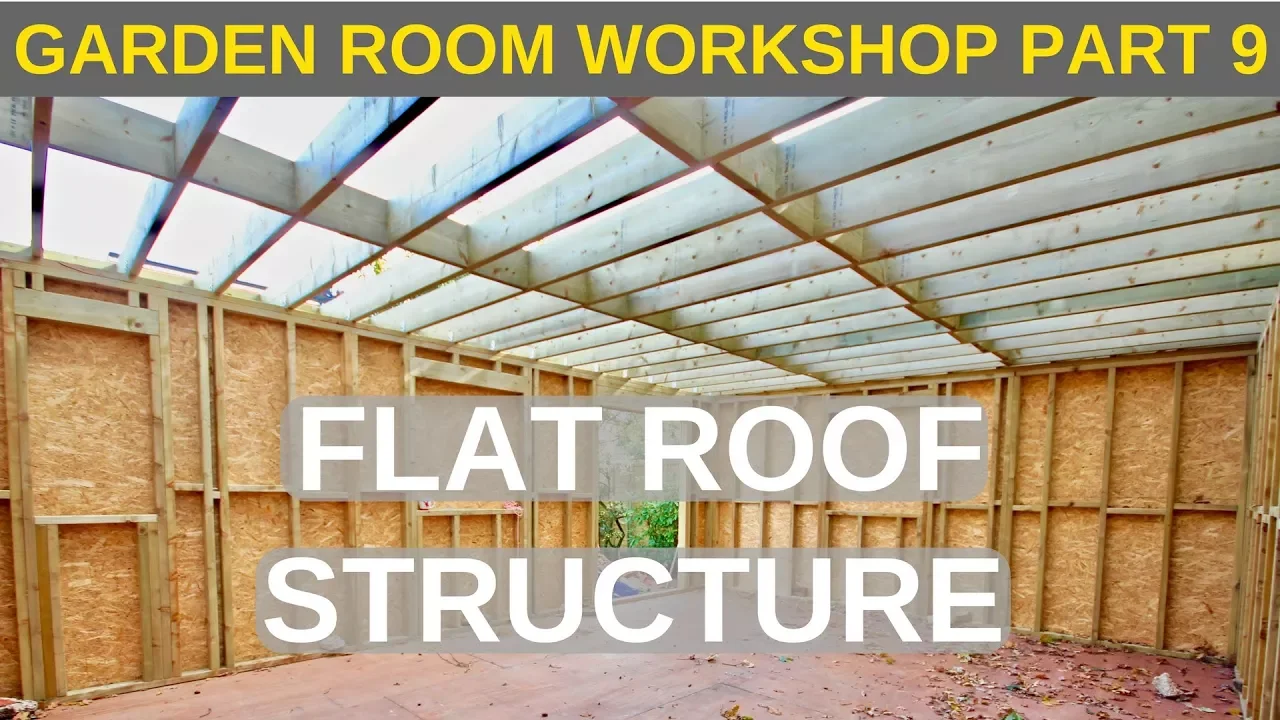
In the previous video I finished the walls of my garden room and in this video I’ll cover the options for structuring the roof and finish the roof joists. Before we get started it’s worth mentioning that because of the braces in the middle of the walls it’s difficult to position the tarpaulin to cover the entire floor to keep the rain off. This is
65 words, the words spoken in the first 30 seconds at 130 words per minute.
Free, no signup. See how the first 30 seconds hold attention, with rewrites.
Sentence shape
| Measure | This transcript |
|---|---|
| Sentences | 98 |
| Average words per sentence | 20.8 |
| Longest sentence | 52 words |
| Questions asked | 1 |
| Sentences containing a number | 30 |
Most used terms
Filler phrases
10 in total: like 7 · I mean 1 · actually 1 · you know 1.
A literal whole-word count of the same phrase list the Prepublish browser extension uses, so a phrase inside another word is not counted and a phrase used in its ordinary sense still is. It is a count and not a judgement.
What this transcript is
Every word below is the caption track YouTube publishes for this video, pulled from the video itself and reproduced unchanged. It is not Prepublish's writing, not a summary, and not a re-transcription: it is the video's own published captions. English captions, published by the channel, in the video’s original language. Source: the video on YouTube. A channel that would rather this page did not exist can ask for its removal through the contact page, and it is removed.
In the previous video I finished the walls of my garden room and in this video I’ll cover the options for structuring the roof and finish the roof joists. Before we get started it’s worth mentioning that because of the braces in the middle of the walls it’s difficult to position the tarpaulin to cover the entire floor to keep the rain off. This is why I recommend plywood flooring over OSB as it dries much more quickly and PIR insulation which is is highly water resistant over wool insulation, which can soak up water like a sponge.
As you’ll know I decided to have a flat roof on my garden room as they are easier to build for novices. Flat roofs do tend to have a bad reputation though, for instance my original garage roof caved in! However, there have been some great innovations in roof coverings in recent times so they are definitely fit for purpose. Going back to our diagram from Part 6, we can see that the roof is the number one area for heat loss in a building in relation to its surface area.
This is of course because warm air moves upwards. The first thing to consider is whether to have a cold roof or a warm roof. A cold roof is created with the insulation between the joists with the deck above. As the insulation keeps heat below the joists, the deck is cold, hence the name. A warm room is so called because it has the insulation above the deck and so the deck and joists are kept warm. There are advantages and disadvantages to both.
The major advantage for a cold roof is that is thinner. This is good if you are sticking to the Permitted Development 2.5 metres outbuilding height discussed in Part 2 and you want to maximise the head room inside your garden room. The thinner depth also creates a thinner and sleeker looking facia and this is an issue I’ll talk about a bit more in a bit. The second advantage is that, as there is no second deck needed like a warm roof, less material is required which keeps the weight of the roof down as well as the costs.
The advantages for a warm roof are manyfold. There is less cutting of the insulation required and whole sheets can be laid down on top of the deck. For a cold roof, installing insulation is labour intensive, as it needs to be cut to fit between the joists. A warm roof is also easier to install a vapour barrier. As mentioned in Part 6 a vapour barrier should be installed on the inside of the insulation. It’s much easier and more effective to install this over the deck in a warm roof than under the joists in a cold roof.
A cold roof also needs ventilation between the top of the insulation and the underside of the deck of a minimum of 50cm in order that moisture can escape. This is difficult to get right and it’s hard to know if there’s a problem until too late. A warm roof however needs no such ventilation. A major advantage for a warm roof is there is no thermal bridging. A cold roof has breaks in the insulation where the joists are through which heat is lost at a much faster rate.
A warm roof doesn’t have this issue and therefore has a better U-value for the same insulation depth. If you want downlighters in your garden room it’s much easier to install them in a warm roof as there is a cavity above the plasterboard ceiling. In a cold roof, it’s still possible but it means cutting a hole in the vapour barrier and insulation which has deleterious effects. Overall we can see that there’s a clear winner and building regs recommends that a warm roof is used wherever possible.
The extra depth is an issue though so if you’re restricted to 2.5 metres height, you may want to go with a cold roof. Most garden room companies seem to use this method. As a final note, a hybrid roof can also be created with insulation both above and below the deck but I won’t go into that here. As I had 3 metres to play with I went for a warm roof. So let’s now go into more detail about the materials that make up the depth of my warm roof.
The first thing I needed to know was how thick my joists should be. My span between my front and back walls was about 4.8 metres. If we go back to the span tables we looked at in Part 5, there are various tables for flat roof construction. I’d switched timber merchant at this point which only supplied C24 grade timber. There are 3 tables for C24 timber which vary the the imposed load - this is the temporary load caused from walking on the roof. 0.75 and 1 KN per m2 tables are for access for maintenance only whereas the table for unlimited access is 1.5KN per m2.
I knew I wouldn’t be on the roof much so I went for the middle table for 1KN per m2. There are options for dead load as well, this is the weight of the roof excluding the joists themselves. I didn’t research this too much but made sure I could go up to 1KN/m2 as I was using a warm roof which has more material than a cold roof. We can see that Joists of 47mm x 220mm support a span of 4.91m which is over my 4.8m span that I require.
My timber merchant only had a nominal size of 47 x 225mm timbers but they were an actual size of 45 x 220mm Above the joists is the deck. I decided to use 18mm OSB for this but if you fancied having the joists exposed and you didn’t want to have downlighters you could opt for 18mm plywood and have an effect like this. On top of this deck goes the insulation. Going back to the building regs U-values we can see that a new build residential property requires a U-value for the roof of 0.20.
On Kingspan’s calculator, inputting the roof type, covering and structure, we can see that a 100mm PIR depth gives the required U-value. To be honest, I’d already settled for 100mm as I had some left over bits from the floor which I wanted to use but it’s nice that it meets the recommended U-value. Above the insulation is a second deck, a top deck. Most of my research suggested that 18mm should be used here too, but I’d noticed when building the walls that I could walk on top of the 11mm OSB without an issue and on the roof it would be supported by the insulation below without any voids so I went for that.
So if we add all this together, for my garden room it adds up to a total roof depth of 350mm. We can then deduct this number together with the height of the floor above ground level to work out our headroom height and factor in laminate floor and plasterboard ceiling. I’d recommend a minimum head room height of 2.1 metres so if I were doing my build under permitted development 2.5 metre height I’d only be left with about 1.86 metres.
I was sure I wanted a warm roof so that’s why I went for planning for a 3 metre height. Of course if your floor is closer to the ground and your building is not as wide as mine and therefore your roof joists are slimmer, it’s possible to get 2.1 metres head room with a warm roof. You may also decided that you don’t need such thick insulation either. There are a lot of permutations involved so play with the numbers before coming to a decision on whether you go for a warm or cold roof.
Lastly, it’s called a flat roof, but it’s not perfectly level as it requires a slope to prevent rain water from pooling. You’ll need to look at your desired roof finish required minimum slope. I chose an EPDM rubber roof finish for mine which had a minimum slope of 1:80 but to be cautious I went for a 1:60 slope. So how do we create this slope? Well, there are two main methods. The most common is firring strips. These are tapered lengths of timber that are fastened on top of the roof joists that are thicker on one end and go down to nothing at the other end.
The second option is to make the walls that hold up the joists different heights and therefore make the joists themselves slope. There are advantages and disadvantages to both. The main advantage for using firing strips is that it’s much easier to construct the walls, all four are the same height and there are no rake walls like in my build which were, quite frankly, a bit of a pain. Another benefit is that the joists remain flat so the ceiling is also flat.
The slope is very gentle on a flat roof but if you prefer the look of a flat ceiling then this is good to go for. As for sloped joists, an advantage is that, well, there are no firring strips required. I actually couldn’t find firring strips long enough for my building although I could have cut some myself from timber joists. Either option comes at an increased cost to the build as well as adding quite a significant amount of weight to the roof.
With sloped joists, you also get a little more headroom which is also useful. Lastly, and the deciding factor for me, is that firring strips add additional depth to the roof and therefore the fascia. As mine was already 350mm thick, adding another 90mm would have made it look a bit odd and cumbersome. Overall, I’d say that firring strips are perhaps a little easier and certainly more frequently used by professionals but for my building and its specific measurements I’m glad I went for sloped joists.
The choice is yours! Okay so at this point, along with the previous videos, you should have all the information you require to design your own building so let’s get on and do some building work. Once I’d finished finished the joists, I could get a tarp over the whole building. It also felt like a good place to stop and admire my work so far and for the first time it really like I was inside a building. Next I set to work on the noggins.
If the span of your joists is less than 2.5 metres then you don't need to include any noggins. Up to 4.5 metres one row of noggins at mid- span is needed. And Above 4.5 metres, like my span, use two rows of noggins at intervals of a third. I’m not going to show how I put them in as you know the score by now from the floor and walls. The only thing I can add, is not to measure the gap and cut them to fit, but instead to cut them to the right size for your spacing, in my case 14 and a quarter inches and make them fit.
This will keep your joists straight and the same goes for the walls and floor. Now while the joists create the overhang at the front and back, I wanted a small overhang at the sides as well. My joists on each side sit on top these studs, not the end studs which gives me space to attach the side pieces to the side walls. You’ll see what I mean… So that is the roof joists completed and at this point it was all looking rather good.
I could now remove the last of the braces from the inside of the building too as the roof is now holding the walls in position. It the next video, which will be mainly action, I’ll complete the rest of my warm roof ready for the EPDM covering and the fascias too. See you then!
The words are the caption track's own and nothing is reworded or re-transcribed. Paragraph breaks are placed between sentences so the text reads as prose.
Free tools for your own script. No signup, no login.
Paste your draft and see where viewers are likely to drop off, with a rewrite for each weak line.
Paste the first 30 seconds of your own draft for a hook score and rewrites.
Check your draft against YouTube's advertiser-friendly guidelines before you record it.
Read this channel's public videos and transcripts, and download a writing brief for it.