Getting the transcript
Reading the captions from YouTube. A video nobody has opened here before takes 10 to 30 seconds; this page fills in on its own.
Getting the transcript
Reading the captions from YouTube. A video nobody has opened here before takes 10 to 30 seconds; this page fills in on its own.
Joseph | Video Editing · @josephvideoediting
Where viewers went back to watch this video again, from YouTube's public Most replayed graph, lined up with what was said at that moment.
Most replayed moment #1
17:332.4x the video's typical replay level
backgrounds done. Let's get to work on the spheres. Select your circle mask. Hold down shift and draw a circle. Add the fourcolor gradient and set the colors to that of the background. Then simply make each one slightly lighter. With the sphere, I want to add a stroke around it. So I'll duplicate my sphere layer and
Said at 17:25
Most replayed moment #2
28:512.4x the video's typical replay level
looks like. More than 90% of my students admire one editing style. So, which one is it? It's the minimal and luxurious Imani long form editing style. But the secrets behind the style is what actually amazes me. You see, one of its
Said at 28:45
Most replayed moment #3
16:042.2x the video's typical replay level
key icon. Bring it into Premiere Pro and place it right here. And align everything just like this. Now add your text fade and preset to both texts. And let's key frame the rotation of our key. Move to the end. Increase it a little bit so that it's constantly rotating. And finally, to add a glow to it, this is an icon,
Said at 15:57
The graph counts replays. It does not show where viewers stopped watching.
Words
7,069
Runtime
29:44
Speaking pace
238wpm
Reading time
29min
238 words per minute, above the 201 75th percentile of 349 measured videos. That distribution comes from the 349-video hook study.
Opening (first 30 seconds)
Video editors, in this video, I'm going to show you how any beginner editor can create a stunning viral Instagram edit using only Premiere Pro. And if you're new to video editing and you also want to create stunning edits using Premiere Pro, then this video is for you. I've been teaching beginner editors like you inside of my community how to create viral edits for 2 years now, and they've all made some pretty insane stuff. So, what's the secret? The secret is the four stages of video editing, which is exactly how we're breaking this video down. First, the secrets to engaging cuts and quality subtitles in Premiere Pro. Second, using trendy text animations to create hooks
119 words, the words spoken in the first 30 seconds at 238 words per minute.
Free, no signup. See how the first 30 seconds hold attention, with rewrites.
Sentence shape
| Measure | This transcript |
|---|---|
| Sentences | 486 |
| Average words per sentence | 14.5 |
| Longest sentence | 44 words |
| Questions asked | 7 |
| Sentences containing a number | 39 |
Most used terms
Filler phrases
51 in total: like 42 · actually 8 · basically 1.
A literal whole-word count of the same phrase list the Prepublish browser extension uses, so a phrase inside another word is not counted and a phrase used in its ordinary sense still is. It is a count and not a judgement.
What this transcript is
Every word below is the caption track YouTube publishes for this video, pulled from the video itself and reproduced unchanged. It is not Prepublish's writing, not a summary, and not a re-transcription: it is the video's own published captions. English captions, generated automatically by YouTube, in the video’s original language. Source: the video on YouTube. A channel that would rather this page did not exist can ask for its removal through the contact page, and it is removed.
Video editors, in this video, I'm going to show you how any beginner editor can create a stunning viral Instagram edit using only Premiere Pro. And if you're new to video editing and you also want to create stunning edits using Premiere Pro, then this video is for you. I've been teaching beginner editors like you inside of my community how to create viral edits for 2 years now, and they've all made some pretty insane stuff.
So, what's the secret? The secret is the four stages of video editing, which is exactly how we're breaking this video down. First, the secrets to engaging cuts and quality subtitles in Premiere Pro. Second, using trendy text animations to create hooks like these. And third, creating clean and minimal animations, a simple character animation, a clean UI zoom in, and an advanced multi-part animation. And fourth, the secrets to using sound design and music to bring life to your editing.
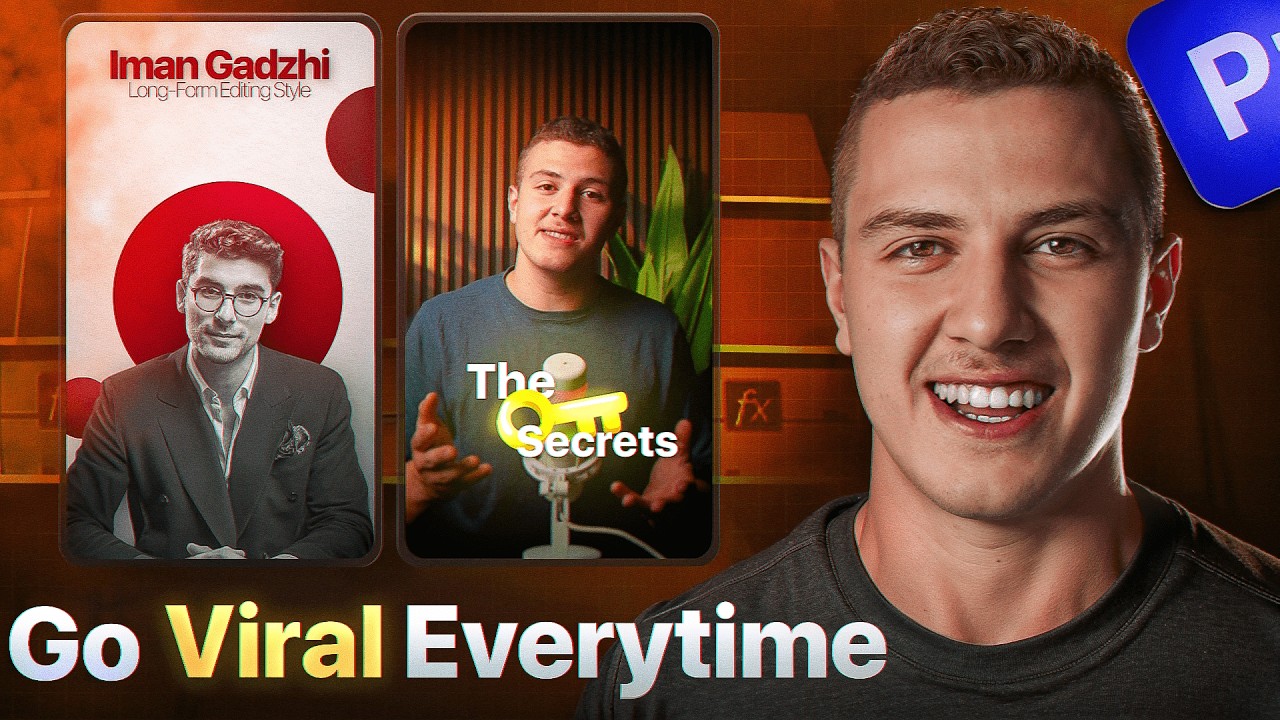
More than 90% of my students admire one editing style. So, which one is it? It's the minimal and luxurious Immangaji long form editing style. But the secrets behind the style is what actually amazes me. You see, one of its core pillars is these animations which scream luxury and minimalism. And the genius part of this is actually the execution. By utilizing editing programs, editors combine creative ideas and advanced visuals to create magic.
And that is how viral short form edits are created using Premiere Pro. All this so that by the end of this video, you'll not only understand how viral edits are created in Premiere Pro, but you'll also have this stunning edit here created from scratch. So, without further ado, let's dive right in. Starting with stage one, the engaging cuts and highquality subtitles. Creating cuts that are engaging starts by first removing any silences or bad takes that are in the video.
Then, we use a technique called J cuts, where we have our audio begin before our video. This makes the transition from clip A to clip B smoother. Once that's done, we work on our high-quality subtitles by first generating subtitles using Premiere Pro's auto subtitle generate feature. This is where Premiere Pro will listen into your audio and turn it into a script using a process called transcription. Then, it's going to turn this script into subtitles using a process called captioning, which is where we dive in and make the necessary changes to turn these into the subtitles we need.
This process is quite simple and straightforward. So, let's go ahead and create some engaging cuts and highquality subtitles in Premiere Pro. I'll select my razor tool, come right here where my sentence is done, make a cut. Then I'll also make another cut before I start my next statement. This will isolate the silence in the middle, and then I can just select it and delete it. Now, I'm going to continue to cut out all the silences from the rest of the video, just like so.
With the cuts done, let's go ahead and turn these into engaging J cuts. Zoom in right here to our first cut. And in order to make our audio start before our video, we'll hold down Alt, which isolates the video and the audio layer. And then we can drag our video layer back a little bit and then fit it in. As you can see, this is going to make sure our audio starts back here and then the video follows. Now, we'll go through and apply the J cuts to this entire video, just like so.
And there we go. We'll end up with a nicely cut video. Now, let's create our text. As we mentioned before, we're going to be using Premiere Pro's auto subtitle generator by first heading over into the Windows tab and clicking on text. Remember those two processes I just told you about, transcripting and captioning? Yeah. Well, Premier Pro can basically do both of them at the same time. To do this, just click on this blue button called create captions from transcript.
And let's change a few settings. First, I know I want each word to be its own subtitle so that I have maximum control over everything. The first slider controls how many characters each subtitle contains. So, I'm going to drop that all the way down. The second slider controls how long each subtitle has to be, so I'll also drop that all the way down. And finally, we'll set our lines to single. With the settings in place, we can click on transcribed and create captions and let Premiere Pro do its thing.
Now, with our captions generated, we have subtitles, but they don't look good. So, let's go ahead and work on making them look nice. To do this, simply select one of your subtitle layers and click on your properties panel. This will open a bunch of text settings that we could change to affect our subtitles. Start by changing the font to a font you want to use. I'm using the SFUI display font. Then, let's use this slider to increase the size of our text, like so.
Finally, click on this zone here and drop its Y position to center the text and move it down. Just make sure that your text ends up in the lower thirds of your screen. For reference, your screen is divided into thirds. In short form content, your upper thirds is where your eyes are supposed to be and your lower thirds is where your subtitles are supposed to be. Also, don't forget to come down here and remove the default drop shadow that Premiere Pro adds.
And with our text created, let's apply this to our entire subtitles. To do this, we click on this plus icon here and click on create new text style. Give it a name and click on okay. This saves your text as a text style and applies it to the rest of the video. The last thing you should know is that these yellow layers over here are actually very limited. So, we select all of them, click on graphics and titles, and click on upgrade caption to graphic.
This turns them from a yellow caption layer to a pink graphic layer, which we can then control a lot more. With our engaging cuts out of the way, and some highquality subtitles, we finally complete stage one, which means we finally get to move into stage two, creating the hook animation. The hook animation is by far the most important part of the video. We need something that's going to grab our viewers attention. And in our case, we're creating this viral text animation sequence to do so.
In terms of design, we're simply using the captions we generated and placing them in certain patterns to look appealing. To make them blend in nicer, we'll even create a pop and fade in animation with a little blur. On some of them, we'll even change their blending modes to get this cool effect. And for post-production, I'll make the bottom of my screen dark and blurry so that the viewer can really see the text. I'll even top everything off with a zoom in and a zoom out to get this clean look.
Now, let's go ahead and create this hook animation. To create our first text sequence, start by placing your text on top of each other and extend them like so. This makes them build on each other. Now, let's start by designing this text here. Add in a drop shadow effect and increase the softness just a little bit to get a nice shadow. The first thing I'm going to need is my pop-in blurry animation. So, let's start by adding our transform effect to the text.
And to create our popin, simply move 1 second into the animation. Add a key frame for our current position. This is going to determine where the text ends. Then, move back to the start. Start it slightly lower. And this is going to start our text here and end it here. Now, to get this sharp but quick popin, click on this arrow, move the slider all the way back, and this is going to begin our animation fast, and then slow it down.
We're going to go ahead and pair this with an opacity fade in by going down here in our transform effect, moving 1 second in, key framing our opacity at 100, moving back and starting it at zero. This starts the opacity at zero, makes it go up to 100, giving us a fade in animation. The last layer I'm adding is a little bit of blur at the beginning of the animation. Start by adding in your gajon blur effect. Go to your key frame over here, and key frame your blur ending at zero.
Then go back to the beginning and start it at 15. And with this done, we get a beautiful pop in fade in text animation. Now, in order to apply this to the rest of your text, we just close these effects down, select all of them, right click, and save them as a preset called blurin fade in. Now, we just search for it up here in the effects tab. And to apply it, we select all our text and drag it on. And there we go. With our text now designed and animated, let's start placing it in a nicel looking pattern.
We can just use our cursor tool to drag our text around and start by putting these two texts here. and placing these other two texts over here. Then change the words here to 90%, change its font to a bold font. And finally, scale these first two texts down and place them like so. And then scale these last two texts down and place them here. And one last thing I'm going to do is instead of this 90% text popping up, I want to do a glitch fade in.
So we'll go in here and delete those effects that we added. And to create a glitch fade in animation, we key frame the opacity, move forward, increase it, move forward, and decrease it. And keep alternating like this until you get a fade in. And that completes it for our first scene. For our next section, we're only going to want the word admire on the screen. We'll also change the font to bold, make it full caps, and make it bigger.
Then to get that special effect, head over to your effect controls under your opacity. Set the blending mode to difference to get this. We'll also add a glitch fade in animation using the opacity just like we did earlier. And for this last section, it's very straightforward. Layer all your text on top of each other and start them sequentially. Select all of them and apply your animation preset. Set this phrase here to a bold font.
Make it huge and scale both of your other texts down to this size and place them here. With our text complete to finish our hook animation, we're going to need to make the bottom of our screen more blurry and darker. We'll start by right-clicking and adding an adjustment layer. Adjustment layers are like glass panels. They are invisible, but you can add effects on them which affect the layers under them. So, we'll lift our text layers up and drag this adjustment layer under them so that it doesn't affect the text layers, but it does affect the footage.
And add in your brightness and contrast effect to decrease your video brightness a little bit. and then add in your gajion blur at just 15 to also blur out your footage a little bit. And to isolate these effects to only the bottom, click the circle mask next to your opacity. This will mask these effects like so. Then make your circle bigger and place it like so. Click on invert to invert the mask and increase the feather to get smoother edges.
And this makes a huge difference. Now, let's finish this whole hook with a dynamic zoom in. We add in an adjustment layer, place it on top of all of our layers so that it affects everything. Add the transform effect and key frame the scale at the beginning like so. Then move forward and bump it up to 120, giving us a simple zoom in at the beginning. Then move forward and add another key frame at 120. Then move to the end and end it at 100, giving us a simple zoom out at the end.
Click on this arrow and start your zoom in quick and end your zoom out slow. And with all the text, animations, and adjustment layers complete, we finally end up with this beautiful hook animation. Real quick, if you're new to video editing and you really want to become an expert at Premiere Pro and After Effects and be able to create the viral editing styles of 2025, then this is for you. We built Ultimate Editors to take complete beginners and turn them into the editors that can create the viral editing styles of 2025 in less than 60 days.
And it works. Beginners like you are inside of Ultimate Editors. And this is what they're creating just after 2 months of joining. So, how do we do it? First, you'll master the editing programs with our step-by-step Premiere Pro and After Effects master classes designed to make you an expert in both these editing programs, even if you've never opened them before. Then, you'll learn the six viral editing styles. Devon Jtho, Iman Gaji, Josh Leon, by Maximize, Apple Style, and even my own broken down into simple beginner friendly master classes.
Our master classes break every little editing concept down from inspiration to fundamentals to complex animations. We guide you through everything. On top of this, we'll even show you how to make your first $1,000 as a video editor, give you three weekly coaching calls, and a 247 live community admin to personally support you. Ultimate Editors is the best place for beginners to master the editing programs, learn the viral editing styles of 2025, and get paid for it.
So, if you're ready to master the video editing programs, learn the viral editing styles of 2025, and make your first $1,000 per month as a video editor, join Ultimate Editors. The link is going to be down below. But with all this being said, let's dive right back into the video. Now that stage one and stage two are complete, it's finally time to dive into stage three, creating the body animations of the video. When editing a video, you always want to watch through what is being said and create an animation that visualizes it.
So for this first section, when I say this, it's the minimal and luxurious Iman Gajji long form editing style. I want to create an animation of Iman Gajaji popping up with a title of his style. For the second section when I say this, you see one of its core pillars is these animations which scream luxury and minimalism. I want to create a UI animation with two spheres coming and a clean title that says this. And for the third section when I say that by utilizing editing programs, editors combine creative ideas and advanced visuals to create magic.
I want to create a logo pop-up. Visualizing creativity with an icon slide in and visualizing this with a text pop-up and finishing off the animation. In between these three animations, we have these two phrases which I call interrupting statements. And for these, we're going to be creating a simple text and icon sequence just like this. So, now that we understand what we want to create, let's get to work on animation number one.
The minimal and luxurious Imani long form editing style. To begin working on our minimal white character animation, let's start with the background. To create a high-quality background, I'll right click here, add a color mat layer. This is a layer with a simple color. And after dragging it into our timeline, the color is too simple, so we'll add in a fourcolor gradient. This generates a gradient made up of four points, which all have different colors.
And by setting one of the points to white and simply using the eyropper to make all of them white as well. Then by selecting the second one and making it slightly darker, making the third one a bit darker and the fourth one even darker, you can end up with a subtle white gradient background. This fourcolor gradient effect is an amazing effect for creating simple but effective backgrounds. The next big element in this animation is our desaturated Immanangaji pop-up.
To create this, we want to start by getting a picture of Imani. Then to get rid of the background, we go to AI background remover, put our image in, and then download it without a background. Let's drag this new image back into Premiere Pro, size it up, and place it here. To turn it black and white, we add our lummetry color effects, go into here, and drop the saturation all the way. To blend this a little bit better, we add in the drop shadow effect. increase the opacity while increasing the softness to 115.
And there we go. The next element we have in our scene is this red circle that's colored behind of our character. To create this, we hold down this rectangle tool and select our circle mask. While holding down shift to draw a circle here, then add the fourcolor gradient to it. Turn one of the colors to a red and turn all of them into red. Then make some of them darker and some of them lighter to end up with this. Finish it off by putting it under your image layer here.
Now, before we continue adding more elements, let's take a moment to animate everything that's on the scene right now. Let's start with our red circle here. We're going to be creating a scalein animation by adding in our transform effect, moving 1 second in and key framing the scale, moving back and dropping it down to 60. This will start the scale at 60 and increase it to 100. Click on your arrow and make sure this animation starts fast and then slows down.
We're going to layer this with an opacity fade in by key framing our opacity and starting it at zero, moving forward and increasing it to 100. This will give us a scale in and fade in animation. Now, for our character animations, we simply want a pop-up with a nice blur. So start by adding your transform effect. Move over to the 1 second mark and key frame the current position. Then move back and start it slightly lower, giving us a simple pop-in.
Open up your slider and start this animation fast and then slow it down. This animation's great, but it's too simple. Let's stop it up with a gaj and blur effect. Key frame the beginning at 15. Move forward and have it fade out to zero. This gives us a beautiful animation like so. But this scene still feels a little empty. So go ahead and move your image layer up and duplicate this circle two times. Then on one of my duplicates, I'll go into my transform effect and change my end scale key frame to 60 so that it ends up smaller.
Then on another one, I'll change the end key frame to 30 so it ends even smaller. But I'm also going to go back and start it at zero on both of these so that we have a simple scalein animation. And now by using my transform position, I'll move one to here and then move the other one to here and simply delay them back to here. The final part of this scene is going to be the text pop-up. So to create this, I'll simply duplicate this thick text that we made back here and change the words to Immanangaji and scale it down to fit.
Then down here, we're going to decrease the variation so that the font is closer together. Let's make it dark so that we can see it and start by placing it up here. Now this looks cool, but it's still too basic. So let's add a fourcolor gradient. Click on the effect and spread the points like so on the text. Then set one of the colors to a red, another one to a dark red, and another to a dark red, and another to a black.
Place the red up top and the blacks down at the bottom to get this. Now to create our second text, just duplicate the text layer and write out long form editing style. Use a lighter font, scale it down, and then simply have these text animations. Start back here, and we're good to go. Now, this animation is perfect, but to finish things off, I'm going to add a quick zoom in. Add in an adjustment layer, add your transform effect, key frame the scale, move to the end, add a key frame for the scale at 110.
Let this be a slow and simple zoom in. And let's finally top this off with a paper texture by searching up for a paper texture overlay, bringing it into Premiere Pro, and placing it on top of all these layers. Then simply set the blending mode to multiply. And there we go. And this completes animation one, the minimal white I imagi pop-up. That being said, this brings us to this interrupting statement section here. But the secrets behind the style is what actually amazes me, where I'll show you guys how I'm going to edit this really quickly.
As you guys can see, the section is only made up of two simple text and a simple icon rotation. So I'll start by deleting all of our text and leaving just one. Then I'm going to write out the word the, duplicate it, and write out the word secrets. Then let's head over to flat icon. Download a key icon. Bring it into Premiere Pro and place it right here. And align everything just like this. Now add your text fade and preset to both texts.
And let's key frame the rotation of our key. Move to the end. Increase it a little bit so that it's constantly rotating. And finally, to add a glow to it, this is an icon, which means we're going to need to right click and pre-ompose it. Then add in the VR glow, set the threshold pretty high, and add some brightness to it. And with that being said, that completes this interrupting statement right over here. Now, as you guys noticed, we went over some pretty complex Premiere Pro techniques to create a high-end animation like this one.
Which is why, as a video editor, if you don't know After Effects and Premiere Pro, you simply won't be able to create the advanced animations like the viral editing styles of 2025. And this is why in Ultimate Editors, the first thing that we do is take you through our Premiere Pro and After Effects master classes, step-by-step beginner-friendly courses that teach you everything about these programs. If you're a beginner and you want to master After Effects and Premiere Pro, there's no better way to do it than with Ultimate Editors.
You can get access to all of the courses. The link is going to be down in the description below. Now, it's time to animate our next section where I say this. You see, one of its core pillars is these animations, which scream luxury and minimalism. To do this, we're going to be creating a clean UI animation, two sphere shape layers, and a clean, minimal text in the middle. We're also going to be creating a cut in the middle that focuses on the text for emphasis.
So, let's go ahead and break it down. Starting with the background. To create my background, start by duplicating the white background I had before. Add a new fourcolor gradient. Set the colors to dark gray and make one of them an orange and one a red. And this is going to be our background. So backgrounds done. Let's get to work on the spheres. Select your circle mask. Hold down shift and draw a circle. Add the fourcolor gradient and set the colors to that of the background.
Then simply make each one slightly lighter. With the sphere, I want to add a stroke around it. So I'll duplicate my sphere layer and change the size of my duplicate to 105. then change my colors again to something lighter. Then we're going to decrease the sphere size to 102 and we'll get this. Finally, let's duplicate our light sphere once again. Bring it up to the top. Decrease the size down to here and place it down here.
Finally, to add a glow, let's drag in our drop shadow effect. Then we're just going to set the color to white and increase the softness and the opacity till we get this. And now with the sphere complete, let's select all three of these layers and pre-ompose it. Then let's rotate it and place it up here. And to make it animate onto the screen, add your transform effect. Key frame the current position. Move it forward.
Decrease the Y value at the beginning of the animation and smoon it out to get this. Background's done. UI is done. Let's get to work on the text. Select this text that we made earlier here. Duplicate it and place it here. Let's first make this animation a lot longer by extending these key frames here. Then write out the word luxurious and minimalistic and scale our text down to here. Now orient your shape layer and text so that they align like so.
Now for our second text, let's duplicate our text layer. Write out the phrase animations incorporated in the video and make it smaller. Give it a lighter font and align it to the left side. Then using our cursor, we're going to select our text box and make it smaller. This is going to create a nice paragraph text that just looks nicer. Now, this looks great, but the text is a bit dull. Add a fourcolor gradient. Set the points on the text like this.
Make some of them a light orange, and place it on top of your drop shadow so that it only affects the text. Then, do the same for your second text, making some points darker. And lastly, offset your second text a little bit. Now, finally, let's add in our last sphere here by duplicating this main one. And using our vector motion, we simply rotate it and move it down to here. Now, to add more depth to the scene, I'm going to be duplicating the darkness and blur adjustment layer I made earlier on.
Bring it over here and select my mask on it and center it to here. And to finish off this animation, we're going to be creating some zoomins. Start by adding your adjustment layer. Add the transform effect to it. Then use your razor tool to cut right here. And for our first scene, let's go back to the beginning, key frame our scale, move forward, and go up to 120. Then space them out and speed up the beginning like this.
As for my next scene, I'll select the adjustment layer and start my scene zoomed in on the text here. Making sure the text is in the center. Then just key frame your scale at 132, move it back, and move forward and end it at 140. Starting this animation slowly, and then ending it slowly, too. Now, the thing that sells this camera effect is actually the blur. Let me show you. Add a gon blur to your adjustment layer. Bring it up to 30.
Key frame it at the start and then have it fade out to zero. Starting fast and then slowing down. Then just copy paste this effect on your other adjustment layer. This will really sell your camera effect. And with all this complete, the backgrounds, shapes, UIs, and zooms, you'll get this beautiful UI animation that looks like this. You see, one of its core pillars is these animations which scream luxury and minimalism.
Which brings us to the interrupting statement, which is right after it, which is going to be easier than the first one. And the genius part of this is actually the execution. Let's start by adding in a brain icon. Go to flat icon, find a brain icon, bring it into Premiere, and place it like so. Start by coloring it with a four-color gradient, placing the points like so, and using the following colors. Now, to create a simple pop-up, add your transform tool, key frame the position, move back, and start it slightly lower.
Make sure this animation starts fast and then slows down. Then, we're going to pre-ompose it so that we can add a drop shadow, and once again, set the color to yellow and increase the softness to get a nice glow. On top of this, I'll even create a glitch fade in with the pop-up by varying our opacity just like we did earlier in the video. Now, just duplicate the text we made for this interrupting section here. write out the execution and place it here.
Duplicate your darkness and blur layer under everything and then duplicate the zoom that we made earlier on and you'll end up with this. Now, as a beginner editor watching this, you're probably finding the walkthrough of how I create these animations the most useful. However, you might have felt like I'm going through this stuff pretty quickly. This is because there's a lot of footage and I'm really trying to cram it into a very small YouTube video.
But if you really want to learn how to create highquality animations, we have 20 plus animation recreations in Ultimate Editors. These are step-by-step 1-hour long master classes where I guide you through how I create these animations you see. And this again is how beginners like you are joining Ultimate Editors and becoming amazing editors within just 60 days. The link to get access to Ultimate Editors is as usual going to be down below.
Now, with this final animation left, let's go ahead and dive right in. This is the raw footage I have to work with. By utilizing editing programs, editors combine creative ideas and advanced visuals to create magic. And the animation I want to create is a beautiful logo pop-up with an icon slide in and a text popin. Let's build this. For starters, let's start by creating our background. I need a dark blue background.
So, I head over to Pinterest and search for a dark blue MacBook wallpaper. I like this one, so let's bring it into Premiere Pro. And to make it look even better, I'll add the gajon blur effect to it and blur it out a little bit more. Now, let's work on our logo pop-up. Start by downloading a Premiere Pro logo from flat icon and drag it into Premiere Pro. Let's create a white edge to it by adding a drop shadow, setting the color to a light blue and increasing the distance without any softness.
Now, to create the glow, we're going to just copy and paste this effect that we used on the brain and increase the softness and tone down the opacity. Now, to create our popin, we're simply going to go back to our brain animation which we made and copy the transform effect, then paste it on the Premiere Pro logo. To give it a bit more life, we'll pre-ompose the layer, key frame the rotation at zero, move it forward, and start this with a rotation, making sure it starts quick and then slows down.
Then create that glitch fade in effect by varying the opacity as usual and scale it down a little bit. And there we go. Our logo animation is done. Now let's work on our icon slide in. First is this blue layer that comes in from the top right. So let's use our rectangle tool to draw out a big rectangle here. Then color it with a fourcolor gradient. Use colors from our background like so. Then just rotate the square and place the layer behind our Premiere Pro logo.
Create a pop-in animation by adding in your transform effect. key framing the position, moving forward, and starting it off to the right and smoothing out the animation. Now for the icon, head into flat icon and download an icon for this animation. Let's bring it into our scene and start by placing it here. Let's animate it coming in to by adding in our transform effect, key framing the current position, moving back, starting it off to the top right and smoothing out this animation.
Then just pre-ompose it and copy the drop shadow glow from the brain to this icon and change the color to blue. Finally, to add some depth, I downloaded three more icons, brought them into Premiere, desaturated them, darkened them, added some blur, and spread them out like so. Then, I just pre-omposed all the layers with the background to make it easier for me. And with the icon animation done, it's finally time to move into our text segment.
I simply duplicated a text layer, wrote out the word advanced, scaled it down to here, duplicated the layer, and wrote out the word visuals on the second one. Then, just set the word advanced to a light font, and finally, I placed them like so to fit the scene a little better. And with all three of these animation sections complete, let's finish things off with a zoom in. I start by adding an adjustment layer on top of everything and adding the transform effect.
Start by key framing a little zoom in in the intro here. Smooth it out and then cut the layer right around where our background comes in. Then zoom in like so. Key frame the position and scale. Move forward and have it move to the top right like so. And finally, for this last one, zoom into our text here. Add a key frame for the position and scale. Move forward and have it zoom into the text a little more. Finally, let's cut our adjustment layer at the end and have it zoom out of the scene.
And after all this complicated mess, we finally end up with this beautiful and stunning animation for our last section. By utilizing editing programs, editors combine creative ideas and advanced visuals to create magic. If you've watched this far into the tutorial, you're clearly interested in mastering the editing programs and learning the viral editing styles of 2025. So, why haven't you checked out Ultimate Editors yet?
Just as a reminder, you're getting the Premiere Pro and After Effects Master Class, six viral editing style master classes, a complete client acquisition masterass, three weekly coaching calls, 24/7 live community support, and monthly editing competitions where you can win up to $1,000. All of this in Ultimate Editors. This is a huge offer, and this is everything you're ever going to need as a video editor. So, click the link down below and join Ultimate Editors today.
And now with stage one, stage two, and stage three finally complete, it's finally time to move into stage four and bring everything to life with sound design and music. Now to sound design our short, all that we have to do is simply watch through our video, ask ourselves what animations happening on the screen and ask ourself what sound effect would fit this animation. However, there's a lot happening on the screen and a lot of it is happening at the same time.
So how do we do this? Well, we break things down into a three-step sound design workflow. First, we sound design all the movements using whooshes. Then we sound design the animations using textured sound effects. And finally, we add risers and hits for anticipation. I've already taken up enough of your time, so if you want to learn everything about sound design, I've made tons of videos on these. You can check them out here.
But let's first get started on sound designing our movements. I'll be sourcing all of my sound effects from Epidemic Sounds. And first, I need some whooshes. So, let's start by searching up for whooshes and downloading a bunch of them. Now comes the time to watch through the video and look for movements and assign whooshes to them. The first thing I can see is a quick zoom in in the beginning. So, let's double click on these whooshes to open them in our source monitor and listen through them.
I really like this one, so I'll click on O to create an outpoint, which essentially only selects this sound effect and drag it in. And to match the whoosh to the movement, I'll just align the peak of the whoosh to the peak of the zoom in at the beginning. And there we go. Now, we have a zoom out in this section. So, let's bring this whoosh in and align it like so. For this first minimal animation, there are no movements, but we do have a zoom in here with our first interrupting statement.
So, let's add a whoosh right here as well. Now, this UI animation has two big spheres coming in. So, let's assign a deep whoosh for each one of these. In our interrupting statement, we also have a zoom in. So, let's add a whoosh to that as well. And in our last animation, we have a ton of movements. For our logo pop in, we'll start with a light whoosh. For the background coming in, we'll add a deeper whoosh. For this zoom in, we'll add a simple whoosh.
And finally, for this zoom out, we'll duplicate our whoosh again. And there we go. That does it in terms of movement and whooshes. Now, we can move on to step two, the textured sound design. For starters, in our first scene, we have a ton of text pop-ups and glitch fadeins. So, I'll download some metallic gear sound effects and mechanical sound effects. I'll add in this light click to this text popup here and add one for our second text pop-up, too.
These sound really nice. Now, for our big glitch text, I'll add in a longer mechanical sound effect and align it like so. For our two text popins here, we're going to add in a light metal click again. And for this glitch fade in, we'll use another mechanical gear sound effect. And for this last text section, we use a light click for the small words. And for the big text pop-up, we went with this mechanical gear sound effect.
Now, diving into this white minimal section, I add in two light metal clicks for the text. And I wanted to create an ambiance for the scene. So, I added in a sci-fi ambient whoosh to help fill this in. I also made sure to blend it in with a whoosh at the beginning and a whoosh at the end. For this next UI scene, I decided to really make it feel like a UI by using UI sound effects on the text pop-ups like so. And I used a synthesized UI sound effect and just layered it on top to get this melody, too.
And finally, for our last animation, we add a glitch sound effect for our glitch pop-up. Then we use another UI synthesizer for this icon pop-up, making it feel like a UI. And finally, these same two UI sound effects that we used earlier for the text for our text pop-up. Finally, with all this done, I slapped in a riser right here and one right here. And the sound design was complete. And for music, I simply added a mysterious song which I had laying around and it worked nicely.
And after going through all four stages of creating a viral edit, this edit was complete. the cuts and titles, the hook animations, the body animations, and the sound design and music. The viral edit is finally complete, and this is what it looks like. More than 90% of my students admire one editing style. So, which one is it? It's the minimal and luxurious Imani long form editing style. But the secrets behind the style is what actually amazes me.
You see, one of its core pillars is these animations which scream luxury and minimalism. And the genius part of this is actually the execution. By utilizing editing programs, editors combine creative ideas and advanced visuals to create magic. And that is how viral short form edits are created using Premiere Pro. Ladies and gentlemen, with these four simple stages, you can turn any boring edit into any viral edit you want.
Thank you so much for watching all the way till the end of the video. And if you made it this far, comment down the word winner so that I know who the OGs watching till the end of every video are. And God bless all of you guys. Check out Ultimate Editors and I'm going to see you guys in the next video. In the meantime, you can check out one of these two videos over here. Both of them are really, really cool and I really recommend you check out this one.
This one over here.
The words are the caption track's own and nothing is reworded or re-transcribed. Paragraph breaks are placed between sentences so the text reads as prose.
Free tools for your own script. No signup, no login.
Paste your draft and see where viewers are likely to drop off, with a rewrite for each weak line.
Paste the first 30 seconds of your own draft for a hook score and rewrites.
Check your draft against YouTube's advertiser-friendly guidelines before you record it.
Read this channel's public videos and transcripts, and download a writing brief for it.