Getting the transcript
Reading the captions from YouTube. A video nobody has opened here before takes 10 to 30 seconds; this page fills in on its own.
Getting the transcript
Reading the captions from YouTube. A video nobody has opened here before takes 10 to 30 seconds; this page fills in on its own.
Ali Dymock · @AliDymock
Where viewers went back to watch this video again, from YouTube's public Most replayed graph, lined up with what was said at that moment.
Most replayed moment #1
6:067.7x the video's typical replay level
Said at 0:00
Most replayed moment #2
8:005.6x the video's typical replay level
I spent just over £2,000 on the lot, which I thought wasn’t too bad, given what some companies try to charge.
Said at 8:03
Most replayed moment #3
12:122.4x the video's typical replay level
you’re putting them in the right way round. Once in, I could add my normal packers to get the glass nice and snug. Now for windows and of course doors that open, you have to place the packers in a method
Said at 12:06
The graph counts replays. It does not show where viewers stopped watching.
Words
2,165
Runtime
19:04
Speaking pace
114wpm
Reading time
9min
114 words per minute, below the 160 25th percentile of 349 measured videos. That distribution comes from the 349-video hook study.
Opening (first 30 seconds)
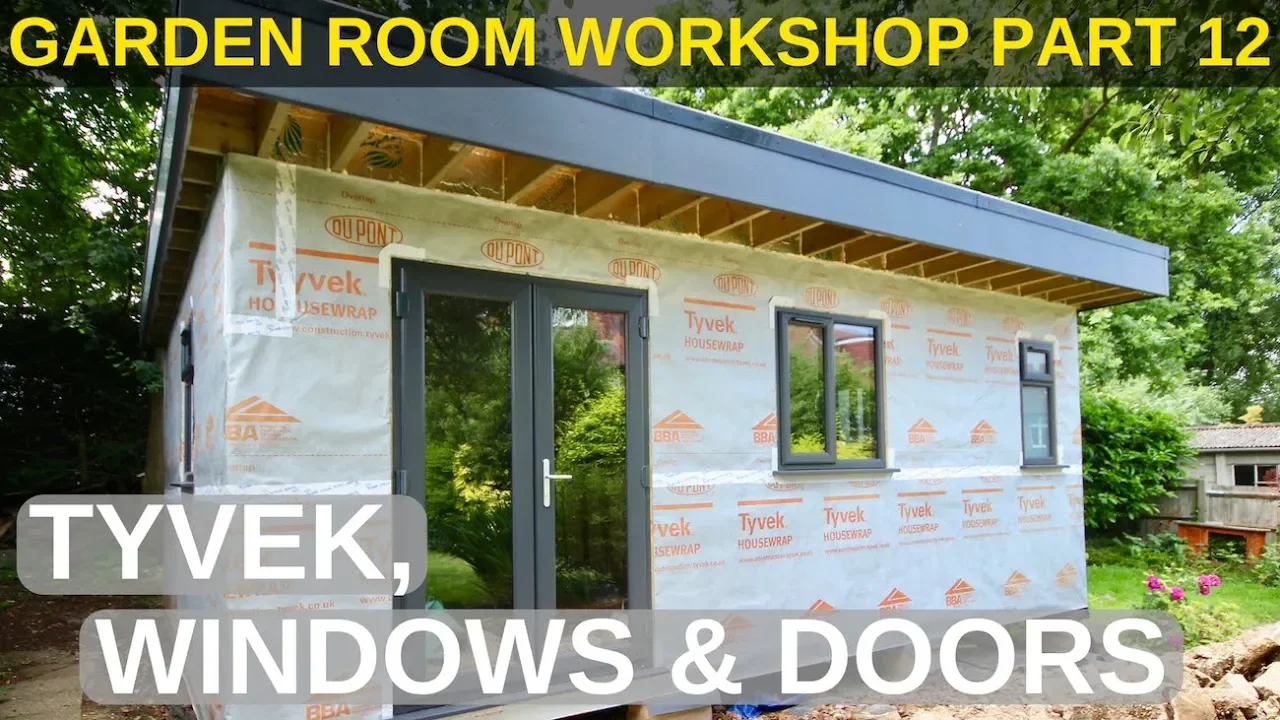
Welcome back! In the last video I fully completed the roof of my garden room and in this video I’ll install the windows and doors but before we get to that we’ll rewind the clock and discuss this Tyvek Housewrap by first getting the window and door openings ready. Now onto the breathable membrane. This is actually
57 words, the words spoken in the first 30 seconds at 114 words per minute.
Free, no signup. See how the first 30 seconds hold attention, with rewrites.
Sentence shape
| Measure | This transcript |
|---|---|
| Sentences | 100 |
| Average words per sentence | 21.7 |
| Longest sentence | 57 words |
| Questions asked | 2 |
| Sentences containing a number | 15 |
Most used terms
Filler phrases
12 in total: actually 5 · like 5 · you know 2.
A literal whole-word count of the same phrase list the Prepublish browser extension uses, so a phrase inside another word is not counted and a phrase used in its ordinary sense still is. It is a count and not a judgement.
What this transcript is
Every word below is the caption track YouTube publishes for this video, pulled from the video itself and reproduced unchanged. It is not Prepublish's writing, not a summary, and not a re-transcription: it is the video's own published captions. English captions, published by the channel, in the video’s original language. Source: the video on YouTube. A channel that would rather this page did not exist can ask for its removal through the contact page, and it is removed.
Welcome back! In the last video I fully completed the roof of my garden room and in this video I’ll install the windows and doors but before we get to that we’ll rewind the clock and discuss this Tyvek Housewrap by first getting the window and door openings ready. Now onto the breathable membrane. This is actually the fourth type of membrane we’ve encountered in this series. To recap: the first was the the damp proof membrane, briefly mentioned in Part 4 which is usually used under concrete slabs to stop moisture from soaking up from the ground below.
The second was the damp proof course, which is used in the first few layers of bricks in a house build but I also used between my block piers and my floor joists. I actually used DPC it at this stage too as I designed my foundations so the blocks protruded slightly from the underside of the building. If water ran down the walls it could hit those blocks and soak under the joists causing rot so I stapled pieces of DPC to the walls and overlapping the blocks so any rainwater will flow right over them instead.
The third is a vapour barrier which is used on the inside of the insulation and stops moisture inside the building moving into the walls. And now the fourth, the breathable membrane which is used on the outside of a timber building and has 2 functions. 1. As the name suggests, it’s breathable so any moisture that does get into the walls can escape out of the building. And 2. It's waterproof so stops any rain water externally from soaking into the walls.
I guess you could say it works a bit like an anorak or cagoule and the structure of it is actually really interesting! In case you’re wondering the EPDM rubber roof I installed in the last video is also breathable. There are a few brands of breathable membrane on the market but Tyvek from DuPont is certainly the most well regarded, even if it is on the pricey side. It’s not too easy to find in the UK but I managed to find mine at Jewsons, but other specialist online stores do stock it.
The bottom role is added first and the top role should then overlap by at least 6 inches to allow water to run over it. I started from one corner of the building and used three staples at the top corner so that the roll could pivot, and then I unfurled the roll before stapling at the top of the other side of the wall. Then I could go back and staple around the top, bottom, openings and a few in the middle to keep it in place.
I don’t think there’s any real formula to how many staples you use, just use common sense and what feels right but it should end up tight to the building. Unless you have a very large door opening it’s best just to continue the Tyvek over any openings, and cut them out later on. For the top roll, if you’ve gone down the route of having sloped joists like mine then there may be a small amount of slack in the Tyvek due to the change in angle.
Just gather it in one place, fold it over and staple in place. Next I needed to tape over where the two sheets overlap. I’m a little bit sceptical whether a cheaper non branded tape would be just as good but I went for the real stuff which again isn’t cheap but I saved on some tape by not taping over the openings as I’m about to cut them out. A quick note: the tyvek housewrap is only supposed to be exposed for up to 4 months before the cladding goes on but I think that’s designed for strong Californian sunshine and I’ve left mine for much longer, and you’ll know when it’s time to get on with the cladding when the red writing starts to fade.
So cutting out the windows and doors. You’ve probably seen on other videos this method of cutting a top flap into the Tyvek but this is designed for American-style windows which have a flange around the outside. Our windows in the UK are usually fastened into the brick through the sides of the windows so I had to come up with a way of cutting the Tyvek that suits our style of windows and this is how I did it: Now on to the windows and doors.
Originally I’d intended on getting them second hand and spraying the white U-PVC grey but as my garden room came along I felt it deserved better. I’d have loved to go for aluminium but budget constraints meant I’d be getting U-PVC instead. I found a company online called ModernUPVCwindows which again had great reviews and allows you to select the size down to the millimetre, remembering to leave at least 5mm spacing around the sides and top, as well as the ability to choose many other options.
In case you want to emulate what I did, here’s a quick look at what I selected. I spent just over £2,000 on the lot, which I thought wasn’t too bad, given what some companies try to charge. The sills come 10cms oversized so first up is to decide whether to have the sills straight like this or rebated. I chose a rebate as I thought it would make a nice feature but I discovered it really helps keep the window in position, preventing it from moving backwards in the timber frame and keeps all the windows and doors uniform.
To work out how deep to cut the rebate will depend on your style preference and what you’ll clad the walls with. I wanted my sills to only protrude slightly from the cladding so I factored in the timber battens and cladding and decided on a 6.5cm width rebate. I attached the sill caps with the same mitre-bond I used in the last video. I could then mark where to cut the rebates. 5 cm in from the sides and 6.5cm in from the outer edge.
Next I used packers in the gaps around the window to keep it in place. The trick is not to make it too tight so as to bend the window or door out of shape but tight enough so they don’t fall out. The number of packers you use will depend on the size of your windows but I used two at the top and 3 on each side for this window. The packers should be roughly 15cm away from the corners and you can of course combine the packers to fit the gaps.
For the next stages, I got three new tools: I then set about removing the beading. It’s actually better to remove these before putting the window in place but when removing them, it’s important to lay them out so you know exactly which ones came from where so I laid them out neatly on the floor. I started by fastening the bottom of the frame. I drilled the right size hole, then applied some sealant to stop any water getting in before driving the specialised screw that came with the windows.
I used two screws for the bottom. From there I moved the window into plumb and marked plumb with a sharpie on the sides so I could see if the window moved during fixing. I could then fix the sides and top. You can either screw through the packers or next to them. I think I prefer the latter but on this window I fixed through the packers. Now I could put the glass in. My windows came with special packers which have grooves that match those of the window frames.
The number you use will depend on the size of the window but a minimum of one each side. My glass had a specific inner and outer side so make sure you’re putting them in the right way round. Once in, I could add my normal packers to get the glass nice and snug. Now for windows and of course doors that open, you have to place the packers in a method called toe and heeling. Two packers at the top on the handle side and two packers at the bottom on the hinge side.
This stops the window from sagging over time and causing problems with opening it and the concept won’t be new to you. If you look at a wooden gate, it’s braced in much the same way - from top of the opening side to bottom of the hinge side. To get the beading back in place I sprayed some window cleaner to help lubricate and then hammered them back in. Always start with the shorter ones as these are the most difficult to get in and after the first one is done do the opposite side before doing the other two.
I then broke off the packers protruding from the window. I actually think it’s better to do this later on once they are held more firmly in place with the spray foam, which I’ll come to in a minute. I then moved on to the other windows and the doors. For the bigger patio style door I enlisted my girlfriend’s help but it proved too heavy to lift onto the sill and it didn’t help that our hands were half frozen of course.
Instead we attached the sill to the frame using smaller screws underneath so it could move as one. This is a pretty common way to install windows but I think I prefer the other method as you can adjust the window and door once in place to keep an even gap on all sides. Still, needs must. Once all were in they were looking good. Off-camera I installed the door handles and added the trickle vents for ventilation. If you’ve come this far you’ll find both very straight forward.
I also added PIR insulation between the joists on the front and back of the garden room and now I could move on to the spray foam. Now if you remember I showed two options for framing the corners but if you’ve done yours like mine, there are gaps between the blocking which need filling. I didn’t do it when raising the walls because I didn’t have the right size insulation to hand so to remedy this I drilled a hole wide enough to fit the nozzle of my foam gun and then filled them that way.
Back to my windows and doors- the foam had expanded about 3/4 of the way through so I came back and filled the rest from the outside. Once it had all fully expanded and dried I could cut off the excess. Off camera, on the outside I used silicon to seal around the windows and doors for extra air tightness and to stop any bugs digging into the spray foam. And finally I could pull off the plastic protectors for the big reveal!
A few quick notes. If the doors aren’t quite lining up properly then you can adjust with an allen key and do remember if you need building regs for your garden room you’ll need yours signed off. The last thing to say is that, installing windows and doors is a profession in itself and this was my first go so if you are a professional, you know, go easy on me! So what else is new? Well, that job I mentioned I was looking for, I started in January and it’s home-based which suits me perfectly, so it looks like I’ll be setting up an office space in my garden room eventually.
The discount for Rubber4Roofs is now available and about 30 of you have already taken advantage. I’ve also managed to get you guys a discount at FasciaExpert which is where my fascias came from and they also supply UPVC soffits, guttering and cladding. The code for that should be ready shortly. Both codes will probably change regularly so only email when you’re about to order and I’ll shoot the code across to you. Both are ongoing but of course if anything changes I’ll update the description or pin a comment.
Lastly I’ve been building a website to go with this channel and series and plan to go into more depth on each of the video’s topics. It’s still in development but take a look around and see what you think. Part of the reason for building the website is to showcase your builds and I’ve seen so many good ones coming along already, so take lots of photos and send them in once you’ve finished. So what’s next? Well, I’ll briefly cover how I framed my shower room and we’ll get stuck into the electrics and other things.
See you then everyone!
The words are the caption track's own and nothing is reworded or re-transcribed. Paragraph breaks are placed between sentences so the text reads as prose.
Free tools for your own script. No signup, no login.
Paste your draft and see where viewers are likely to drop off, with a rewrite for each weak line.
Paste the first 30 seconds of your own draft for a hook score and rewrites.
Check your draft against YouTube's advertiser-friendly guidelines before you record it.
Read this channel's public videos and transcripts, and download a writing brief for it.