Getting the transcript
Reading the captions from YouTube. A video nobody has opened here before takes 10 to 30 seconds; this page fills in on its own.
Getting the transcript
Reading the captions from YouTube. A video nobody has opened here before takes 10 to 30 seconds; this page fills in on its own.
FunkyScott47 · @funkyscott47
Where viewers went back to watch this video again, from YouTube's public Most replayed graph, lined up with what was said at that moment.
Words
4,532
Runtime
20:51
Speaking pace
217wpm
Reading time
19min
217 words per minute, above the 201 75th percentile of 349 measured videos. That distribution comes from the 349-video hook study.
Opening (first 30 seconds)
My last DSi modding video helped a ton of people, and today I have an updated version for you that's even better. In this guide, we'll be setting up custom firmware on your DSi to unlock its full potential. By the end of this video, you'll have a fully modded DSi that boots directly into Twilight Menu ++ where you can play your DS and Gameboy games, hopefully giving your console a new life. It's pretty straightforward, but here's everything you need for this guide. Of course, you'll need your DSi along with an SD card. It can be the one that came with your DSi or it can
109 words, the words spoken in the first 30 seconds at 217 words per minute.
Free, no signup. See how the first 30 seconds hold attention, with rewrites.
What this transcript is
Every word below is the caption track YouTube publishes for this video, pulled from the video itself and reproduced unchanged. It is not Prepublish's writing, not a summary, and not a re-transcription: it is the video's own published captions. English captions, generated automatically by YouTube, in the video’s original language. Source: the video on YouTube. A channel that would rather this page did not exist can ask for its removal through the contact page, and it is removed.
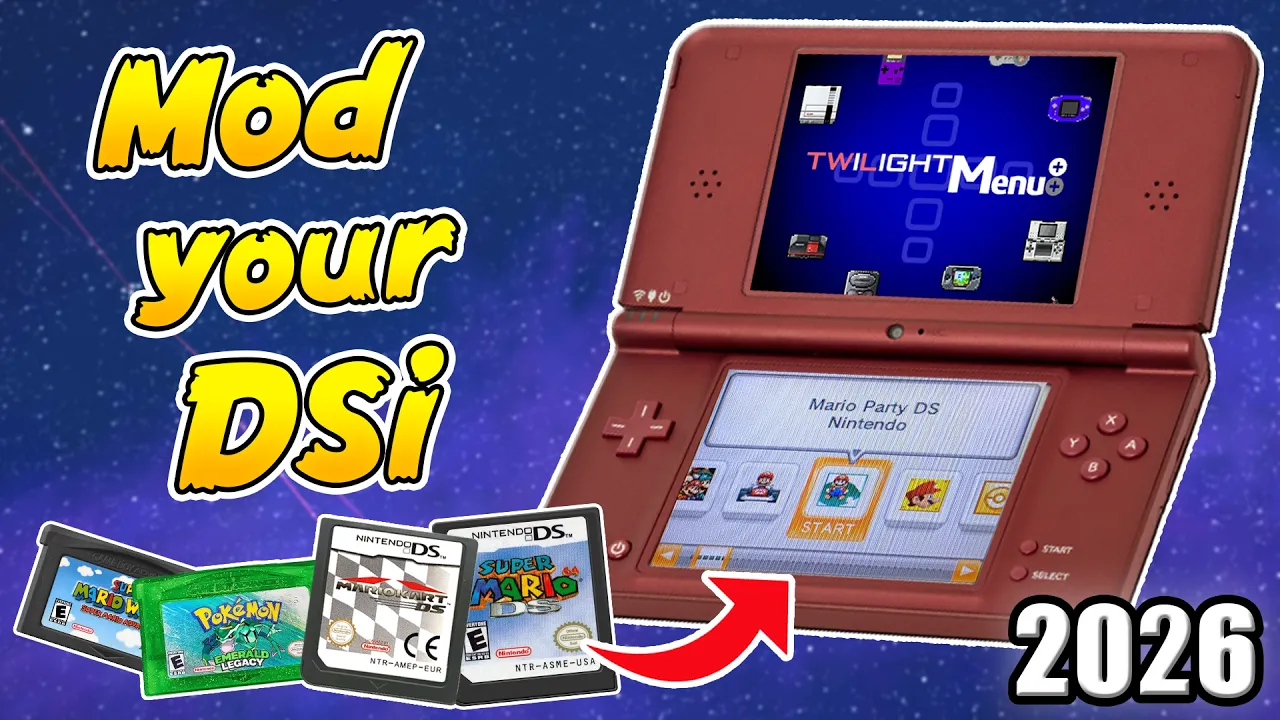
My last DSi modding video helped a ton of people, and today I have an updated version for you that's even better. In this guide, we'll be setting up custom firmware on your DSi to unlock its full potential. By the end of this video, you'll have a fully modded DSi that boots directly into Twilight Menu ++ where you can play your DS and Gameboy games, hopefully giving your console a new life. It's pretty straightforward, but here's everything you need for this guide.
Of course, you'll need your DSi along with an SD card. It can be the one that came with your DSi or it can be a brand new one. Both a regular sized SD or a microSD card with an adapter work just fine. Just make sure this plastic tab is pushed up, otherwise you'll run into issues. For the sake of the video, I'm going to be upgrading my 4 GB card that's in my DS already to the 16 GB card that's going to give me a lot more space.
And we're not going to lose anything that you already had on your DS before. I'll be doing this on Windows, but it will also work if you have Mac, Linux, Chromebook, or even a phone. You just need to be able to download and transfer files to your SD card. If your PC is like mine and does not have an SD slot, you'll need something like this USB to SD adapter in order to connect it. I'll have product links in the description if you're interested, but that is all you need, so let's begin.
So, getting started, I'll have a link to this Google Doc page I've created [music] in the description of this video. Now, if this looks different in the future, then I finally made a website. I'll get to it eventually, but this is going to have all of the information and links that we need. And there is a disclaimer, this video is for educational purposes only. If you're new to this sort of stuff, it's always a good idea to watch the video through once to understand the process before trying it yourself.
Because it's a video guide, make sure to read the description or pinned comment to ensure this guide is still up to date before starting. I'll either inform you myself or I'll pinned comments from you guys that have the date that you successfully followed the video. But with that out of the way, here's all the links we need, but there is one thing we need to check first. We're actually going to check if your DSi already has custom firmware [music] installed.
This could be the case if you buy it used off eBay and the person before modded it and then just didn't tell you or tried to hide it. So, in order to do that, just press and hold the A and B button at the same time and hit the power. And once it turns on, if you see the regular boot screen for a Nintendo DS, then your console is not modded and you can continue with the guide here. If you got a screen that looks like this, that means you already have custom firmware on your DSi and you can actually skip the exploit.
So, for you guys, I have a already has custom firmware link, so you can head here and then skip to the timestamp on the screen to continue the guide from there. But if you do plan to upgrade your SD card, make sure it's formatted properly, which we'll be doing shortly. But now that you know your DSi is not modded already, if you're using your existing SD card, go ahead and remove it from your DSi and place it into your computer.
That includes if you plan to upgrade to a larger one like I am in this video. We're going to make sure that you don't lose any data that's on it already. If you have a brand new SD card and you don't care to lose your data, you can skip this part and then insert your brand new one right away. And also, if you're just going to be using your existing SD card without upgrading to a new one, you can also skip this because it's going to be properly formatted already.
So, over in this PC, this is my existing [music] SD card. It's my 4 GB one. Inside, I have a DCIM and a private folder. DCIM is going to have all your pictures. As you can see, I have some pretty important ones and I don't want to lose them. So, if you also don't want to lose your stuff, highlight all the folders on your existing SD card, copy it, and then we're going to place it somewhere [music] on your computer. I'm going to quick make a folder and then I'll put them inside.
Paste. We can exit out of that. Now that we have those backed up, since I'm upgrading to my 16 GB card, I'm going to remove my existing one and place my new one in. So, this one's completely new. It's got nothing on it. We need to make sure that it's formatted as FAT32. So, if you right click on it, go to properties, mine is already FAT32, so I'm good to go. But if yours is something else, then you need to format it before continuing.
So, to do that, if it is 32 GB or lower, you can actually do that on Windows. So, if you right click on it, press format, you'll have an option to format it to FAT32. You can leave it at 32 KB, but formatting your SD card will wipe everything that's on it. So, if you didn't back up your stuff yet, make sure to do that so you don't lose it. But go through the prompts, press start, formatting will erase all data, press okay, and then it's done.
And then you can go back to properties and check that it's FAT32. Now, if you have an SD card that's 64 GB or larger, unfortunately, Windows is not capable of that. So, over on the doc, I have links for programs for Windows, Mac, or Linux where you can format it as FAT32 there. For Windows, it'll take you to this page. You just click the image to download. It will download GUI Format. You might have to press keep, but don't worry, it is safe.
And then over in your downloads, you can run GUI Format.exe. And then you just follow the prompts the same way we did for Windows [music] and make sure you select the proper drive letter. You really want to make sure you don't format the wrong drive. It does help to name it. I have DSi hit like, so I'm 100% sure that's it. And then allocation unit size, 32, and then go and press start. Do you really want to format it?
All data will be lost. Press okay, and it finished. Now, if you run into issues, make sure all of your file explorer windows are closed and then try again. And if it still doesn't work, you might have to restart your computer and then open the FAT32 format program first so that there's no other windows and then try. And then it should work. If it automatically goes back to a lower allocation unit size, don't worry, that should be fine.
But now that we're done formatting it, we are ready to continue with the guide. And a quick note before we get started, we're going to make sure file extensions are viewable. So, click on view, show, and make sure there's a check on file name extensions. This is going to clear some things up later on. So, head on back to the doc and we'll be using the official DSi written guide. So, I have a link here for this. It will take us to this page.
The reason we're following the written guide because if you do happen to run into any issues, they have troubleshooting links as we go along the guide. There's also an FAQ at the top and the full troubleshooting page. But now, let's get on with the prep work for our SD card. We'll start off by downloading the latest release of dump tool. So, click on that link and it will download a boot.nds file and then scroll down.
We've already checked if we have custom firmware on our console, so we're good there. We're going to be doing the memory pit exploit. So, continue to launching the exploit. And now let's get that file on your SD card. So, open up your downloads and then your SD card on the other side and just drag the boot.nds folder onto the root of your SD card. Press yes if Windows prompts you. We're done with that download. You can delete it, exit out.
Perfect. Now, you can eject your SD card and place it in your DSi. So, now go ahead and place your SD card into your console, power it on, and now we're going [music] to navigate to DSi camera, open that up. If you've never ran it, you might have to run through a tutorial real quick. So, go ahead and do that. And once you're inside, click on the SD card icon [music] here. Now, we're going to go into the album. This is where you can see my super important pictures, but we're looking for this Facebook icon here.
It's okay if you don't have one. You just need to be aware if you have one or not. So, once you have that in your head, we're good to go. You can exit out, power off your console, take your SD card out, and put it back in your computer. So, now over on the guide, scroll down where it says section two memory pit. We're going to download a file and this is where you need to remember if you had a Facebook icon or not. I personally did, so I'm going to be grabbing this top file.
If you did not, just click on the bottom one. So, download the proper file. Now that we have the file, open up your SD card, go inside the private folder, DS, app, and then you should see a folder with a bunch of numbers. If you don't see this folder, put your SD card back in your DSi and make sure you click that SD card button as that will generate it. But go inside of this one and you should see a pit.bin file. We just need to rename this file.
So, right click, rename, and just call it tip, t i p. And now we can move this to the side, open up your downloads, and we're just going to grab the pit.bin file we downloaded and put it inside of this folder. Press yes if Windows prompts you. Look at that, both of them are 47 KB. Once it's in there, you can delete the pit.bin from your downloads, exit out, go back to the root of your SD card. And for this exploit, we do need to get rid of this DCIM folder.
So, we're going to back it up again, or if you still have your original backup that we did earlier, you can skip this, but you can copy, place it somewhere safe, and then delete it from your SD card. And again, if you don't have any pictures, this won't matter. This only applies to anyone who already has pictures that they don't want to lose. But with that folder gone, your SD card should look like this. And now we can eject it and place it back into our DSi.
With your SD card back in your DSi, open it up, power it on, and we're going to head back into the DSi camera. So, load in. And a quick warning, do not take any photos while we do this exploit, otherwise you'll have to redo the process. And here, we're going to select SD card. If it's already selected, it will look like this. And then just click the album button. You should see a magenta flash on your screen. That means the exploit was successful [music] and you should see this page.
Now, if you did not get to this screen, make sure to check the written guide for all the troubleshooting tips. It could be a couple different things. But now, a quick note for anyone who found out their DSi was already modded before they started, in order for you to get to this screen, on this page here, you need to download dump tool. So, click on that. Simply place it on the root of your SD card. Press yes if Windows prompts you.
Now, you can eject your SD card, put it into your DSi, and when you power it on, press and hold the A and B button to get to this screen where you can select dump tool at the bottom. Then, you should be on the same screen for the NAND dump as everyone else. All right, with that out of the way, let's get back to dumping our NAND. So, just press A and it will begin. If you don't know what a NAND dump is, we are backing up your internal storage.
That way, if anything bad does happen, don't worry, it's very rare, you'll be able to fix it using your NAND dump. Currently, 3% done, so I will meet you when it is complete. Also, if you have a red light for the battery, like me, go ahead and plug it in. So, that took about 7 minutes and you should see that is 100% complete. But now, we're just going to hit the start button to exit. Now, we're going to take the SD card out and place it back into our computer.
Open up your SD card and you should see a new folder that looks like this. Go inside and this is your NAND backup. We're going to place this somewhere safe. So, go back and you can rename this folder. I'm going to rename mine with the console type and the date. You can always do this NAND backup again in the future once you have more on your console and that way you update it, so it never hurts to have the date in there, as well.
But this, you can go ahead and cut it and place it anywhere on your computer. It just needs to be in a safe spot that you're not going to lose it. So, if you have a cloud storage, that's a good idea to put it there, as well. But once it's somewhere safe, open up the guide again and we're going to continue to dumping NAND and we already did this part, so keep scrolling down to where it says choosing a menu. Click on that one.
For this guide, we're going to be using Twilight Menu, but if you do prefer a different one, you can read up and see which one you want, but I'm only going to be showing Twilight Menu in this guide. So, click on Twilight Menu plus plus and where it says download the latest Twilight Menu, click on this link. It should be a direct link for the download. Now, if that did not work for any reason, you can go to this release page and it has the latest version, as well.
You're going to want to grab the Twilight Menu {dash} DSI.7z, but hopefully that direct link work and you have the download ready. But once you have that file, scroll down to [music] continue to installing Unlaunch. If you found out your DSI was modded before starting this, you can skip installing Unlaunch because you already have it. Unlaunch is going to let us auto boot [music] into Twilight Menu every time you turn your DSI on.
Otherwise, you would have to run the exploit every single time in order to get to Twilight Menu and play your games. And there are some warnings here, that's because Unlaunch is installed to your actual system menus, there's a slight risk of getting a brick. But don't worry, it's very safe, just the off chance that it might happen that we have to warn you. But I do highly recommend installing this, it is so much better when you auto boot into Twilight Menu.
So, here, scroll down and click on safe Unlaunch installer. That will download that file there. And now, we can open up your downloads and then your SD card. First thing we're going to do is delete the current boot.nds file off of your SD card, that way you should only have a private folder. And for this part, you do need an extraction software. Windows has a built-in one, but it's recommended to use 7-Zip, it's free and much better.
But for the Twilight Menu folder, just right click, go to show more options, 7-Zip and extract to. You can delete the zip file, open up the folder and we're going to click on boot.nds, hold control and click on nds and roms. So, with all three selected, drag it onto the root of your SD card. Perfect, you can go back and delete the zip file. And now, we're going to drag the Unlaunch installer onto the root of your SD card, as well.
Click yes if Windows prompts you and then you can delete the file. And this is what your SD card should look like. And now, we can eject it and go back to our DSI. For those of you who had a DSI previously modded, you can simply press and hold A and B while booting and then select Twilight Menu plus plus. But for everyone else, we need to run the exploit again. Now, before we actually install the menu, there is one important thing you should know.
So, we're going to go to system settings. You can see your system version here. Mine is 1.4.5, but there is one firmware version where it will not work. So, if you see version 1.4.2, you're going to have to update your system to the latest firmware. So, you [music] can do that as normal, on the fourth page, you go to system update. You do need an internet connection. But if your firmware version is not that number I mentioned, then it doesn't matter, you can proceed without system updating.
But once you're sure, go back to the DSI menu and now we're going to go [music] back to the DSI camera. Load in. Make sure SD card is selected and we'll click album to run the exploit again. You should see that screen. And this time, we're now at the Twilight Menu setup. So, we'll just go through these prompts. Just press A to select English, select your region and this doesn't change anything for your actual DSI, so it doesn't technically have to match your actual console.
But my region, USA, Canada, actually, to be exact. For now, we will load into the Twilight Menu by Rocket Robz. So, this is Twilight Menu. Don't worry, we're going to configure the ROMs after we get Unlaunch installed. So, to do that, you should see safe Unlaunch installer by Edo9300, press A to load it. Another reminder, if your battery indicator is red, make sure it's plugged in. But go ahead and press A. So, here we'll be able to install Unlaunch, but first, if you want a custom background, press A on custom backgrounds.
If you want to preview each one, just select A on which one you want to see and then the preview will be on the top screen. Doesn't look any different for the black, but I'll press no, change it to Clippy and that's what that background looks like. So, once you pick one, just press A on yes and then that one will be selected and then go down, press A on install Unlaunch, press A on yes. Install successful. We're good to go.
Press A and now, we're going to hit [music] the power button and your console should reboot into this menu, which is the file menu for Unlaunch. So, now we can go and change so that when you turn your DSI on, it will load directly into Twilight Menu. So, to do that, on the top screen, use the D-pad to go to options, press A and then where you see no button, that means when you turn on your console not holding any buttons, whatever we have here selected will load.
So, right now, it's file menu. So, press A on no button and on this page, we're going to scroll down until you see Twilight Menu plus plus. Press A on it and now you can see it says boot.nds where it says no button. Auto boot is now officially set up for our Twilight Menu. If you want any more button configurations, for example, if you want to press and hold A to get the original DSI menu, you can press A on button A and then go to launcher.
And now, when you power on your device holding the A button, you'll load into the regular DSI menu. But once you're good there, go down to save and exit and then you can just power off your console. So now, I'll quickly show you, we turn it on not holding anything and then we load into the Twilight menu. Just like so. So now, with that all set up, we can power off our DSI, take your SD card out, we'll get it cleaned up from all the files we don't need anymore and then also set up our games.
So, on your SD card, we can start off by going into private, DS, app and this folder [music] and we can delete the pit.bin. Delete that. You should be left with your tip.bin file. We're going to rename that one back to pit. Go back to the root of your SD card. You can delete the Unlaunch installer, so delete that. And now, at this [music] point, if you had a DCIM folder, you can go ahead and place that back on. And now, you have all of your important pictures back and then you can delete your old DSI card if you backed it up like I did to upgrade.
And then, this is what your SD card should look like. Now, let's set up our games. I'm going to be showing you DS and Game Boy games. So, go into your ROMs folder. We'll start off with Game Boy. There should be a GBA folder, but if not, just go ahead and create one. Go inside, so I have two, I have Emerald and Fire Red. I'll place them [music] in. Now, Game Boy games need to be in a {dot} GBA format or they can also be {dot} agb or {dot} mb, but GBA is the most common, I believe.
And if you're wondering where to get them, I can't tell you on this video. But on a completely unrelated note, you can check the pin comment. So, GBA games are set up. Now, we'll go into the NDS folder and I'll place a bunch of different games in here. And these files should be a {dot} nds file. So now, we have Game Boy and NDS games set up. If you're curious what other games that Twilight Menu supports, I will have this linked in the description.
You can view a list of all the supported consoles. It'll show you the console, the loader that it uses >> [music] >> and the extension type for the game files. Now, not all of these are built in, so back on this page, you can follow the prompts to add more features. But that's good, we have Game Boy and NDS games set up. We have our SD card clean. Now, we can eject our SD card for the last time in the video and go try out our games.
Place that back in. Straight into the Twilight menu. And now, to play your games, you go into the ROMs folder, go inside the folder of the game you want to play and then you should see your games inside. Now, if you want to change settings for each game, press Y on the game you want to change the setting. You can access your cheat menu here and there's a few different options, even an option to remap the buttons. But the default settings should be good, they're definitely good enough for me.
I'm going to press B and and then, go ahead, press A and you'll load into your game. Loading your very first game is going to take a little bit longer, but it'll be quicker on the next one. And there we go. That took a solid 30 seconds, so be patient on the first time you load. You're now playing your NDS game. If you want to exit the game without turning your console off, here's how you do it. Hold the left bumper, right bumper, down on the D-pad and select.
It'll give you this menu, you can reset the game, screenshot and at the bottom, you can quit the game. And then also, if you don't want to do all this, while you're in the game, you can press the power button and because you have Twilight Menu as the auto boot option, it will boot back into your Twilight Menu ++. So, there's two different options for for leaving the NDS games, and we're back here. And then, if you want to switch over to your GBA games, press B, go find your GBA folder, press A to load, and there you go, you're ready to play.
If you want to access the Game Boy GBA Runner settings, you can click the bottom screen. If you want to exit a Game Boy game, you can just simply press the power button, it'll reload into Twilight Menu. If you found this guide helpful, I'd love it if you could hit the like button for me. And if you did happen to run into any issues along the way, or you just have questions, feel free to comment down below, or for quicker and better help, you can join my Discord server linked in the description, where there's helpers there to assist your troubleshooting.
Just remember to be respectful. But, with all that being said, I hope you have a fantastic time playing your DS and Game Boy games on your newly modded [music] DSi. I'll see you on the next one. Stay funky, and happy modding. Woohoo!
The words are the caption track's own and nothing is reworded or re-transcribed. Paragraph breaks are placed between sentences so the text reads as prose.
Free tools for your own script. No signup, no login.
Paste your draft and see where viewers are likely to drop off, with a rewrite for each weak line.
Paste the first 30 seconds of your own draft for a hook score and rewrites.
Check your draft against YouTube's advertiser-friendly guidelines before you record it.
Read this channel's public videos and transcripts, and download a writing brief for it.
Most replayed moment #1
12:432.8x the video's typical replay level
built-in one, but it's recommended to use 7-Zip, it's free and much better. But for the Twilight Menu folder, just right click, go to show more options, 7-Zip and extract to. You can delete the zip file, open up the folder and we're going to click on boot.nds,
Said at 12:35
Most replayed moment #2
10:512.1x the video's typical replay level
the future once you have more on your console and that way you update it, so it never hurts to have the date in there, as well. But this, you can go ahead and cut it and place it anywhere on your computer. It just needs to be in a safe spot that you're not going to lose it. So, if you have a cloud storage, that's a
Said at 10:44
Most replayed moment #3
14:112.0x the video's typical replay level
Make sure SD card is selected and we'll click album to run the exploit again. You should see that screen. And this time, we're now at the Twilight Menu setup. So, we'll just go through these prompts. Just press A to select English, select your region and this doesn't change anything for your actual
Said at 14:04
The graph counts replays. It does not show where viewers stopped watching.
Sentence shape
| Measure | This transcript |
|---|---|
| Sentences | 287 |
| Average words per sentence | 15.8 |
| Longest sentence | 48 words |
| Questions asked | 1 |
| Sentences containing a number | 24 |
Most used terms
Filler phrases
22 in total: like 15 · actually 5 · sort of 1 · you know 1.
A literal whole-word count of the same phrase list the Prepublish browser extension uses, so a phrase inside another word is not counted and a phrase used in its ordinary sense still is. It is a count and not a judgement.