Getting the transcript
Reading the captions from YouTube. A video nobody has opened here before takes 10 to 30 seconds; this page fills in on its own.
Getting the transcript
Reading the captions from YouTube. A video nobody has opened here before takes 10 to 30 seconds; this page fills in on its own.
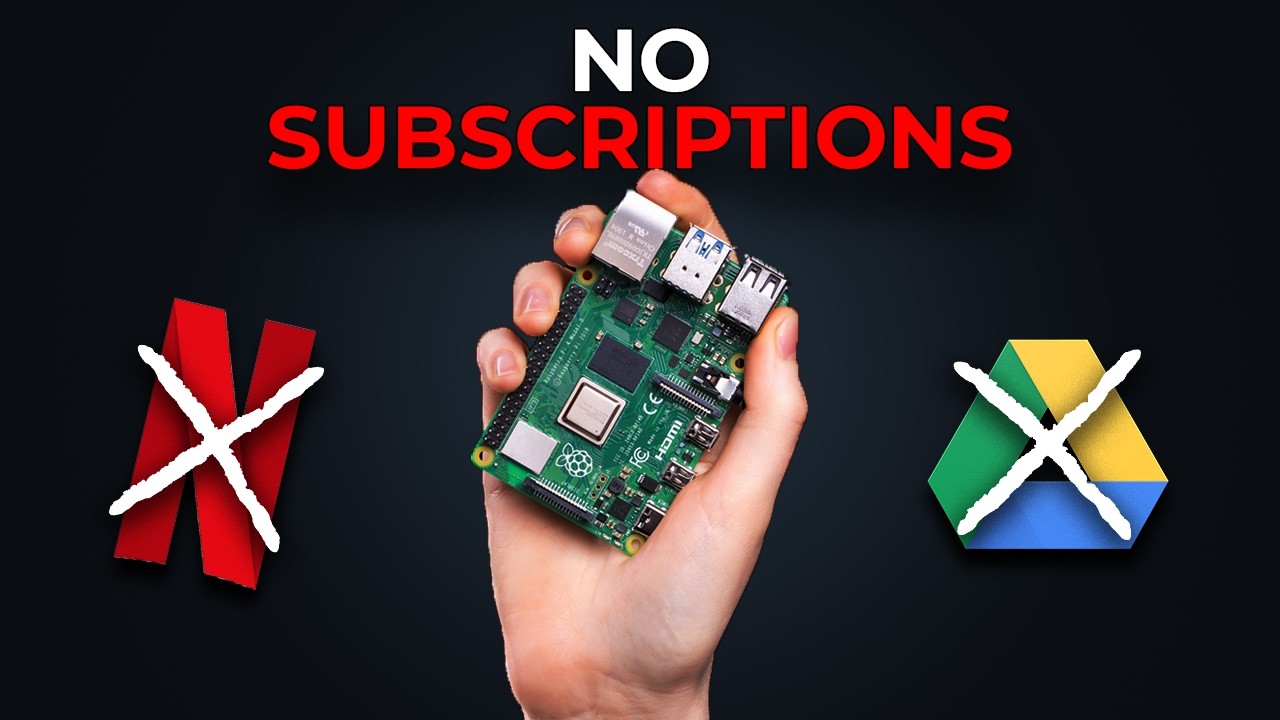
Tucker · @Loggedbytucker
Where viewers went back to watch this video again, from YouTube's public Most replayed graph, lined up with what was said at that moment.
Most replayed moment #1
15:389.6x the video's typical replay level
to none. That's because the Pi does not have a usable hardware video encoder, no graphics card. So, in this video, I'm not going to show you how to acquire content. So, I'm just going to use this fair use video off of Blender right here. I would definitely avoid going to Reddit and searching up anything about piracy.
Said at 15:30
Most replayed moment #2
20:004.3x the video's typical replay level
just don't want to have to do this again. I guarantee if you don't do this 6 months from now, you're going to be like, why the hell is everything not working? And have no idea. So just come in here and do this right now. And tail scale on the phone works similarly. Just download the Tailscale app from the App Store or
Said at 19:54
Most replayed moment #3
11:154.0x the video's typical replay level
the containers. Docker composs. So you should see these four services running here. So now image is up and running. We could go into our browser and go to media.loc2283. That is the port that image will be
Said at 11:08
The graph counts replays. It does not show where viewers stopped watching.
Words
4,089
Runtime
20:49
Speaking pace
196wpm
Reading time
17min
196 words per minute, between the 181 median and the 201 75th percentile of 349 measured videos. That distribution comes from the 349-video hook study.
Opening (first 30 seconds)
So, you bought a Raspberry Pi and want to set up your own home server. I'm going to teach you how to do it right now. I'm going to be using this kit from Canit. It has everything you need. It has 128 GB SD card, a nice little case to put your Pi in, a heat sink, and a fan to keep the Pi cool, and a power supply, a USB micro SD card reader, and finally, the actual Pi itself. The only things you'll need that this kit doesn't include is an Ethernet cable and some
98 words, the words spoken in the first 30 seconds at 196 words per minute.
Free, no signup. See how the first 30 seconds hold attention, with rewrites.
Sentence shape
| Measure | This transcript |
|---|---|
| Sentences | 358 |
| Average words per sentence | 11.4 |
| Longest sentence | 42 words |
| Questions asked | 1 |
| Sentences containing a number | 29 |
Most used terms
Filler phrases
23 in total: basically 10 · like 8 · sort of 2 · actually 1 · kind of 1 · you know 1.
A literal whole-word count of the same phrase list the Prepublish browser extension uses, so a phrase inside another word is not counted and a phrase used in its ordinary sense still is. It is a count and not a judgement.
What this transcript is
Every word below is the caption track YouTube publishes for this video, pulled from the video itself and reproduced unchanged. It is not Prepublish's writing, not a summary, and not a re-transcription: it is the video's own published captions. English captions, generated automatically by YouTube, in the video’s original language. Source: the video on YouTube. A channel that would rather this page did not exist can ask for its removal through the contact page, and it is removed.
So, you bought a Raspberry Pi and want to set up your own home server. I'm going to teach you how to do it right now. I'm going to be using this kit from Canit. It has everything you need. It has 128 GB SD card, a nice little case to put your Pi in, a heat sink, and a fan to keep the Pi cool, and a power supply, a USB micro SD card reader, and finally, the actual Pi itself. The only things you'll need that this kit doesn't include is an Ethernet cable and some kind of storage.
I have an external Samsung SSD that I'll be using that's 1 TB. First things first, grab your USB micro SD card reader and pop that micro SD in and plug it into your computer. Hop on your computer, go to raspberrypi.com/software. Scroll down here. We can see the options. Download for Windows, Mac OS, or Linux. I'm on Windows. So, once we have the imager downloaded, select the Pi model. This is Pi 5. Scroll down on the operating systems and select other.
We want to install Raspberry Pi OS light. Select your storage device. This is just the micro USB. and choose your host name. I would recommend calling it media pi like I do so the commands are similar that we're going to be using. Select your time zone and country. Next, we're going to create a username and password for our Pi. This is how we're going to connect into it. I'm going to choose the username Tucker. You could choose whatever you want here, but this will change the commands you're using.
I'll show you in the section coming up. You could enter your Wi-Fi name and password here, so your Pi will connect over Wi-Fi. Since we're using an Ethernet, this won't matter, but it is an option. But if you're doing any sort of video, this will not be good. So use Ethernet. Make sure to enable SSH and have use password authentication selected. We could skip past this screen here and we could write to the Pi. This will take about 10 minutes so we can build our Pi out while we wait.
Next, we're going to grab our Pi and grab our case. This breaks out into three pieces like this. Next, we're going to grab our heat sink. This goes on the pie. You could always line it up with this tiny little one in the top. And you could line it up without taking the stickies off if you want. Take the stickies off. Stick it on like so. And the next thing, this little tan tab here, you're going to pop it off with your fingernail.
This is the fan port. And make sure you plug this in the right way. You want the yellow wire to be towards the outside of the pie like this. So next, you want to snap the pie into the bottom piece of the case. You'll know how to line it up because it has these cutouts for the ports here. Line up the middle piece and snap it back on. And the fan should snap into the top piece here perfectly. And then you can just snap that on.
And boom, you have your Pi assembled. Now, on the back, if you look, it has a slot for the micro SD card. Now, you're going to take your USB out of your PC and slide that micro SD card into that slot nice and firm. Make sure you line it up correctly. We're almost finished with the in real life part. Grab your power brick. Make sure you plug this into the USBC port marked power, as you can see right here. And while we're at it, plug your Ethernet cable into the Ethernet port on the other side of the Pi.
Now, plug that sucker in. We'll also plug our external hard drive into our Pi here. Just a warning, this will erase everything on the drive. So, make sure before you do this, you back up anything important on here. And plug the other side of your Ethernet cable into your router so you can get some internet on that thing. And now back to the computer. Now, if you're on Windows, open up the command prompt. And if you're on Mac OS, open up the terminal.
After this step, all the rest will be the same. Now, before we jump into it, I need to preface this. If any errors or weird things happen, I highly, highly recommend you use chat GPT or Claude or whatever LLM of choice. Paste the errors in. You have all the commands you've run and it will help you. I promise. Click on the first link in the description. It'll bring you to this page. This is a write up and it has every single command that I'll be running in order.
It has a placeholder where I write Tucker. I replaced it with username. Make sure you're replacing that with whatever you change your username to. Same thing with Media Pi. Change that if you didn't name it Media Pi. Please read this carefully. has a little bit more extra information. All right, now that we got that out of the way, let's jump into it. So, we're going to SSH into our Pi here, which basically means we're going to go inside of it.
So, I'm going to write SSH tucker at media.local. If you chose a different username, you're going to have to change Tucker to whatever you chose. Type in yes, and now enter your password. When you type, your password will not show. And to know it's working, you're going to have this green and blue Tucker at media here. That's how you know it worked. The first command we're going to run is pseudoapp update double and sign pseudoapp full upgrade-y.
This basically fully updates all the software on our Pi. This will take some time. Just let it run. Once that finally finishes, we're going to do pseudo reboot. This restarts our Pi and it will kick us out of the SSH. So, we'll need to sign back in. Quick tip, if you use your up and down arrow keys, you can scroll through your past terminal commands. So, you don't have to type in SSH each time. You could just go up, press enter, type your password in, and get right back in.
Next, we're going to see if our time zone is set correctly. Make sure that matches up with the time zone you're currently in. Image uses this to timestamp photos. If that time zone's wrong, you could use this pseudo time date ctl set-time zone command to set that to whatever you need it to be. We're going to run this command here. This will confirm that we booted off of the SD card. and DFH will show the amount of space we have on there.
All right, the next step is we're going to reformat our external drive if you have one. This command will just list all the devices that are plugged into the Pi. We can see it has the name, the model, the size. My external drive is named SDA, so I'll be using that in all the future commands. Substitute that if yours is any different. Now, we have a couple commands that we need to run in a chain here, and they all do different things.
So, we're going to do pseudo uount dev sda1. This detaches the partition from our file system tree. Our next command pseudo wipe fs- a dev sda. This erases file system and partition table signatures. So, we're basically just clean slating our drive here. Now, pseudo parted dev sda script nk label gpt. We're writing a brand new partition table to the drive here. Now we're going to create a partition spanning the entire drive with pseudo parted dev sda script mk part primary ext4 0% 100%.
This is just making sure this gets 100% of the drive. Now we're going to do pseudo mkfs ext4-lb bulk dev sda1. This actually builds the ext4 file system structure inside of the partition we've just made. This command might take a couple minutes. Just let it run. And now we're going to mount that partition with pseudo blkid dev sda1. Now this uyu ID here, we want to copy this. Make sure we do not paste the quotes when we paste this in.
We're going to go into pseudo mkdur-pnt storage. This creates an empty directory here. Now we want to do pseudo nano/etc/fab. This opens our file system table in the nano editor. Use your arrow keys to go down to the bottom of this file to the last line. And we want to add as the last line UYU ID here and the rest of this. I would highly recommend copy pasting this and then just deleting it and writing out the rest of your UYU ID.
We want to make sure there's no typos in this at all. Once we did that, we want to save. So press Ctrl X Y to save and then press enter. So now we want to do pseudo mount dash A. This mounts everything listed in that fstab directory we just made. If you get this hint here, you could just use this command systemctlmon-reload. It'll just reload this. Just enter your password here to confirm this. Now to double check that worked, we want to do df-h storage. this report space on our file system that's mounted.
So, I have a 1 TBTE drive here. I'm expecting to see this 916. Now, we want to make sure this survives our reboot here. So, we're going to do pseudo reboot again. We're going to wait for the Pi to come back up and then we're going to SSH back in. Once we do that, we're going to run that same command again, df-h/s storage, and we're going to hope to see the same output as we saw before. This is getting a little cluttered, so I'm going to use the clear command here.
This just wipes everything off of your terminal. So you could look at a blank slate. All of your previous commands are not deleted or anything. This is just decluttering basically. Pseudo chown-r user user/nt storage. This will set both the owning user and owning group on the directory and everything inside of it. So normally a freshly formatted drive is owned by root. So this will let our user access this. We're going to do four MK dur which basically means we're just creating folders.
So, we're going to create two for image and two for our jellyfin here. And we can run find mnt/stom max depth 3 to see everything under that path and make sure this all was created. Now, for the fun part, we're going to install Docker. We're going to run a curl command here. So I need to just preface this by saying be very very careful running curl commands. Do not copy paste curl commands from random places on the internet.
Always verify what they do. So this curl command, we're just going to Docker. So you could go to this website and double check, but do not just paste random curl commands in your console. This downloads Docker's official install script and pipes it straight into the shell to execute. So once that installs, we're going to run pseudo user mod- a capital G docker and then dollar sign user. We're just adding our user to the docker group here.
And we can go exit to get out of there. Now we can ssh back into our pi here. And we're going to verify docker ran with docker run d-rm hello world. This just downloads a tiny test image and runs it and make sure it works. We could also run docker compose version and we can see our docker version right here. Now we're going to install image. So mkder dur-p tilda which is the squiggly line next to one back slash image and and cd squiggly line back slash image.
This creates our image folder and brings us into it. So we're going to run a wget command here. This downloads image from their GitHub page. And we're going to also run wget.v EMV. We're creating environment variables that the compose file reads. Just copy paste these in. So we're going to edit that file we just made. Nano.ev. So we're going to change four of these lines in here. Leave everything else alone. I have put these into the file.
Obviously if your time zone is different, change that. Same thing to get out of this. We're going to controll x y then press enter. Now that we have image installed, we can start it up. So docker compose up-d. This reads that composer file we just made and downloads anything missing and brings it up. This should take a few minutes. Once that's done, we'll verify the containers. Docker composs. So you should see these four services running here.
So now image is up and running. We could go into our browser and go to media.loc2283. That is the port that image will be running on. So we can create an account here. Email and password. This is entirely local and not connected to anything. You can install image from the app store or the play store on Android or Apple and the server endpoint URL will be the exact same except it will have back slash API after and you can now mess around with image.
I'm not going to tell you how to configure this in this video but it's pretty self-explanatory. They also explicitly tell you about the 321 rule. If this is going to be your only backup for your photos, I would not recommend it as it says right here. So, the 321 backup rule is you just keep three total copies of your images stored on two different types of media with one copy kept offsite. I don't do this personally.
If you want to not pay for cloud storage, you could have an extra drive. You could leave it at your buddy's house. You could do a backup off of this every once in a while in case a drive failure or your house burns down or something. Better safe than sorry. If this is your only photo backup plan, I would highly recommend having some other point of failure here. Now that we have image set up, let's set up jellyfin. So, we're still under the image directory here.
So, let's just exit and ssh back into the pi to get into the root directory. So, mkdur-p tilda/jellyfin and and cdt tilda back/jellyfin. Same thing as the image. We're just creating a folder here and then going inside of it. The next thing we're going to do is paste in this long print f command here. This just writes everything in here nicely so we don't have any sort of indentation or weird things happen. And we can validate that with docker compose config.
One thing to double check is this user portion here. It's 1,000 1,000. If you use this command id-u and and ID-G, this will print out your user ID and make sure that matches up with the,000 or else you will have to change that, but it should default to 1,00 1,000. All right. And now we're going to create these directories here. mkdur-p tilda back/jellifin back/config tilda jellyfin cache. This creates two bind mount folders as our user.
If we don't do this in this order, we're going to get some access denied errors. I ran into an issue here that I had to change. You might not, but my jellyfin did not start. If you run get cf page size, this will print the kernel's memory page size and bytes. And if it's 16384, then that will cause an issue. This needs to be 4096. If yours has the same thing as mine had, you go into pseudo nano back/boot back/firmware back/config.txt.
And at the very bottom, you add this kernel command. So, it's kernel equals kernel 8. This forces the Pi to boot at the 496 page kernel instead of the Pi 5 default. So, we're going to save that. Crl X Y, then enter, and we're going to pseudo reboot again and wait for that to reboot. Once it booted up, SSH back in. Type your password in. And we're going to run that get cof page size command again. And we're going to get 4096.
And we're going to run docker ps. This should not be restarting anymore. And we should have jellyfin up and running now. So same thing. We're going to go into jellyfin now and set it up. So we're going to go to media.loc8096. That is the default port for Jellyfin. We're going to choose our language. We're going to create an admin user and then we're going to create our media library. So, first we're going to change the content type to movies right here and change the display name to movies.
And for the folder media folder under media movies, click okay. And then we're going to do this again for the TV. So, content type shows display name TV folders media TV. Okay. metadata language. We're skipping this page and we're going to leave allow remote connections checked. We're almost done with the jellyfin setup here. Just sign in with your username and password you just created. One more thing we're going to double check here.
Since this is a Pi setup, we're going to make sure that transcoding hardware acceleration is to none. So, click this little hamburger menu in the top left and go to dashboard. After that, go to the playback menu and transcoding and make sure this hardware acceleration is set to none. That's because the Pi does not have a usable hardware video encoder, no graphics card. So, in this video, I'm not going to show you how to acquire content.
So, I'm just going to use this fair use video off of Blender right here. I would definitely avoid going to Reddit and searching up anything about piracy. I just wanted to throw that out there. So, if you accidentally stumbled upon that, you could know to avoid that. The next thing we're going to do is set up our Samba. This basically lets us have the Pi as a location on our computer and we don't have to do any commands to get new movies or shows in.
So it'll just live on your Windows Explorer or your Mac Explorer. So back into the Pi here, make sure you're performing these commands at the root of your Pi. So if you still see the jellyfin like I have here, do cdt tilda to get to the root. We're going to do pseudoapp install-y samba samba-combin. This installs samba, which is basically a network file sharing protocol. This will take a few minutes to run as well. Just wait it out. and we're going to paste in another print f command.
This will just basically make sure there's no typos in this. Just a reminder, make sure you're replacing the tuckers or the username placeholder with the username you've been using this whole time. We could run tail 12/cambba smb.f to make sure this all looks good. So now we want to set a samba password. So, pseudo SMB pass WD- a user. This creates a password for our user that we have here. I would just make this the same as your PI password to make it easy to remember.
Now, we're going to do pseudo systemctl restart SMBD and an pseudo systemctl enable SMDB. Restarts and reloads the service. So, it picks up the config change we just made and enables it to start automatically if your Pi ever reboots. So now this differs a little bit on Mac and Windows here. For Windows, you're going to go to file explorer. You're going to click the address bar and type in the following command. Back slbacks/media.local/media.
We're going to enter our username and the password we just made for Samba and probably tick remember my credentials so it doesn't have to do this anymore. So now you can see we're connected. We can see the movies and TV folders, but we need to do one last step to make this permanent. So, right click on this PC, go to map network drive here, and then you could just select whatever drive name. I'm just going to keep Z.
And then type in that same link/media.local/media. And once you click finish, now we can see the media drive is located in our Finder permanently. For Mac OS, it's a little easier here. Go to Finder and command K. We're going to type in SMB colon/media.local connect registered user. We're going to put our username in here and the password. And then we're going to select media share and it mounts it to Finder like it does any external drive here.
So now you can drag and drop files into your server like you would any other file or folder on your computer. You can use the command line to bring in movies and shows, but this is just a way easier way if you're not comfortable with the terminal. So, back on our Windows PC here, we dragged in that free Blender movie and we're going to pull it up in Jellyfin here. As we can see, it's not there. So, we want to go to our dashboard and click scan all libraries.
And then you can see we got Big Buck Bunny running, baby. So, right now, your movie, shows, and photos are only accessible when you're on your home Wi-Fi, which is obviously not what we want. So we want to install away so we can access this on our phones from anywhere. For that we're going to use an app called tail scale. So we're going to run another curl command here. This will detect our distribution and install the right tail scale package to our pi.
Once this runs we're going to run pseudo tail scale up. This will start the tail scale client and begin authentication. Tailcale is basically a VPN that every device you log in gets a stable address and can reach every other device directly no matter where they are. No fancy port forwarding or anything complicated. It makes it super super easy. I'm going to sign into Tailscale here. I'm just going to use my Google account for ease of access so I can log in on my phone.
After the initial login, you're going to want to do one thing here. You're going to want to come in here and disable key expiry on your Pi. By default, these keys expire after 6 months. So basically, you just don't want to have to do this again. I guarantee if you don't do this 6 months from now, you're going to be like, why the hell is everything not working? And have no idea. So just come in here and do this right now.
And tail scale on the phone works similarly. Just download the Tailscale app from the App Store or Play Store, depending if you're on iOS or Android. Make sure you're logging into the same exact account. And we're just going to toggle the VPN on. If this is your first time doing this on iOS, you're going to have to accept a VPN configuration prompt. Just accept everything. And boom, you should see a VPN come on in the top of your screen.
And now you're ready to connect from anywhere. If you have the image and jellyfin apps, you can test to see if they're working. Now, type in Media 8096 for Jellyfin. and media pie 2283 per image. And this should be working flawlessly now. You can see here in the command center, I'm not connected to Wi-Fi. And at the bottom, I am on the VPN. So, this should be working flawlessly now. Thank you so much for watching. Subscribe and if you have any questions, let me
The words are the caption track's own and nothing is reworded or re-transcribed. Paragraph breaks are placed between sentences so the text reads as prose.
Free tools for your own script. No signup, no login.
Paste your draft and see where viewers are likely to drop off, with a rewrite for each weak line.
Paste the first 30 seconds of your own draft for a hook score and rewrites.
Check your draft against YouTube's advertiser-friendly guidelines before you record it.
Read this channel's public videos and transcripts, and download a writing brief for it.