Getting the transcript
Reading the captions from YouTube. A video nobody has opened here before takes 10 to 30 seconds; this page fills in on its own.
Getting the transcript
Reading the captions from YouTube. A video nobody has opened here before takes 10 to 30 seconds; this page fills in on its own.
Nate Herk | AI Automation · @nateherk
Where viewers went back to watch this video again, from YouTube's public Most replayed graph, lined up with what was said at that moment.
Most replayed moment #1
5:283.3x the video's typical replay level
and then I want the lid to be put back on, no shadows, no hands, no reflections." It spits out this prompt, I put that into Kling, and here's the result. I haven't watched this yet, so hopefully it's good. Okay, interesting. I mean, obviously we
Said at 5:22
Most replayed moment #2
5:522.7x the video's typical replay level
downloaded that video. I'm just going to drag it over here to the left-hand side and you can see right now that this video that Claude Code is looking at is the exact one that we just generated together. So, this is what it's going to use. It's basically going to take that video, pull out like 120 frames or however
Said at 5:46
Most replayed moment #3
4:272.7x the video's typical replay level
whether I'm doing it in a playground like this or over API, is with key.ai because I found that it's really fast and it's like really cheap. So, I went to NanoBanana 2, the new version of NanoBanana, and I came in here and did a 16x9 aspect ratio image, and I said, "I need a professional studio grade image
Said at 4:20
The graph counts replays. It does not show where viewers stopped watching.
Words
5,131
Runtime
20:15
Speaking pace
253wpm
Reading time
21min
253 words per minute, above the 201 75th percentile of 349 measured videos. That distribution comes from the 349-video hook study.
Opening (first 30 seconds)
So, you know how on Apple's site, we've got the product, we've got quotes come in, we've got dynamic elements like this. We can see sort of like the deconstruction of the product itself. And all of these features on the website give it a super professional and branded feel. And I'm sure that some of you guys have realized by now, but this website is not Apple. This is one that I built with CloudCode using this new skill in like 30 minutes. So, I'm going to show you guys today the exact process to build sites just like this that are super professional, that have these really nice animations going on, and they just feel awesome. I'm also going to be giving you away the
127 words, the words spoken in the first 30 seconds at 253 words per minute.
Free, no signup. See how the first 30 seconds hold attention, with rewrites.
Sentence shape
| Measure | This transcript |
|---|---|
| Sentences | 299 |
| Average words per sentence | 17.2 |
| Longest sentence | 60 words |
| Questions asked | 6 |
| Sentences containing a number | 16 |
Most used terms
Filler phrases
117 in total: like 37 · actually 26 · basically 19 · kind of 14 · you know 10 · literally 4 · I mean 2 · right? 2 · sort of 2 · uh 1.
A literal whole-word count of the same phrase list the Prepublish browser extension uses, so a phrase inside another word is not counted and a phrase used in its ordinary sense still is. It is a count and not a judgement.
What this transcript is
Every word below is the caption track YouTube publishes for this video, pulled from the video itself and reproduced unchanged. It is not Prepublish's writing, not a summary, and not a re-transcription: it is the video's own published captions. English captions, generated automatically by YouTube, in the video’s original language. Source: the video on YouTube. A channel that would rather this page did not exist can ask for its removal through the contact page, and it is removed.
So, you know how on Apple's site, we've got the product, we've got quotes come in, we've got dynamic elements like this. We can see sort of like the deconstruction of the product itself. And all of these features on the website give it a super professional and branded feel. And I'm sure that some of you guys have realized by now, but this website is not Apple. This is one that I built with CloudCode using this new skill in like 30 minutes.
So, I'm going to show you guys today the exact process to build sites just like this that are super professional, that have these really nice animations going on, and they just feel awesome. I'm also going to be giving you away the skill and everything that you need to do this for completely free. So, that even if you've never opened up CloudCode or, you know, built a website before, you will be able to do exactly what you're seeing on screen.
So, let's not waste any time and get straight into the video. Okay, so we're using CloudCode in Visual Studio Code. So, if you don't have that, just go to the browser, type in VS Code, and download this for your operating system. It's completely free. Once you're in here, you're going to go over to the left, which is the extensions button. You're going to type in CloudCode and install this one. It will then prompt you to sign in with your Anthropic subscription.
And by the way, you do have to be on the paid plan, so either the Pro or the Max in order to use CloudCode. Now, once you've got that installed, you're going to click on this button up here, which is the explorer, and you need to open up a folder. So, just go to your desktop, go to your documents, open up a brand new folder, just call it, you know, 3D website testing, and then open it up right here. So, here you can see this is the project that I've been working in.
I've just called it animated websites. And what I'm going to do is give you guys all of the skills in here that you need in order to just replicate what I'm doing. And I'm giving you guys all that for free, of course, so that once you have that, all you have to do is give CloudCode a video. For example, here we have a video of a camera. You can see what happens is it just basically spins around, and then it kind of like goes into x-ray mode, and we can see inside the camera.
And now that CloudCode has that, you just say, "Build me a website for this video." And what you get is something like this, where we have Vansa One. You can see it looks like a product landing page. As we start to scroll down, the camera is revealed. And as we continue to scroll more, we get dynamic text that comes through, as well as the actual camera animation starting. And the crazy part is I didn't give it any of the copy, I didn't give it a color scheme.
I didn't give it any information about the product. Obviously, you could, but what it will do is it will just basically create this for you, and then you can go ahead and make the tweaks that you need. So, the two skills that you're going to need to go grab are the front-end design skill, which is the one that I grabbed from Anthropic. It was an official skill, but I changed it a little bit. So, this is like kind of my version of the front-end design skill for this specific use case.
And then you're also going to need to go get the video to website skill. So, both of these skills are literally just markdown files. They're markdown files that I've worked on that tell Claude code the best practices for creating these animated 3D websites. And you can get these skills for completely free by going to my free school community. The link for that is down in the description. You'll go to the classroom. You'll go to the skill section, and you'll be able to find all of them right in there.
And literally all you'd have to do is take them from your downloads folder, drag them over here to the left-hand side, and then just basically tell Claude, "Hey, set up this folder so I've got my .claude. Within that .claude, I've got a skills folder, and then within that skills folder, here are my two skills I need you to use." And it should look something like this on the left-hand side. Now, before you get too overwhelmed if you've never used Claude code before, it's super simple.
Right here we have our actual agent that we talk to and have conversations with, and over here we just have folders. So, I just showed you where the skills live, which is in a .claude folder within a skills folder, but then the other stuff in here is super simple. Here are all the video files that I've used to make the previous websites. And then for each website, I created its own folder. So, for the camera website, it has all this information.
For the watch website, it has all this information. And for the Yeti website, it has all that information as well. But anyways, if you just follow the steps that I take in this video, it will all make sense, and you will get a nice output. And by the way, if that's a bit confusing, then definitely go check out my skills video, which I will tag right up here. And then once you understand that, hop right back over here.
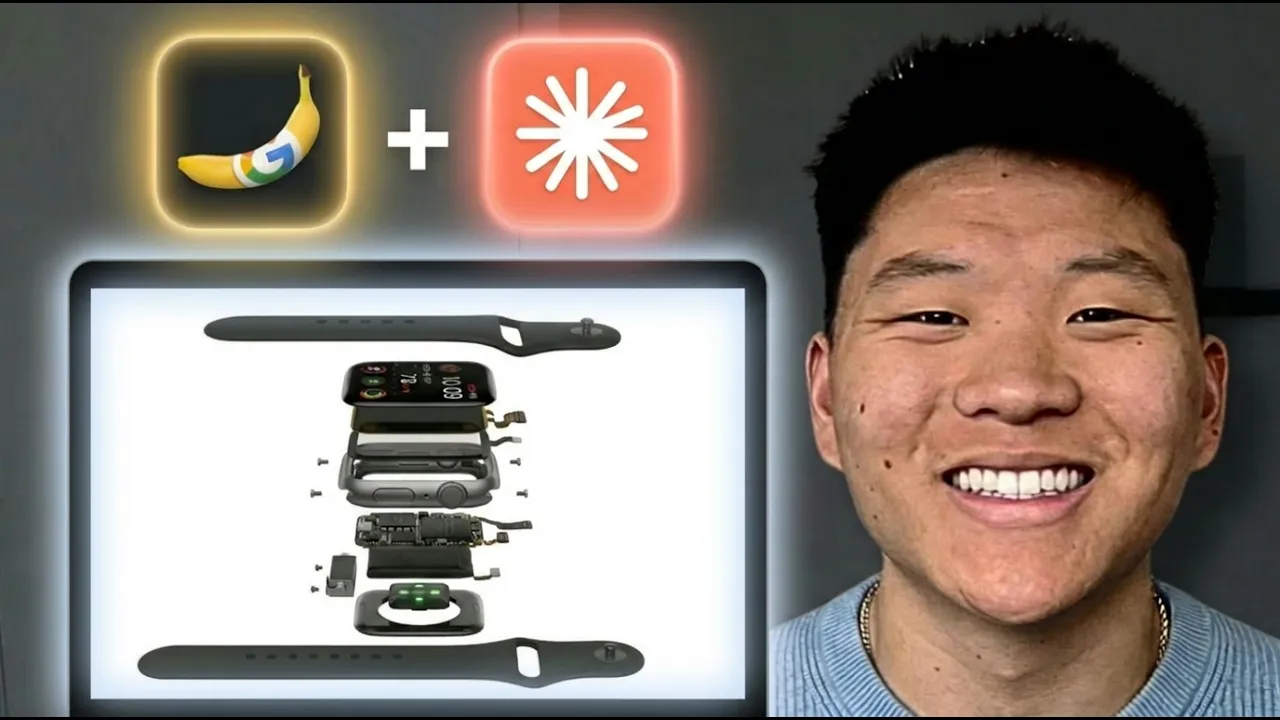
All right, so I'm going to walk you guys through this process step by step so you can see exactly what I did to create these really cool animations. And what you need to understand is that all of these animations that you're seeing on the sites and all the other ones that I've shown, they're just videos. And so, all I did here was had NanoBanana generate two different images for me and then turn it into a video. So, for example, that first one with the Apple Watch is just the Apple Watch kind of opening up and then exposing all of its layers.
And then, when I wanted it to close back up, I just prompted it to do the opposite, and now we have the second one where it goes from that end frame and then kind of like folds back in on itself and reveals the Apple Watch. So, now that you understand how simple this really is, let's go over to NanoBanana and start making some images. Okay, so the way that I like to use Nano Banana, whether I'm doing it in a playground like this or over API, is with key.ai because I found that it's really fast and it's like really cheap.
So, I went to NanoBanana 2, the new version of NanoBanana, and I came in here and did a 16x9 aspect ratio image, and I said, "I need a professional studio grade image of a blender. It should be against a plain all-black background with no shadows, no hands, no reflections." And this is essentially going to be our start frame when we make that actual video. So, then I saved that output, dropped it in here as an image input, and I just said the exact same prompt, but this time it should be filled with fruit and juice.
So, now we have our start frame over here and our end frame, and we just need to animate it so that it actually looks like fruit and juice is, you know, being dropped and poured in. So, then I found the best results using Kling 3.0, which once again, you can also access in this key.ai. So, we give it the start frame, we give it the end frame, and here's what I did for my prompt. I actually went over to Claude and I gave it the start and end frame and said, "Help me make an AI video prompt where I want the lid to float off, fruit and juice to be dropped in, and then I want the lid to be put back on, no shadows, no hands, no reflections." It spits out this prompt, I put that into Kling, and here's the result.
I haven't watched this yet, so hopefully it's good. Okay, interesting. I mean, obviously we we maybe want to fix that a little bit, but I'm fine with that for the sake of the demo. The fruit and juice kind of just magically appear from nowhere, and now they're in the blender. Okay, so I downloaded that video. I'm just going to drag it over here to the left-hand side and you can see right now that this video that Claude Code is looking at is the exact one that we just generated together.
So, this is what it's going to use. It's basically going to take that video, pull out like 120 frames or however many frames make up that video, and then it's going to have all of those saved. So, just as an example, if I go to the frames from the watch, you can see it created over 100 WebP pictures from that actual video. And it's kind of like stop motion animation where each one just changes a little bit and as you go through, the actual video starts to form.
So, it basically associates each of these frames with a scroll position. So, as you scroll down, it kind of like reveals itself or if you scroll backwards, it goes the other way. So, now I'm going to make sure that my agent is on plan mode, which basically means it won't actually do anything. It'll just read things and it will help create a plan, which is going to result in much better websites on the first try. All right, so I started off by saying I just dropped in a video called blendercling.mp4.
Help me create a one-page product landing page for this product. It should be modern. It should feel very professional. It should have smooth animations and design throughout. All of the text should be easy to read and the background of the website should be completely black. It should be a dark mode and it should blend into the background of the blender cling image so that it looks like it is one, you know, fluid webpage.
So, if you were really doing this for a product or for a business, you'd probably want to prompt it with some more information, but I'm just going to show you guys for now how this works. I'm going to shoot that off in plan mode and you will see that it naturally comes back and asks me some questions. Now, if you're wondering how I was able to speak right into my Claude Code, then check the description for my tool. Now, one thing you'll notice once you read through the way that this works is that you will have to have FFmpeg, which basically just extracts frames from videos.
It's a free tool and if you don't have it installed, Claude Code will help you install it. It'll just do it for you, so don't worry about that. But now you can see it's asking us some questions. So, the first one is what is the product name and brand for this blender? And I'm just going to go ahead and say create branding just like it did for the Vanta 1, which was the camera website. And it says what kind of content sections do you want?
I'm just going to go with the full premium, which is what we've been doing for the other example sites. But of course, this is where you could customize it a little bit to fit your needs. And if you've never used Cloud Code before, what's happening here is you are basically able to look at everything that Cloud Code is thinking and doing. You can see a task, you can see a glob, you can see what it's reading. And you'll see later when it actually starts implementing things, it'll create itself a task list or a to-do list, and you can actually watch it fulfill those to-dos.
So it's really cool. Okay, so now we're at the point where the plan is done. We've got Obsidian Vortex Premium Blender landing page. We've got the brand identity here. So Obsidian, Obsidian Vortex, the tagline is annihilate everything. The accent color is blood red. And we've got fonts, we've got the video details, implementation steps. So here is the FFmpeg thing I was talking about that will extract the actual frames.
Then it will build the HTML, then it will create all these different sections, it will build the CSS, it'll build the JS, and then it will test locally. So before this actually goes anywhere on the web, we will test it right here, and then if we're good with it, we can push it to the web. And I'll show you guys that at the end of the video. So I'm actually just going to make one more suggestion, and then we'll let it start building.
I want to say this looks pretty much there. There's one thing that I forgot to mention, which is that I want the product video to be kind of right aligned. So I want it to be on the right 2/3 of the page, and all the text can be left aligned. And this is just to show you that you do have control over the way it looks. So I'm going to go ahead and shoot this off. It's going to come back with another plan, and I'm going to accept it, and then I'll check in with you guys when we have our first iteration of this website done.
And by the way, now that I've accepted the plan, I put it in bypass permissions mode so that I can just continue to run without stopping all the time to ask me questions. Here is the to-do list that I talked about. It's going to go through and make sure that all of these are good to go. All right, so in just a few minutes that came back, and it says, as you can see, the site is live at localhost. Open it up in your browser and check it out.
So let me go ahead and open this up and we will see what we got. So, you just saw the Obsidian loading. We've got Obsidian Vortex. It looks really clean so far. Now, let's see what happens when I start to scroll down. So, we see the blender starts to appear. Nice. And as I continue to scroll, we have We didn't build another blender. We engineered a force of nature that reduces anything to nothing in absolute silence.
As I keep scrolling, we can see that the fruit is starting to appear. So, we've got Meet the Obsidian Vortex machine from aerospace grade stainless steel, blah blah blah. There's also text in the background as you can see that says I think it says obliterate everything. So, that's pretty cool. We've got brushless motor. We've got titanium blade array. So, that actually kind of pops in a little bit late as you can see.
As I'm scrolling, it pops in a bit late. This one comes through and then we've got the stats that come up really nice. And then we have the last blender you'll ever own. And then I should have the CTA right here, which is Own the Force, Pre-order the Obsidian Vortex. So, let's just actually think about that. I dropped in a prompt that said, Here's a video, create a one-page landing page. That was basically it. It used the skill and it created a plan for us.
And then we actually had a website where pretty much everything is perfect. Obviously, there's a few things that we need to iterate upon, but this is super super clean and the animation I think looks really good. But, the the biggest problem that I'm noticing is right here when we scrolled to number two feature, we really don't get to see it unless we scroll back down. So, what I'm going to do now is I'm going to go ahead and clear this out because we're at 53% context, so I don't want to mess with context rot.
And I'm going to once again go back into plan mode. All right, so I just tested out the blender website and it looks really good. I do have one piece of feedback though. When we're scrolling down and we see the features, feature number two doesn't actually appear until it's basically off the screen. So, we need that to actually come into view a bit earlier. But, besides that all the of the other features, features one, three, and four are working well.
So, I'll shoot that off and while it's coming up with a plan, I just want to make sure that that was accurate. Feature three looks good and we don't even have feature four. So hopefully it can understand, read through the code and see what's going on. So while this is creating a plan, I thought that I would real quick explain the difference between localhost and actually having something on the web. Because if you've never built a website before in Cloud Code, that part might not click yet.
So what happens is we kind of have two different environments. We've got our local computer and then we've got the actual cloud. So remember when Cloud Code said, "Hey, cool. Your website's live. You can go ahead and test it on localhost port 51006." If you right now typed this into your browser, you'd probably get nothing. But I can type it in because it lives on my machine locally. Because what's going on is Cloud Code is helping us write all of the actual code.
Because that's really what a website is. It's a bunch of code. Whether that's HTML or JS or CSS or whatever it is, it's code. And so what we're doing right now is we're using it to build code and then we're testing it. And then we're going back and forth on our computer until we're good. And then once we actually like the code, we push it to somewhere on the cloud so that it can actually be viewed by other people. So I'll cover this pipeline once we actually get to that stage in the video, but I thought that I would address this kind of like local thing first real quick.
All right, you can see it came back with a plan to fix the blender feature number two late appearance. I'm just going to go ahead and accept this. Okay, so it did that really fast. I'm going to click into this website and we'll see if that fix has actually been changed. We've got feature one, we've got feature two. There we go. And we've got feature three and everything else still looks intact with the site. So all of the magic that's happening here is once again within the skill that I built.
So it is the video to website skill. If I open this up, this is basically just a markdown file. And it says, "Turn a video into a premium scroll driven animated website." So this is where all the secret sauce really lives on how it actually does this. I know that this is a pretty beefy skill, but hey, I mean, it seems to be working pretty well. And what you can do now is every time you're using the skill to build websites, you would just say, "Awesome.
Here's what I told you to fix. Here's what I like. Here's what I don't like. Make sure that all of this is reflected on the skill.md. So, essentially, every single time that you build a website with the skill, the skill gets better and better and better. Now, we have our code that we like, and it's time to push it over here. So, what we need to do is we're going to use a combination of GitHub and Vercel. GitHub basically just lets us store code.
So, basically the same way you would have maybe like a Word file locally on your computer, if you wanted other people to be able to use that, you would have to put that on OneDrive or, you know, uh Google Docs, so that other people could look at the different versions and collaborate on it. And then what happens is we sync up Vercel to our GitHub so that we can actually deploy that code onto a real URL, so that it's no longer just like a localhost URL.
First thing you want to do is go over to GitHub and create an account. It's completely free and it has been around for tons and tons of years. It is a industry standard for code. And then the second thing that you're going to do is go over to Vercel and create an account over here as well. So, what's cool is we can basically have Cloud Code do this entire pipeline for us. It's super, super simple. So, if you haven't yet connected your Cloud Code to your GitHub, you would just come in here, maybe clear out the conversation, and say, "Help me connect to GitHub so that I can push this code base to my GitHub repository." And what it can do is it can help you basically use the CLI to authenticate, meaning it will basically just have a pop-up for you, and all you have to do is sign in.
It's super simple. So, here you can see it says, "You're already authenticated with GitHub as nateharkay. Nice." Now, the next step is to say, "Awesome. Now, let's go ahead and create a new GitHub repository for me. You can just call it blender-website and push the code base for the Blender website into that repository." Now, because we're pushing something to GitHub, and because it's going to go on the web, this is where you'd want to be careful if you had like API keys or anything sensitive in there.
In this case, we have literally nothing to worry about. But, that is something just to keep in mind. All right, nice. So, your Blender website is now live on GitHub. Here's everything that it did. And it also says, "If you want to connect this to Vercel for auto deploys, you can import the repo from the Vercel dashboard." So, first let's just check in on this GitHub repo. We can see that this has been set up. We have one commit, which is the one that we just did.
And that's important because every time we make a change, we can see exactly what happened to the code here. Now, what you'll notice is that this is a public repository. You could go into the settings and you can make this private, and it would still be able to auto-deploy to Vercel, no problem. And now that we're in Vercel, all I have to do is come here to projects and click on add new. And then what you'll notice is right here, because I've signed into Vercel with my GitHub, it says import GitHub repository.
And all I can do is choose right here, blender-website, click import, and this is automatically just going to build up this site for us. So, I'll hit deploy, and then we'll let this spin up, and I'll show you guys that this is now accessible on the web. Awesome. So, you just deployed a new project to my hair projects. So, let's go ahead and continue into the dashboard here. All right, so something interesting just happened, and I'm glad it did so I can show you guys how to fix it.
So, our project is now here on Vercel, and when I click into the domain, everything seems to load up right, right? We've got Obsidian Vortex, we see the animations come through. But as I start to scroll, where's our blender? We still get the text coming through. We still get all these animations that we were looking for, but our blender's not there. So, what happened was, when it pushed this GitHub repo, it excluded the frames.
So, if I come over to the left-hand side and we go to our blender project, and we open up the frames, you can see that all of these were grayed out, which basically means everything got pushed to GitHub in this folder except for the frames. Which means when the site tries to render it, there's no frames to actually render. So, what I did is I said, "Okay, that didn't work. You need to have the frame in the code base so that it can actually use it, otherwise the animation just disappears." So, I told it to update those changes, make another push.
It fixed that, and then basically it came back and said, "Okay, I did that now. The frames are in the GitHub repo." If I go to the GitHub repo, you can see that we now have two commits. If I click into the commits, you can see, "Nice. The second one added animation frames for Vercel deployment." And then in Vercel, if I go to deployments, you can see that we had two. We had this current one that I rolled back to so I could show you guys.
And then we have this main production one, which I could go to and we could actually roll up to this one. So, I can click on these three dots and then click on redeploy. And now that I have redeployed, if I open up this Blender website one more time and we come down and we start to scroll, we can now see that the frames are being rendered and we still have all of the animations that we had built and now the site is actually ready to go.
And just to prove to you guys that this really is on the cloud, you can see on my phone, we have the Blender website with the animations. Now, obviously this hasn't been yet optimized for mobile, which would kind of be the next step, but you can see that the animations are still here. And if it hasn't quite stuck yet, here's the advantage of doing it like this. Now that we have our site on the web, which maybe customers would be looking at and interfacing with, what if we wanted to change something like the colors or maybe even change the animation?
We don't want to be changing what's actually out there in production in real time. So, we can change the code, we can test on a localhost, and then once we're finally good with it, we push it to GitHub and then it automatically syncs to our real domain. So, that way we have basically a testing environment, a staging environment, and then we have our actual production website. And what you guys saw is that this literally took me like 30 minutes.
And obviously if I spend another 30 minutes, the site could be like five times better. And this is crazy because there's so many businesses out there, whether they're local in your area or, you know, you look online, that have horrible websites. Because they don't want to prioritize it or they don't want to pay some web design agency tens of thousands of dollars for a new website that could also take potentially months.
Whereas what you could do is you could find prospects, you could find some sort of niche. Let's say you want to design websites for Blender companies. You could build a demo site similar to this, right? Like you could build something like this in one day if you sat down and you wanted to make it really, really good. And then you email them the link or you walk in and you show them and say, "I can build this for you with your products, with your copy, and I can get that to you in two days and I can charge, you know, $5 to $10,000, which is a lot cheaper than they might get with other vendors." And then of course, on top of that, you could do monthly hosting, you could have maintenance, which is recurring revenue, but it also ensures for them that if they need any different features, you can fix that code base and you can push that all up there because you understand how this all works now.
So, maybe you don't like the style of how I'm doing this with the different, you know, text coming through and maybe like this animation overlay thing, then just update the skill so that your cloud code doesn't actually do that. And once you now actually understand how all we're doing is we're turning videos into a bunch of frames and then having it scroll through, you'll be able to do so much more because it doesn't just have to be product spinning or, you know, x-ray vision.
It can be words. It can be like walking. It can be whatever you want. You can also you can go to this website awwwards with three W's for some inspiration on animations. It is super, super cool what people are doing here. But, that is going to do it for today. If you guys love nerding out about this kind of stuff, then definitely check out my plus community. The link for that is down in the description. Got a great community of over 3,000 members who are building with AI every day, building businesses with AI.
If you have similar goals, it's a great spot to be. But, anyways, if you enjoyed the video or you learned something new, please give it a like. It definitely helps me out a ton. And as always, I appreciate you guys making it to the end of the video. I'll see you on the next one. Thanks everyone.
The words are the caption track's own and nothing is reworded or re-transcribed. Paragraph breaks are placed between sentences so the text reads as prose.
Free tools for your own script. No signup, no login.
Paste your draft and see where viewers are likely to drop off, with a rewrite for each weak line.
Paste the first 30 seconds of your own draft for a hook score and rewrites.
Check your draft against YouTube's advertiser-friendly guidelines before you record it.
Read this channel's public videos and transcripts, and download a writing brief for it.