Getting the transcript
Reading the captions from YouTube. A video nobody has opened here before takes 10 to 30 seconds; this page fills in on its own.
Getting the transcript
Reading the captions from YouTube. A video nobody has opened here before takes 10 to 30 seconds; this page fills in on its own.
E'Calm · @emmiescalm
Where viewers went back to watch this video again, from YouTube's public Most replayed graph, lined up with what was said at that moment.
Most replayed moment #1
4:056.3x the video's typical replay level
you understand this, just go to settings, click on channel, then click on advanced settings. Here, under the audience section, choose the middle option. Yeah, we don't want our videos to be shown to kids. Now, go to feature eligibility, then verify your
Said at 3:59
Most replayed moment #2
6:144.0x the video's typical replay level
Ronaldo, you can go to vidIQ. I've even partnered with them so you don't have to worry. You can get one month full access with just $1 if you use the link in the video description. Once you're here, hit on research. >> [music] >> Then in the search bar, enter your
Said at 6:06
Most replayed moment #3
18:534.0x the video's typical replay level
effect. Now, you can select all, create a compound clips, and go ahead and add any filter and effect you like. Finally, you can export the video. >> [music] >> Oh, no. I don't know. I don't like it.
Said at 18:45
The graph counts replays. It does not show where viewers stopped watching.
Words
3,743
Runtime
19:28
Speaking pace
192wpm
Reading time
16min
192 words per minute, between the 181 median and the 201 75th percentile of 349 measured videos. That distribution comes from the 349-video hook study.
Opening (first 30 seconds)
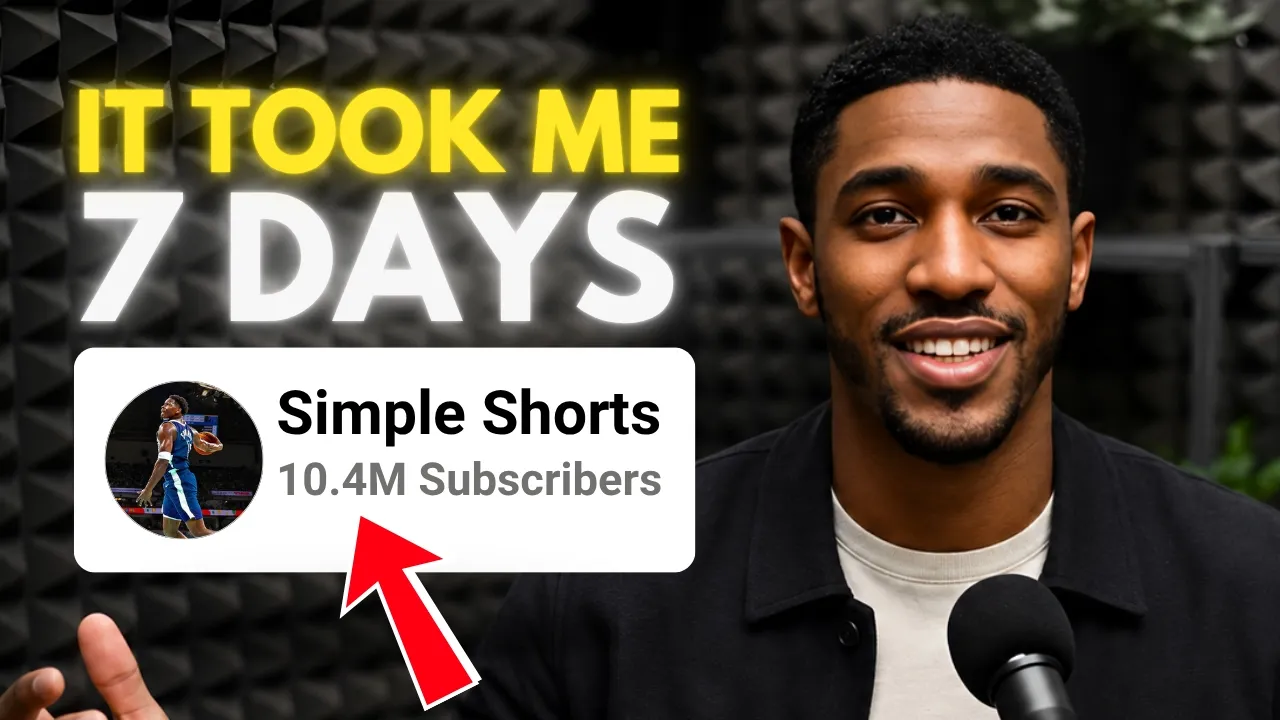
I want you to really listen to what I'm about to say because it's the difference between building a business and wasting your time. You see, there's a specific way I've been blowing up these YouTube Shorts channels. And in this course, I'm not just giving you the tricks. I'm going to show you the actual system I use to monetize this basketball short channel and more importantly exactly what I do when a channel gets stuck in zero or 1K view jail. Now, wait a second. You see, most people, I mean, the gurus will
96 words, the words spoken in the first 30 seconds at 192 words per minute.
Free, no signup. See how the first 30 seconds hold attention, with rewrites.
Sentence shape
| Measure | This transcript |
|---|---|
| Sentences | 297 |
| Average words per sentence | 12.6 |
| Longest sentence | 39 words |
| Questions asked | 7 |
| Sentences containing a number | 36 |
Most used terms
Filler phrases
35 in total: like 26 · I mean 2 · actually 2 · literally 2 · you know 2 · right? 1.
A literal whole-word count of the same phrase list the Prepublish browser extension uses, so a phrase inside another word is not counted and a phrase used in its ordinary sense still is. It is a count and not a judgement.
Run the check on the words above: where attention is likely to drop, with a rewrite for each weak line. The free check shows the scores and the one issue costing the most.
What this transcript is
Every word below is the caption track YouTube publishes for this video, pulled from the video itself and reproduced unchanged. It is not Prepublish's writing, not a summary, and not a re-transcription: it is the video's own published captions. English captions, generated automatically by YouTube, in the video’s original language. Source: the video on YouTube. A channel that would rather this page did not exist can ask for its removal through the contact page, and it is removed.
I want you to really listen to what I'm about to say because it's the difference between building a business and wasting your time. You see, there's a specific way I've been blowing up these YouTube Shorts channels. And in this course, I'm not just giving you the tricks. I'm going to show you the actual system I use to monetize this basketball short channel and more importantly exactly what I do when a channel gets stuck in zero or 1K view jail.
Now, wait a second. You see, most people, I mean, the gurus will tell you that borrowing content from people doesn't work on YouTube in 2026. And all they say is that you're going to get hit with a reused content ban or inauthentic content the moment you try. Well, they're mostly right, but only because they don't understand how to do it. Yeah. See, I started this channel just 3 months ago. You can see that my first video was uploaded on the 10th of February 2026 and you can see it's monetized.
So, if this is dead on YouTube, why is this channel making money? That's a myth. Let's actually look at the data. If we go to analytics, you can see that this channel is indeed making money. [music] I've made $3,700 in the last 28 days. And I'm being real here because I'm showing you real data. And I'm showing you this not to flex or something, but just want to send a signal to you that YouTube Short is one of the best ways to make money right now.
And you can start doing something. You can see I started this channel on February 10th this year and got monetized in the same February. Although, I made close to $200, but March and April were huge. If I change it to last 90 days, you can see that this channel has generated $7,700, which isn't bad for a 3-months-old channel. So, in fact, this is 100% monetization safe. It's just that people don't know how to do it. First, we need to create the channel and do some few settings.
But before that, let's talk about why videos get stuck at zero views. If you check my videos, you'll realize every video here is getting not less than 40K views. Do you know why? It's because my channel has trust. And I'm not talking about trust from the audience, but the trust from the algorithm. >> [music] >> Let me show you why. If you go to my channel homepage and hit on more, you'll realize that this is an old account.
This channel was created 5 years ago. So, what I'm trying to tell you now is that use an old account if you have one. If you don't have one, create a new account, but don't just upload a video on it. Try to warm it up. This may not make sense to you until you start seeing your video stuck at zero views. One thing about this is that you can create the channel today, upload a video, and within a few hours you'll start to see views like 1K or 20K views, which will make you think you finally broken through.
But, you'll upload your next video and nothing will happen. It won't even get into the algorithm. I've been a victim of this in the past, so I know what I'm talking about. Now, why are your videos getting stuck at 1K and 2K views? Let me make it simple for you. It's like playing a World Cup knockout stage. All you need is to win the match, else you're out. The same thing applies here because when you post a short, YouTube shows it to a seed audience.
That's usually people who have watched similar content or your own subscribers, and it's only looking for one metric, which is your swiped versus watched ratio. If less than 60-70% of people choose to stay and watch, the algorithm assumes the video isn't good enough for a general audience and stops pushing it. I'll show you how to fix it. Now, if you pass the initial test, the video is pushed to a much wider, colder audience who might not know you.
At this stage, the algorithm now prioritizes average view duration and retention percentage. Per my experience, if your retention drops significantly in the middle of the video, often around the 15-20 second mark, the algorithm jails the video. For a 60-second short to break past 10K, you often need over 80-90% retention. Now, for your video to go truly viral, retention alone isn't enough. YouTube looks for positive user signals, which are high shares, likes, and comments.
If people watch the whole video, but don't interact with it, the algorithm sees it as passive entertainment. Shares are the most powerful signal here. Think about it. YouTube wants people to stay on their app. So, when you share a video, you are literally bringing more people to YouTube, and they will reward you with millions of views for that. Once you understand this, just go to settings, click on channel, then click on advanced settings.
Here, under the audience section, choose the middle option. Yeah, we don't want our videos to be shown to kids. Now, go to feature eligibility, then verify your phone number here. Hit save. Next is branding. Make your channel look professional. So, go to Canva, then in the search bar, search for YouTube banner. See, we want the banner to show on all devices. So, let's pick the one that has borders like this one here.
Here, you can change colors, but if you want to add elements and text, then make sure all the changes are done in the frame. This will make it fit perfectly on mobile devices, which are over 70% of YouTube users. >> [music] [music] >> For the logo, I mostly use a face or a recognizable figure. Once all are set, just click on customization, then upload them. >> [music] >> Now, you need a searchable handle. If you're doing basketball like me, your handle should have hoops, ball, or dunk in it.
This is not mandatory, but it helps the algorithm understand your channel better. Then in the description, I use keywords. I don't just write a bio, I write a list of what the algorithm should index me for. Since my channel is about one particular basketball player, I used highly searched keywords on that particular player. But if you're doing general basketball or you're going into football but on one particular player like Ronaldo, you can go to vidIQ.
I've even partnered with them so you don't have to worry. You can get one month full access with just $1 if you use the link in the video description. Once you're here, hit on research. >> [music] >> Then in the search bar, enter your keyword. Let's say your video would be about Ronaldo. I'll put in Ronaldo here and hit enter. You can see this keyword has close to 1.5 million search, which is huge. >> [music] >> Now if you check here, you'll realize this has over 2 million search and this is close to 600,000 searches.
Select like five of the high search keywords and click here to copy. Now go to chat GPT, cloud or Gemini. Give it this [music] prompt. First you need to paste the keywords you copied here. >> [music] >> Next, enter what your channel is about. So if your channel is about basketball or let's say Ronaldo skills, just enter it here. I'm not going to ask you to do a specific video because most of you would end up doing the same thing.
So watch the video and decide it for yourself. >> [music] >> Now hit enter and you'll get a simple description like this. Copy it then paste it here and you're good to go. Let's hit publish. If you're done with the channel, congratulations. You're already ahead of the 99% of people who said they'll start it tomorrow but tomorrow never comes. Now that the house is built, we can't just sit and wait. We need to start the warm-up phase I told you about because uploading to a cold channel is like trying to start a fire with wet wood.
That's a complete waste of time because it won't [music] work. You know that, right? So, let me show you exactly how I warm up my accounts to ensure that the first upload doesn't hit zero views. And I do this in two step. I call the first one the niche signaling phase. And for this step, we're telling YouTube's cookies that this account is interested in a particular niche, which in my case, it's basketball. So, when I eventually upload a basketball short, YouTube already knows which seed audience to test it with.
So, what I do is I search for my competitors. For example, NBA highlights or basketball skills. But, if you're doing this for a specific player like I did, then you'd have to search that specific player. So, let's say you're doing this about Ronaldo. You can search for something like Ronaldo skills or crazy goals. All right, let's go to shorts. Now, here I watch four to five full videos. I like them and leave a genuine comment.
Like I told you earlier, the goal here is simple. We are just telling YouTube's cookies that this account is interested in certain types of video. So, that when we upload our short, YouTube already knows which seed audience to test it with. The second step of the warm-up phase is the community interaction. I call it the 24-hour rule. Here, I spend at least 15 to 20 minutes over the first 24 hours just scrolling the shorts feed.
I swipe past the junk and I watch the viral clips all the way through. What this does is that this signals to the spam filter that this is a high-quality active user account. I repeat these steps for about four to five days. >> [music] >> And that's all. All right, now that your channel is warmed up, it's time for the most dangerous part, finding your clips. You see, most people who try to pull content end up getting their channels banned or permanently demonetized.
Yeah, that's because you'll face reuse or inauthentic content issues. But, I'm going to be 100% sincere with you. I get all my clips from TikTok, too. You see, if you just copy and paste someone else's work, YouTube will literally refuse to pay you a single cent. You have to do it differently if you want to actually get paid. But, let me show you the exact safety-first system I used to stay monetized. First, I open TikTok and go straight for the heavy hitters.
I mean, the viral ones. Since my channel focuses on one specific player, I head right to his page to find his absolute best performing content. Just look at this. This video has over 150 million views. This one, 96 million. This one, close to 53 million. These aren't just crazy numbers. They are proof that there is a massive hungry audience for this exact person. That's the secret. I didn't choose him because I liked him.
I chose him because the data said I'd be crazy not to. If you're building a channel like this, don't guess. Find a player whose numbers are already doing the heavy lifting for you. In fact, there are plenty of players like this out there. But, I'm not going to give you a specific name because then everyone watching this would just go and do the exact same thing. Now, here's how I do it. I grab some of those top-performing videos I just showed you.
But, I'm going to say this again because it's the most important part. Do not just copy and paste. I repeat, do not copy and paste. If you want to get paid, you have to edit these clips so they don't break YouTube's rules. And I'm going to show you exactly how to do that in just a second. But, before we move on, let me ask you a quick question. Have you seen this video yet? If you haven't, you need to watch it the second this video is over.
It's the full breakdown of the exact system I used to make $400,000 in just 3 months by getting over a billion views. I've put the link in the description and the pinned comment so you don't miss it. Now, let's get back to the strategy. Now, this is where 99% of creators fail and get their channels deleted. You see, you have the viral clips, but if you upload them right now, YouTube's AI will flag you for repetitious content in seconds, and you may be even get copyright strikes.
That's why you need to edit the video. Yeah, you need to tell YouTube AI that the video is yours. That's all it needs. So, pay close attention because if you miss even one of these steps, you'd be wasting your time. >> [music] >> Here is how I transform my clips into original content that YouTube loves to monetize. >> [music] >> First, I open CapCut and import the video clip. Next, I go ahead and add it to the timeline and then find my start point.
Let's say I want my video to start from somewhere here. I'll just place my play head at this point, select the clip, then hit the letter Q on my keyboard to simply trim off where I don't need anymore. [music] Now, before I do anything else, here's what I do instead. I create the captions. You'll understand why. Just keep watching. [music] All right, so I create the captions by clicking here, selecting the language. Of course, my video is in English, so I'll select that, then hit on generate. >> [music] >> Good.
Now, you can't just leave the captions like this. Yeah. For your [music] videos to go viral, you need to create captions that will keep your retention at higher level, and I'm going to show you how I created mine in a [music] moment. But, can you spend just 5 seconds to like the video and subscribe? This is the only way to show me how serious you are to learn YouTube automation. All right, let's continue. First, select one of the captions, but make sure apply to all main captions is checked.
This way, all the changes you'll make will apply to the other captions as well. [music] Now, we're not picking any pre-made templates. Those captions are not engaging enough, and most of them are premium. But, you can go with that if you think that will work for you. For me, I love to create how I want my caption to look like [music] because I want it to engage the viewers, and that's what I want to show you. All right, go to effects. >> [music] >> Here, just find a style that has a glowing effect.
Something like this. I didn't say all of you should pick this. There are lots of them. Just go through it and find different ones. If you're using the pro version, there's no need for this because you can add a glow effect to [music] the caption after you're done with everything. All right, let's go to basic and change the font style. >> [music] >> This is the font style I use. It's called Lemon Milk. You can search it on Google.
Click any of the results, you'll see it here. Just download it, extract the zip file, and install it to your device. Now, if you restart your CapCut, then come back to the font style, it should be at the page that opens. But, if you don't like it, you can use this font style called Copperplate, or just go through it and pick the one that works best for you. Next, you need to make sure the same caption is selected, so we don't mess everything up.
Now, let's go to animations and add a fade-in animation to it. Let's reduce the duration to around 0.2 [music] second. Now, let's click on out and then add a fade-out animation to it as well, babe. Let's also change the duration to 0.2 [music] seconds. I'll play it somewhere here and scale it up a little. Know that these animations that we're adding don't apply to the rest of the captions, but don't worry, we'll fix it soon.
But, let's add a zoom-in keyframe to the caption we've selected. You can do that by placing the playhead at the starting point of the caption. Go back to text, and under the basic section, scroll down [music] and add a keyframe on transform. Now, move the playhead to the end point of the caption we've selected, and then increase the scale to about 10%, and a keyframe would be added automatically. Next, right-click on the last keyframe, go to show all presets, and click on ease out.
All right, you've created your own template. Now, you need to add it to the remaining captions. And to do that, you first need to copy the attributes of the caption you've edited. This is simple to do. Just hold the control key and the shift key together, and then hit on the letter C to copy all the attributes. You can also right-click on it, and then click on copy attributes. Now, select all the remaining like this. >> [music] >> Then, hold control and shift together and hit on the letter V.
Click on paste to add the attribute to those select captions. Now, you need to do a little bit of work here. You realize the key frames are not at the end of some of the captions. That's because those captions are longer than the first one we edited. So, what you're going to do is to drag them like this one after the other and add the ease [music] out preset to it. If you didn't see last key frame on some of the captions, just place the play head at the end of that caption and increase the scale. >> [music] >> Now, you can see that some of the texts are so long that it even has to come to the next line.
So, let's head to captions then break them down. I usually keep mine at two to three words. >> [music] >> Now, here's the result so far. >> [music] >> But, we're not done yet. We need to add our own reactions. And there are lots of ways you can go about this. But, what I do is I watch the video and whatever comes into my mind, I write it there. Let me show you. You see the move? That's crazy. So, I'll pause at this point then add the shocking face emoji.
Go through and add some text and emojis. Like what you'd say if you're reacting to the video. >> [music] >> Once that's done, we need red and green overlays for when the ball entered the net and when it fails. For this clip, I don't have any fails so I'll show you the green overlay effect. But, don't worry because you can use the same approach for the red one. It's simple. Just click on stickers, hit on shapes, and then select the square shape. >> [music] >> Now, scale it up to cover the video like this.
Change the color to green and reduce opacity to around 40%. I keep the duration about 0.5 to 0.7 seconds. [music] Now, what I do is I copy this sticker and paste it exactly to the point where the ball enters the basket. [music] Next, go to audio, click on sound effects, then search for the ding sound. Now, add it to where you place all the green overlays. Next, you can go ahead and add other sound effects depending on your video.
All right, let's create a compound clip by selecting all the files, right click on them, and hit on create a compound clip. Before I do anything again, I cut scenes to 5 to 7 seconds, zoom some scenes, and flip some scenes. Once done with that, I'll add a scoreboard by using only text. So, I'll add a text for both players. Let's place it somewhere here and add some glow effect to it. Let's extend it to meet the length of the clip. >> [music] >> Then, I'll add another text for the scores.
Next, I'll create a division line to make reading easier. Now, I'll go through the video and change the score [music] line. You can see that the guy in blue scored first. So, what I'll do is I'll split his text in the track like this and change the number to one. Let's continue. He scores second. So, I'll split the same line again and change the number to two. Now, MK scores. And if I click on this, you realize it corresponds with this number here.
So, let's split it and change the zero to one. Now, repeat it till you cover it all. Now, before you add the filters and effects, add your title at the beginning. For the title animation, I use retro typer. I also add keyboard typing sound effect. Now, you can select all, create a compound clips, and go ahead and add any filter and effect you like. Finally, you can export the video. >> [music] >> Oh, no. I don't know.
I don't like it. >> [screaming] >> Now, hear this. YouTube Shorts is one of the best ways to make money right now. If you're a beginner, I'll suggest you learn from this video. I'm not saying you're going to blow up overnight, Although, it's possible as a beginner, but learning to understand how the system works is what you need. Cuz once you understand and know what to do, you can blow multiple channels. That's all.
If there's something in the video that you don't understand, just message me on Instagram for assistance. See you in the next one.
The words are the caption track's own and nothing is reworded or re-transcribed. Paragraph breaks are placed between sentences so the text reads as prose.
Free tools for your own script: paste a draft and see where it stands before you record it.
Paste your draft and see where viewers are likely to drop off, with a rewrite for each weak line.
Paste the first 30 seconds of your own draft for a hook score and rewrites.
Check your draft against YouTube's advertiser-friendly guidelines before you record it.
Read this channel's public videos and transcripts, and download a writing brief for it.