Getting the transcript
Reading the captions from YouTube. A video nobody has opened here before takes 10 to 30 seconds; this page fills in on its own.
Getting the transcript
Reading the captions from YouTube. A video nobody has opened here before takes 10 to 30 seconds; this page fills in on its own.
Stefan 3D AI · @stefan_3d_ai
Where viewers went back to watch this video again, from YouTube's public Most replayed graph, lined up with what was said at that moment.
Most replayed moment #1
6:125.0x the video's typical replay level
also want to try Triple, buy link in the description, you get extra 500 credits. Give it a try. Or if you consider to buy subscription, there's also a promo code there. Now Cascader part. Okay, so let's open the Cascader and let's create a new scene. That's super easy.
Said at 6:05
Most replayed moment #2
10:583.8x the video's typical replay level
that was actually a decent result. Okay, so I actually got these three frames done. Okay, and now we're gonna select all these frames and we can just add Bezier animation and that's nothing interesting, right? It's just like a smoothing. But of course, we're
Said at 10:51
Most replayed moment #3
9:062.6x the video's typical replay level
that. And we can actually control that. So adding and removing frames is very easy. Just select the timestamp and press F. F for frame, of course. So now if I create a simple in between animation. So now here, if I open this menu and create some simple
Said at 8:58
The graph counts replays. It does not show where viewers stopped watching.
Words
3,872
Runtime
20:40
Speaking pace
187wpm
Reading time
16min
187 words per minute, between the 181 median and the 201 75th percentile of 349 measured videos. That distribution comes from the 349-video hook study.
Opening (first 30 seconds)
What's one of the hardest part of game development, especially for solo devs? Animation. You can make a character, make a scene, assets and even full game level. But to make it move nicely, animate it, that's where things get hard, right? So in this video, I gonna show you how I created 3D character and scene with AI and then used Cascadeur to make animation way easier. It has auto posing, you can add automatic motion between keyframes, fix collision and add realistic physics. And in recent updates, generate animation with AI and
94 words, the words spoken in the first 30 seconds at 187 words per minute.
Free, no signup. See how the first 30 seconds hold attention, with rewrites.
Sentence shape
| Measure | This transcript |
|---|---|
| Sentences | 303 |
| Average words per sentence | 12.8 |
| Longest sentence | 40 words |
| Questions asked | 17 |
| Sentences containing a number | 12 |
Most used terms
Filler phrases
94 in total: like 37 · actually 36 · right? 8 · I mean 5 · basically 4 · sort of 2 · you know 2.
A literal whole-word count of the same phrase list the Prepublish browser extension uses, so a phrase inside another word is not counted and a phrase used in its ordinary sense still is. It is a count and not a judgement.
Run the check on the words above: where attention is likely to drop, with a rewrite for each weak line. The free check shows the scores and the one issue costing the most.
What this transcript is
Every word below is the caption track YouTube publishes for this video, pulled from the video itself and reproduced unchanged. It is not Prepublish's writing, not a summary, and not a re-transcription: it is the video's own published captions. English captions, published by the channel, in the video’s original language. Source: the video on YouTube. A channel that would rather this page did not exist can ask for its removal through the contact page, and it is removed.
What's one of the hardest part of game development, especially for solo devs? Animation. You can make a character, make a scene, assets and even full game level. But to make it move nicely, animate it, that's where things get hard, right? So in this video, I gonna show you how I created 3D character and scene with AI and then used Cascadeur to make animation way easier. It has auto posing, you can add automatic motion between keyframes, fix collision and add realistic physics.
And in recent updates, generate animation with AI and preview live in Unreal Engine. Sounds great, let's get started. Steph here again and let me introduce you to amazing tool for animation. Just recently this year, I was covering HiMotion and NVIDIA Kimono, which you liked a lot. But just 5 days ago, Cascadeur dropped a really huge update. And this is way more than paper, because that's organically fits in the whole tool that gives perfect solution.
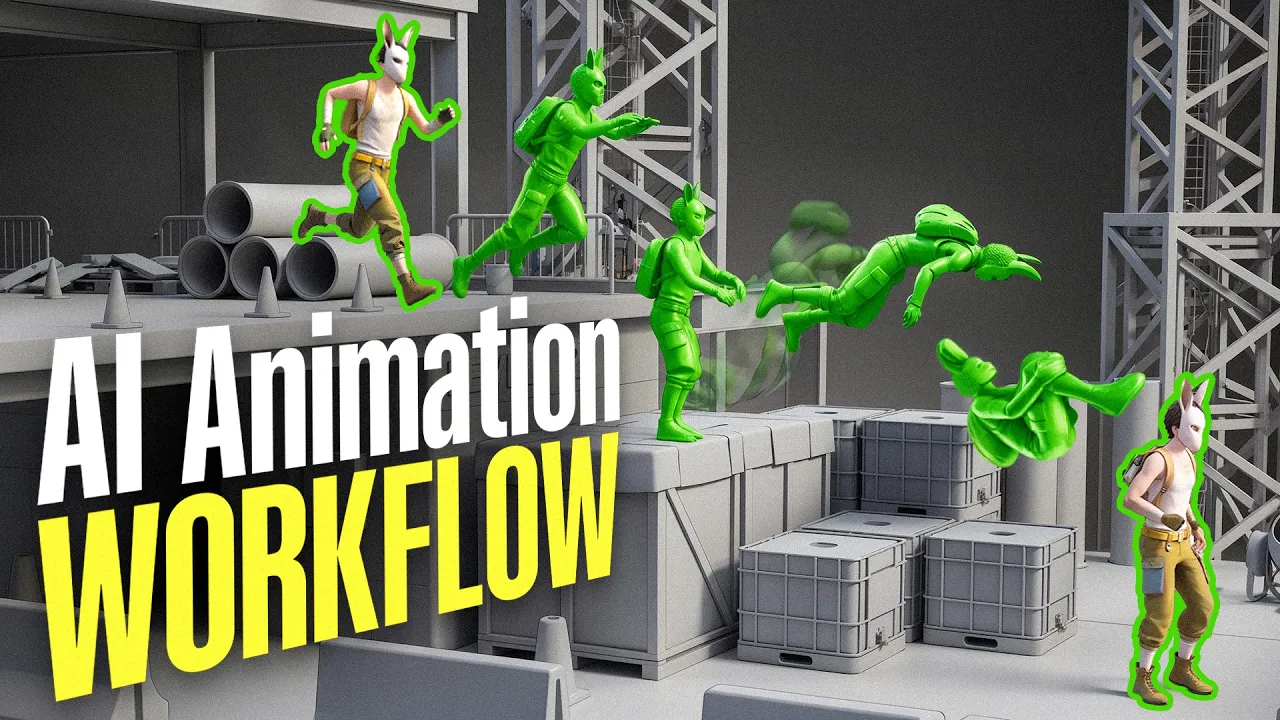
But before we dive into the Cascadeur, let's do some preparation very quick. So here's the idea, I did quick blocking of over construction site, where we gonna make this parkour animation. So my idea is to make the guy run like that, do some tricks, and then he will go slowly here and potentially jump. So that should be enough to actually stress test it. Quite long animations, we have different levels of animations and of course we're gonna do a parkour tricks.
Cool? I think yes. To make it really exciting and to show you guys something really amazing, we took it seriously. So we prompted quite nice construction sites. We decided on style and then we built up the whole blocking in Blender. Why in Blender? Because it's way easier to build up primitives in Blender rather than just generating. Again, that's just a bunch of rectangles if you think about it. And for some genetic assets, we actually took them from Sketchfab.
Just some free assets like this crane. When blocking was complete, it was time to texture it. Since we were dealing with the very big surfaces, it doesn't make sense to texture them with AI, since AI maximum will texture it as a 4K. For this big object, it's definitely not enough. So instead, we quickly applied materials in Substance Painter. It all took less than 30 minutes to do. Same things apply for labels and text.
True decals, you can add them really easy on the objects and then bake them in textures after all. So as you can see, we did the base for the level quite fast and easy. But it's now quite boring, right? And here we start creating assets. Okay, so with ChagiPT and Anabanana, we created a bunch of props that we're gonna need for the scene. There was quite a lot, almost up to 15 prompts. And these prompts we actually need to generate with AI.
And thanks a lot for Tripod. That was very easy to do. So we're gonna use Smart Mesh and I'm gonna set the right amount of polygons for each, since I really want my scene in Unreal Engine be quite optimized. For props, my personal opinion, this optimized mesh is absolutely amazing. And when you're happy with the result, you can generate it a few times with different poly count and see which works the best. Then go to texture and texture it.
And just like that, we have the prop ready. I mean, guys, all together, it's taking like three to four minutes. In Unreal Engine, we intend to use Toon Shader. So lucky for us, we can even preview it here on a flat color. In Toon Shader, it's only Albedo used really. So that's also quite nice. In similar way, of course, I created the rest of the assets. I really recommend if you're a professional and you know how much polygons approximately needed for the assets, that's great.
This tool, you're gonna max it out. But for those who don't know, the lower polygons you can get keeping the shape right, the better, right? That will be just an optimized assets. Also don't use 4K texture wherever, because that's just not needed like for small parts. You can definitely go over 2K and that will be enough. In triple also for some assets, you can actually generate not only texture, but also the add the PBR.
Of course, I'm not gonna lie. It requires some polishing setup in Blender with maps and stuff. Like sometimes you're gonna want to drop and like fix small thing. But that's very easy to learn and not a big deal. And just like that, look how many awesome assets we created. Like less than a half day. That's amazing. Pretty much the same way I generated character, of course, in parts. And I do have dedicated video about characters and more are coming with updated flow.
So like and subscribe guys to not miss it out. And yeah, as you can see, all parts are pretty much flawless. I mean, it's like amazing. So when all parts are generated, again, I also used Smart Mesh because I just generated them right away, optimized, textured them. Sometimes I also add PBR. For my case with Toon Shader, it's not that needed, but can add additional detail. After all, of course, I assembled here in Blender.
I lined it all parts together, fixed some stuff, did some cleanup for the rigging. I showed this process quite often on my channel. If you want to learn that, guys, you can definitely do it. Just take a look at the videos or jump in my Discord, guys. We're going to help you do that. Character done, scene done, time to assemble everything together. And now we can actually script the animation. So because now I see where all the obstacles are, where all the equipments are, and we can prepare for the animation.
This is actually a very important step because we're going to drop this bloated scene in Cascader as well to work around it. And here you can see I actually duplicated a part of it, which will be related to animation. And I'm going to actually remove the materials from it and save as a collision so we can use that in Cascader. As for the character, I will rig basically adding a skeleton in Mixama as usual. And Cascader works very well with Mixama skeleton.
And if you guys also want to try Triple, buy link in the description, you get extra 500 credits. Give it a try. Or if you consider to buy subscription, there's also a promo code there. Now Cascader part. Okay, so let's open the Cascader and let's create a new scene. That's super easy. And as simple as it can be, we're going to drag and drop FBX file with our character. Now it will also suggest to create a rig. And that's exactly what we need.
Since we used Mixama, our skeleton is recognized very nice and we can create our proper rig around these bones. Now what's the difference between skeleton and the bones? The skeleton of Mixama contains quite a lot of bones. You can see them here listed. 65 and more. That's pretty standard for a skeleton. Rig, however, is a control points, how you control all of that. And together with like some inverse kinematic, forward kinematic, it's way easier to control the skeleton, not controlling all 65 bones one by one.
Now, while my character is simple and using standard skeleton, Cascader does amazing job improving the quick rigging tool. And that's why a lot of professionals actually use it. You can drop a completely custom skeleton and you'll be still able to recognize the skeleton and add up like proper rig. But it's way easier than do that manually. So here you can see, you just define which bone is pelvis, which bone is shoulder, et cetera, et cetera.
It works very nice with non-standard characters. And with most recent update, they also added support for quadruped animals and creatures. Guys, this is really valuable. For me, animating animals was an area I thought I'd never go before. Now I consider trying that. Now we have our character in scene and let me quickly break down what's happening here and what you can do. So let's click on this menu. And here is the main tool, which is auto posing.
So it's already selected. And what it allows you to move rig and it will make the rest of the body follow. This is by itself already an amazing tool. It is pre-trained. The algorithms here are smart. So like you can see the movement is actually adjusted. Of course, you have quite deep control about it. You can lock and unlock some parts. It's done very easy. Just right click. And you can see if you lock something, it will not be affected, but despite this auto posing.
So most of the time, we're gonna use this tool to set some frames and the rest will be done with the animations. Of course, you can move stuff around in global and local courts. Also to explain UI a little bit. At the top, you can see the setting about the ghosts. We're gonna use it later. That basically previewed the previous or upcoming frame as a ghosted version of the avatar. And you can set amount of ghosted copies.
We're gonna use that for sure. Here we can set the ghost mode and silhouette mode. If that will be easier for you. Another thing is to show trajectory and how you show it. Again, for all of the options like in between animation and root motion, we're gonna use that. And we can actually control that. So adding and removing frames is very easy. Just select the timestamp and press F. F for frame, of course. So now if I create a simple in between animation.
So now here, if I open this menu and create some simple Bezier animation or anything and turn on trajectory, you'll see the exactly how this select points through time. And there's even an edit mode. So if you turn this animation to fix it and then we can even edit each moment of time and trajectory. And also you can see how this ghosted preview works which we selected previously. Pretty amazing tools if you ask me. There you can enable, disable grids and do a few more views if you need it.
Here in auto posing, you have a few more settings such as like enabling hands if you wanna work with hands. That's the basics that we need to know. And now let's actually start cooking. Now I'm gonna drag and drop my collision which is the blocked scene. And how about we actually locate it? We're gonna locate it on the ground level because for the first part, I'm gonna show you in betweening. Now note is very important.
There is two way of do AI animation. In between animation and root motion. The root motion is most advanced and most excited. We're gonna cover a little bit later but it's also very useful in between animation that I kinda want to show you which is algorithmic and has less settings but can be also very useful. But however, it meant to be on the floor. So since I'm gonna use it here, I'm gonna make sure my last floor is on top of my collision is under the ground level.
And now it's very simple. Let's set the frames and set right pose with auto posing enabler. And just to let you know guys, I'm not a professional animator. I'm also new to this but I'm super excited and I gave it a try and I was amazed how far I can get with it. And I actually did something decent. And watch this video until the end because that was actually a decent result. Okay, so I actually got these three frames done.
Okay, and now we're gonna select all these frames and we can just add Bezier animation and that's nothing interesting, right? It's just like a smoothing. But of course, we're not here for this. So we're gonna select them again and we're gonna press this in between button and it's completely different result. So let's preview the animation. Okay, so now our character walking. We just actually did three frames which was not that hard because we got auto posing and we already have the character actually doing something looks nice.
Of course, it's not polished and I show you more options how to further improve that. Now let's move to the second part and show you how people actually use it and professionals as well. You can actually drop reference animation and here I got some video. And the only thing we need to make sure is that the frame rates of the video is the same frame rate as we do have in scene. Let's wait it process and then we're gonna allocate it somewhere here.
So now let's find the frame where we want to actually start doing that animation. Gonna press on the object and here in texture constraint, you can choose the starting frame. So which will be the 70 and now it only start playing animation on 70 frame. And guess what I'm gonna do? I'm gonna do exactly the same thing. I will try to do this poses for five to six important poses and then we're gonna do the in -betweening.
And bit by bit I was actually making very good progress. And now we're gonna speed the same process for a jump of the second floor. And here I want to do the Arabic flip or like side flip. Pretty much the same process but I was trying quite a lot and still my animation was looking very bad. But with these tools alone, it is very difficult to make the animation look right. That's where I gonna introduce you to more tools that helps to clean it up.
And one of them is of course the enabling physics. So here let's enable that physics. Now the previous animation track I split just to not overload my PC. And here I gonna demonstrate you how to use the physics. So first of all, since I actually moved the platform to the top and there is no grounds, we actually need to let it know that there is a new ground and which is our collision. So if we enable physics right now, you can see it actually don't understand why it thinks and made it like flying to the space.
Because it thinks that the character is in air all the time and is jumping. So we're gonna select the object, go to collision and add kinematics. Now it's a different thing, okay? And now we can see our jump became more natural. In physics, you also have this ghost offset that I was using that should preview the physics and my version, okay? And here we can see that with physics, it actually adds more logic and you can play with a lot of settings.
The gravity, you can add it or not add it. Stiffness, dumping and all these parameters in the list. And after a while, I was able to achieve some really nice results. So now the movement looks more natural and even though it's like quite really difficult motion, I was able to achieve something close to the reference. I definitely need more practice on that. But guys, let me know what you think about it. Also in Cascader, of course, you do have access to IK, FK and their own GK, which stands for Global Forward Kinematics or something like that.
And you can definitely use that to fix some limbs rotations and movement. So in my case here, I was trying to fix arms with FK to make it smoother and not going too wild. And that was actually successful. But now guys, let me introduce you the most recent new AI tool, which is very similar to NVIDIA Kimora, which you might expecting to see here. And yes, there is. It works a little bit different. You're not just prompting the action.
You also do set some frames and you set the pose and then you have this option for root motion, where you can play with different settings and different styles such as run, walk, acrobatics, jump. And it will try to do the following movement. We're gonna press R button to generate that root motion. And also what you need to know is that this is a diffusional AI, which always gonna generate different movements. So if you're not happy with it, it's not same as in between animations.
So you can press few times and it always give you different results, especially if you're gonna play with styles like acrobatics. I found very interesting example, someone testing all different styles and you can see the same actions. And here you can see how in same poses, different styles work. So like jump, acrobatics, there's a ground, which actually will force it to make a crunch. And there's a lot, a lot, a lot of animations.
For example, acrobatics can give you some quite cool flips, such as this rise and more. So definitely this is one of the main tool, but in some way there's also less control, but you can always add more poses. Here we can see how I actually made the crunch and so forth. And I also started to assemble this last part, where my character goes on top of that metal beam and there was like quite dangerous moments. So I had to also play with the hand animation.
So you already might know, like basically the same out of posing, trying to use all the tools, all these AI tools and come up with the results. Don't forget guys, if you want the physics and all that stuff work, you're gonna need to add these objects to collision. And what I also know that it also works with some holdable objects and the Cascader does amazing job, like with weapons, shields and all that stuff that will be concluded.
And that will be taken into the account when calculating the physics, the motion and stuff. And here guys, I want to show you the final part, which actually shows how amazing tool. And that is not only for the beginners. It's not only to create animation from scratch. It's also to polish your animations. You can also combine ready-made animation. You can drop them here and combine them in one track. So here I was doing like all that stuff and it was not looking that great.
So there are different approaches altogether. This blue is a baked animation from previous step. And here you can see, it's not really looking natural, right? So this jump is awful, right? But now what I'm gonna do, I'm gonna add physics to this object, to the collision. I'm gonna make this all animation fixed and add out of physics. So this is how I understand it works and it will recalculate it based on the physics settings and my action becomes way, way better.
So let's take a look on this altogether, okay? Take a look on the green avatar, right? Wow, okay. It looks so nice. All right. And then we have, and even the jump. And you see like when he jumps on the beam, like this sort of dump, it was amazing. And yeah, I mean, physics polished this line. I mean, I was almost frustrated at some points, but yeah, I knew that I need to do this step later. And then we can press snap to the physics and basically our track will be snapped to the physics, right?
So it's like a baking. And the last part is to bake the animation and retarget it to our character. Actually, that was quite easy to do. We can select all frames. We're gonna select the character in pose, select it all and retargeting copy. Then we're gonna go to our character in the scene and just gonna add same amount of frames, select the avatar and retargeting paste. Wait a little bit, it process. And now we can actually press play and it works.
So at this point you can pretty much move it to the Unreal Engine, but I haven't enough time to test the most recent update that was actually released the moment I was making the video. There is also a live link where you can drop the character in Unreal Engine and sort of like preview the animation right away in scene. That might be useful in many times. So you don't need to do this process back and forward. This is how animation works, like back and forward, back and forward.
And when I was talking about retargeting and this is also very important tool that solves a lot of headache for professional artist. And I know many pros use this tool to do a retargeting. As you can see, like they do handle like difference in the proportions, different skeletons. That's actually not that easy if you try to do that in any other software. Yes, of course they still continue improving that, but that's huge thing.
So the professionals can drop the animation here, do rigging animations, retarget, or they can drop their existing animation and actually polish it, make it more realistic with physics and so forth with the collision and all the other options. And you saw how physics, smoothing and recent root motion in Cascador even better than NVIDIA Komodo for me. That has more control and it's built in into this ecosystem. Like you can polish it on top of the physics and I believe very soon in Cascador, we're gonna see something that NVIDIA Komodo can do, like generating the free motion as well.
So guys, subscribe. I will keep you posted. I contacted Cascador. They're quite nice guys and huge professionals knowing what they're building. As usual, you can find it in the description. And now it's time to bring it all to Unreal Engine. Boom. Guys, if you want separate video about how I created this scene and the character built up all together, generated the assets, fine-tuned them, I can create a separate video.
I have all the recordings. Just let me know in the comments if you want it. Let's add the animation to our scene, do some preparation, and I also did some camera movement. And here's the final result, guys. That was actually my first real try into the animations on that scale. I mean that complete more than 1000 frames track in game that looks like something decent. Let me know what you think in the comments and see you in the next video.
The words are the caption track's own and nothing is reworded or re-transcribed. Paragraph breaks are placed between sentences so the text reads as prose.
Free tools for your own script: paste a draft and see where it stands before you record it.
Paste your draft and see where viewers are likely to drop off, with a rewrite for each weak line.
Paste the first 30 seconds of your own draft for a hook score and rewrites.
Check your draft against YouTube's advertiser-friendly guidelines before you record it.
Read this channel's public videos and transcripts, and download a writing brief for it.