Getting the transcript
Reading the captions from YouTube. A video nobody has opened here before takes 10 to 30 seconds; this page fills in on its own.
Getting the transcript
Reading the captions from YouTube. A video nobody has opened here before takes 10 to 30 seconds; this page fills in on its own.
TechAnim Studios · @TechAnimStudios
Words
4,767
Runtime
40:53
Speaking pace
117wpm
Reading time
20min
117 words per minute, below the 160 25th percentile of 349 measured videos. That distribution comes from the 349-video hook study.
Opening (first 30 seconds)
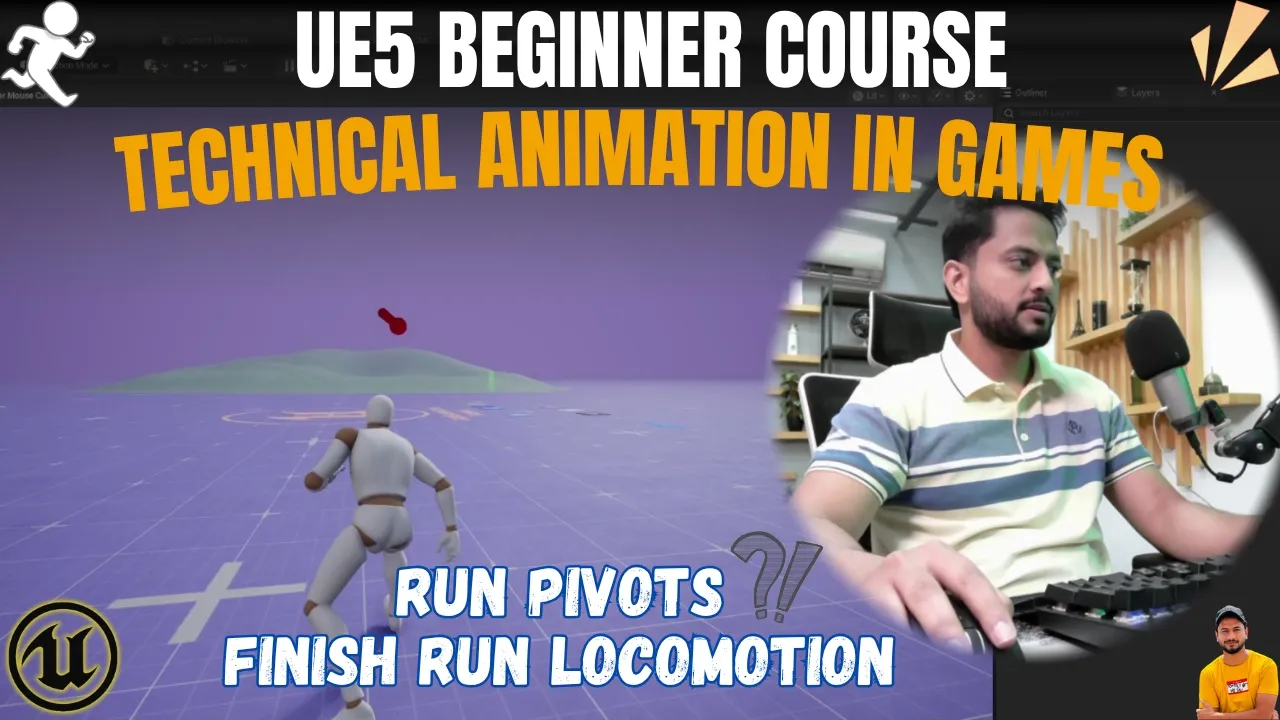
Hello and welcome to TechAnim Studios. This is the part three of our word technical animation in video game series. And in this part we will finish our run locomotion system. We will add pivots to our run locomotion system. As you can see that our character is properly performing pivots when the movement is opposite side of our
59 words, the words spoken in the first 30 seconds at 117 words per minute.
Free, no signup. See how the first 30 seconds hold attention, with rewrites.
Sentence shape
| Measure | This transcript |
|---|---|
| Sentences | 362 |
| Average words per sentence | 13.2 |
| Longest sentence | 49 words |
| Questions asked | 5 |
| Sentences containing a number | 44 |
Most used terms
Filler phrases
96 in total: uh 62 · like 33 · I mean 1.
A literal whole-word count of the same phrase list the Prepublish browser extension uses, so a phrase inside another word is not counted and a phrase used in its ordinary sense still is. It is a count and not a judgement.
Run the check on the words above: where attention is likely to drop, with a rewrite for each weak line. The free check shows the scores and the one issue costing the most.
What this transcript is
Every word below is the caption track YouTube publishes for this video, pulled from the video itself and reproduced unchanged. It is not Prepublish's writing, not a summary, and not a re-transcription: it is the video's own published captions. English captions, generated automatically by YouTube, in the video’s original language. Source: the video on YouTube. A channel that would rather this page did not exist can ask for its removal through the contact page, and it is removed.
No Script X-ray for this video: YouTube shows a Most replayed graph only once a video has enough views.
Hello and welcome to TechAnim Studios. This is the part three of our word technical animation in video game series. And in this part we will finish our run locomotion system. We will add pivots to our run locomotion system. As you can see that our character is properly performing pivots when the movement is opposite side of our current character rotation. So we'll have starts, stops, loops, and pivots are working fine.
As you can see in this video that everything is working really smooth. There is not any foot sliding or any any jitter when we are switching direction or when we are pivoting. And keep in mind that we are not using any motion matching, any offset root bone, or any advanced techniques here. We are using just beginner-friendly basic math and making things completely from scratch. Like it's all custom functionality. We are not using anything from advanced nodes which are which which are included for locomotion like motion matching, offset root bone, etc.
So let's get right into it. So this is the part where we have left off previously. And we have slight issue here which bothers me a lot. Like you can see that sometimes we are not performing the correct start animation. See? This is happening because our rotation rate is set to negative one, which means as soon as we give the input, you can see the red arrow, that the rotation of the character changes immediately. We don't have any information like what was the rotation on previous frame to compare in which direction we are moving.
So, we don't have that information with this rotation rate. And due to that, we are not sure when we are giving giving opposite side input that either we are going positive 180 or negative 180. So, after 180° our quadrant change like our value changes from 180 positive 180 to negative 180. So, the system confuses in this and due to that sometimes the character rotates in positive 180 and in the animation we have selected was negative 180.
Or if the character rotates in negative 180 and the animation was selected positive 180. So, due to that we have this slight sometime we have this issue that the start rotation was not working. This we are not selecting correct animation. So, we need to fix this issue first. So, instead of changing the rotation rate anything like that like I can change the rotation rate, but instead of changing that what I have decided to tackle this issue and fix it properly.
And I have spent like a lot of time figuring out what would be the best solution for this. And the easiest the proper solution would be to change our input uh behavior slightly. So, in order to fix this, what I'm going to do here is open my character blueprint. So, this is our character blueprint and we haven't touched it before. Like it's the base default game animation sample project character blueprint. So, the issue is when we have the input in opposite side like 180 or negative 180.
First, we need to find out if we are giving the op- opposite side input. And then we will change the input behavior slightly. What I mean by that, I will show you over here first. So, before moving we have this X uh input axis. I'm going to search for input axis underscore move. Uh this is our input axis move. And I'm going to split this truck pin. And after that, I'm going to search for make vector node. And I'm going to connect my X into Y because our input axis X is our uh Y when we are moving.
And Y is our X. And I will show you here using draw debugs coordinate system. This will use get actor location. And I'm going to debug my input rotation here. Make rotation from X. Here you will see in action. So, here you can see when I press W my input direction is forward. When I press A, the input direction is in left side. Okay, so this is all working fine. And when we switch direction, you can see that when I press W, the input direction is not in correct direction.
So, what we will do here is I'm going to search for rotate vector. Rotate this vector towards my com- actor rotation. Sorry, our controller direction. Get control rotation. And then I'm going to use this vector as my input direction. And here you can see that no matter which direction I'm moving, my input direction is incorrect. Uh in incorrect direction. Okay. So, this is uh our input direction. What we will do here is compare it with our current actor rotation.
I'm going to use delta. Current actor rotation. And here it is our direction value. You can call it. I'm going to use split struct, and I'm going to print it over here. Print string. And here you can see that uh if I select debug character over here, you can see that our values are slightly uh 180 positive 180, and then when we when I'm switching direction towards left, the values are changing to minus 180. So, well, now we have the input direction.
Like when the input is purely opposite side. So, if we have this information, I'm going to promote this information to a variable. I'm going to call this input direction. Here. So, instead of switching 180 to positive 180 to negative 180, what we will do is we will move for the first frame. For example, when we start moving for the first frame, if the value is 180, we will input the value 179. If the value is -180, we will give the value -179.
So that in our animation blueprint, we have the enough information that we will select correct start animation. Okay, so now I'm going to get my This is our current act controller rotation. I'm going to recombine the struct pin. I'm going to use combine rotator over here. And we will combine I'm going to split struct pin, and we will use this as in our yaw value. So now we will use our input direction. I'm going to use select rotator based on my input direction.
So if my input direction is positive, like greater than zero, 180, like if we if our input direction is positive, what we will do here is combine -1 here. Like we will subtract -1. But if we are if our input direction is negative, we will add one so that we have uh input direction uh subtract input direction. Okay, so now if I hit play, and without changing the input direction, you can see if I disable this in movement, and use only print string over here, -1 and 1.
And if I debug my input direction, 180. And based on this information, if we have the 180, we will subtract one. I'm going to use it over here. Okay. So, yeah, that's it uh in our input direction changes. So, just to be clear, what we have changed here is if our input direction is positive 180, we will subtract minus one. If we I If our direction is negative 180, we will add one into our input direction, so that our start value will not be 180 ever.
Like when we start moving, if we have the 180, we'll have subtract one uh we subtract one, which means 179. If we start moving in negative side, and if our direction is negative 180, we will add one, so that we'll have value of minus 179. So, this is the only change that we need to make inside our uh movement inside our input movement. I'm going to move this whole nodes over here and put it into our separate comment.
By the way, you can grab all the project files free of cost on my Patreon page. And here you can see, now if I go to my animation blueprint, this is our animation blueprint, and here is our find movement start direction function. Inside our blueprint thread save, we have this movement start direction. I'm going to delete all my functionality over here that we have added recently in our last video. And what I'm going to do here is simply I'm going to instead of removing everything, just give me a sec.
We will use our property access. And try get pawn owner, we will get our current actor rotation. And then we will compare it with our current mesh rotation. So, if you have followed along all the videos, you have in our first video we have the we offset our skeleton mesh to our capsule component. So, this is this is the value which we are offsetting to from our capsule component. So, we are comparing this current skeleton mesh rotation in world space to our current actor rotation.
I'm going to use delta. Compare it with my root yaw alignment, this variable. Root yaw alignment. And this will be our direction value. And now if I use print string and print the direction value over here, you can see that it will always start with 179 here, you can see. No matter if I am moving 180 or -180, it will always start with 179. Here it is. So, now we have the correct way to find out which direction we are start moving.
If I remove this functionality, like remove this, if I connect it like before, break rotator, put it over here, you will see that our input starts with 180. Here, see? So, we will start with 179 for the first frame only. Okay. So, this is our fine movement start direction function is already set up. So, now we no longer have that issue where we uh where we are not playing the correct start animation. So, this is the proper fix for our correct start direction.
Now, let's go ahead and set up our pivots. So, for setting up our pivots, uh first we need to know when we pivot when we are in pivot state or not. So, I'm going to open my blueprint thread safe function. This is our setup essential properties. I'm going to search for First of all, uh we have this information. I'm going to use property access node, grab my acceleration value from my movement component, and promote it to a variable.
I'm going to call this acceleration. Excel eration. So, the condition will be pretty straightforward whenever acceleration is opposite to our velocity. Which means we are pivoting. I'm going to grab my acceleration. We have already our velocity. velocity And then I'm going to normalize each of them. Here we go. And now I'm going to use dot product to find out the direction, in which direction our acceleration is. And if that is greater than if that is less than zero, less than or equal to zero.
Which means we are pivoting. I'm going to promote it to a variable. pivoting There we go. Okay. And now if I hit play and debug the value of pivoting. Here you can see when I immediately give opposite side input, the variable becomes true. Here you can see that. Our value our variable pivoting becomes true in this duration, like for these number of frames. And whenever velocity will be aligned with our input with our acceleration direction, the pivoting will be false.
So, we only need this pivoting to be true only for one frame, just to trigger the transition. We We not We are not needing this pivot to remain true as long as that duration uh velocity becomes equal to acceleration direction. So, we only need it for one frame. So, in order to do that, I'm going to create a new variable. I'm going to call this was pivoting last frame. So, if we are in pivot state in our last frame, then just set it to false.
We only need it for once. I'm going to use and over here. Was pivot last frame not true. Then we set the pivoting to be true. And as soon as the pivot will become true, we will set the was pivoted last frame to be true as well. Now, if I hit play, and give opposite side input, uh you will see that the debug string Here it is. There we go. So, we have this true only for one frame here. You can see that. We are setting the pivot to be true only for one frame using this condition.
So, this is more than enough for our for our purpose to trigger the pivot transition. And now let's set up our transitions inside our animation graph. So, now if I go to my animation graph, uh >> [sighs] >> There it is. So, let's imagine you don't have any pivot animation, and you don't want to use pivots. You will What would be would you do in that situation? So, the the easiest solution would be uh we have this uh set we have this functionality set up over here.
We are offsetting the mesh from capsule as soon as we have the input. And we will use another condition. And here if we are pivoting then we will reset our value one more time because the reason is if I give this opposite side input immediately, you can see that our mesh is aligned with the capsule immediately. So, what we will do here is as soon as the pivot becomes true we will reset our value again. Like let's say we uh trigger the pivot we will reset our root yaw alignment variables here and then start calculating that variables again.
And now if I hit play uh instead of hitting play, we need to set up one more condition in the animation graph. So, we are in moving state all the time. I'm going to move these over here. And I'm going to select the debug of this character. You can see that when we are in pivot uh state our mesh immediately align with the capsule direction. So, in order to fix this without using any pivot animation, what you what we need to do here is move from moving state to idle state just for one frame.
Like this. When we are playing the start animation. See? We are moving just for one frame and then start moving. So, what we will do here here is add another condition here. If we are pivoting, then switch to idle for one frame only using a show blend and then start moving again. And now if I hit play, and you will notice that our pivots are working fine without using any pivot animation. See? Uh I am triggering pivot.
Here you can see pivot becomes true. And we are not aligning mesh immediately with the capsule. Here you can see. We are properly playing the start animation. So, you can also use this This behavior is also like acceptable. Looks realistic. Looks natural. So, we need to play the pivots. So, let's do that if we don't want this behavior. So, what we will do here is I'm going to remove this condition over here. And I'm going to go to my base layer.
Here you can see that uh inside our locomotion start state machine, we have our run start and cycle states. And I'm going to create a new state alias that will be our start and cycle alias. Which means this state alias will represent our these two states. For example, if I want to perform pivot from start to cycle, from start to pivot, like from this condition or cycle to pivot, we need to make two transitions. But when we are using state aliases, like this state represents these two states.
If I select cycle and run start and now if I add a state over here pivot we will only need one transition from here. Here you can see. We can go from start or cycle state to pivot state with just one transition here. And now if I open pivot state and I'm going to search for sequence layer. I'm going to connect this over here. So for our sequence player the sequence will be dynamic value because we will decide based on the direction and fit position to properly play the correct pivot animation.
And I'm going to set the looping to false as well. And I'm going to set the start position to be a dynamic value. And now if I select my sequence player again and go to the on become relevant and create a new binding I'm going to call this on become relevant. Select run pivot anim. Select run pivot anim and from this function I'm going to search for set sequence. Make sure you set this set sequence uh with player library sequence player library because we are using uh sequence player over here.
So set sequence and I'm going to grab this node and convert it to sequence player. Connect it over here. And from my sequence, I'm going to use select. So, we need to find out which direction we are taking we are taking pivot. So, we have the movement direction here. I open my let's say function, we have this movement direction. So, we need to perform pivot when we are complete complete opposite side. So, that means uh when movement start direction equals to backward right or forward right.
Means we are completely taking uh opposite side input. So, if we are the movement is backward right or forward right, then we will select 180 right pivot, otherwise we will select 180 left. I'm going to duplicate this node one more time. And based on our feet position, we will decide either we need to play uh right foot pivot or left foot pivot. So, we already have this variable here uh that we have calculated right foot forward.
So, if our right foot is forward, then we will play in this position uh 180 right with right foot. Otherwise, 180 right with left foot. And if our if we are in a uh like negative side, if we are in then we will play 180 left with right foot or left foot. And now I'm going to go to my content browser and we need to select our pivot animation. I'm going to go to animation run. I'm going to search for relax turn 180. Okay.
These are four animations that we will use for for our purp- for our pivoting. >> [clears throat and cough] >> And make sure that you have inside all these four animations, I have already applied the fit sync markers. And the root yaw modifier which we have created previously like in our last video. So, if I I'm going to show it one more time over here. If I remove this root yaw modifier, so we have this BP root yaw any modifier.
This will what what this will do here is map this root rotation, this rotation into a curve. Here you can see the root is turning from 0 to 180 and we have mapped that into a 0 to 1 curve for all of our pivot animations. There we go. So, these four pivot animations have all these root yaw curve applied. Uh if you don't know about this, you will highly recommend you to watch my previous video about this about the series.
And we have these sync markers already applied. Now we need to select the correct animation. So, if we are in up positive side, then we need to select 180 right with right foot. 180 right turn right with right foot. Select it, paste it over here. Otherwise, 180 right with left foot over here. Same for left case, turn it left 180 with right foot. Turn left 180 with left foot. So, now we have selected our correct animation.
And now the animation is not starting with the proper frame. We need to change the start position like this 180 yards should play this animation should play from this point like point nine at point nine second so that we play the pivot animation as soon as the character takes turn. Here you can see. We don't need to play this portion of this animation. So, what we can in order to do that, what we can do here is I'm going to grab this sequence player.
I'm going to set this set start start position. And I'm going to set the set accumulated time accumulated time as well. So, what this will do here is as soon as we select the correct animation, we will also select the correct start frame of the animation. So, similarly if we are taking 180 turn in positive side 180 right I'm going to use select float. Move it over here a bit. I'm going to duplicate this node one more time select float.
Same case for this. Now, we need to just select this correct start start frame of the animation. Okay, I'm going to use right foot. And right foot over here. Okay. So, if we are pivoting in 180 right, turn right with right foot, we need to play the pivot from around 0.9 second. Here, you can see when as soon as the we are taking uh turn, 0.9 second somewhere around here, 0.9 second. I'm going to set this 0.9 over here.
And for my left, this will be also 0.9. Or as soon as the as the leg crosses the root, yeah, 0.9 is suitable value. And I guess for all these animation, it works the 0.9 works fine. So, I'm going to put 0.9 for all of these. So, if you find something like if you have different animation or you find some better starting position, you can do that completely. But, I'm going to set this 0.9 for all these animation. So, now what we are uh what we are doing here is selecting the correct start animation based on our direction and feet uh feet position.
And here we are selecting the correct start frame of our selected animation. And now, if I close this function here, and I'm going to play. Here, you can see we are taking pivots. We are taking pivot. If I move this when animation graph over here, you will see that in action. I'm going to select my debug player. Just give me a second. So, here you can see we are in pivot state. So, now once we are in pivot state, we need to exit to cycle state or we need to we can also perform pivot once we are in pivot state as well.
I will show Let me show it to you. So, first of all, once we are in pivot state what we will do here is we need to uh when pivot is ending, start sending, we need to blend towards the cycle state. I'm going to add a state alias here. I'm going to call this pivot alias. And I'm going to move it over here. And from pivot to cycle, I'm going to make a transition. I set this automatic rule base to true. And I'm going to set the duration to 0.35 second.
So, we have the sync marker applies applied for all of our start loop animations. Here you can see. I'm going to copy this locomotion sync group. And I'm going to apply this sync group again to on my pivot as well because we are blending from pivot animation to cycle animation. So, our field should be properly uh blend in the correct uh frame. I'm going to paste the group name over here, locomotion sync. Make sure you have same group names for the animation that you want to blend uh together.
I'm going to set the sync group. and I'm going to change this group role to be transition follower for this time because we are blending from pivot to cycle. And now if I move this over here and play one more time, uh we need to perform pivot. Here you can see I we are in pivot state. Uh we are not going from pivot to cycle because we have not selected the correct state alias over here. So, this is the state alias we need to mention which state we are representing.
So, we are representing pivot state for this. And now if I hit play one more time, and here we can see See, we are in we are properly blending from uh pivot to cycle, and there is not any fit sync there is not any fit sliding involved here. So, this is uh working fine. So, the next thing is once we are in pivot state, we can we need to also uh handle this that we can perform pivot again. Here you can see when we are in pivot state, we cannot perform pivot again unless we are in transition in cycle state.
So, we need to fix this. And there's a really clever way uh we can uh make There's a really clever way to achieve this. So, what I'm going to do here is once we are in pivot state, uh what I will do here is I'm going to create a new just empty state. I'm going to call this uh pivot re-entry. And make sure I have set this uh pivot and set this allow reset on entry. So, as soon as this uh state becomes valid, it should reset itself.
Okay. So, once we are in pivot state, this pivot alias represent our pivot state. So, once we are in pivot state, we can go to this empty state if pivot becomes true again. Here. I'm going to debug the print uh pivot value over here. So, uh you already know that we are calculating pivot and uh we setting we are setting up setting it up to true just for one frame. And there's there is a reason behind uh doing that. So, I will show you over here.
So, once we are in pivot state, if pivot becomes valid again, if we are pivot again valid, we will go to this entry state with uh weight of like let's say point We don't need to change this uh We need to change this duration to zero second. Like we will immediately go to this empty state. And from this state to pivot, we will uh perform pivot again with uh duration of like let's say point three second and I'm going to change this blend to be an actual blend.
Here. And the condition will be true by default. So, it's just a way to re-trigger this pivot state one more time. Once we are in pivot state, if pivot becomes valid again, we will re-trigger this state by the help of this uh re-entry empty state animation. Okay, this is it I believe and now if I move this over here and make it bigger like so that we can see what is going on here. Okay, now if I play okay, there's an issue we are not selecting the correct pivot animation.
Okay, I will try one more time. So here you can see the debug string. So we are setting up the pivot to true just for one frame. We will trigger the pivot and when we are in pivot state if we again trigger the pivot, you can see that we are re-entering the pivot state again. Okay, it works fine now just give me one more second. I will cross-check everything is is same initialization. Set this to initialization as well.
This will be okay, everything is fine. I'm going to play again. Okay, here you can see that we are performing pivots. And pivots are completely working fine. We are landing from pivots to cycle. And there is not any feet sliding involved. And we are also performing the pivot properly. So, I hope you guys like this video. And in the next video we will set up our turning place system. So, thanks for watching and I will see you in the next one.
Bye.
The words are the caption track's own and nothing is reworded or re-transcribed. Paragraph breaks are placed between sentences so the text reads as prose.
Free tools for your own script: paste a draft and see where it stands before you record it.
Paste your draft and see where viewers are likely to drop off, with a rewrite for each weak line.
Paste the first 30 seconds of your own draft for a hook score and rewrites.
Check your draft against YouTube's advertiser-friendly guidelines before you record it.
Read this channel's public videos and transcripts, and download a writing brief for it.