Getting the transcript
Reading the captions from YouTube. A video nobody has opened here before takes 10 to 30 seconds; this page fills in on its own.
Getting the transcript
Reading the captions from YouTube. A video nobody has opened here before takes 10 to 30 seconds; this page fills in on its own.
Stefan 3D AI · @stefan_3d_ai
This video has no Most replayed graph yet: YouTube shows one only once a video has enough views. These are the moments viewers replayed most in Stefan 3D AI's most watched videos.
Most replayed moment at 4:08
7.0x that video's typical replay level
and it will also have the access to full ai apis. Now let's do some serious tests. The first test will be to do an animation of a character that will be split in parts. The first test will be to create animation. Animation of a character that will be an
Said at 4:01
Most replayed moment at 9:39
5.7x that video's typical replay level
Overall I think this guy's made really amazing job, bring it it all together and I really had a lot of
Said at 9:41
Most replayed moment at 20:36
4.1x that video's typical replay level
Just also because I was playing that game when I was kid. Okay, let me see if I remember how to play that. Let's start with the road, right? Let's try to build a, oh, there are cars. There are cars. It generated nice cars and they're like, wow.
Said at 20:29
The graph counts replays. It does not show where viewers stopped watching.
Words
5,671
Runtime
31:24
Speaking pace
181wpm
Reading time
24min
181 words per minute, the same as the 181 median of 349 measured videos. That distribution comes from the 349-video hook study.
Opening (first 30 seconds)
With the best AI tools, how difficult it is to create a nice looking 3D game level? Is it just about generating pile of assets and drop them into game engine? And if you try to ask AI to place them around, most likely you will end up in slope. However, if you use them right in right workflow, you gonna get amazing results like myself. And in this video I gonna break down this complete AI workflow and I show you how to do only using free AI tools. So
91 words, the words spoken in the first 30 seconds at 181 words per minute.
Free, no signup. See how the first 30 seconds hold attention, with rewrites.
Sentence shape
| Measure | This transcript |
|---|---|
| Sentences | 625 |
| Average words per sentence | 9.1 |
| Longest sentence | 37 words |
| Questions asked | 12 |
| Sentences containing a number | 22 |
Most used terms
Filler phrases
161 in total: like 109 · actually 25 · basically 15 · I mean 6 · sort of 3 · you know 2 · right? 1.
A literal whole-word count of the same phrase list the Prepublish browser extension uses, so a phrase inside another word is not counted and a phrase used in its ordinary sense still is. It is a count and not a judgement.
What this transcript is
Every word below is the caption track YouTube publishes for this video, pulled from the video itself and reproduced unchanged. It is not Prepublish's writing, not a summary, and not a re-transcription: it is the video's own published captions. English captions, published by the channel, in the video’s original language. Source: the video on YouTube. A channel that would rather this page did not exist can ask for its removal through the contact page, and it is removed.
With the best AI tools, how difficult it is to create a nice looking 3D game level? Is it just about generating pile of assets and drop them into game engine? And if you try to ask AI to place them around, most likely you will end up in slope. However, if you use them right in right workflow, you gonna get amazing results like myself. And in this video I gonna break down this complete AI workflow and I show you how to do only using free AI tools.
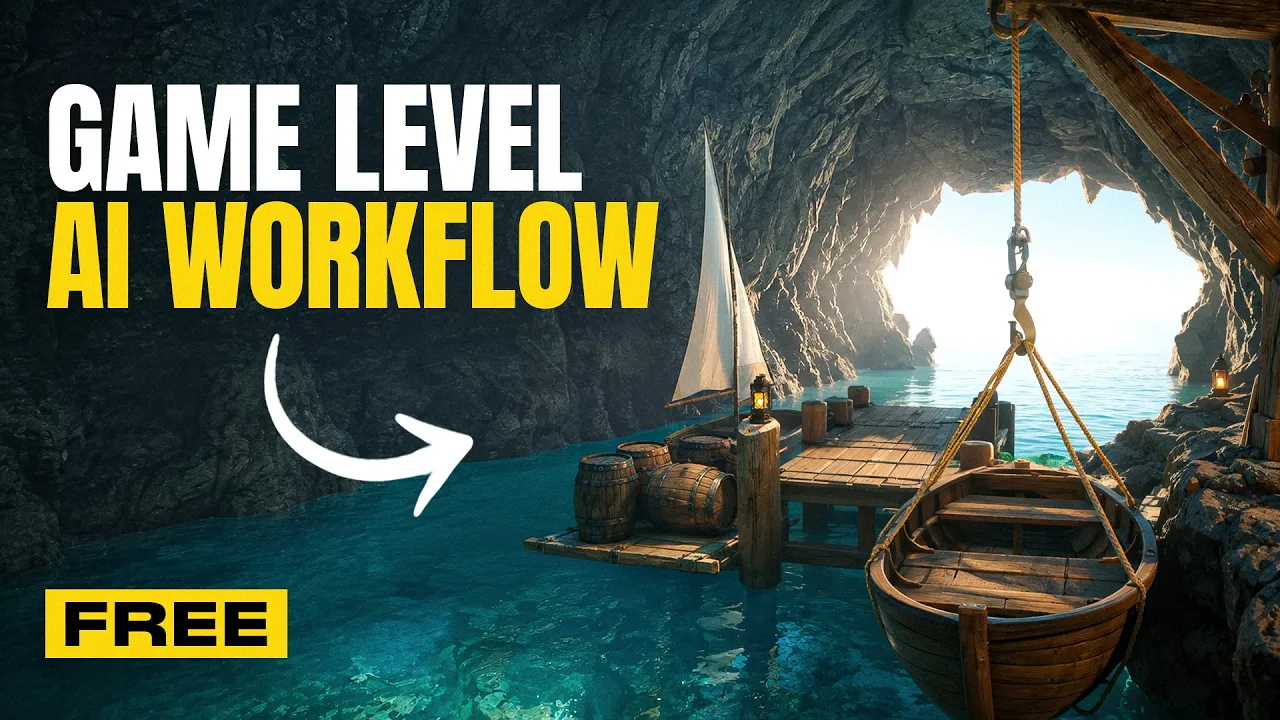
So the starting point is of course the idea. And I actually have something amazing prepared for this video. We gonna create this amazing pirate cave. I just like everything about this idea. I was actually checking your comments and then I tried to do some ideas and this just pops up and like wow. And there are few difficult things to address here like this big cave and a lot of interesting objects. So what will be the next step?
High level it looks like this. First, we gonna prepare building blocks. That includes props concepts, generation and preparing them for further work. Second, we actually convert this asset kit into the game level. And we gonna do that in Blender. And it's not about modeling, it's more about assembly things. You can also do that in game engine, but you most likely gonna spend much more time. And third step is to set it up in game engine.
For this video I gonna show it in Unreal Engine, but same thing can be done in Unity. Now let's follow the plan. So here's how you can do that for free. There is AI studio from Google where you can access free Nano Banana. And guys it's still amazing. I've been doing so much tutorials using that and hopefully it will be soon updated and do even better job. Of course if you have some bugs you can use better models such as Nano Banana Pro, or GPT image to edit and so on.
And here's what I did basically. I split my concept image into smaller chunks and from those smaller chunks I extracted building blocks. For example with the cave I extracted the cave alone and then I actually circle it on the image. You can actually do that right away in Gemini and said I need this and this and this stone. Then I got some generations and selected the best ones. Same thing I did with the piers. Again just go around and say like okay I need this part, this part, this part, this part.
That's the whole magic. And this is very important process. You might need to do this process once or two times to get better understanding at what size you can keep it or where it actually makes sense to go deeper and generate it in smaller parts. For me that's the question about how much control over scene I want. So I generate them like that. How I'm gonna actually place them around? Also for some objects like stone, boards, planks, I generate them in group and later I'm gonna generate them in 3D as well.
That saves a lot of time and tokens. And one more thing I also prepared with Gemini is textures like this fishnet texture or later I even show you how to create seamless texture to use as materials. And here's how my final list of images look like. Nothing crazy. Again depending on the environment this list can be like three times more. That's totally fine. And one more advice you don't really need to predict all parts you might need.
You can always circle back. To generate 3D models we're gonna go to Hunyuan website. They still provide with 23 daily generations which is amazing. And there's basically two options how you can address that. First one is to generate high poly. And I recommend to use that for some big objects where you want to keep those details. And I'm gonna do that for most of the stone objects. You can see them on my screen. And I don't even need a texture because I'm gonna show you one cool approach how we're gonna bake normal and add seamless texture on top.
Another thing is that if you go to laboratory there is 3D smarts topology which generates low poly meshes. It use same credit pools and basically choose triangles or quads here. There's also amazing Hunyuan 3D studio. I made a complete video recently. It's on my channel. There are even more possibilities. And also for free. Now for most of the simple objects I was actually using smart topology. And I was getting quite quite good results which you can see on the screen.
Again how do you decide where you need more details. Less details is how close players will see those objects. To be honest even though it's low poly there are quite enough details. But if you want to get maximum from what 3D AI can offer I definitely recommend to take a look into Tripo P2 which just recently released I think two weeks ago. As soon as it released it actually took first place basically surpassing itself.
Also Tripo still takes first place in high poly generation. Main new feature is that they added quads. And again like the quality of the topology is insane. It still requires thinking and same as with Hunyuan. Like you do something with high poly first then the retopology baking. Something you do with low poly right away. Again very similar approach that you see in the video. But overall you're gonna have better mesh quality.
Less time to process it and so forth. And of course by my link in the description you're gonna get extra free credits. And if you decide to buy subscription there will be a promo code for 60 % of first months. Now back to cooking. Now let's bring it all to Blender. Why Blender? Because that's free software. It's very convenient and you don't really need to learn everything about Blender. You just need to know some tools to be able to process that.
Whether that's high poly low poly whatever. I think that's just the best tool to work with 3D. And even myself I can't remember when last time I was doing actual modeling. So what we are going to do now is to convert these assets into actual building blocks. There are a few issues that might be concerning you. Let's start one by one. First I'm gonna prepare some assets from textures that I generated. Which was the pirate papers.
As you remember I generated color texture and alpha texture. And here's how it's done in Blender right. You can prepare it here to place it around. And later again like reuse it in Unreal Engine. This is what exactly what I do. I created one plane one texture for four. I'm just gonna split this plane into four parts. Why? Because these four papers will use one material. While there will be multiple objects. I'm also gonna do that for fishnet.
You can see it here. And now I actually went through all my objects and selected those I'm not happy with. In terms of texture. Right we're talking about like just texture in first place. So there will be some boxes, anchor, barrel. And what I'm gonna do? I'm gonna select all of them and export them as GLB. And bring you know where into the Moondiff. Moondiff is still available for free. And by my opinion this is like a best tool for AI texturing.
And I have options to only use paid tools. But still we use Moondiff to do the final touches. This is how good it is. And the process here looks very simple. We select the object. Import all objects so you can actually traverse through them. Now we're gonna go to texture mode. And here you can see on the other side of the coin. This completely broken. So I preliminary uploaded all assets here. You can just click plus and upload all the images.
I choose in painting. Painted the broken area. And with selected view. Click in paint or generate. Now there is generated image. And I can simply use this in paint to reveal that area that I want to change on my texture. That's how simple it is. I just fix it. This texture. And I can actually export back this color texture. And use it back in Blender. Here's another case. I have this box. And you can see like the front side looks very nice.
But these sides look terrible. Like I mean less detail. Like I mean basically it doesn't fit in style. So let's regenerate it. And boom. So this one looks so much better. I'm gonna do that for other sides as well. And now I'm pretty happy. Let's do the same thing for anchor. But in case of anchor I am completely unhappy with texture in general. So I'm gonna actually hide that texture. Select the reference. And generate completely new image.
And there is another tooling here is that you can add it as layer. And you can see how much better the texture is. Add as layer sort of like print the complete texture from the view. So you can basically go view by view. And again generate. Make sure that it generates what you want. Otherwise like specify the prompt. The prompt image. And do the thing. So here you go. Like it's much better job that it was originally done by Hunyuan.
And good news for you guys. Of course there is complete breakdown on how to use motif on my channel. So it's good for two cases. Address some artifacts. Add some details. Text. Logos. I don't know whatever. Just make anything sharper. Or even retexture the object completely. That's also possible. Now when all my objects ready. I can just export the color texture for each. Or export them all at once. Go back to Blender.
And for example I gonna just simply replace the color texture for new one from motif. One potential issue fix. What else can go wrong? Sometimes there are very very small artifacts on textures. And to do this round trip with motif might be taking too much time. For this one I can recommend you to take a look into some Blender native functionality. Such as clone brush. So it works very simple. Go to your object. Click on the texture that you are not happy.
Let's say color texture. It must be selected. Now go to texture paint mode. And here's what you can do. Select the clone brush which is here. And with control click anywhere to source the texture. And it works like this. Basically where you click with control it will use that as reference to clone that area. So you see like let's say there is like some holes and I don't need those holes. I click somewhere and I just like paint it like that.
That's it. I saved so much time I'm gonna just address some issues. There can't be some blurriness that you can address like that etc etc. And you might only see that when you can start assembly objects and more. One thing if you do any modification of texture in Blender don't forget to save it. So you can do that like this. Another extremely common issue when you work with AI generated assets. They are not consistent by color.
Let's say we have these two boxes. Let's say I'm happy with the texture overall but I want them matching in colors. So I want the left one look more like the right one. And here's the easiest way I figure out for myself. In Blender right here we can do the color correction. That's very easy. Shift A or right click and you can get access to a bunch of color nodes. That you can connect between color texture and the material input.
And just do the correction. So I played a bit with values and now I have much better result. Again there are plenty of nodes like gamma, contrast or even RGB curves that you can control for better result. And now this looks so much better. Now the only thing of course is that you cannot just simply export that to Unreal Engine or Unity. But that's not a problem. You can easily bake that into the new texture and that's done in few clicks.
But I also will show you how you can not only bake that in new texture but also bake these two objects in new texture. Because again like why not them to use one material. They are like old boxes. So I joined the objects and duplicated them. I'm gonna call them high low but they are basically same polycount. Then on low basically objects are gonna bake on. I removed all materials and created new one and call it box. Now one thing we need to do to make this work is to re -unwrap objects.
Or actually at least pack it. To make sure that the UV space they use is not overlapping. There is an amazing free add -on called UV packer. And I just did that in few clicks. Right I select it. All objects in edit mode. Click unwrap. Click pack with the margin. And that's it. Now these objects are one object with new material and UV that doesn't overlap. Last thing we need to do is to create new texture. Again here just create new image texture.
Give it a name. Box. Color. We can connect it to shader. And let's do the baking. We're gonna go to cycles engine. Bake option. Here gonna choose diffuse. We're gonna uncheck direct and indirect lights. Select it to active. And here usually we need to set this value for 001. Then we can enable cage. Those objects are identical. So we just need one extra mil to do the coverage. And since we do select it to active. We're gonna click on object that we're baking from.
Then baking on with Shift. Make sure that in target object the right node is selected. And click bake. That will be almost instant. And here is the result. Now we can hide that source object. And here we go. It's now not only new color but also in one texture atlas. Similar way you can bake five objects together. Ten objects together. Just make sure it's reasonable. And that all objects are not that blurry. Like I mean you decide like on texture size.
On purpose. How these objects gonna be used. And so forth. And if you guys like my workflows. And want seriously improve in baking game levels or characters. I have amazing news for you. Me and my team we just finished working on 3D AI course for game levels. And that's just mind blowing. We're gonna guide you from very beginning. How to work with the idea. And how to get your game level ready. We already have hundreds of happy students from character course.
And now it's time to build the worlds for these characters. And to celebrate that for launch week there will be special discount for anyone. All links will be in the description. Another thing that usually pops is PBR. For example I have this pen. And what I gonna do I gonna go and just create two textures. Right in shader. One for roughness and another for metallic. And by default those are black maps. We gonna need to set them to non -color.
Cause we gonna work with properties. And of course we gonna go to texture paint. Now here there is a fill brush. And we can sort of set the properties with the values. Like this. That will also paint this information into the texture. And just like that I can create right material. The cool thing about creating maps is that you can always switch to brush. And for example make one area less reflective. Here is one example.
I made it like extremely metallic. I gonna reduce the brush a little bit. And now I gonna paint with complete black on roughness. Which will make it maximum reflective. Right so I gonna paint like that. And it will become almost mirror. You can see it's extremely reflective. Or if I change it to white then it will be absolutely non -reflective. Now let's talk about one more thing. Big assets. Big assets like big surfaces that still need like detailed texture.
And usually there is tile texture used. Because generation is limited. Or there is a second approach. We gonna build big objects from smaller checks. That depends on multiple factors. If you saw my previous video where I created souls like game level. I was using tile texture for big surfaces. Also using with normals and stuff. Here I have a bit more difficult challenge. Because this is a big cave. And if I just create some surface and add that tile texture.
It might lose some big bumps and so forth. So I decided to create it from smaller chunks of rock. So here's how I did it. Here are my rock chunks. What I gonna do in Blender. I gonna first resize them. Then I gonna duplicate them. And create low poly version. But I don't need any low poly generator. I gonna just do that with Decimate. Here I gonna choose extremely low value. Because I gonna need a lot of rocks to do that cave.
And I can go as low as 0 .1 and even lower. Here you can see the final result. Again I just did that twice. So each of my rock like basically two of them. Only have around 1000 polygons. Right? I actually did that from 1 million polygons. So that's significance. And you can see it just follows the shape. Of course I cannot use it right away. It will be just ugly shape. You can see how it looks. But what I can do is that I can bake the normal map.
From my original high poly object. But before that I decided to quickly do some manual UV. Because it's not a difficult shape. So you can see I just set some seams. Just some lines. Like some cuts. Again like UV is basically imagine yourself as a tailor. And you just need to tell like how to cut the garment. So we can easily paint it later. There are many benefits of proper UV. That allow you to fit objects better. And work with textures in easier way.
For both UV and baking I have amazing free short video on my YouTube channel. Take a look. So I did un -wrapped it. And you can see I just have few islands. I can preview if there is some stretching. And maybe add some more cuts. Now just create new material. Create new map. We're gonna call it normal map. Again you can choose the resolution. I will actually choose 4K. Because again I'm gonna multiply this object quite a lot.
And do the baking. Just go to cycles. Choose normal map. Select it to active. Almost same settings maybe we can make the cage extrusion like lower. Because the shape it doesn't follow like exactly. And press bake. And here's what I got. Quite amazing normal map. So I connected it to shader. Now look at this low poly. I think that's pretty pretty good. Now I'm gonna use that normal map. And I'm gonna need to color and maybe roughness and metallic.
To do so we're gonna generate style texture with Gemini. So here's how I did it. I have very very simple short prompt. And I got results something like that. Also ask it to generate like normal map and roughness map. But we already have normal map. We can combine them together. Or I'm gonna just use roughness map. Best paid alternative will be patina. One of the best AI model for seamless textures. Original provider is fall .AI.
So you can take a look there. It is also available in some platforming tool. Great. Now I'm gonna bring this color and roughness maps here. And connect it to shader. I was a bit unhappy about the roughness. So I connected it with gamma to adjust the value a little bit. Yeah I just want something like this. To not too reflective. Good good good. Now it looks like a rock. Only issue is that the scale is wrong. So I'm gonna click on this node with control T.
That will add this mapping. So I can adjust the scale. If control T doesn't work make sure that in Blender. Node Wrangler addon is activated. It's included in Blender but sometimes it's not activated. Here we can try different options. Instead of UV sometimes like generated or object can work nicely. And yeah the most important thing is to adjust the scale. Yeah I was trying like four or six. And I think I'm gonna stick with four.
I really like the result. And I really like how it actually works together with my normal map. My rock is ready. The last step is of course to make this final transformation. Again size and color correction will be baked into textures. New color texture. New roughness texture. The process is all the same. Just select different baked type. For example for color it's diffuse. When it comes to roughness we change baked type to roughness.
And you can again bake much more like metallic etc. Now I can delete all other nodes. Boom and here's the final results. My building blocks are ready. I can repeat same process for the rest of rock objects. Big other objects. And here you can see my final list of assets. I call it a starter pack. And these are not only AI generated objects. I already prepared them, processed them, adjusted where needed, generated some materials etc etc.
These objects are what player will see in the game. Let's move to the fun part. And it will be about assembling. First of all don't forget to bring your reference image here. In Blender there is image and reference that will add any image внутри the Blender. And that image is always visible regardless what shading mode is for other objects. That will reduce amount of switching. And now we can actually assemble things.
First thing to do is to understand where you start. I always recommend to divide it into simple chunks. For me first chunk was pierce. And that was frankly like the easiest chunk to start with. Later I gonna build everything around. I will not start with the cave because cave is big And I don't really know the exact size of the cave because it must nicely cover pierce. There must be some space from pierce to the side like you see on the reference.
So instead I will start with the assets that is known in size. Like this wooden pierce parts, the ladders, this hut and this area. And for me it's so much convenient to do this object placement rather than in RL Engine. I don't know it's just not convenient there. And one of the best advice I can give you here is to learn hotkeys how to transform objects in Blender very quick. There is absolutely nothing crazy. But it will make this process for you so much more pleasant.
At this stage 80 to 90 % will be just moving things around. Sometimes maybe some simple procedures like cut things, optimize if they go внутри too much and so forth. So just five minutes later I already have something nice coming up. And when you have this first step it will be much easier to build on top because that's not only first step that also a size reference for all the location. When you use big assets one thing you need to care is that part of the assets might be never visible to player.
For example I had this big rocks and there is no point to actually keep this bottom part. So I used a knife tool like it's very very easy. You just like draw the line just cuts the whole bottom surface and I gonna use it like this. Because again like that will save polygons like a lot of polygons. And especially if you start like to work a lot with them you can use knife or you can actually cut by pulling. And this is really the concept you need to know about this 3D software and stuff.
There is a big fear that you need to learn so much about Blender or any other software. But in reality you just need to know few right tools and that's it. With knife alone you can do quite a lot. I still don't know 95 % of what Blender offers. And I'm not sure if I need to. And here we go one hour later basically. Yeah this whole location all you saw with the time lapse was just one hour. And I already have this I think most important chunk of this location because rest will be built on top.
And you might see I don't really spend much time like placing accessories. I always keep accessories for the final mile. Start with big objects first that's very important. And again anytime you miss some objects just go back and generate them. That's super easy and fast. How cool is that? AI alone will not be able to do that great job. At least not soon. Just think about how many decisions you make along this process.
Like where to put that? How it's gonna look better like where not? Because you basically tell your story through this. And I truly believe this is art. It's just the pen evolved. Instead of drawing with polygons we now draw with ready 3D models. Now let's approach the cave. So as I said I decided that I'm gonna build it from big chunks. To be honest that's not the fastest way of course. But I keep all the details that matters to me.
So from внутри again like it will look like actual cave. So for you it will be quick time lapse. But in real time I actually spent around 25 minutes to build up the complete cave. And it looks something like this. Well not that much basically. I'm pretty happy with the result. Again super important when you do so much placing transforming objects around. It's definitely better to do that with hotkeys. Then one last mile about decay was to add this stalactites I think they called right.
And I did not generate them. I just cut one of the rock, scaled it a little bit and started to placing. And the good thing about this approach when you reuse the assets when it's possible. Is that again they all are already using like one same texture. Like you already optimizing. So this approach is good by many means. My cave is ready. Just for fun I added some lights to show you like what is the current stage. Yeah of course in Unreal Engine you're gonna look much better.
Now it's time for final step here. I'm gonna hide the cave. It's done but I gotta just hide it. I also really recommend you to organize your workspace. Like your workspace here is like collections. So again that's gonna make your life much easier. Like starter pack like one collection. Like the pierce one collection. Cave one collection. Cave is like bunch of objects etc. Just put them in one collection so you can hide it by one click later.
Placing accesses is very simple. Nothing to comment here. Just enjoy the time lapse. I was putting these papers all around. The coins. Small objects. Lights. Of course the lights. Actually lights was the most important thing because later in Unreal Engine I gonna light them up. And there were a few things that I even had to circle back when I started to set it in Unreal Engine. You're gonna see it later. I'm gonna add the chain.
The hook. All that things. One interesting case and advice that I want to give you is that sometimes generating objects with AI is not optimal by speed and by quality. For example I needed a rope to connect this hook and the boat with the pierce. So instead of going and generating the rope alone I just created the primitive curve. The curve is very simple object in Blender. It's just like a line that you can control and it's very very easy.
And you can add some depth to it like this. And that will be five times faster than doing that with AI. Here you can see I just control the Bezier curves and it forms the right rope like this. Any shape like this you can convert to mesh when it's finalized. Because when you convert it to mesh you cannot control it through Bezier curve. When you can actually delete that Bezier curve. Then I added some simple cuts to unwrap it like you can see here right into some line.
And of course generated some tile rope texture with Gemini. And here we go. Look at this nice amazing rope. Of course you're gonna learn that over time. But if you're willing to learn. So for example even when you have this amazing Claude Court with Blender setup. I actually have a lot of videos about it. Don't only ask it to do some stuff. But I really encourage you to try asking like what is the best easiest way or fastest way.
Like to approach this tech. Like I need a rope. Sometimes it will be this. Sometimes you can do that with primitives like in few clicks. Learning one small thing per day will take you very far. Our game level is finally completely ready for game engine. So let's export it and assemble in Unreal Engine. Again as I said this approach works with Unity and Godot even basically with any other engine. There are some engine specifics but I'm not going to cover them here anyway.
That's completely different thing. But let me explain my approach briefly. First of all we bring all objects to Unreal Engine. And I guess like the most annoying for me right now is that I have to go through each material and recreate the right PBR Unreal Engine material. Right. Even though you prepare all maps etc nicely but they are not really optimized. Good thing about it is that uses the same textures etc. That's totally fine.
Some assets like water etc. You don't really need to take care about in Blender because there will be dynamic assets. And for that I absolutely love Unreal Engine. Like grass for example like water weather and weather in my case is probably the most important thing. I really love two add -ons that I use all the time which called like ultra dynamic sky ultra dynamic weather. Again all these beautiful images that you see from my videos not only about nice 3D but also how you sell it.
That's something important I learned from game design. So sometimes I can spend one hour like two hours like doing some different light options. Placing some lights around playing with weather with the sky etc. And I mean you actually do that like first because when you're going to place this point lights around again. It all works together. And I absolutely love how this water with this light from the cave came up eventually.
I mean like that took a while but again like this not nothing crazy. Again overall I spent around two hours in Unreal Engine doing this main setup. Placing lights around adding some VFX etc. I also did some animations that boat on the rope so it's moving a little bit. And also for the boat that is on the water so it's sort of like again floating a little bit. I remember a long time ago that adding all this you know animations and stuff is so difficult.
But again like Unreal Engine is something crazy right now. Those things you can add like in five minutes like cloud physics some animations through shaders. Plus plenty of ways how you can do that. And recently there was like Unreal Engine 5 .9 announced. And they say there will be even more AI possibilities there and there bringing that native MCP. And by the way if you haven't seen that I really recommend you to take a look at my video about new Unreal Engine MCP.
And while I was talking that much look I already have this all set. Just look how amazing it is. I mean I'm super happy about myself. Especially about how Sun goes from this cage entrance. It's such a cozy nice small location. That's exactly what I had in mind like when I was building the app. And honestly there is nothing crazy I did. A bit of taste good idea right approach. This right approach is very important again.
AI is a great great tool. But you still need this tool to get something really great. That was Steph. Definitely don't forget to hit that like button guys. This was a very big video. And I see you in the next videos.
The words are the caption track's own and nothing is reworded or re-transcribed. Paragraph breaks are placed between sentences so the text reads as prose.
Free tools for your own script. No signup, no login.
Paste your draft and see where viewers are likely to drop off, with a rewrite for each weak line.
Paste the first 30 seconds of your own draft for a hook score and rewrites.
Check your draft against YouTube's advertiser-friendly guidelines before you record it.
Read this channel's public videos and transcripts, and download a writing brief for it.