Getting the transcript
Reading the captions from YouTube. A video nobody has opened here before takes 10 to 30 seconds; this page fills in on its own.
Getting the transcript
Reading the captions from YouTube. A video nobody has opened here before takes 10 to 30 seconds; this page fills in on its own.
Nate Herk | AI Automation · @nateherk
This video has no Most replayed graph yet: YouTube shows one only once a video has enough views. These are the moments viewers replayed most in Nate Herk | AI Automation's most watched videos.
Most replayed moment at 5:28
3.3x that video's typical replay level
and then I want the lid to be put back on, no shadows, no hands, no reflections." It spits out this prompt, I put that into Kling, and here's the result. I haven't watched this yet, so hopefully it's good. Okay, interesting. I mean, obviously we
Said at 5:22
Most replayed moment at 20:09
3.5x that video's typical replay level
from that exact avatar five different times. So, selling gets easier, you're able to increase your prices, and more clients stay on retainer because you're not just a vendor at that point, you're the person who actually understands their business. So, here's one more prompt for you. Open up Claude and run this when
Said at 20:01
The graph counts replays. It does not show where viewers stopped watching.
Words
4,624
Runtime
19:22
Speaking pace
239wpm
Reading time
19min
239 words per minute, above the 201 75th percentile of 349 measured videos. That distribution comes from the 349-video hook study.
Opening (first 30 seconds)
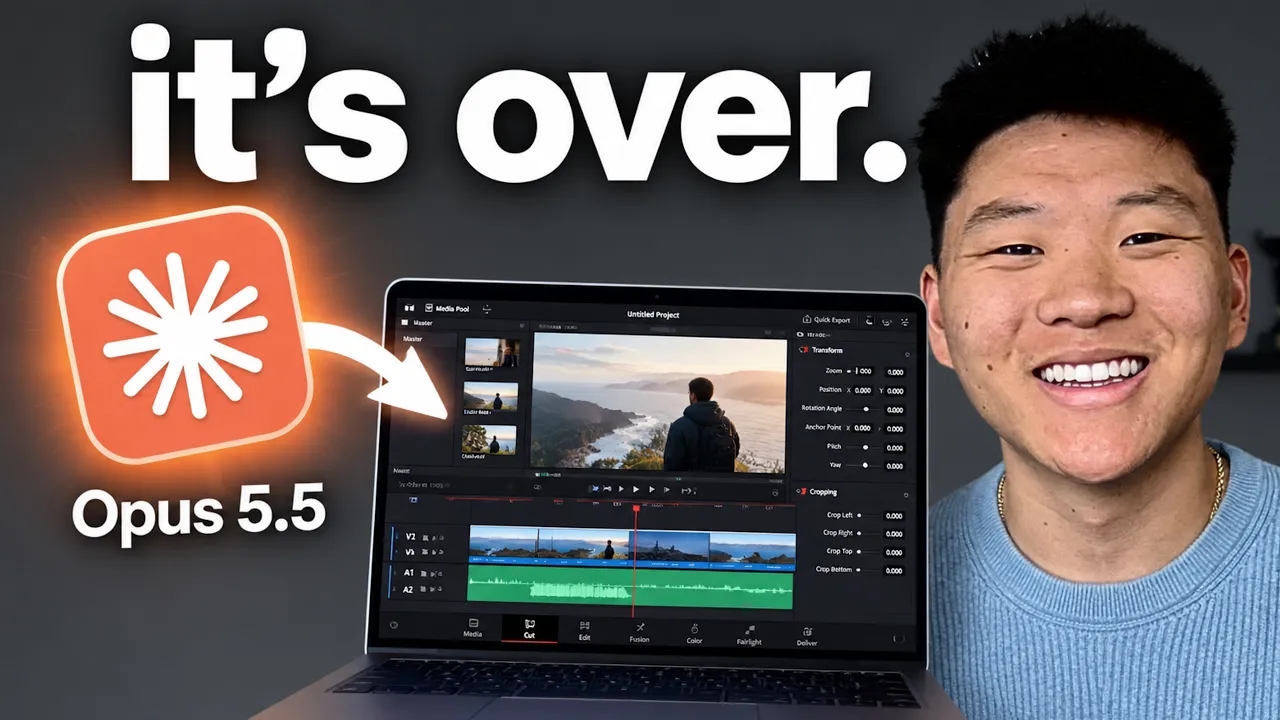
So, I've been experimenting with AI models editing videos for me for a long time. Super powerful models like Fable 5.1 and GBD6 Astra. But, Opus 5.5 is giving me some of the best outputs ever. Take a look at this example, which was just one prompt. Not only does this thing do the motion design and the sound design, but it also will go out and it will grab the B-roll and it will grab screenshots or even generate images and videos for you if it needs it. It has amazing taste and it does good with verification. So, today I'm just going to talk about how you actually get this set up because all you have to do
120 words, the words spoken in the first 30 seconds at 239 words per minute.
Free, no signup. See how the first 30 seconds hold attention, with rewrites.
Sentence shape
| Measure | This transcript |
|---|---|
| Sentences | 277 |
| Average words per sentence | 16.7 |
| Longest sentence | 71 words |
| Questions asked | 6 |
| Sentences containing a number | 17 |
Most used terms
Filler phrases
103 in total: like 45 · actually 16 · basically 12 · you know 7 · sort of 6 · kind of 5 · literally 5 · right? 4 · I mean 2 · um 1.
A literal whole-word count of the same phrase list the Prepublish browser extension uses, so a phrase inside another word is not counted and a phrase used in its ordinary sense still is. It is a count and not a judgement.
What this transcript is
Every word below is the caption track YouTube publishes for this video, pulled from the video itself and reproduced unchanged. It is not Prepublish's writing, not a summary, and not a re-transcription: it is the video's own published captions. English captions, generated automatically by YouTube, in the video’s original language. Source: the video on YouTube. A channel that would rather this page did not exist can ask for its removal through the contact page, and it is removed.
So, I've been experimenting with AI models editing videos for me for a long time. Super powerful models like Fable 5.1 and GBD6 Astra. But, Opus 5.5 is giving me some of the best outputs ever. Take a look at this example, which was just one prompt. Not only does this thing do the motion design and the sound design, but it also will go out and it will grab the B-roll and it will grab screenshots or even generate images and videos for you if it needs it.
It has amazing taste and it does good with verification. So, today I'm just going to talk about how you actually get this set up because all you have to do is use your natural language. And yes, of course, that entire intro that you just watched was edited with Opus 5.5. This is the actual video. As you can see, all of these motion graphics that it did were created right inside of here, inside of Claude. And what's cool about this is I specified a lot of things that I wanted, but it got really creative here.
And that's one of the things about Opus 5.5 is that it has amazing, amazing taste. So, let me show you what I actually said in this prompt. So, I gave it the original video and I said that I need you to edit this to be super engaging and clean with Hyperframes, which is the actual tool that we're using here. It's completely free and we give Claude code this tool and it basically writes HTML and animates it. So, if you need to get set up with Hyperframes, then just go to Google, type Hyperframes, you can go to the website here, but ultimately you're just going to want to go to this GitHub repo for Hyperframes and then you just need to literally copy this link, the URL, give it to Claude code and say, "Hey, set up Hyperframes so that we can use it to animate videos." That's it.
And then on top of that, I have this free repo called Hyperframes Student Kit. And in here it has all of the skills and examples that I actually have done with my pipeline of editing videos. And if you want to get this, you can go to my free school community. The link for that is down in the description. In here you go to classroom and you can click on all YouTube resources or you can go to AI skills and you can access that Hyperframes Student Kit.
Anyways, I said the first step is for you to transcribe the video so you can make sure that motion graphics and animations come in at the exact perfect time. So, it has to just the video. You can do that using something like 11 Labs API, or you can do that with something like Whisper, which is more of a local model that can run and transcribe videos, but 11 Labs is a little bit quicker. So, 11 Labs you pay per usage, and Whisper is going to be free, but it's just a little slower.
So, you can use either one, and it's really simple to get that set up. You just ask Claude to go to help you set that up. I said, "Then you will build the animations based on my instructions. When I say powerful models like Fable 5.1 and GBD-6 Astra, I want you to have animations come in where I'm pointing." So, that was basically right here where I point, and I have Fable 5.1 come in right over here, and then I have GBD-6 Astra come over here.
And I told it that I wanted to have a Claude logo, and I wanted to have an opening eye logo. I wanted it to be animated. That's basically all I said, besides also saying, "Make sure there's some sort of liquid glass card behind the element as it's animated, otherwise it will be hard to see." And as you saw right here, we got liquid glass right behind it so that we could actually read the text and see the logo. So, that was me using natural language, as you see.
Then I said, "When I say best outputs ever, I want you to have all three those words at the bottom and highlight them." And so, that's what it did right down here, Opus 5.5, best outputs ever. And you'll notice that it also put a little bit of an overlay under this text, because once again it wanted to make sure that we could actually read it. So, very, very well done there. Then I said, "For the rest of the video, when I'm talking about B-roll and screenshots and generating images and videos, I want you to have things come in on the left and right side of the screen.
Once again, they should have some sort of overlay, and I want you to actually go off and get a B-roll screen recording, and get a screenshot, and pull in stuff, because I want you to prove to the viewers that you're able to do all of this." The whole point is that I'm explaining what Opus is capable of when it comes to animating and editing videos, and I want you to prove it in real time. Now, that is basically my entire prompt, and what's so cool about that is that it goes off and it does it, but it also puts its own spin on things.
Like, you'll notice at the very beginning, it's doing this very subtle zoom in effect. I didn't ask for that, but it just kind of knew to do that to make it more engaging. I didn't ask for this either. When I said the one prompt thing right there, it just did that by itself with a super cool Claude looking interface. I didn't ask for this either, but I absolutely love it. And then you'll see what it interpreted when I said get the screen recording, get the screenshot, generate an image, generate video.
It did all of that on its own. Amazing taste. The verification. I thought this was a super clean animation right here. The verification with like screenshots and checking. You guys will notice in my prompt, I didn't actually ask for that at all. It just did it because it thought that it would make the intro more engaging and I would argue that it definitely did. And now you can see that's all I said. I didn't ask another prompt.
And what we got was that exact video right back here with all of these things that we just saw. Now, let's break down that other example that you guys saw inside of the actual intro itself. This little YouTube show reel, which I was super super impressed by. This was also a one-shot prompt, like I said. Really, really impressive. There's so many things that wanted to play here. It had to go get screenshots of so many of my thumbnails and then it zoomed in on the thank you one, which I think was amazing reasoning.
It literally said, "Okay, this is Nate holding up the play button saying thank you. This is the one that we're going to put in the center and this is the one that we're going to zoom in on." Because I think that highlights the branding and the culture of YouTube, which was just insane. So anyways, it generated all of this stuff and the sound and the music, all of that, right? Now, here's what I did in this example. What's important is that you're clear on what you want.
And you'll notice in the previous version, I was like speaking very emotionally. And that's what's cool about it is sometimes you don't always know exactly what you want, but you know the emotions you want the video to create inside of you, right? So, what I did is I downloaded an example that I saw on X. I saw this example from Ken. Amazing output here using hyperframes and using Opus. And you'll notice there's a lot of similarities with this reel and the one that we just looked at with YouTube.
So, basically what I did is I used this as inspiration. I downloaded this video. I then came into Claude Code and I gave it to Claude Code and I said, "Analyze this video, which was created by Opus 5.5, and figure out why this is so good." So, I liked this video and I wanted to do something similar. And I had Claude Code figure out what that is. I had Opus figure out why it's so good. And then I said, "Turn that into a skill." So, now we have the skill called motion reel or something and I'm I'm going to give that to you guys for free just a sec.
And then I said, "Okay, use that skill, create me my own show reel about YouTube." I said, "Collect b-roll images, any assets you need. Make sure the whole thing feels branded to YouTube, the typography, design, language, colors, branding, all that type of stuff that makes YouTube YouTube should be unmistakable in this show reel." And now we have our output. You can see here it wrote this skill called motion show reel.
So, if I go into my files real quick and I go to the skills and we go all the way down to the M's, we go to the motion show reel. We now have this motion show reel skill with all of this information like about how we actually design reels like this. So, I'm going to put this inside of my um Free School community once again. So, if you guys want it, hop into my Free School community and you can grab it in the YouTube resources or inside of the AI skills.
It'll be in there and now you can do reels just like that. What you'll also notice is that it had to go generate these images. So, you can see it created these images and then it sent them to Cling in order to turn those images into videos and that's how we actually got these animations inside of the video right about here where we see the actual play button sort of being animated. These two scenes were because it created an image and then it created a video and then it sent it back to Claude and then Opus took all that stuff and put it into one consistent video.
Now, here's another show reel style video, but this one didn't use that skill that we built at all. And just to show you how cool stuff can be made even with a show reel. So, I said, "Make a dynamic 15-second motion graphics video that shows what an incredible motion designer you are like it's your show reel for a resume. Go all out." I actually saw this from someone on X. They made a demo and they said this is what they prompted with, so I tried it out.
I said, "Make it about our company AIS. Use real assets and logos from our products when possible. You can also use key.ai to generate any assets you need and use hyperframes or any other tools for motion design and music and sound effects. And with one shot prompt, this is what we got back right here. So, let's take a look. >> You can see the similarities at the beginning with the little B that like drops and there's sound effects.
But then with the motion graphics, with the color schemes, with the same sort of like spatial awareness of doing things like this, I thought it was so cool. It pulled pictures from our website. It knew how many members we had. It had this 3D sort of image which I think was an image that was generated and then it was turned into a video similar to that YouTube show reel. Anyways, this background image is from our website as well.
So, just very, very well done. Real quick, guys, I've got this completely free website design skill that I'm giving away. I use this for every single website that I build, including our AI Automation Society site, which I think is pretty slick and I absolutely love this website. It's called ScrollCraft and it understands things like scroll-driven animations and layering. But also it has things in there like taste, typography, spacing, depth.
It's just a really good website design skill in general and it's completely free. So, the link for this will be down in the description, but let's get back to the video. Now, let me show you guys, this is one of my like new favorite benchmarks. I basically give ClaudeCode access to a folder which has 105 GB of YouTube videos, or sorry, not YouTube videos, videos and recordings and resources from our event, AIS Live. And then I say, "Hey, look through all this and create me a sizzle reel.
Tell a story out of this." And look what I got here. Now, this wasn't a one-shot prompt. This was one prompt and then me giving one round of iteration and then having it fix one thing. So, technically three prompts, that's why it is V2.1. But let's take a look at this output right here. >> Hello, hello AIS Live. I'm so, so pumped. It was electric. >> That's cool. >> Never even opened VS Code. Signed the deal. >> The chat's going crazy. >> Drippy. >> Fantastic event. >> This was amazing. >> Such a fun two days. >> I literally like logged off yesterday just buzzing.
I had goosebumps. >> Can't wait for the next one. >> I mean, do you guys have any idea how complicated that process is? Just to tell a story out of an event when you just are given a folder of resources. And of course, it's marketing for our next one, which is actually real coming up October 17th and 18th. So, mark your calendars if you guys want to show up. More details will be in the description. But, I know there were a few things that weren't great.
There were sometimes where there was like an awkward cut of the speech and a few things that we could tweak, right? But, look at this. Look how it made like this tunnel of all the screens. Look at the beginning how it was zooming in on different screens. Like, it was really aware of the spacing and this is just really, really cool. It was also pulling out specific moments in the transcripts of these calls that were showing kind of like the vibe and the energy within the live event.
This is my favorite scene here at the end where it has all of these scenes come together and it forms the actual AI S live logo even with the little red dot and then it zooms in on the red dot and it says your seat is in the middle. I just thought that the way that it was able to actually bring all of this to life is really, really impressive to me. Now, I also wanted to show you guys what else is possible. Like, a lot of times it's about thinking of a use case.
So, I recorded this really simple video of me explaining how to make avocado toast. And I perfected that, by the way. My avocado toast is so good. But anyways, I just wanted to show you I did three different edits with this avocado toast video. This one I said, "Hey, I want you to edit this using hyperframes. I'm looking for a simple and clean whiteboard hand-drawn style animation." And it's really simple as if you're trying to explain to a kid how to make avocado toast.
Simple graphics, simple animations, easy to understand. If you need to generate any images like or sorry, assets like images or videos, you can use key.ai. I then said that some scenes should be a full screen whiteboard takeover and some scenes should just be the left half is the whiteboard and the right half is my face. So, it then went ahead and started generating things, it started reasoning, it started testing things out, and now we have this output which I'll go ahead and play right now.
All All so here's how I make avocado toast. When you put the toast in the toaster, when you're letting it sit, you don't set it flat on the plate because then that bottom side gets a little soggy. You want that both sides to be crispy. Then you put the eggs on the pan, you mash up the avocado, you spread the avocado on the crispy bread. I put like everything bagel seasoning on the avocado mash, and then I do some balsamic vinegar, and then you put the eggs on top of the toast.
And that's how it's done. Now, my main critique here is that the eggs are super tiny and the balsamic glaze is only on one little piece of the toast, so that wouldn't taste as good as if it was everywhere. But anyways, look how good this was able to in one prompt just animate this stuff in a very simple and engaging way. It's hand-drawn. It is, like I said, it's kind of friendly and playful as if you wanted to show a kid.
But this was literally just one prompt and it took care of everything. Now, when I first really started using AI to edit videos, it was for course style videos. Things that were super easy. We just wanted them animated with like, you know, bullet points and super simple images and graphics. So, here is what I did in this one. I need you to edit a course style video for me using Hyperframes. My camera will start off full screen and then I want it to be a rounded crop.
The background's going to be super simple, super minimalistic, and the style I'm looking for is just bullet points with important takeaways, not too wordy, and they should be big. And then visual aids should just be AI-generated images, very simple, very light motion graphics to help illustrate concepts. And here is what we got. This was once again a one-shot prompt. Oh wait, that was just an image. It was just doing verification.
Here we go. All right, so here's how I make avocado toast. When you put the toast in the toaster, when you're letting it sit, you don't set it flat on the plate because then that bottom side gets a little soggy. You want that both sides to be crispy. Then you put the eggs on the pan, you mash up the avocado, you spread the avocado on the crispy bread. I put like everything bagel seasoning on the avocado mash, and then I do some balsamic vinegar, and then you put the eggs on top of the toast.
And that's how it's done. So, all of the images and videos in this video were AI-generated. All of this was AI-generated, and you you see that it's going to save you so much time because it can go get B-roll, it can take screenshots, it can you know generate things if you need it to. It's just really cool because now you can film content and editing doesn't have to be the bottleneck anymore, especially when you start to build skills around stuff like your preferences and motion styles and all that kind of stuff, your brand guidelines.
And then the last one I did here was kind of a short-form video and this was using Hyperframe once again and you'll notice that I'm not really having this leverage other skills. So I wanted to show you how easy it is to do a one-shot prompt with Opus 5.5. Pretty much all these examples I've been running on high by the way, high meaning the effort level. And I just said basically this, generate the assets you need, have it be engaging, have it be fast-paced, easy to understand.
So let's see what we got down here for this short. Here's how I make avocado toast. When you put the toast in the toaster, when you're letting it sit, you don't set it flat on the plate because then that bottom side gets a little soggy. You want that both sides to be crispy. Then you put the eggs on the pan, you mash up the avocado, you spread the avocado on the crispy bread. I put like everything bagel seasoning on the avocado mash and then I do some balsamic vinegar and then you put the eggs on top of the toast and that's how it's done.
I mean it's not perfect, right? But a one-shot prompt and it's just it's really cool that it's able to switch between these different scenes. It definitely keeps my attention because we have all these different sorts of B-roll going on in the background. It is just a really, really decent output when you consider what this would have taken for a human to do it for you. And now, one-shot prompt, you iterate, you iterate, you build skills.
And I wanted to show you guys one more example with Lululemon because this is like a physical, tangible product. Look how good it did at making this video feel like Lululemon. >> So if you guys think about what it actually had to do there, all of these videos were obviously AI generated, but what I'm pretty sure it did is it went to Lululemon and it found all these actual pieces of clothing. It found them, it took pictures of the actual model here, and then generated videos of them running or jumping or whatever it is in the clothes.
And then of course it brings it all together here with actual catalog images. It's just really cool to think about how many little pieces would have had to go into this if you were editing this or creating this as a human, but really as a human all I did was I told it what I wanted and sort of the emotional feeling I wanted it to carry throughout, the vibe. High energy, fast-paced, engaging, sync the music to the beats, sound effects, things like that.
So I just wanted to talk about the five things that I'm constantly thinking about when I'm actually editing videos with AI. I'm just going to run through these super simply because you just you could basically give the transcript of this section to your AI agent and it would be fine. So the first piece is to transcribe. If you're starting off with a clip and you need it to be edited like, you know, a video or a course or whatever it is, you obviously want to transcribe first so that the beats can come in at the right time and so that the AI knows how to tell a story out of it.
Transcribe is essential. Whether you want to use Whisper or Eleven Labs or some other tool, transcribing is essential. From there, you're going to have it cut things out. So if it's mistakes, cut out the mistakes. If it notices in the transcript that there's like 20 seconds of dead space, cut out the dead space. Things like that. You're cutting things up. And a lot of times I'll use AI just to literally cut out mistakes and then I'll take the clip and do whatever I want with it, but it's able to just clean out your content so much quicker than you could because you'd be in the the editor looking for the dead space and then, you know, snipping everything out.
And then number three is to plan the beats. A lot of times from there what I like to do is I like to be very specific about what it is that I want. As you guys saw in this intro version, the intro for this video, I was basically just planning out what I wanted. Now, obviously it went off the cuff a little bit and it was creative, but if I would have said like these are the only beats I want you to actually create, nothing else, it would have done that.
But, I let it be creative here. But, I basically said, "Hey, at this point, I want this to come in. I want this to come in. I want this to come in." And the better you can set expectations of what you're looking for and what you would consider good, obviously the better or not better, but the more aligned your output is going to be. Number four is to use skills. So, build skills around things. If you build a lot of reels, then build skills around reels.
Use my HyperFrame student kit. Use resources and use inspiration. Like you guys saw me do, I took a video that I really liked and I told it to build a skill. Now, guess what? Every time I run that skill, I will look at the output and say, "Hey, in this version, I really liked this and I really didn't like this. Update the skill with that information, run it again, and then I'll give you more feedback." And that way you're actually building a reusable component where every single time you run the skill, it's getting better and you're able to just move faster and faster.
You don't want to have to repeat yourself every time. If you ever find yourself repeating something, just throw it in the skill. And then the fifth one, probably the most important one, is the verification loop. You'll notice how as it's going through a lot of my videos, it's taking screenshots and looking at them and then making iterations. And that's how you get in that loop where you're not just basically saying, "Okay, here is my output number one." You're getting output number like five or six because the agent basically did this.
It delivered output one and then it watched it. It realized there was some mistakes and then it came back and it delivered output two. And then it watched output two and then it kept iterating on its outputs until it realized, "Okay, this one is finally good enough where I'm going to give it to Nate and here you go, Nate. This is the finished video." So, now you're getting something that has already been checked by the AI and iterated on, then, you know, compared to if it just handed you this first version and then you're frustrated and you have to make all these, you know, prompts.
But, anyways, guys, there are so many use cases when it comes to using AI to help you edit things or add motion design because it's not really something that you had to have previous video editing experience in order to take advantage of now. So, don't let editing be your bottleneck, but that's going to do it for today. If you enjoyed and learned something new, please give it a like. It helps me out a ton. And as always, I appreciate you guys making it to the end of the video.
I'll see you all in the next one. Thanks, everyone.
The words are the caption track's own and nothing is reworded or re-transcribed. Paragraph breaks are placed between sentences so the text reads as prose.
Free tools for your own script. No signup, no login.
Paste your draft and see where viewers are likely to drop off, with a rewrite for each weak line.
Paste the first 30 seconds of your own draft for a hook score and rewrites.
Check your draft against YouTube's advertiser-friendly guidelines before you record it.
Read this channel's public videos and transcripts, and download a writing brief for it.