Getting the transcript
Reading the captions from YouTube. A video nobody has opened here before takes 10 to 30 seconds; this page fills in on its own.
Getting the transcript
Reading the captions from YouTube. A video nobody has opened here before takes 10 to 30 seconds; this page fills in on its own.
Stefan 3D AI · @stefan_3d_ai
This video has no Most replayed graph yet: YouTube shows one only once a video has enough views. These are the moments viewers replayed most in Stefan 3D AI's most watched videos.
Most replayed moment at 4:08
7.0x that video's typical replay level
and it will also have the access to full ai apis. Now let's do some serious tests. The first test will be to do an animation of a character that will be split in parts. The first test will be to create animation. Animation of a character that will be an
Said at 4:01
Most replayed moment at 9:39
5.7x that video's typical replay level
Overall I think this guy's made really amazing job, bring it it all together and I really had a lot of
Said at 9:41
Most replayed moment at 20:36
4.1x that video's typical replay level
Just also because I was playing that game when I was kid. Okay, let me see if I remember how to play that. Let's start with the road, right? Let's try to build a, oh, there are cars. There are cars. It generated nice cars and they're like, wow.
Said at 20:29
The graph counts replays. It does not show where viewers stopped watching.
Words
4,629
Runtime
25:26
Speaking pace
182wpm
Reading time
19min
182 words per minute, just over the 181 median of 349 measured videos. That distribution comes from the 349-video hook study.
Opening (first 30 seconds)
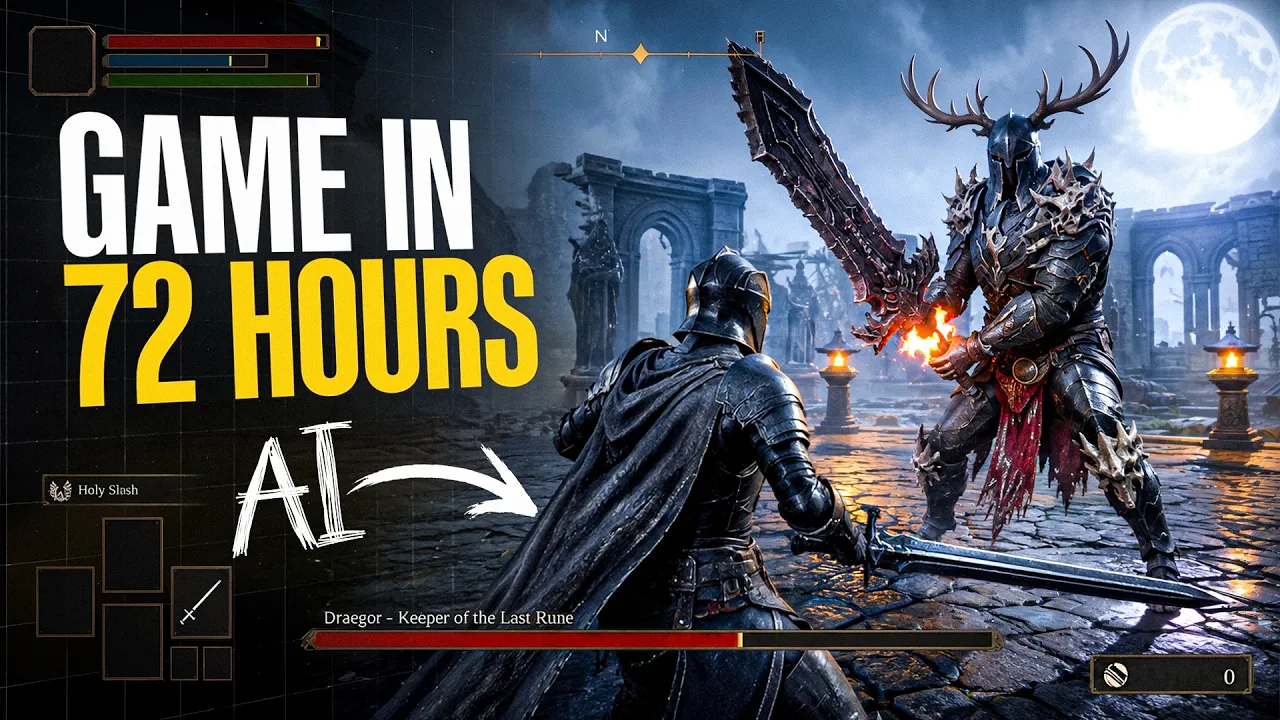
How far can skilled artists get with AI assisted gamedev workflow? What can be done now in just few days? Create one polished game asset or maybe a game character rigged and ready for the game or a complete playable game level. I gonna show you how I created a souls -like game in only 72 hours using AI and my experience in 3D and game development. And disclaimer I do not believe AI one shot game in one prompt. That's tasteless bull****. But I see AI as an incredible tool
91 words, the words spoken in the first 30 seconds at 182 words per minute.
Free, no signup. See how the first 30 seconds hold attention, with rewrites.
Sentence shape
| Measure | This transcript |
|---|---|
| Sentences | 462 |
| Average words per sentence | 10.0 |
| Longest sentence | 32 words |
| Questions asked | 6 |
| Sentences containing a number | 27 |
Most used terms
Filler phrases
193 in total: like 153 · basically 14 · actually 12 · you know 5 · I mean 3 · right? 3 · sort of 3.
A literal whole-word count of the same phrase list the Prepublish browser extension uses, so a phrase inside another word is not counted and a phrase used in its ordinary sense still is. It is a count and not a judgement.
What this transcript is
Every word below is the caption track YouTube publishes for this video, pulled from the video itself and reproduced unchanged. It is not Prepublish's writing, not a summary, and not a re-transcription: it is the video's own published captions. English captions, published by the channel, in the video’s original language. Source: the video on YouTube. A channel that would rather this page did not exist can ask for its removal through the contact page, and it is removed.
How far can skilled artists get with AI assisted gamedev workflow? What can be done now in just few days? Create one polished game asset or maybe a game character rigged and ready for the game or a complete playable game level. I gonna show you how I created a souls -like game in only 72 hours using AI and my experience in 3D and game development. And disclaimer I do not believe AI one shot game in one prompt. That's tasteless bull****.
But I see AI as an incredible tool especially in right hands. At least you need taste and great idea. Here's the plan. I'm going to create unique location concept and split it into the parts. Gonna generate tile textures and surface textures. Of course I gonna need epic boss and a player character. To save on time I gonna start on souls game UE team plate and configure it with my ClaudeCode and UE MCP setup as well as adding new things, balancing and stuff.
And before we start guys please hit that like button and subscribe. 80 % of you watching my videos without subscription. Let's fix it. I really appreciate your support. Souls -like games. Oh my days. And especially I'm a big fan about its unique aesthetics. I don't know how to explain that. Like I mean these games master the atmosphere. You know Dark Souls, Bloodborne, Elden Rings. They all have it on some another level.
And that's one of the reason I decided to start with this concept. We gonna go with closer to realistic style while a little bit stylized in some aspects. But most of the environment will be quite realistic as well as bosses. I spent a while circling through my previous ideas and in the end I ended up this concept. So there's a knight and the boss. It's like a triad but knight all that things mix it. I don't know why I started to like deers after I played Alan Wake 2.
It's something mysterious about deers for me right now. And as I always say ideation is very very difficult thing. So gonna be honest this 72 hours do not include ideation because that will be two three more days. And here's my final concepts. Right? The location and the boss and the character. It's final concept but I gonna refine details later. And that's exactly what I did next. And I started to circle on details.
So basically I know the location. I needed quite a lot of environment stuff like ruins, walls. Not ruined walls. I basically decided it will be a circle area. So there will be two levels of walls. One more preserved other like more ruined etc. And here's the final list of stuff I ended up. There's quite a lot of accessories in game design approach to not have this infinite area. I decided that it will be border will add like this infinite effect.
And it's easier to work done with grounds I think. At least to handle these depths of the environment of surroundings. Same thing goes for both. So here's the initial concept. And when I started to actually walk it through I refined details along the way. And it took a while again like I did like quite a generation like to make sure everything is fine there. And I show you one cool thing how I approach it the boss later.
Same thing goes for the main character. Basically player character. Right? This one is easier because we're gonna use souls like template and you basically go grab armor along the way. So that's gonna be evolved later on. But for the beginning we need just basic setup. Then it's time to generate all this bunch of assets. And for that of course I'm gonna use Chippo. The best option. And by the way I don't know when you watch this video.
But in a few days after I will release this video there will be Chippo P2. Which is crazy. Like they basically upgrade the smart mesh. There will be 100 % video on my channel. So subscribe to not miss it. That's crazy good. However the right approach is not always just to do it like low polar right away. For these characters and for the environment assets I actually generated almost everything high poly. Textured because again that definitely saves more details.
Again like smart mesh limited to 20k triangles and like wanted or not. But this like impossible to preserve all details especially like on small environment objects and they can be voluminous. Right? That's why I just generated them all high poly. You can see all of them. Then I will do the preparation in Blender. Well basically I gonna either decimate it or do the retopology also here in Chippo. And do the baking where I can control all the parameters.
Get optimized nice version etc. And when I say baking it's not only about normal map and ambient occlusion map. I also gonna bake color. So it's not necessary to go back to texture. If the original shape follows nicely the color bakes very easily. But not only 3d assets is what I need. There will be also big surfaces and again like you can see that there will be a circle. And there's a lot of stone. There is an area where the boss will be.
Actually I gonna put the chair there so he's sort of like sitting there. But generating this big stuff doesn't make sense. And of course when we gonna walk there imagine like to generate all this arena at once. Like even 8K will not be enough when you walk you gonna see like this blurriness. That's why we gonna generate trial textures. And for this one I have my favorite one which is Patina. Available on fold.ai. Also available on some platforms.
What it allow you to do is to prompt with image or text and generate set of textures. And well they are tiled seamless basically right. So we gonna prepare some materials and again like you can easily apply them on bigger surfaces. Not losing in quality. That's classic gamedev technique and that makes perfect sense. Why not to do that like if we can also do that with AI. I gonna need few surfaces for the ground. And I also gonna create chainmail tiled texture.
Why? Because I gonna create boss and I gonna take male body as a base. And for some part I gonna just apply that texture because you know like for those flexible part of the body that is not covered by armor. You gonna see that soon. And not tiled texture we also gonna need. For example this circle area. I'm not going to generate that but I gonna just generate the texture. Because I gonna just create a cylinder and just project that texture to the cylinder right.
No need of 3D and that will be definitely cheaper because you can just create an image and apply the texture. Well basically that's super easy. And the cool thing is that also with same AI I generated ambient occlusion and normal map based on same texture. So without picking our stuff. And look at this it looks great. It looks voluminous right. It interacts with lights. So that's amazing. All things generated. Gonna bring it all to blend there and do this step that I described earlier.
It looks like this. I need high poly and I need low poly. There's different ways how you can do the low poly. For example in Tripo you can go to the retopology tab and do it here. And it's like quads triangles again like depends. We figured out that smart low poly basically does cleaner nicer topology. But it might have some areas that you need manually to refine in terms of adherence to original high poly model. Without this setting you're gonna guarantee it get optimized model that follow exactly the shape.
Well the wireframe will not be that artistically nice. If you're gonna publish that wireframe on X you're ready for a lot of hate. But I don't really care. This is all about the time that you want to invest and the end results. It's not affecting the performance or stuff that crazy as many like to say. Although again depending on the case it might be necessary. Especially if you work inside a team etc etc. Or that's like reusable asset.
But for most of the static assets I personally don't see the need to do the perfect wireframe perfect UV. Also for this video to save on time I skipped the manual UV unwrapping. There is only one option how you can do that with AI. It's like in Hunyuan Studio or any platform that use that Hunyuan API. And it's not that great especially on complex objects. And it's long and a bit random. So instead I'm gonna either use AI generated which is done by xatlas inside.
Or I'm gonna just do the UV smart projection in Blender. But I have a UV packing add -on so I'm gonna just use that to make sure like it's not nothing crazy there. And I can bake it okay. And when I have this high poly low poly I just gonna go do baking is done in cycles in Blender. It does nice baking of color. That's what we need. Then it does ambient occlusion. We can mix it up or we can also set it like in Unreal Engine for different purposes.
And you can see it's pretty pretty pretty nice. Like even to everything I did very quickly. And same goes for normal map in any other property map. Also this stage sort of gives you some flexibility because for some properties like roughness for example. Or metallic or ambient occlusion you can skip them or you can adjust them along the way. And just like that again. I'm gonna go over like all the assets and prepare them.
Look at this Tron for example. You but that's looks so cool. Wow that the mesh here I just made like with decimate in Blender. All top everything baked absolutely perfect. There is no visible artifacts. Then time comes for a boss. And this one is my favorite part. I don't know I just always enjoyed this process for one specific reason. And it sounds like this. When I started like doing 3D making characters for me seemed like impossible area.
And I was knowing how much time it requires to do like this characters. Like especially like some custom character like this with that much details. Right that can take a month like a month if it's a professional working like. I mean like at last like two weeks if that's a professional guy. And it requires not only hard skills but artistic skills that you learn in art school. About proportions about colors about like details etc.
You know like making like a right proportion of a character. Like if you try to do that like you're always gonna mess like with scale of heads to body. Hands arms all that stuff like the muscles and I would say that was abandoned dream. And again like I'm guys 3D artist. 10 years like technical artist right. I do a lot of modeling etc. And I was scared to make 3D characters. And now with this workflow and that's probably the reason I started like to trying all that things like year ago.
And you basically liked all these videos which I really appreciate. And by the way speaking of characters I just dropped like one hour long video. Complete beginners guide to 3D characters with AI. Where I explain this process in more details and we create an amazing character. I put a lot of effort guys like take a look on that if you still not. So my workflow to balance quality speed is the following. We do generate high poly in sculpting mode.
We combine all parts together. It's super fun and easy to do with the brushes like elastic grab something like that. By the way also good idea to do use our reference characters such as in this case. I used male character because again I use some parts of his body. And I will just apply that tile chain texture. So that will be like a body covered with a chainmail. When I have it all assembled I can have part by part bring it to a Tripo to do the retopology.
Basically low poly version that's I gonna do that for each part one by one. Then bring it all back and repeat the process I did for the assets right. Again this one is allowing you for like max flexibility. Sometimes by the way you can ignore baking of color and do deformation for your high poly mesh that's totally fine. Like in sculpting mode you just like adjust fine tune stuff. No problem. Then you do the low poly and texture that low poly in Tripo.
But baking will be only for normal and ambient occlusion. Again you just try different approaches. Will they pretty much will bring you to the same point. And here you can see this part of the body that I cut from that male reference. And that's tile chainmail texture. And here I applied it again like that chainmail. This also comes along with the normal. So a little bit of tweaking here and we have this chainmail applied right.
And it looks brilliant right. Dang and that mesh is also very optimized like so why not. You can alternatively like generate it with the eye but why. One part by the way like this apron I created with texture as well. So I created just a plane and asked it's Gemini and I to create an image texture and then create an alpha texture. So like you can see like how I did that. Also again like you just think about it that I need that texture.
You go to Gemini like you prompted like here's my character. I need that apron on the front part like boom please do me the texture like dun dun dun. You can even like provide it with a reference like what width it should be like length etc. And it will read it like a nano banana pro is extremely nice in edit. And that's how it's done. Looks super nice. Then I take it to aqua rig of course boring process just set markers etc.
For humanoids really not a problem. Especially in normal proportions like nothing really crazy there. Then you export it again export depending on the engine that you use. You can export for Unreal engine unity or even for Blender. What's true that is most likely you're going to still review some weights. And that's absolutely normal. That happens all the time. And absolutely similar process I made for my player character.
And you may see in Blender it look a little bit grayish. That's because I did skip the material settings here. And I'm going to make it like metallic and roughness in Unreal engine. Because in Unreal engine you still recreate the material. And since that will be just a property I'm going to just set it there. One thing that I created manually was the cape. It's not a crazy skill but that cape I'm going to want to animate it.
But the texture for the cape of course was created with Gemini. Same way as I created apron for the boss. And here you can see like how it looks like. Also the reason is like just because I know how these weights are set in Unreal engine. And it's easier to work with the mesh that I control. And here we go one and a half day all assets that I gonna need are done. Here you can see them all in Blender. We have character.
We have boss. We have also weapon. We have plenty of different assets. Every asset is optimized. That degree that I think there's reasonable. Because again there will be plenty of assets in my game. So here we go all of them is here. Now technically we can go to Unreal engine and start build it up. But I really used to Blender in a way that's like create like surfaces etc etc. And I think for me it's just easier to do like combine that stuff and just export it at once to Unreal engine.
That goes for like the bigger objects like the arena like the walls maybe. All the details like small details let's say dropping stones. Definitely gonna do that in Unreal engine with like brushes and the tools that designed for that. While the core of the arena the roads and stuff I gonna just create with the primitives. As you can see in my scene there is a skeleton like that's the reference skeleton. I exported from Unreal engine just for a size reference so I know like what to do.
And here's the process like few primitives big shapes etc. Then starting to allocate the objects. And there are like a lot of shortcuts. What you can use for example for this walls what I did. I actually created one object where there is like different walls together. You can see then I created circle curve and applied it as a modifier. Like basically two modifier array and curve. And boom I have them all placed perfectly around the circle.
So imagine generating that at once that will definitely not bring you far. Because that will be less controllable. Here here super optimized. I build it all myself like from the bricks organized etc. I use same technique for all the other circles. There will be like small circle of rocks. There will be outer circle of ruined walls and so on and so on. Of course there will be a gap for gates and that's not a problem. Again like every modifier like a curve or array you can apply them.
Which will just bake it into geometry. Well you actually apply them anyway on the export done automatically. Then bigger surfaces. Again it's time to apply the tile textures that I prepared. And here you can see how this tile texture look. Again super super amazing. Because it generates bunch of maps in really nice way. And you know like there was tile PBR generators like maybe like even 10 years ago. But they were not even close to what quality it is when it's like generated with AI this way.
I use a little bit of my magic to distribute this texture in nice way. I created like a circled area looped it. And again like that uses the UV. So what you can see here. So it's not just area but they go in circles. Which make it like much nicer looking. And for that center area as I said I use dots texture that I generated. Also very useful sometimes to do use up scalars like from 2k to 4k again for some big areas like this.
Then there will also be a road that comes to this arena. Small stuff again all of that. Build from primitives then unwrapped and texture it with that tile texture. Like again one thought that's still hitting my mind all the time is that these AI tools are such a big leverage for professionals in first place. Rather than the beginners. For beginners that's like a much fun like easier way to step in. But you still have to learn things or to actually get use of it.
Like you know like to get started. So I really believe that you have to know the basics of 3D of game development. To understand how things done and to be able to orchestrate that AI agents to do some useful stuff. At least at this stage it is so true. And of course the quality like this way you get way better quality. Oi guys here we go. The location is ready. The location is optimized. It's nice because I made it applause.
Let's bring it to Unreal Engine. As I said I gonna build on top of the template or like so it's like framework it called. It's really cool team plate but it doesn't provide you with the assets of course. Especially with more unique assets. And I figured out that the best approach working with agentic AI like a Claude Claude all that stuff. If you can provide it with a solid base. Especially if you're a beginner I think that's really cool to start with a template.
Because you can actually figure out what mechanics they are. You can try to tackle them with Claude. It can help you to navigate in that template. Explain how it's done. And you're gonna move and learn much faster. And honestly I'm more excited about building 3D characters and 3D locations. So I use this shortcut but later we'll be able to adjust it with Claude Claude anyway. And as I said to figure out what's going on in this team plates.
And where are all the parts etc. How do I connect all the pieces to my location. I used Claude codes through MCP which was helping me saying where it is. How to use it etc. That's super useful. Like the gates for example. Other than that the process is pure creation. Well there is not much magic that I did later. I brought all the rest of the assets and started to build up the location. The annoying thing is again that for optimization you usually need to set up the materials anyway in Unreal Engine.
And all that stuff. So that takes a little bit of time. I didn't figure out how to export them from Blender with the same setting. It sort of supports it but it's not that great. So you usually still rebuild the shader. And little by little brick by brick. Object by object. Cage by cage. Accessory by accessory. My location starts to look nice. Also I took some free VFXs for fires for my lights. Free water. By the way this is like a free water shader.
And one cool addon and one cool plugin like Ultra Dynamic Sky and Ultra Dynamic Weather. I have it from I don't know how long already. And I really enjoy working with this one. It's super easy to set any weather like any weather condition. And again like weather lightning it's like half. It really is a half. With the right lighting it looks so much amazing. Especially if you watch my previous videos you might know I have some unhealthy attraction to miss.
And fog. I just think it makes everything so much more dramatic. Like let me know if you think the same way. Then it was time to bring my bed guys to the game. I started with both. Pretty much a simple process. You export it like with the right skeleton. You do the retargeting. You do some preparation. You set the materials. You set the physics because I do have this apron and I do have like cape for my main character.
So like it's pretty easy again. You create as a clothing assets. Paint weights. Also set the colliders for the bones. And that's pretty much it. And it already brings so much life. And if you're struggling with this clothing physics or like lose bones physics. Again I created actually like two videos. Like there will be one main video about physics in Unreal Engine. And there will be a separate video about clothing. And in Unreal Engine 5 .8 they updated that system.
Which is even easier right now. Like or faster I would say. Faster. Spent a bit time figuring out how to connect boss to the template boss. And how to connect my character to the character. But thanks Claude Code helped me figure it out very very fast. Very important disclosure. I did not everything like with Claude Code that way that like do that for me. Because that's actually possible. And most likely you're gonna succeed with Opus 5.
I had only 72 hours like three days. And in terms of moving faster. I actually asked it to explore my scene. And in the background it was checking like what's in the scene. Like what files I do I have. What settings there are. And just telling me like what I should do or how it's set. And then I was iterating very very fast. Basically say you need to connect it to this blueprint. And in that blueprint you need to set the weapon and etc etc.
That's basically it. And it was already day three. And I just had like a little bit more time left to do some tweaking. So I actually become a little bit lazy. And decided to give some prompts for Claude to actually try to do it himself. And one of the surprisingly interesting use case is to do the camera movement or cinematics. In -game cinematics I mean. I tested that before and was surprised that it can do the good job.
And then with some extra help you can do it way nicer. So that's what I tried to do. Like the boss appearance scene when we entered the gate first time. So the camera goes to the boss. And also I played around with some other stuff. Opus 5 is really crazy. But it's also quite expensive if you use it outside the subscription. By the way if you're interested I was doing a comparison. Opus 5 with Kimi K3 and GPT. And I figured out that if you're gonna use that by API.
That's gonna cost you a fortune. A little bit about my Unreal Engine setup. So I use Unreal Engine 5 .8. And I use Unreal Engine native MCP together with Vibe UE. I made a complete video about that. There are some other options MCPs. But from my test this one is most complete. Like the best MCP out there. So you can take a look at my other video explaining that setup. And with Opus 5 it works like crazy. And in the end of day 3 I was finally able to play my own game.
To be honest game is too loud. That's more like a boss fight alone. But I created a complete game location. Two characters. Quite detailed one. Configure it all together with the template. And being able to play. That's crazy. Especially I'm happy about the location. Again like when I started to doing that I was not sure how good it will end up. But I'm gonna try my best. But guys that's insane. And one last thing guys.
I truly believe that AI right now is a great tool. And if you use it right. If you learn about what you're doing. If you learn how to do that better. AI can help you with any of your ideas. If you hope to just one shot something with AI. It will be very disappointing. Because even ideation is very difficult thoughtful process. And AI will not be able to do that for you. That was Stef. Like and subscribe. And I see you in the next one.
The words are the caption track's own and nothing is reworded or re-transcribed. Paragraph breaks are placed between sentences so the text reads as prose.
Free tools for your own script. No signup, no login.
Paste your draft and see where viewers are likely to drop off, with a rewrite for each weak line.
Paste the first 30 seconds of your own draft for a hook score and rewrites.
Check your draft against YouTube's advertiser-friendly guidelines before you record it.
Read this channel's public videos and transcripts, and download a writing brief for it.