Getting the transcript
Reading the captions from YouTube. A video nobody has opened here before takes 10 to 30 seconds; this page fills in on its own.
Getting the transcript
Reading the captions from YouTube. A video nobody has opened here before takes 10 to 30 seconds; this page fills in on its own.
DIYholic · @DIYholic
Words
1,923
Runtime
16:06
Speaking pace
119wpm
Reading time
8min
119 words per minute, below the 160 25th percentile of 349 measured videos. That distribution comes from the 349-video hook study.
Opening (first 30 seconds)
It's happening. Can you guess what's in these boxes? Hey everyone, welcome back to my channel. As you can see, I have two unopened boxes that we will be unboxing together in this video. I'm super excited to be sharing with you that I'm officially entering the DTF world. Before getting started, I wanted to give a special thank you
60 words, the words spoken in the first 30 seconds at 119 words per minute.
Free, no signup. See how the first 30 seconds hold attention, with rewrites.
Sentence shape
| Measure | This transcript |
|---|---|
| Sentences | 149 |
| Average words per sentence | 12.9 |
| Longest sentence | 31 words |
| Questions asked | 1 |
| Sentences containing a number | 9 |
Most used terms
Filler phrases
3 in total: actually 1 · like 1 · you know 1.
A literal whole-word count of the same phrase list the Prepublish browser extension uses, so a phrase inside another word is not counted and a phrase used in its ordinary sense still is. It is a count and not a judgement.
Run the check on the words above: where attention is likely to drop, with a rewrite for each weak line. The free check shows the scores and the one issue costing the most.
What this transcript is
Every word below is the caption track YouTube publishes for this video, pulled from the video itself and reproduced unchanged. It is not Prepublish's writing, not a summary, and not a re-transcription: it is the video's own published captions. English captions, generated automatically by YouTube, in the video’s original language. Source: the video on YouTube. A channel that would rather this page did not exist can ask for its removal through the contact page, and it is removed.
No Script X-ray for this video: YouTube shows a Most replayed graph only once a video has enough views.
It's happening. Can you guess what's in these boxes? Hey everyone, welcome back to my channel. As you can see, I have two unopened boxes that we will be unboxing together in this video. I'm super excited to be sharing with you that I'm officially entering the DTF world. Before getting started, I wanted to give a special thank you to ProColored for sponsoring this video. However, all thoughts and opinions are my own. I've heard so many amazing things about their craft machines, and I'm very excited to take you along this journey and share everything that I learned along the way.
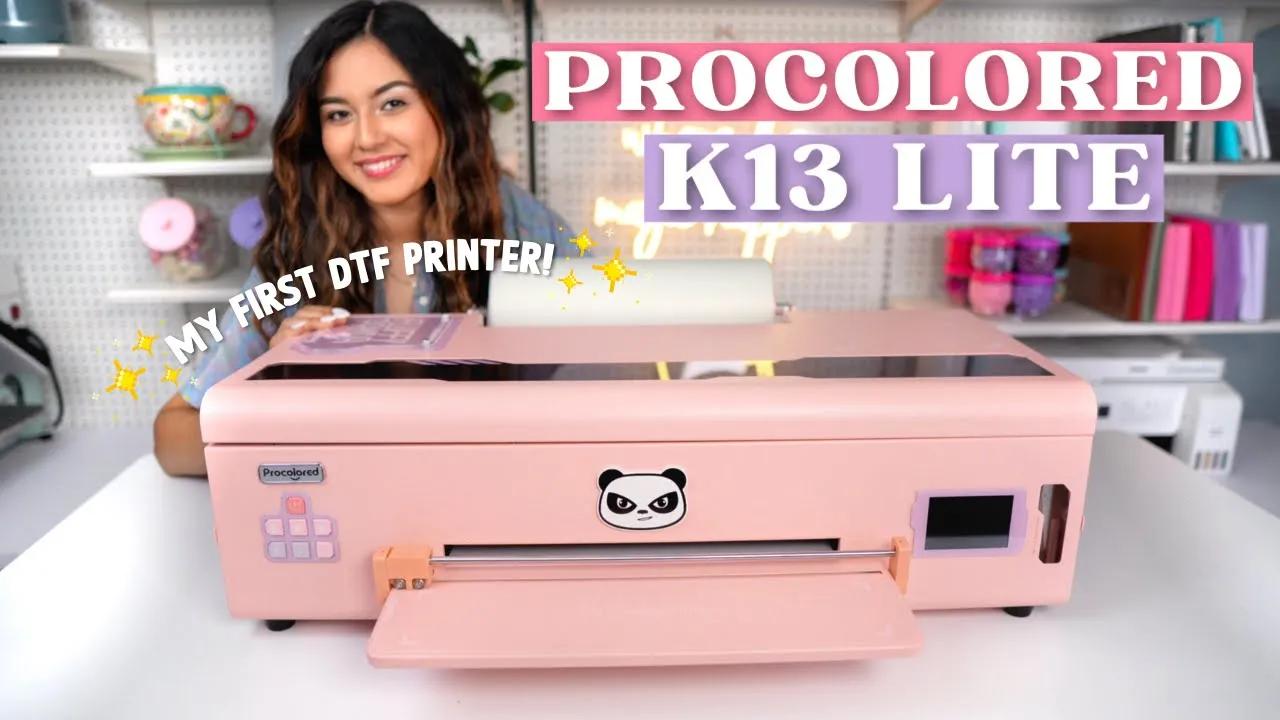
So, let's get into the unboxing and see what's inside. The printer comes in a separate box inside a wooden crate, which is great for keeping it safe during shipping. We're one step closer to opening this box. She's so pretty. It looks just as beautiful as it looks online. And of course, we have the procco colored panda logo, which is so cute. And then all of the details are lavender with pink. It comes with this accessory box.
Let's open it up and see what's inside. Inside you will find this customer care card with QR codes of resources that will help you set up your printer. Just open your phone camera and focus it on one of the QR codes. It will prompt you with a link to click on. This link will take you to their support and services page. Scroll down to find your printer model and select any resources available for viewing. Now, let's take a look inside the box.
The first accessory I see are the roll film brackets, which are pink to match the printer. We also have the roll film plugs, a USB data cable, some syringes, and lint-free cloths. These are part of their cleaning kit. Along with the lintfree swabs, we have the printing moisturizing device, several spare dampers, a power cable, and two screwdrivers to help with the setup process. There's the rod for the film roll, an acrylic board, which is a cute little detail for your printer.
And it also includes all of the screws you need for it. I love that they included five funnels, one for each of the ink colors. These will be super helpful. There's more ink tubes. And here is our cutting tray, also in pink to match our printer. Don't forget to check the little spaces. There are a few additional items tucked inside. This includes spare fuses and a spare cutter for the tray. Finally, we have two USB dongles.
Now that we're familiar with the items, let's get started with the setup process. Just so you know, your ink will be shipped separately, so that's why I have a complete different box. This is the DTF powder. This is a 13in wide film roll and it's actually super heavy. The first thing I'm going to do is open the top cover. On this note, it says to remove the yellow fixing plate off the ink cart first and then turn on the power.
So, we're going to go ahead and do that first. Let me give you a closer look of the yellow plate it's talking about. I'm also going to be removing this little tack here. I'm just going to take the screwdriver it came with to remove the screws. Now that I've done that, I can remove the warning label. For the next few steps, I flipped the printer so you can see everything that I'm doing. The first thing we're going to do is remove these four screws on the back.
Now, I'm going to take the film brackets and install them into those same spots. You want to make sure these rollers are facing inward. Next, I'm going to set aside the rod and the two film plugs. I'm going to go ahead and loosen up these screws. Now you can take one end of your rod and place it inside one of the brackets and tighten up that screw. We're going to flip it over and do the same thing. Before securing the second bracket, you want to make sure to load in your roll film.
Place the other bracket. Make sure it's nice and secured. I had to go back and fix the rod a little bit. I just pushed the rod a little bit more. That way there's a little bit more space where it came from. Go ahead and tighten up this side as well. Now you're ready to place the roll on the brackets with the arrow facing the printer. Okay. So, I flipped the machine facing forward. There's two screws on both ends right here.
I'm going to be loosening these up just a bit. This is where the cutting tray will be installed. You want to line these two sides onto the back side. You can't see it from the angle, but I'm just going to tighten up these screws. Now you can remove the tape from the cutter. Now I can remove the sticker from the film and feed the film into the printer. I'm going to go ahead and plug in the power cord and the data printer cable.
Next, we'll download the printer driver and install the ProColored Studio software. To find it, visit ProColors website. Go to the support section and select resources and downloads. Scroll until you find your printer model. I have the K13 light pink. Here you can view all of the available resources, but for now we'll open the software download link. Once on the page, select the two files and download them both. I went through the pop-ups agreeing to everything.
I opened the zip file we downloaded earlier, extracted it, and clicked on the ProColored Studio light setup. I followed all of the prompts to install it, and once it was successfully downloaded, I opened it. This part was easier than I expected and it took less than 10 minutes to complete. The first thing we'll do in the studio software is a no ink print test to ensure the printer is working correctly. The blue power button will blink during the process and once it's finished, the blue light will become solid and steady, indicating everything is working as it should.
On the right side of the printer, you will see the waste material ink tank. All of the ink tanks are visible and labeled on the outside as well as on the inside. Now for the fun part. We can start filling each of the ink tanks, matching the label on the bottle to the tank's colored label. I put on plastic gloves to keep my hands clean in case this part got a little messy. grab the funnels to make this step easier. Heat.
After loading all of the ink tanks, close the panel door and turn on the printer. Press and hold the one-click ink guide button for about 10 seconds to draw the ink from the bottles to the tubes. The printer will then run a print head cleaning and you can see the waste ink flowing to the wasting tank which I found pretty cool. After that, I printed a nozzle check to ensure all of the colors were working correctly and they were.
That means we are ready to start printing real images. Please know that the software for this printer is only compatible with Windows and not Mac. Because of this, I had to purchase a cheap HP laptop and it worked perfectly for this. I wanted to test the colors using a color strip test, which also turned out really well. The colors printed out perfect and vibrant. I decided to print a cute image to make a t-shirt for the holidays.
I adjusted the size to 12 1/2 in wide. The software is userfriendly, allowing me to leave the default settings for the white ink fill mode and the print direction. Then I just hit print. I was amazed by how smoothly everything printed. The image was large and it only took about five to six minutes, which I thought it wasn't bad at all considering it was a very large image. I also printed a smaller image that took a lot less time.
Now for the exciting part. Before we test our print, we must coat our images with the DTF powder it came with. Make sure to cover the entire white ink evenly without touching the ink with your fingers as this powder will cure the ink and act as the adhesive for our transfer. I recommend wearing plastic gloves and a mastering this step. To cure these transfers, I'll be using the ProColored smokeless oven. Its design is sleek and it utilizes activated carbon filtration and powerful dual fans to remove odors and maintain fresh air quality during the process.
You can open it from the drawer or the lid when placing or removing your transfers. Once the oven is preheated, I place the transfer inside with the white ink facing up. You'll notice the powder is melted, creating an orange peel texture. This indicates it's been cured correctly. The colors look amazing. I can't believe I just created my first few transfers with my printer. Now, we're ready to use these transfers on blanks.
I prepped my shirt and pressed it for a few seconds to remove moisture and wrinkles. Then I went over it with a lint roller. I folded my large transfer in half and used the fold as a guide to align it with my t-shirt ruler. I then secured it in place with heat resistant tape. Next, I pressed it at 320° F for 15 seconds. And then I used a cooling block to speed up the cooling process. Remember, DTF transfers are a cold peel, so remove the film only after it has completely cooled down.
I like to press it one more time with the Teflon sheet cover on my heat press to help seal it. This gives the image a glossy finish after the second press. I repeated the same process for the smaller image and the zipper bag. I'm super happy with the results. The colors turned out exactly as I hoped. I've always wanted to learn how to create my own DTF transfers, and I'm incredibly impressed with the K13 Light. This process has been more simple than I expected.
I can't wait to keep creating and exploring all its possibilities. Honestly, the maintenance process has held me back from trying DTF printing before, but not anymore because the K13 light is designed for beginners. You still have to do your part, but honestly, so far, it's been great. If you've been thinking about starting a small business or upgrading your craft setup to DTF, this is your sign. Procolors Black Friday sale is live and they're offering a huge bundle discount.
Plus, if you purchase any printer this week, you can enter their giveaway for a chance to win a full refund, $1,000 in cash back, gift cards, and more. Don't miss out on this amazing sale. All of the details are listed in the description box below. If you have any questions about the printer, let me know in the comments, and I'll be happy to help. I hope you enjoyed this video and found it helpful. Thank you so much for watching.
See you guys next time with a new DIY.
The words are the caption track's own and nothing is reworded or re-transcribed. Paragraph breaks are placed between sentences so the text reads as prose.
Free tools for your own script: paste a draft and see where it stands before you record it.
Paste your draft and see where viewers are likely to drop off, with a rewrite for each weak line.
Paste the first 30 seconds of your own draft for a hook score and rewrites.
Check your draft against YouTube's advertiser-friendly guidelines before you record it.
Read this channel's public videos and transcripts, and download a writing brief for it.