Getting the transcript
Reading the captions from YouTube. A video nobody has opened here before takes 10 to 30 seconds; this page fills in on its own.
Getting the transcript
Reading the captions from YouTube. A video nobody has opened here before takes 10 to 30 seconds; this page fills in on its own.
Sam Smyers · @samsmyers
Words
1,352
Runtime
9:03
Speaking pace
149wpm
Reading time
6min
149 words per minute, below the 160 25th percentile of 349 measured videos. That distribution comes from the 349-video hook study.
Opening (first 30 seconds)
What's up everybody? Sam's vice here. Today I want to go over how to use the crystallizer by Soundtoys. Now I know this plugin has been around for a while, but only recently have I been experimenting with it and that's because I've been noticing it being used in some modern production styles and so in this video I'm going to go over how to use a plugin and then give you some ideas how
75 words, the words spoken in the first 30 seconds at 149 words per minute.
Free, no signup. See how the first 30 seconds hold attention, with rewrites.
Sentence shape
| Measure | This transcript |
|---|---|
| Sentences | 84 |
| Average words per sentence | 16.1 |
| Longest sentence | 74 words |
| Questions asked | 1 |
| Sentences containing a number | 5 |
Most used terms
Filler phrases
21 in total: like 12 · actually 5 · kind of 2 · basically 1 · uh 1.
A literal whole-word count of the same phrase list the Prepublish browser extension uses, so a phrase inside another word is not counted and a phrase used in its ordinary sense still is. It is a count and not a judgement.
Run the check on the words above: where attention is likely to drop, with a rewrite for each weak line. The free check shows the scores and the one issue costing the most.
What this transcript is
Every word below is the caption track YouTube publishes for this video, pulled from the video itself and reproduced unchanged. It is not Prepublish's writing, not a summary, and not a re-transcription: it is the video's own published captions. English captions, generated automatically by YouTube, in the video’s original language. Source: the video on YouTube. A channel that would rather this page did not exist can ask for its removal through the contact page, and it is removed.
No Script X-ray for this video: YouTube shows a Most replayed graph only once a video has enough views.
What's up everybody? Sam's vice here. Today I want to go over how to use the crystallizer by Soundtoys. Now I know this plugin has been around for a while, but only recently have I been experimenting with it and that's because I've been noticing it being used in some modern production styles and so in this video I'm going to go over how to use a plugin and then give you some ideas how you might be able to use it in some of your productions.
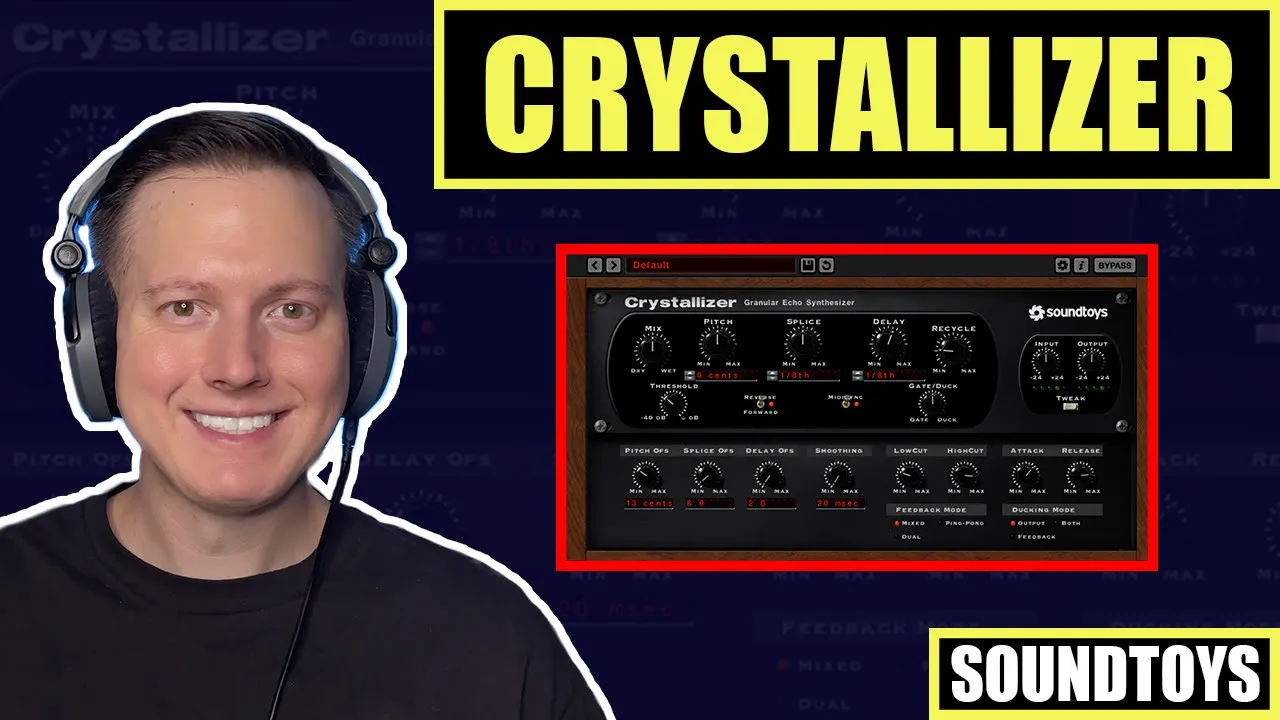
So let's go ahead and jump right into it. So I have the crystallizer opened up. This is what it looks like when you open it up and I have it on a lead synth sound. Right now the crystallizer is bypassed so let me play the you the sound. There is a bit of reverb on it and if I turn the bypass off Now we can hear the crystallizer. I'm going to open up this tweak menu which gives you some more advanced options. You have your input and your output here.
You have your mix knob which you mix between the dry and the wet and then you have this recycle knob here which is going to be like your feedback knob on a delay. You have this pitch knob which allows you to pitch the sound up or down. So 800 cents is going to be like eight semitones. So if I do seven semitones So then you can hear the sound and that's not a very pleasant sound when it's pitched that way. So notice that the sound is also in reverse and that's because this little switch right here allows you to switch it between reverse and forward.
So there you can hear the sound in forward but I like it at in reverse. Uh that's how it is set up default and I think that's how I use the sound mostly. We have our MIDI sync which allows you to turn it on to just milliseconds or you can have it synced in time with your session. We have this splice knob which actually takes the incoming signal and chops it up into these different splices essentially. So let me turn it on the delay and adjust this to 16th note.
So, there you can hear the differences, and then this delay determines where that actual splice is going to occur. So, it'll delay it maybe a 32nd note or a 16th note. And you can essentially go all the way up to a full note. So, I can adjust this recycle. That sounds pretty cool. So, down here we have a threshold knob, and then we have a gate and a duck. This threshold controls this gate and duck in the center here.
It doesn't do anything, but if I take it to gate, then anything that passes above the threshold, any audio signal that passes above the threshold, you'll be able to hear it. And then as it goes below the threshold, you won't be able to hear it. So, that functions as a gate, and then if I turn it all the way to duck, then it actually does the opposite. So, as the signal goes down below the threshold, you'll start to be able to hear it because as it passes above the threshold, it ducks it.
Let's go ahead and reset that, and now let's go to some of the tweak options. We have our low cut and our high cut for the feedback, and I don't know why they just didn't call this recycle the feedback if they're going to call it feedback down here cuz this is what it is relating to. So, you have a ping pong mode. You have your mixed mode, which takes the left and right channel, mixes them together, and then shoots it out of both the left and right channel.
And then you have your dual mode, which basically takes the left and right channel and doesn't mix them together. You have your pitch offset. It's set by default at 13 cents, and it essentially pitches the left channel down and the right channel up. There it is, pretty extreme. We have our splice offset, which actually offsets the right channel. And then we have our delay offset, which also offsets the right channel.
According to the delay and then the splice offset according to the splice. Then we have our smoothing, which actually adjusts the cross fades of these splices. And so you really just have to play around with that and see if it affects the sound in a way that you like. So that's a really basic overview of how to use this plugin. And now let me show you how I might use it on this pluck sound. I actually quite like the default, so I'm just going to adjust some of the default settings.
And I might just do something like that on this pluck sound. And use that instead of using your traditional delay, and that'll give you more of a unique sound. You can also put the crystallizer on all kinds of sounds. If you go to the presets here, we have an option for drums. So I could put this on a drum loop. Let's go and turn that on. This 808 drum sound sounds cool. Maybe if I turn down the dry. So now I almost have this stereo echo added to the drums.
And that's something kind of cool. So really just experiment with some of these presets. And then you can see how they set the knobs and then you can adjust the knobs and try to get and dial in the sound that you want. I can put it I can also put this on like a hip hop lead sound. Here is the sound. And let's go ahead and put on the crystallizer. And there you can hear a really crazy effect as I adjust that pitch up.
It almost keeps on rising up and up. And it gets a bit screechy so you can just play around with the pitch there. Almost like a cool echo. Maybe if I turn this down. So now that's creating almost a whole new melody. So you could just play around with that on some really cool pads or hip hop sounds and maybe it'll give you some really interesting vintage-y or just unique sounds. I have the siren sound. And one thing I think is really cool about crystallizer is that it really amplifies atmospheric sounds and this is where I'm really hearing this crystallizer being used especially like ambient music or maybe some melodic house or melodic techno.
I've noticed that this sound this crystallizer sound is being used this reverse sound especially. So I could apply this crystallizer to this atmosphere. And it's almost like I just created a completely new sound. And then I could just bounce that down. And now I have this new atmosphere. And so you can just do this with a bunch of sounds, create these really cool atmospheres by tweaking the knobs on the crystallizer, and then you can create a sample pack of a bunch of atmospheres, and then you'll have all these different types of atmospheres that you created that are unique, and then you can add them to your tracks, your deep house tracks, or whatever kind of track that you're making.
So, that was a brief overview of how to use the crystallizer. I hope that that was helpful, and if it was, please go ahead and give this video a like, and also please consider subscribing if you aren't yet subscribed. And finally, if you are truly looking to improve your mixing skills, then check out my Modern Mix Academy. This is a full online mixing course that I created that will help you make some of the best records of your life from the comfort of your own home.
Thank you so much for watching. I'll see you next time.
The words are the caption track's own and nothing is reworded or re-transcribed. Paragraph breaks are placed between sentences so the text reads as prose.
Free tools for your own script: paste a draft and see where it stands before you record it.
Paste your draft and see where viewers are likely to drop off, with a rewrite for each weak line.
Paste the first 30 seconds of your own draft for a hook score and rewrites.
Check your draft against YouTube's advertiser-friendly guidelines before you record it.
Read this channel's public videos and transcripts, and download a writing brief for it.