Getting the transcript
Reading the captions from YouTube. A video nobody has opened here before takes 10 to 30 seconds; this page fills in on its own.
Getting the transcript
Reading the captions from YouTube. A video nobody has opened here before takes 10 to 30 seconds; this page fills in on its own.
Stefan 3D AI · @stefan_3d_ai
Where viewers went back to watch this video again, from YouTube's public Most replayed graph, lined up with what was said at that moment.
Most replayed moment #1
2:134.3x the video's typical replay level
With reference ready, we're moving to the second step. Let's create 3D models. And lucky for us, we do have 3D Studio from Hunion where we can get 20 generations for free. There is a global version, Chinese version. On Chinese version, you can get up to 30 generations and you
Said at 2:07
Most replayed moment #2
7:392.7x the video's typical replay level
comment. The most liked one will receive personal consultation and full course absolutely for free. Now step four, retopology. And we're gonna go to the same exact place, 3DEI Studio. So I'm gonna export each object one by one. This is important because
Said at 7:33
Most replayed moment #3
3:272.5x the video's typical replay level
extra penny, I recommend also to try Triple. And one thing to mention here on Top3D, you can get promo codes for almost every tool. Now we have models generated. They look amazing. Let's bring them to the blender. Here comes step three. And here in sculpting
Said at 3:20
The graph counts replays. It does not show where viewers stopped watching.
Words
4,623
Runtime
24:41
Speaking pace
187wpm
Reading time
19min
187 words per minute, between the 181 median and the 201 75th percentile of 349 measured videos. That distribution comes from the 349-video hook study.
Opening (first 30 seconds)
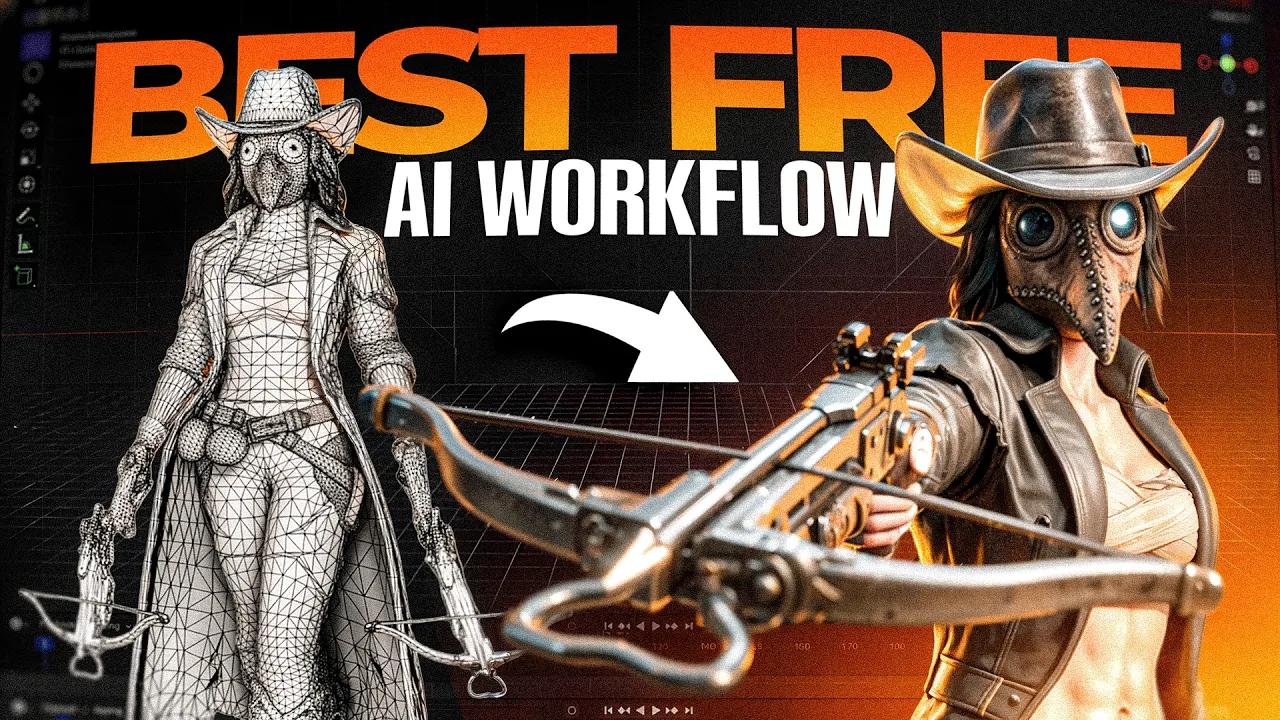
For the last 6 months, me and my team was absolutely locked in, testing every AI tool out there, breaking workflows, rebuilding them, arguing on every point about what actually works and works to use. And now it's actually the time to show you my full free AI 3D workflow for characters and props. This time it's not a fake demo, it's not just for video, it is actually a usable workflow that I use to create production grade 3D assets. I gonna show all steps and even share the drive link so you
94 words, the words spoken in the first 30 seconds at 187 words per minute.
Free, no signup. See how the first 30 seconds hold attention, with rewrites.
Sentence shape
| Measure | This transcript |
|---|---|
| Sentences | 398 |
| Average words per sentence | 11.6 |
| Longest sentence | 44 words |
| Questions asked | 12 |
| Sentences containing a number | 32 |
Most used terms
Filler phrases
84 in total: like 45 · actually 23 · right? 6 · basically 5 · I mean 3 · sort of 1 · you know 1.
A literal whole-word count of the same phrase list the Prepublish browser extension uses, so a phrase inside another word is not counted and a phrase used in its ordinary sense still is. It is a count and not a judgement.
Run the check on the words above: where attention is likely to drop, with a rewrite for each weak line. The free check shows the scores and the one issue costing the most.
What this transcript is
Every word below is the caption track YouTube publishes for this video, pulled from the video itself and reproduced unchanged. It is not Prepublish's writing, not a summary, and not a re-transcription: it is the video's own published captions. English captions, published by the channel, in the video’s original language. Source: the video on YouTube. A channel that would rather this page did not exist can ask for its removal through the contact page, and it is removed.
For the last 6 months, me and my team was absolutely locked in, testing every AI tool out there, breaking workflows, rebuilding them, arguing on every point about what actually works and works to use. And now it's actually the time to show you my full free AI 3D workflow for characters and props. This time it's not a fake demo, it's not just for video, it is actually a usable workflow that I use to create production grade 3D assets.
I gonna show all steps and even share the drive link so you can check it out. I gonna show you the mesh, UV, textures, everything for your inspection. And this time only free tools gonna be used. I'm freaking excited, grab your drinks and let's get started. The starting point of course is always the same, we gonna need to create concepts. The better the concepts, the better the output. I was brainstorming quite a lot with ChatGPT, creating different characters.
And finally I got this mix of Plague Doctor with the Demon Hunter. And let me know if you already feel where the inspiration comes from. The good news is that you don't need to go and pay for any image generation. Guys, there is AI Studio like Gemini that you can use for free. So if you go to AI Studio, go to the image generation, there is Nano Banana which is absolutely free. Yes, of course there is Pro and Nano Banana 2 or GPD image which is very cool.
But even free version is extremely capable. The day Nano Banana was announced, it was already crazy good. So here you can see all the references created only with Nano Banana. My process is very simple, I just explain my thoughts, sometimes would like draw around and say like, I need this part removed, added, etc. I do have dedicated video about it, how I do that, you can take a look. For complex character, you might want to split it in more parts, sometimes in less parts.
That's actually how you feel what parts you want to be dynamic and so forth. In my case, we have body alone, we have hands, boots, overcoats, a crossbow, belt, hat, hair and mask. With reference ready, we're moving to the second step. Let's create 3D models. And lucky for us, we do have 3D Studio from Hunion where we can get 20 generations for free. There is a global version, Chinese version. On Chinese version, you can get up to 30 generations and you can create multiple.
Okay, we're going to go to character workflow and start creating 3D. Okay, you already might know how to do that. You can use single image multiview. I don't use multiview all the time, only when I need to specify something from the backside. Or if single image generation doesn't give that much results. We're going to only create geometry because this time we're taking it seriously. So we only care about nice geometry right now.
Hunion 3.1 is amazing. Again, and the fact it's free is absolutely crazy. I mean, use it while it's still so. If you're struggling to find your best 3D AI, guys, there is a website I created free for you. Simplest idea. You can blind test the model and figure out which one is the best. Pretty much just go to the leaderboard and you always know which model is really the best. And as soon as new model is released, we're adding it here right away to keep everyone up to date.
And you can see Hunion performs extremely nice. If you do have extra penny, I recommend also to try Triple. And one thing to mention here on Top3D, you can get promo codes for almost every tool. Now we have models generated. They look amazing. Let's bring them to the blender. Here comes step three. And here in sculpting mode, we just need few tools really to put things together, fine tune a little bit, fix some imperfections, cover some holes.
So first thing, of course, let's put things together. Now we go to the sculpt mode and the brush that I use 80% of time. Guys, we were testing different brushes, everything. And we figured out you just really need to know like this one, the grab brush or elastic grab, which basically works like if you with your hands move the mesh around and saying like adjusting a little bit. So for example, here overcoat is goes around the hands, right?
It's quite simple tool, but you can do so much stuff, especially with AI generated objects, just align them together, fix proportions or stuff. You can move big part or you can move small part. Another extremely useful tool, especially in my workflow is masking. So there is a laser mask and you can also use a mask brush to select the parts accurately, which you want to cut. In the mask menu, there is an option to cut mask and fill holes that will basically create a nice cut and fill the hole so you can proceed with further sculpting.
Why do I use that? First, you can remove the parts that will be covered with the objects. Also, you can cut feets since we're going to put the boots there. You can cut arms because we do have arms separately. You can do pretty much everything. Also, you can combine two parts of successful generation. Let's say I have object A and B and I do have some successfully nice part that I want to combine. Cut them, join the objects and let's go.
Of course, there is a smooth brush and some other simple brushes that can help to remove unneeded geometry, unneeded details. In my case, I smoothen the head since it will be covered by a mask. But if you're particularly looking into the faces or even rigging the face, I do have separate video about that too, guys. How to create face that can be animated and we were even doing a VTuber stuff. Lastly, very common use cases to cap some holes and it's very difficult to do it in edit mode if we work with scope.
There is inflate brush that can, you know, add the volume and to the holes like this and then in combination with remesh. Again, you just need to know this very basics. Let remesh basically recalculate the mesh. You find the right value and it cups any holes with remesh. You unite, join the objects and stuff and stuff. Or you can do remesh to more comfortably work with geometry. These four simple things that I mentioned is more than enough to achieve 90% of any results.
To achieve 90% of anything in sculpting. And just like that, we got it ready for the next step, which will be retopology, of course. We want really cool meshes. We want really nice wireframes. But before we continue, there is my personal announcement. I am so proud to present my first ever 3D course. It's finally ready. It is designed specifically for beginners indie game developers. Built around one key idea. I give you knowledge about best AI tools, 10% of 3D skills.
So you can achieve 90% of any goal, such as a character or 3D props on a pro level. You don't need monsters anymore. You just need your desire to create. I created it with my team of 3D artists, professionals with 10 plus years of experience. We were checking every tool, finding the best combination. And all what we learned across these years is packed into this clean system. And we're gonna constantly support this course over the year.
Link in the description. And one more super important part. I will give away this course for free for people who genuinely need it. Who really want to create and cannot afford it. Especially those who work in socially important jobs. Teachers, medicals, students or someone in tough circumstances. Who still want to create. I want to hear your story. Write your story in the comments. Who you are, what you do and what you want to create.
I'll personally read every comment. The most liked one will receive personal consultation and full course absolutely for free. Now step four, retopology. And we're gonna go to the same exact place, 3DEI Studio. So I'm gonna export each object one by one. This is important because that's how it works right now. I'm gonna export it in FBX or OBJ. Then we're gonna drop it to Huion 3D Studio. And there is retopology where you can upload your object.
You're gonna need to choose the low, medium or high target face count amounts. And I usually go with quads. Here's the important thing. It's not always give the best results. But I usually do three to four generations until I get the best wireframe or shape. And frankly speaking, it's never 100% enough for any medium complexity assets. For some simple can be. So let me explain my real workflow on this body part. So I figured out that this one will be the easiest starting point.
That's my logic. And some assets, by the way, was actually very, very good. Not much to fix. So now let's go back to Blender and I can upload my mesh. The good thing is actually fits one to one to my original mesh. I usually do mirroring if that symmetric object. It is a very good technique. Saves a lot of time if you are about to do a manual touch up. So of course I do clean up from some artifacts. It's sometimes not needed objects.
We're going to just remove them because I'm going to still bake a normal map on top of that. And I'm going to use Retopoflow. Well, if you don't know, Retopoflow is a free add-on. You can use that for free if you are not engaging in a commercial development as support. The link will be in the description. What it allows is to quickly enter the edit mode in a very convenient way. Adjust the wireframe. We've been using this tool for manual Retopoflow from scratch.
But we actually figured out that it's super convenient to get the base and just fix some areas that are bad. Like adding loops there and there. You don't even need to learn every tool available within this add -on. Like I was really using mainly few of them. Like polypen, relax, sometimes contour to fill up some areas and stuff. Just like two or three simple tools give you an opportunity to create extremely accurate wireframe.
Retopology and in traditional 3D workflow. Retopology might be the longest part and extremely skill dependent. Right now, it's way easier and absolutely way faster. It requires basic understanding of what topology you actually need for what reasons. And then you can speed it up extremely using AI generated mesh as a base. But again, in reality right now, there is no 100% fine wireframes. I would say 80 to 90% depending on the complexity of the objects.
For some simpler shape, maybe it still makes sense to use quadrimesher or do that manually. And just like that, look at the wireframes that I created. I think they are actually very nice. I consider this a production grade wireframe. If you disagree, drop a comment. Step five is UV unwrap. And luckily for us, we also have AI tool and it can be actually very good. So after we fixed our wireframes, we go back to 3D AI studio and drop these objects here and we can unwrap them.
So everything disclosed, it's not working all the time. But for simpler objects, it actually gives very good results. Similar to low poly, I do a few regenerations usually. And look at this. This is how AI unwraps my body. I think it's fantastic. And sometimes it also can be used as a base and do additional seams in Blender on top. But for some complex objects, it can fail completely. So in my case, the boots failed definitely.
And I just did that in Blender. To be honest, UV unwrapping is probably the easiest thing. So the whole thing here is to draw seams on top of edges. If you have nice wireframe, that's not going to be a problem at all. We're going to set seams and then we're going to unwrap it. One additional step that is very important for professionals is how you pack things. There is a free add-on called UV Packmaster. And also it requires a little bit knowledge how you pack simple objects together that doesn't require a separate texture set.
That's very important for optimization. But that's relatively simple skill. So in my case, I manual unwrap the bottle and the crossbow and then pack them. So Blender packing is not enough. And there is like UV pack add-on that I just mentioned that can help to do that more nicely. You can set the right pixel margin depending on targets, texture resolution, and so forth. With nice UV, we're ready for step six, baking.
What we're about to bake is normal map, of course, because we have nicely done high poly models. And also we're going to bake ambient occlusion map, which gives a lot. This is probably the only step that I really recommend to do completely in the software right now, because it's very easy to learn and it gives really nice results. So what is it all about? It's about to create new maps, aka textures for normal and for ambient occlusion.
The process works like this. We select the high poly, which we created and low poly model. Then we go into the cycles engine and we choose which target map we're going to bake. For example, it will be a normal map. Then there is an option that we need to activate selected to active, which means selected object to active object and some basic settings that we need to know and tackle depending on the results. Usually the values are something like this.
Now it's important that here in shader, the target texture is selected and we can actually press bake. And here we have the results. So we have the normal map. We can connect the normal map through this. So just like that, I baked all these details without adding extra geometry and stuff. For professionals, of course, that's not a news. If you are a beginner and these concepts are very new to you, in my course, I explain everything in details.
So they starting to make sense. And trust me, one evening is enough to comprehend that. Similar way you can bake every object in Blender. And additional, I usually bake AO map, which is ambient occlusion. I just like the depths that it adds to any object. Here's how ambient occlusion together with normal map looks. It's absolutely legendary. I mean, it's already look good, right? Now, if you're seriously getting into it, I can also recommend a tool called Marmoset Toolbag.
This specifically for baking. It's an amazing one. For me, it's even easier to use than Blender. So basically you go create bake project, drop high poly to high poly, set some settings, choose the map that you're gonna need to bake, resolution where the map is saved, and it bakes it almost instantly. You can bake several amount of maps right away, such as normal and ambient occlusion. And you can preview it right away.
And yeah, this just look amazing. Wow, here's go. Let's see all the details are here. And here's the ambient occlusion, right? And here we go. Here's the final results. Guys, it's already starting to look absolutely sick. Look, wow. In CGI, ambient occlusion is my favorite map because it can make object realistic, even without any color texture. And now we actually ready to go and do texturing. And here I want to introduce my favorite tool of the year is probably Modif.
And here AI actually makes sense. And I'm using personally some 3D AI tool like Huion to texture some simple objects and use it as a base. Frankly speaking, there is triple which is paid that gives better texture so far. But the thing is that we're still going to go to Modif and fix it there or even paint it there. So Huion can give nice results. And we usually drop it to the blender and then we adjust the maps, for example, generated roughness and metallic.
And it works in very few cases. Normally I just remove them and set values or do the maps myself, which I'm going to show soon. But the main workflow again is to export the objects. Let's say, I'm going to export everything except here to the Modif. And here again, just a few things that will give you an option to amazingly texture any object. First of all, before I introduce these tools, in Modif there is two modes that are very important.
There are realistic and albedo mode. And the albedo is actually a game changer. We can create a flat color texture without baked light, baked reflections. That makes it so much better and so much more useful in real production. So the process here is simple. We adding the reference and choose the reference, choose the object. And first tool is multi-view texture, which works simple, similar to what any other 3D engine does.
We're going to press generate and it will go view by view and generate texture and try to merge them. So as you can see, the most of the areas is okay, but for the face, it messed it up and it's not that great. This is because it automatically just choose the view. Actually here, you can also control the view. I almost not using that. So I'm going to remove all the layers and go to the single view. My workflow is built around this.
I select the reference and press generate image. So it will create the projection based on my reference. You can just add as layer and upscale if you're using pro version with all these options enabled. And just like that, view by view, I'm going to go around and you can see the results overall is way better. And you might ask me like, what's with the face? But that's okay with the face. We can easily address that. The third tool is actually patching.
How it works, we select the in-paint region. Basically, what we're going to fix. You can upload your texture here or generate a texture like, and then we're going to disable this setting. So it doesn't regenerate anything except this selected area. Choose the image prompt again. Then we're going to use this in-paint brush to actually fix this area. And just like that, we can fix anything. Right here in Modify, you can create additional references such as for face.
And here we go. And with this set of tools, multi-view generation, single view generation, patching and creating additional reference. You can texture any object. Yes, there are more tools that can speed it up. There is a dedicated video on my channel, or I of course cover that in my 3D course in details. And as a result of Modify only, again, this is mostly about the color map. Look what we got. I could never imagine that I can do such a great texturing job, right?
I mean, I'm really bad at painting. Like this requires good talent. And look at the texture maps together with nice UV. It looks very good. So I'm going to take all color textures back to Blender. Now, Modify is complete AI work, but sometimes we just need simple set of tools to tweak some stuff. And actually in Blender, it's very easy to do. So I have this texture from Modify. And there's like, and in texture paint modes, you can use like clone brush.
Just like select the reference region with control and then just paint and fix some stuff. Very easy to use. There's also a smear brush that works very simple to fix some imperfections on textures like this, or very common case, you need to add some logos, text and stuff, or some image on top that also can be done. So for example, here in brush settings, you can go and texture. I'm going to press new, then go to the texture tab and actually open that texture.
So in my case, that will be this stitch or a patch. I just selected that. And here you can see it's already on top of my screen, but don't forget to choose the mapping to stencil. You can also choose tile it, but then it will be like a tile at one. So I'm going to choose stencil. And now with right mouse button, I can move it around and with shifts, I can sort of like zoom it with control. It can rotate it. And if I actually paint on top of it, just like a brush, I can actually add it on the texture.
Look like that. How easy was that? So with this simple tool, you can add any logo, text, everything. You can multiply it by color. You can use that as a real stencil, etc. But what's really happening in Blender or any other 3D software is that we create the roughness metallic maps. And that's very easy. So the concept here is that we're going to create just black maps. Metallic and roughness is a value. So let's connect them.
And we can see that our object is now very reflect. That's because roughness is set to one, which is black color. Now we can go and choose fill and set the value somewhere here to make it like less reflective, maybe like too much. Okay, let's set the value. Okay, that's way better. In edit mode, I'm going to select glasses with my UV. That's not a problem. Go back to texture and fill these areas with darker color, which make it more reflective, right?
And just like that, I got it. I can also use brush and paint areas with brush that will become more reflect. The same thing happened with metallic map and we can achieve any look. That's of course can be done in Substance Painter, but that's like a paid software. Same thing here. You can create emissive map and paint objects that need to be emissive. So I would call this a step compositioning. So you bring all the maps together.
You can also use ambient occlusion map as a separate channel. If in your game engine that's required to be like that, or you can actually merge it with the color map that also can work. It depends how much control you need over it. So with this bunch of simple tools in Blender, such as clone brush, smear brush, paint and fill, and working on different set of maps, such as metallic, roughness, sometimes emissive map to fix all the small issues and make sure this look flawless.
Of course, I did that also because I'm about to share the drive link in the description and you guys will judge it very strict, I believe. And here we go, guys. This is absolutely fantastic. Just look how good it looks in Blender. In game engine, that will be even better. You're gonna see that soon. Step number nine is frankly the scariest. Why? Because we're gonna need to do rigging. Okay, so what do I use is scan. We're gonna export the character alone in T or A pose.
Then we're gonna use accurate. So the workload here is quite simple. We just set the markers as suggested. Like the better you place it, the better the automatic distribution will be. We also gonna do that for fingers. Then also there is a calibration. It's very important. If you are non -standard proportions, you need to make sure that your arms, hands, legs look naturally. And I would say Accurate is definitely better than Mixamo for complex characters.
And you can see already like just in Accurate, it's already look quite nice. But the downside is that like if you want to use the animations right here, they're paid. What we don't really need animations. There is a different workflow how we can use that. What we need here is that we can export it right to our game engine, such as Unreal Engine 5 or Unity. That export it in right skeleton, right mapping. Of course, Mixamo skeleton can also be imported to Unreal Engine, but working with target skeleton is always preferred.
And in case of rigging, we always have to bring it back to Blender and address some problems with weights. Unfortunately, there is no complete rigging solution. And you have to do know the minimum amounts of weight distribution, bones and skeleton. The good news, it only looks scary. In fact, it's just about telling what part over the mesh or what objects are following which bones. I do have dedicated video on here on my channel.
And of course, in my course, we break it down. But there are a few tools that you need to know is that for rigid objects, you can attach them strictly to some bones. You can go through each bone and distribute weights nicely. Mostly all the problems are concentrated in armpits or some objects like overcoat, etc. And knowing some basic tools is very easy to address them. What's a little bit more complicated is adding extra bolts.
But again, with right tools, you can still do that very fast. Like here, for example, I added like two lines of bones and with gradient tool, just distributed the weights like this. And luckily for me, my character doesn't have complex shape and it only took me 30 minutes to get the rig done. Well, now it's time to bring it to Unreal Engine and test it out. Final step, we're going to drop it to the Unreal Engine. We're going to create third-person templates.
Here in third-person template, we're going to set our character, set the materials. Here we're going to retarget animations from standard Unreal Engine skeletons such as Queenie or Manny. With that done in third-person blueprints, we're going to replace it on our character and we already can play the character, right? That's super simple. Additionally, I will set the physics on my bones on overcoat. You can also set this physics bones for tail or anything that needs to be affected by physics.
I can definitely do a dedicated video about physics in Unreal Engine. Guys, if you want me to, if there will be 20 people asking for physics tutorial, I'll do that. And with all that done, here is our amazing character in Unreal Engine with all the material sets. How many A's we're going to grade it? One A, double A or it's triple A. Guys, I really want your opinions. I will read all the comments. Let me know what you feel, if this workflow can be better in your opinion or how useful this was for you.
I put a lot of effort in all of this. Hope you enjoy. Like and subscribe and see in the next video.
The words are the caption track's own and nothing is reworded or re-transcribed. Paragraph breaks are placed between sentences so the text reads as prose.
Free tools for your own script: paste a draft and see where it stands before you record it.
Paste your draft and see where viewers are likely to drop off, with a rewrite for each weak line.
Paste the first 30 seconds of your own draft for a hook score and rewrites.
Check your draft against YouTube's advertiser-friendly guidelines before you record it.
Read this channel's public videos and transcripts, and download a writing brief for it.