Getting the transcript
Reading the captions from YouTube. A video nobody has opened here before takes 10 to 30 seconds; this page fills in on its own.
Getting the transcript
Reading the captions from YouTube. A video nobody has opened here before takes 10 to 30 seconds; this page fills in on its own.
Abom79 · @Abom79
Where viewers went back to watch this video again, from YouTube's public Most replayed graph, lined up with what was said at that moment.
Most replayed moment #1
9:0715.5x the video's typical replay level
all
Said at 9:00
Most replayed moment #2
25:057.5x the video's typical replay level
[Applause] two10 go ahead and snug these guys up I want to make sure that the Chuck is not moving okay still not there so it's not
Said at 24:59
Most replayed moment #3
13:187.4x the video's typical replay level
there Che them think we are ready for our Chuck now this Chuck did not come with a tapped hole that you can screw an
Said at 13:14
The graph counts replays. It does not show where viewers stopped watching.
Words
4,989
Runtime
38:00
Speaking pace
131wpm
Reading time
21min
131 words per minute, below the 160 25th percentile of 349 measured videos. That distribution comes from the 349-video hook study.
Opening (first 30 seconds)
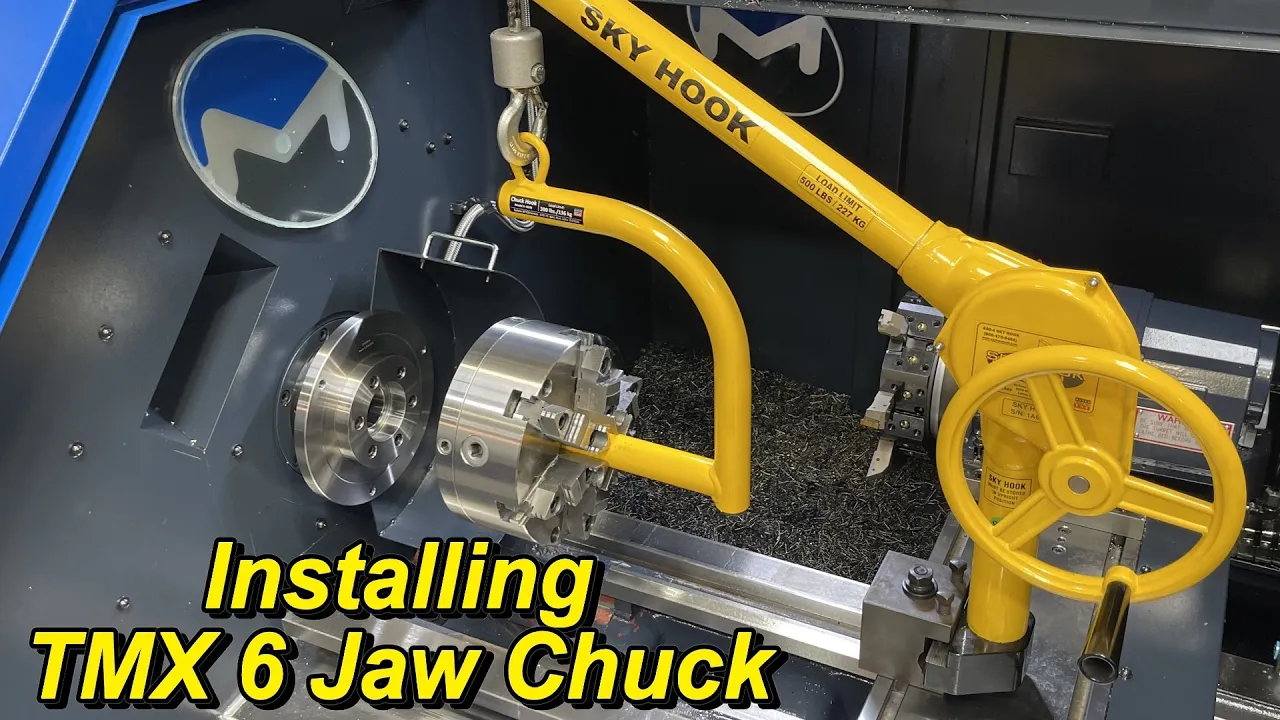
[Music] hey guys welcome back to the shop for another tool Tuesday what I have here is some brand new hardware from TMX that we're going to be installing on our miltronics ml1 162 CNC LA and what I'm doing is I'm replacing the factory three jaw Chuck which is what this guy is right here this is the Chuck that came equipped on the machine
66 words, the words spoken in the first 30 seconds at 131 words per minute.
Free, no signup. See how the first 30 seconds hold attention, with rewrites.
Sentence shape
| Measure | This transcript |
|---|---|
| Sentences | 1 |
| Average words per sentence | 4989.0 |
| Longest sentence | 4,989 words |
| Questions asked | 0 |
| Sentences containing a number | 1 |
Most used terms
Filler phrases
86 in total: uh 38 · like 16 · um 11 · kind of 8 · you know 5 · actually 4 · I mean 2 · basically 1 · sort of 1.
A literal whole-word count of the same phrase list the Prepublish browser extension uses, so a phrase inside another word is not counted and a phrase used in its ordinary sense still is. It is a count and not a judgement.
Run the check on the words above: where attention is likely to drop, with a rewrite for each weak line. The free check shows the scores and the one issue costing the most.
What this transcript is
Every word below is the caption track YouTube publishes for this video, pulled from the video itself and reproduced unchanged. It is not Prepublish's writing, not a summary, and not a re-transcription: it is the video's own published captions. English captions, generated automatically by YouTube, in the video’s original language. Source: the video on YouTube. A channel that would rather this page did not exist can ask for its removal through the contact page, and it is removed.
[Music] hey guys welcome back to the shop for another tool Tuesday what I have here is some brand new hardware from TMX that we're going to be installing on our miltronics ml1 162 CNC LA and what I'm doing is I'm replacing the factory three jaw Chuck which is what this guy is right here this is the Chuck that came equipped on the machine this is an 8 in diameter three jaw it was brand new there's nothing wrong with this but what I wanted to do was upgrade from a standard three jaw chuck to the TMX six jaw set true truck now I started using this same exact Chuck on my Victor lathe in my home shop several years ago and I absolutely fell in love with the performance that this uh six jaw set true actually gives you you can dial this thing in to absolute zero run out and because of the six Jaws I think you get you get better holding consistency with your work pieces you have a lot less deflection whenever you have material hanging out because of the total of the six Jaws all the way around it's almost like a uh a collet is the type of hold that you get so I know that you get a better holding performance with a six jaw and with the ability to adjust the run out to this thing to well well under you know say a half a th trun out that's one of the reasons why I wanted to upgrade to this I know that it's going to be an excellent Chuck so that's what we're going to do this right here is going to be the adapter plate for the spindle I have an a25 spindle nose on my machine and we've got the adapter plate and then the Chuck is going to be in this box here uh we are going to a 10-in diameter Chuck as I said this is a 8 in and this is the 10 in and I believe that was the maximum diameter Chuck that miltronics recommends that you put put on the ml16 all right so uh we'll we'll show you what the hardware here looks like and before we get started getting it installed I have one other minor project that I want to do I want to be able to use my Skyhook to be able to help me install this on the spindle because this is uh pretty heavy I weighed it in the box and it weighs about 76 lbs so that's kind of a heavy Chuck to be trying to hold yourself and get it up on the spindle and then get it bolted on so we're going to use the sky hook but I need to make a little t-nut adapter so we can mount that onto the uh cross slide of the machine there all right so let's give you a peek at the new hardware let's pull it out see what it looks like I haven't even opened up the box yet and then we'll get started on our project and get this thing mounted on the machine all right so let's take a look at our Hardware it's going to be our bolts and then here is the adapter plate adapter plate for a25 spindle TMX builds very high quality tooling Machine Tool accessories Chucks tool holders vices I really like their stuff and I've got several tools that I have invested in that were made by TMX they are made in Poland you can see it right there made in Poland and I have nothing I have nothing but good things to say about that company so the Machining looks beautiful on this adapter plate we'll get it cleaned off and we'll get that mounted on there all right all right there's that beautiful six jaw all right we got our there's our Chuck wrench and let me see if I can open this guy up without having to pick it up that's going to be your inspection report right there there we go look at that that is gorgeous just like the one on the Victor there if you guys are ever in the market for a good Chuck for your machine I would highly recommend that you check out the TMX brand as I said before everything that I have purchased and owned from them has been high quality stuff so I support TMX and I'm going to be very happy to have this Chuck mounted on the laad there get this guy picked up I just wanted to see the back there all right very nice that's going to be our mounting bolts and then on the the back of the Chuck right here this is an adapter that was mounted to the Chuck you can see the split line there and you've got four set screws there 90° or 180° out and then that's how you set this thing true once you get it mounted on there and you get it bolted to the adapter plate right here you're going to end up using these four set screws here to adjust the chuck to the center all right so looking good we'll go ahead and uh get started on the other little uh minor Machining projects we can mount our sky hook to the to the lathe so that we can go ahead and get this guy mounted [Music] up [Applause] [Music] [Applause] h [Music] I that's the T slot beautifully that's the tool post holder that I use got the bottom dressed off so it's not going to dig in and scratch in any way and we can set that guy up here or you can turn it that way whichever way we want half inch stud nice heavy duty washer I can get it started straight and a flange nut to tighten it all down I don't know if this is going to make a difference in the load I want to think that it will but instead of hanging it off over here on that side decided to go ahead and swing it around to this side and then reach over the tool poost with the sky hook whenever we're doing our load it should be just fine we're not picking up very much weight the Chuck weighs less than 100 lb and it should be just fine and it's going to help me be able to uh install and remove um the Chuck or or work pieces like that all right so we can swing that out we've got the we've got the travel all the way back and the hook extends out here where we can set a Chuck down in front of it or a shaft or whatever kind of work piece and be able to reach it pick it up swing it in there be able to move this thing in and use that for our heavy lifting so I don't have to kill my back trying to hold a big heavy Chuck to get it installed on on the spindle we're ready to uh check our adapter fit make sure it it fits properly and this is going to be your mounting face on the spindle noose and I can see some very very minor scratches on here from handling it at the factory I suppose I'm just going to take my Precision flat Stones here I just want to make sure that there's no high spots on there so going to set that on there and it feels good so those minor scratches that you see in the surface there not going to affect it but I just wanted to double check before we get it mounted on there that should be good to go okay let's start getting this stuff mounted up here so here's our spindle face first thing I'm going to do is go ahead and get the Chuck guard bolted back on I had to remove that whenever I was running the uh face driver tool on here so it's the Chuck guard and it and it actuates the uh the safety switch over here whenever you rotate it around and when you disengage it it won't allow the machine or the spindle to turn on and it simply just bolts to the bolts to the face right here want to make sure that the spindle face here is completely clean give it a wipe make sure that there's no lint on there from the towel I think that's going to be good and we're going to repeat that on our adapter plate here too make sure it's good and clean you have this one one alignment pen there that you have to line up with these guys and that's you can see it right there just get one of these guys in there to hold it make sure it doesn't fall off bolts have just a touch of anc's on them on there Che them think we are ready for our Chuck now this Chuck did not come with a tapped hole that you can screw an eyebolt into so we'll just use our Chuck hook there to hold it and get it mounted in [Applause] there that's going to make that job a breeze we want to make sure that the back of the Chuck is nice and clean I have wiped this thing several times it should be good same thing with our backing plate there or our adapter plate clean it make sure there's nothing on it just give it a white with my hand try to remove any of that length that might have stuck to it same thing with the Chuck there I'm going to use the controls of the machine here to just very gently walk it up and see if we can line it up and this right here is the beauty of having this Sky hooked so that I can put it on this machine and hold it so that I don't have to pick this thing up by myself have try to get the the adapter plate the line up there and continue walking it in all right there we go walk it in a little further see if we can push it in there we go put a little bit of pressure on the hook there it is uses a 10mm wrench got it okay take this out all right real happy with the addition of the Skyhook on the milonic here as said I mean I don't foresee taking this off very much but if we end up going back on there with our face driving tool occasionally that's when we'll take this off but for the most part this will probably just stay on there but we may occasionally have a u you know a heavier shaft that I want to be able to get up in here and get into the Chuck and that's where the sky hook will really help me out there we can mount it a little further back on this other t- slot if we want to but that's going to work out really good just a really nice helper tool to have around the shop to save your back and let this do the heavy lifting we want to go ahead and snug up our three mounting bolts but we don't want them really tight we just want it tight enough that it's going to hold in place so that we can use our four adjusting screws there to get it set true I'm just going to run it in there and just give it a couple hits with the impact here okay that should be good hopefully that's not too tight and then we'll use a 10 mm allen wrench to come in here and use this to um adjust the Chuck just going go ahead and run them in until they touch I got this piece of this is a Thompson Harden bar stock right here this this is uh turned to ground and it's hardened that's what we're going to roll with there we are going to start off with a 1-in travel uh 1000 resolution indicator just because I know it's going to be a few thou out and then once we get it close we can certainly switch over to a um a finer resolution indicator and I'm hoping that you guys can see that there I'll move this around so we got a little zero there this is the first time indicating a uh Chuck on the CNC Lathe for me all right let's see what we got oh yeah it's 10 11 12 so we got about 12,000 right there there's our high spot so yep there's our high spot so we've got a screw right there let me see this is um I will say this kind of throws you off sometimes when i' I've indicated this many times on the Victor and it seems like it's always the opposite direction of what you're trying to to do there so this is high that way so I want to push it that way let's see if we can make that happen see it's making it go the other way weird all right so we got to loosen the other one back up now let's loosen that one up and come around see if we can get it close so it's loosen your lows so we'll just snug our lows loosen our Highs but we should be able to hopefully just adjust the lows there and push it since we're within a couple of thousand that right there is one and a half it's about a thousand and we're in between the adjusting screws so I need to do a little bit there and a little bit right here see if we can get it to line up again pretty close I'm going to see if I can get as close as I can with this and then we'll put the test indicator on there and see what we see what we get high low it looks like I'm going to say 2/10 run out right there now what we'll have to do is uh loosen the Chuck tighten it up see what kind of repeatability that we get there too cuz that's ultimately what we want as well is not just indicate the part that's in there right now we want to be able to stick that back in there and it repeat the measurements each and every time so let's get a different indicator and see if we can get this um any closer than we got right there okay we've got the dial indicator I swapped it out for the uh tth reading this is the uh number 25 5-11 indicator's see if I can get it in there and I like using these dial indicators like this just because they're easier to see and it's easier to show the viewer you what we're looking at there unless you got a camera where we're zoomed in but let's see if we can use this guy right here I'll make sure you guys can see this here's our fin adjust all right I said 2000 let's see if I'm right or if I was wrong it looks like I was wrong and it's actually less than one10 wow I mean is that even right am I touching let's just move it let's move it that's about as close as you're going to get indicating it right there wow so you're always going to see a little bit of movement there because that's coming from the actual drivetrain itself your spindles your bearings and things like that you're going to have some minute amount of movement in there but I'm not even seeing a half a tent there so that's pretty incredible that's closer than I thought it was all right so I'm just going to move our dial indicator out of the way and let's unchuck I'm going to go to our uh pinion there you got a zero stamped on this thing that that's sort of that's your go-to pinion that you should uh tighten up we going to loosen it up take the rod and stick it back in there tighten it put our dial back on here just got to get it close and then use the fine adjust on the NOA here to uh get it in there to where you want it all right so there you go we did not repeat very well now that could have been the way that I chucked it I don't know we definitely want to get a better repeatability than that there are a few little Nicks on that Rod so that may not be perfect material to use there I'm just going to I'm going to do this over again we're going to do it one more time like I said there are a few Nicks on this thing and hopefully I wasn't chucked up on anything that was throwing it throwing it off it feels good when you spin it let's try it again these our fine adjust all right we did not repeat well but let's go ahead and adjust it some more and see if we can improve that so we're basically almost 2000 all right we got about 3/10 there we'll snug that one a little bit all right there we go very very little movement on that let's loosen it up go back in there try it again are we going to repeat so we're about a thoul and 2/10 there so I'm not sure it should be repeating better than that so I don't know what I'm doing to throw it off but I'm just going to keep playing with it here until we get it right [Applause] two10 go ahead and snug these guys up I want to make sure that the Chuck is not moving okay still not there so it's not wanting to repeat perfectly for me all right I think one of my problems here is this uh Thompson's bar is not perfectly straight I think it's got a little bit of a it's got enough Bend in it that it's causing a problem out here where we're putting it back in in a different place and it show and run out I need to get it I need to get it set up on the granite plate on some V blocks and inspect it and uh see see if it's um out of round or bent but if we leave it so right there we've got about 2/10 not quite 2/10 and I was able to repeat it a couple times right here just by loosening the Chuck just loosening the chuck tightening it back up just this one and now it's repeating a little bit better that that time it's about three 2 and 1/2 t0 pretty close so I think we're good and I'm going to leave it alone right there you know 2 or 3/10 is not is not very much what I usually when I to whenever I'm doing this on the Victor La I've got a plug gauge that I use it's Precision ground and it's only about that long and that's what I usually use to indicate that one right there so I think this bar is not straight and that's one of the problems that it's giving us and we are rubbing ever so slightly on the back side right there I don't know if we can just get that to wear in I'm not sure what actually is rubbing I hope it's not the bolt but we'll go ahead and turn it on there that's 500 RPM quien it up that time I think we're going to be good to go but I'm going to keep uh checking it I just don't want to keep boring you with the same old stuff right there but I am going to um get a different plug gauge bring it in cuz I got it at my other toolbox at the house and then I'll go ahead and re indicate this and see if this is repeating it should be brand spanking new and the other six draw I have always repeats very very well I'm excited to have this guy and I think this is going to give us better performance on our turning there when we're using our miltronics all right I've got you set up on our Granite surface plate here and I suspected that this bar was G that's what was giving me the problem and I was correct that's this is the problem right here this bar it wasn't the Chuck this is this piece of Thompson bar stock I don't remember where I got this just landed in my possession I've had it here in the shop for the past year and a half or so I use it for just different things odd and ends you know I usually put it in the indexing spacer whenever I get it mounted up on the mill when I want to find the center of the spacer that's typically what I'm using this for right here okay I haven't used it for indicating a Chuck in yet but we've got it on this V block we've got an indicator set and if I just gently rotate the shaft without trying to move the V block around you will see that indicator moving and it is moving about 2,000 of an inch right there okay and that is about what we were getting whenever I was unchuck this and then chucking it back up we were getting anywhere from 1 and 1/2 to 2000 out on our repeatability so this was the culprit right here this is the problem all right so it's not the Chuck and what I'm going to do is go ahead and uh I'm going to grab one of my really good Precision plug gauges there it's a it's at my home shop in the toolbox and I'll bring it down here and I'll make sure that I have one here now uh keeping our box here and we will re re indicate the Chuck and at that point we should be good to go okay but I wanted to show this this is a good way that you can um check run out on any kind of shaft there put it on your granite plate here if you got a good a good V block that you can use and just be real gentle with it you can rotate it and um and check for runout basic run out there anyway so that's what the problem was I wanted to prove that and then share that with you and so I uh I'll be back on the machine to make sure that we get this we get that new six jaw dialed in perfectly all right so it occurred to me after that last clip there instead of waiting around for a um a different plug gauge I've got plenty of nice carbide shank Tools around here that I've been using so how about we use this guy to get this indicated this should be as about as accurate as we can get with a Precision ground shank there this is a helical brand half inch roughing in Mill with a nice long shank there so it should give me enough uh this is a little smaller than the shank so I should have to have no issue with it chucking on the flutes there and chipping that endmill all right just got to be careful with it so that you don't chip it getting it in there all right and I want to make sure before I tighten it up that I got enough room for my indicator right here next to the Chuck all right so we'll pull that out just a little bit right about there and we'll see if we can use this carbide inm Mill shank to get it chewed up all right I'm just going to focus on this one pinion for this exercise and see if it repeats just using the one okay so we got about three and a half now I really got it out of skew that last time look at there I landed on uh just about a tenth by the way I thought I would uh mention this I looked up the spec on the TMX website for this particular truck and they said that the uh guaranteed ti ti repeatability is 610 okay so if we if we get repeatability 610 or under on our dial we should be within the manufacturer spec so like right there I'm going to leave that alone that's about a tenth run out so what I'm going to do is just loosen the Chuck I'm not going to take the tool out I'm just going to loosen it and then we're going to tighten it back up look at that it repeated I would say near exactly what we what we just did let's try it one more time time I knew this thing would repeat I was just giving you guys bad information and using a bad part all right that time we got two tents let's make sure that we're snug on our mounting bolts [Applause] all right back to a tent there all right let's try it again loosen it up we got 3/10 that time so that may be that may be the best that we're going to get there since now I know that the repeatability should be within 610 that's 410 that time let's hope that it doesn't get any worse than that but typically whenever I would uh get good repeatability on the Victor lath it was it was about a half a thousands so I think it's repeating now so we're getting anywhere from two to 410 on our repeatability whenever we unchuck and Chuck that one right there is right at four so I think that's where it's kind of settling out at on repeating do it again yep 3/10 that time I think we're going to leave it alone we're going to let it run right where it's at there there we go it's 1,000 RPM there's 1750 back to 1,000 and that's it all right I think I'm going to settle for where we're at but I'm happy with it so we were getting anywhere from 2 two to 410 repeatability on unchuck and chucking it back up and that's uh that's closer than what I had before and you can always the the beauty of this Chuck is if you need to put something in here and dial it in absolutely dead nut zero on run out that's you can do that with this it's it's it turns it into a four jaw Chuck at that point tighten your work piece up and then adjust these if you need to get a work piece dialed in absolutely true another one of the beauties of the TMX 6 jaw chuck all right guys well that's going to conclude the install of our new six jaw TMX Chuck there real happy to have it and I think that's going to be a great addition for our lathe here being able to adjust it to absolute zero if we need to and I think after we got past our goof up of using a a bad rod to be able to get that thing indicated I think we figured out what was going on there and we corrected Ed that issue we have a good chuck with good repeatability and it's going to be a fine tool to have here on our milonic CNC laad so I do have another uh project coming up very soon I'm going to get started on using our CNC laad so a few months back I showed Machining some of these guys right here these uh these pinion shafts I actually have another batch of these to machine only it's going to be a slight slightly modified version of this a little bit longer uh than this guy right here so I I have jumped back into my Fusion 360 training that's something that I've been working on over the past couple of weeks uh getting trying to get re familiar with Fusion 360 and learning how to properly use that I have a long way to go there's so much to learn infusion or any kind of CAD software for that matter but I want to try to get familiar with it so that I can be a little bit more comfortable sitting at the computer and drawing up parts like this you know sketching it drawing parts and then using the the the cad and cam to be able to come out to our metronics and be able to machine accurate Parts like this so this is what I'm working on in addition to the training every week and um I'm going to share this project with you whenever we get back on that but we have plenty of things to share with you and I just wanted to kind of uh separate the install of this new Chuck on the machine there for a tool Tuesday episode and I hope you guys enjoyed watching this and I hope you come back for some more projects so we'll see you [Music] then
The words are the caption track's own and nothing is reworded or re-transcribed. Paragraph breaks are placed between sentences so the text reads as prose.
Free tools for your own script: paste a draft and see where it stands before you record it.
Paste your draft and see where viewers are likely to drop off, with a rewrite for each weak line.
Paste the first 30 seconds of your own draft for a hook score and rewrites.
Check your draft against YouTube's advertiser-friendly guidelines before you record it.
Read this channel's public videos and transcripts, and download a writing brief for it.