Getting the transcript
Reading the captions from YouTube. A video nobody has opened here before takes 10 to 30 seconds; this page fills in on its own.
Getting the transcript
Reading the captions from YouTube. A video nobody has opened here before takes 10 to 30 seconds; this page fills in on its own.
Stefan 3D AI · @stefan_3d_ai
This video has no Most replayed graph yet: YouTube shows one only once a video has enough views. These are the moments viewers replayed most in Stefan 3D AI's most watched videos.
Most replayed moment at 4:08
7.0x that video's typical replay level
and it will also have the access to full ai apis. Now let's do some serious tests. The first test will be to do an animation of a character that will be split in parts. The first test will be to create animation. Animation of a character that will be an
Said at 4:01
Most replayed moment at 9:39
5.7x that video's typical replay level
Overall I think this guy's made really amazing job, bring it it all together and I really had a lot of
Said at 9:41
Most replayed moment at 20:36
4.1x that video's typical replay level
Just also because I was playing that game when I was kid. Okay, let me see if I remember how to play that. Let's start with the road, right? Let's try to build a, oh, there are cars. There are cars. It generated nice cars and they're like, wow.
Said at 20:29
The graph counts replays. It does not show where viewers stopped watching.
Words
3,553
Runtime
18:35
Speaking pace
191wpm
Reading time
15min
191 words per minute, between the 181 median and the 201 75th percentile of 349 measured videos. That distribution comes from the 349-video hook study.
Opening (first 30 seconds)
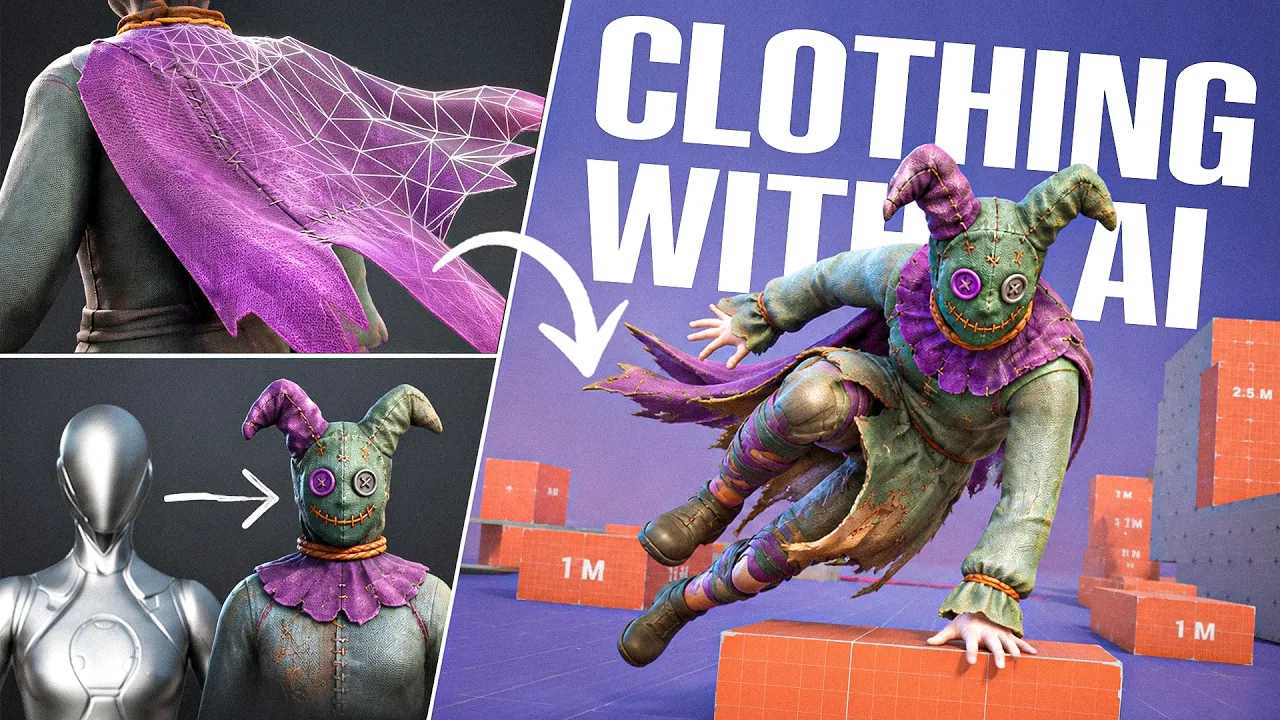
This entire character's outfit was made with AI. It is game ready and moves with clothing physics. And I did not use any specific software like Marvelous Designer. It is all possible to new AI workflow and amazing updates in Unreal Engine 5 .8. And of course, I'm gonna show you the whole workflow for clothing. How to get right reference image for generation. How to quickly prepare it and optimize. Gonna show you new cheat codes for rigging is we now can do that right in Unreal Engine. New chaos clothing is something amazing and
96 words, the words spoken in the first 30 seconds at 191 words per minute.
Free, no signup. See how the first 30 seconds hold attention, with rewrites.
Sentence shape
| Measure | This transcript |
|---|---|
| Sentences | 217 |
| Average words per sentence | 16.4 |
| Longest sentence | 79 words |
| Questions asked | 3 |
| Sentences containing a number | 9 |
Most used terms
Filler phrases
37 in total: like 14 · actually 12 · basically 6 · sort of 2 · kind of 1 · right? 1 · you know 1.
A literal whole-word count of the same phrase list the Prepublish browser extension uses, so a phrase inside another word is not counted and a phrase used in its ordinary sense still is. It is a count and not a judgement.
What this transcript is
Every word below is the caption track YouTube publishes for this video, pulled from the video itself and reproduced unchanged. It is not Prepublish's writing, not a summary, and not a re-transcription: it is the video's own published captions. English captions, published by the channel, in the video’s original language. Source: the video on YouTube. A channel that would rather this page did not exist can ask for its removal through the contact page, and it is removed.
This entire character's outfit was made with AI. It is game ready and moves with clothing physics. And I did not use any specific software like Marvelous Designer. It is all possible to new AI workflow and amazing updates in Unreal Engine 5 .8. And of course, I'm gonna show you the whole workflow for clothing. How to get right reference image for generation. How to quickly prepare it and optimize. Gonna show you new cheat codes for rigging is we now can do that right in Unreal Engine.
New chaos clothing is something amazing and very easy to start with. And I not show you just one approach but three. How to bring your clothing with new character. How to add starting clothing to existing character. And clothing with physics to unexisting character. I'm super excited. Hit that like button to support my channel. And let's get started. And of course we're gonna need to start with the reference. And here's one live hack that will save you a lot of time.
Will you basically need an accurate screenshot or render of your character that you're gonna make clothing for? For sake of this video, let's keep things simple. And I'm gonna take Queenie mannequin from Unreal Engine. So here she is and we're gonna use her as an input and wear the garments on top of her. Again, you can do a full costume. That will help a lot with the proportion, pose and many things really. Or you can do just one part.
That doesn't matter. I'm gonna show you different approaches. How we can solve that. To make it fun, I decided to go with this patchwork costume character. There will be plenty of things to animate with clothing physics later. And that's exactly what we're doing here today. Now, since I decided to go with the costume, we're gonna still need to extract parts. Generating all these parts such as head, boots, cloak, dress, all at once, that's not going to end well.
So we're gonna quickly extract parts with this amazing props extraction node. For this video, same as before, I'm gonna use the DG Studio, which just released and got really appreciated by a community and my team. And they give crazy amount of free credits to start with. However, you can also repeat everything for free with just different set of tools. And for that, I do have a separate video where I explain best free 3D AI tools and you can definitely get same results maybe a little bit longer.
And as you can see, I extracted all parts in just one go. I'm also gonna need body and I'm gonna assemble new character and show you how to re -get if you're creating a new character. But to show you how to put clothing on an existing character, in our case, it will be Queenie in Unreal Engine. We're gonna take dress and split it into two parts. There will be a top part, which is static. And there will be a bottom part that will be actually with clothe physics.
And for bottom parts, I'm gonna do two variations because there is a two ways how we can process that. You're gonna see later. When we are happy with image references, we can actually generate 3D. And here's the thing. I'm really in love with Triple P1 that can do smart low poly. The mesh is really logical. And again, depending on the quality that you're trying to achieve, you can actually start with low poly right away and add details on top later with texturing, etc.
More professional approach, my involved high poly, low poly, then baking and all that related stuff that will give you crazy good quality. If you're a professional, I just made a video how professional workflow is changed with AI and how you can actually benefit from that. The link will be somewhere here. Now I'm gonna download all these 3D generated models, bring it to Blender. And if you want to explore this workflow that I made for this video, the link will be in the pinned comment.
I will of course share it in the description. Okay, now in Blender, first thing we're gonna do is that we're gonna import the Queenie that we can get from Unreal Engine. But that's very easy to do. Just go to Unreal Engine, asset, expert, here we go. And now we can remove the armature and all that stuff. We're not going to transfer any weights here. The only thing that we really need is a Soys and Shape reference. And I think you already guessed what's the next thing.
Yes, we're gonna align all the garments according to our Queenie body. Now, if you're only doing clothing, you only do that for the clothing. I also want to show you this nice character, so I'm also gonna align body and the head. However, for the character, the pipeline will be a little bit different. That's why I'm gonna show you all these different roads that you might need in your work. Speaking of Blender part, it might sounds difficult that you're gonna need to adjust and work with the mesh.
But in reality, it is ridiculously simple. I do have a few videos in my channel explaining this process in more details. Long story short, there's a bunch of tools that you're gonna need to get anything done with AI -generated mesh. You already have the mesh. You just need to align shape there and there, make sure it fits your character and so on. I like to do that in sculpting mode, there are a few brushes, such as elastic grab, and you can easily adjust the shape.
With low polymeshes, you can also do that in edit mode, simply selecting some vertexes, scale them, move them around, rotate sometimes, and that's it. That is holding magic. Trust me, I do have free videos how to start with Blender and I give you exact knowledge that you're gonna need working with AI -generated meshes. However, if you're solo game developer or really want to start with 3D, but not sure what's happening with all this AI thing, I have great news since I just launched my first 3D AI course where I cover all the basics for the beginners and most importantly, I teach you how to use best AI tools to get results fast.
So you can create your first game -ready character in just one week. We already have plenty of happy students. You can ask about it in the discord, all links in the description. Okay, I almost done with my character. Now I'm gonna need additional skirt just to show you one more approach. It was generated the same way and fit my new character. And now we're ready to start with that rigging, loading part. Let's begin with the approach where we have a new character.
Now at this stage there's one important recommendation. So for that sake, I'm gonna separate skirts because I'm gonna show different approaches and I'm gonna rig the character all together. So I'm gonna export three files. The character with the buddy no skirt and two skirts separately. Now if you do have a new character, such as myself, I recommend to do it in a correct. You simply import that FBX that we export it to a correct and the process here is quite simple.
It will suggest to place the markers for the body and for the fingers if you do have. For the fingers, it's also gonna ask like how many fingers you have. And this process can take just five minutes if you know what to do. If you're gonna feel stuck on this stage, don't worry, I do have dedicated video explaining this aqrig step in more details and helping you to address some issues afterwards in blender. Now one of the biggest reason I like aqrig because we can export it directly to the Unreal Engine skeleton.
And by the way, I sometimes use Unreal Engine 4 skeleton because that is actually easier to retarget it. Now let's move to Unreal Engine. I'm gonna use of course version 5 .8 and there's an amazing sample project called Game Animation Sample which I'm gonna use to show you how this character runs. And if you ever wondered, I also use this project in some of my previous videos. It's quite useful. Now here, there are a bunch of characters available such as Quini that I use for cloting reference.
And of course we're gonna need to make sure some chaos cloting plugins are enabled. So you can go to plugins and search for chaos cloting and make sure all these plugins that I show are enabled. We do not need the deprecated or asset USD plugin. That's not really needed. But all the rest with this YTShort, we're gonna need them. Make sure to check them and restore the Unreal Engine. So let's start with importing our character that we just rigged in aqrig.
I'm gonna create new folder and simply drag and drop that FBX here. If you did everything right, pack the textures, you're gonna get everything here very easily. When everything is loaded, you can drag and drop it in the scene. But of course it will not be animated. So how do we actually play it and do that physics style? So the trick is to retarget the animation. For that, we're gonna need to find ABP sandbox character, right click and find retarget animations.
Here, we're gonna select our character and simply say expert retarget assets. For that, we're gonna need a folder because there will be all animations exported. Next, we're gonna need to go into that folder where we expert all that content and find file called RTG out of generated. And we're gonna rename it into RTG buggy. That is the code name for my character. Now, here's few more things we're gonna need to do. We're gonna need to go to blueprints, retargeted characters, find ABP generic retarget animation blueprints.
Here, we're gonna need to extend this window and find iCare retargeter map and in this small menu, add new elements. Now, here, we're gonna call it RTG buggy and actually select our RTG buggy. And we're gonna need to press compile and we can close this window. With that part done, we're gonna copy any character that is close to our and I'm gonna call it character buggy. Now, we're gonna go inside that blueprints and pretty much what I need to do is to just replace the skeletal mesh and everything is mostly the same except that we're also gonna want to find a tag and tag should be RTG buggy.
It's only needed for some internal logic of this project. Since some of you guys ask I want to explain this part as well. And at this stage, we already have the character and animation is done, but to able to use this project, we're gonna go to widgets point game animation widget and here, we're gonna need to make this button to work with our character. So, I'm gonna replace it with RTG buggy and compile the menu. Now, we can go into the game, go on this button and select our character.
And we can already have our character running rounds but of course, this cape is not configured because we did not anything to clothing. So, let's do the clothing. I'm gonna start with green skirt that fits my character. So, we're gonna create a folder and I'm gonna import that FBX that we experience right away from Blender without any weights or rigging. First step here is to create a clothe asset. Right click and we're gonna find it like this, clothe assets.
Okay, I'm gonna give it a proper name and I recommend to start with the preset such as static mesh clothe. And do not skip that part, start with the presets. Now, we can go inside this and here in our religion 58 we're gonna see new chaos clothing interface and there's quite a lot of things that I want to tell you. First of all, there is two viewports, first one, construction, viewport and simulation viewport and we do have nodes on the bottom but do not be afraid.
There are actually extremely useful and much better in my opinion that old tap system. So, if you watch my channel, I already made a video how to do bones physics and clothe physics within all the version of our religion but right now it's much easier and in first place because it can be reused with other assets in very clear way. Okay, so let's click on the static mesh node and select our skirt one. That will be static mesh for simulation and also for render mesh, we're gonna also use the same one because we do have it optimized.
Now it's kind of hard to guess what's happening so I recommend to go to preview scene and in skeletal mesh, find skm queen sample which we actually used to build upon or we can bring any other character here. Next up, there's a node called transfer skin weights and it's really amazing. We're gonna select queeny as well here and that's gonna be used to transfer skin weights on that part that will not have any physics then the next node called weight map and this one is about painting weights basically with brush or some other convenient tools you're gonna specify what area should be affected by physics and how strong.
Here's one of the approach that I figure out is the fastest. I gonna go to mesh into the vertex mode and just select half and assign weights with ads. So basically I just said that all that part is affected by cloth physics. Then I gonna go to brush and choose relax modes to sort of relax the weights. The idea is extremely simple. I just won't grab the intel influence. Also, there is a mirroring for the brush and overall there is so much more improvements compared to the previous version.
I like it much more. When we have it on you can just click the accept and the simulation already runs but you can see it actually goes through the queeny that's why we're gonna go find node set physics asset and set the queeny again. Physics asset is sort of a collider that mesh gonna interact. It can be more optimized mesh or any other meshes. Also, I recommend to go to simulation solver configs and maybe reduce some amount of iterations or add more and one more extremely useful thing is that here now in preview scene we can actually set the animation and play the animation while we're setting up the physics and trust me that is very convenient.
I'm not sure if it was possible before but right now it's just easier. And at this stage is basically about tackling some parameters. You can definitely figure it out with chaggy pt or cloth. It will suggest you what node and what parameters to tackle to achieve whatever you need depending on the material of the clothing etc. I also in my previous physics video I showed that there's an amazing demo from Unreal Engine where they show how different simulation settings look like and you basically can go in that demo and see what parameters how they look like in the game etc.
It's quite useful especially if you work with this a lot. Now when we are done here's the cool thing we can save that assets and it will save all the nodes that we can reuse with another assets. Now let's try on our skirt on Queenie. So let's go find this Queenie BP. It's already exist in this project and I'm just going to go to add this clothing assets to the blueprints. I'm going to parent it to skeletal mesh this is where it belongs and here we go it works.
Don't be distracted with the fact that clothes goes a little bit inside the Queenie that's because I made it for my character and there will be a belt. And now let's bring it to our original character. To do that we're going to take a few simple steps. We're going to duplicate our clothing assets go inside and in transfer skin weights we're going to need to select our buggy character so the weights are transferred to our character now while we can keep all other nodes untouched.
That's the beauty of this new approach but what if you do have a clothing assets but you don't really need clothing physics. Also possible, here's the example with the topware. Of course first I aligned it with the Queenie mannequin and expert it as FBX. I'm going to bring it to Unreal Engine create a separate folder and create a Claude assets as well. In the Claude assets we're going to select static mesh, render mesh, Queen mannequin for scene preview and most importantly in transfer skin weights we're going to select the Queenie or the character that you have.
And this node will do all the job. You don't really need to go to accurate for this purpose anymore. And basically the only node that we need to take care is transfer skin weights. In this node we set the target character and you can play with the settings and I want to point to transfer methods which has two of them and sometimes the closest point on the surface works better than in paint weights so try both of them depending on the complexity of your garments.
And you can see that my clothing is a little bit inside the Queenie and that's easy to fix we're going to need to create node called transform position that we're going to put in the ends of this chain and here we can move the position a little bit. Everything though I saved the assets and put it on the Queenie. So here's how it looks like. Absolutely fantastic. Look it's now possible to do all of it inside the Unreal Engine without even going to accurate.
You only really need to do that if you have a complete character. Guys if you still didn't press the like button it's definitely about its time. And now let me also show you how you can do that the old way and let's preview that all together. So we're going to go to our original character find the skeleton mesh and go inside. Here in editing tools we're going to need to select dots parts that we want to turn into the clothing assets but before I was calling clothing data.
Right click on the asset creates clothing data, create new. Now we can select it in this list and do set some settings, add some weights pretty much the same thing. But instead of nodes representation in new version you can access it in this tab version. For me since I'm a blender and confiwi user I definitely appreciate no representation and again it's way easier to repeat the process. Right? You can just copy the clothing assets replace the asset itself all the settings for the materials for the characters all the presets are saved.
I can imagine you can create clothing asset with material preset for everything that you need in your game and just reuse it like that. Let me know what you think about this approach. If you intend to use all the version of Unreal Engine do not worry. You can watch my previous video where I covered this workflow in more details how to set all that settings but again configuring clothing. It's about tackling a bunch of parameters.
I recommend to do that with chat GPT or take a look on Unreal Engine clothing demo where they show some examples what settings they used etc. And you can see well using all the approach I had to save it and go test it inside the game I cannot really nicely run the animation right here to see how this physics actually work. And finally let's enjoy the results. We do have a lot of clothing physics here we have bunny ears we do have coats skirts all of that and look how nicely it works.
Look try to do it once and you'll be amazed how easy it is right now. I remember myself five years ago and this bones physics, clothing physics was something that always frightening me like there's a lot of settings you need to know right now you create an asset bring it to Unreal Engine do some simple weight painting right there with very convenient tools ask chat GPT about best settings and notes that you're gonna need to use to achieve some effects and voila I made it and it works as I wanted.
That was step don't forget to like and subscribe and I see you in the next video.
The words are the caption track's own and nothing is reworded or re-transcribed. Paragraph breaks are placed between sentences so the text reads as prose.
Free tools for your own script. No signup, no login.
Paste your draft and see where viewers are likely to drop off, with a rewrite for each weak line.
Paste the first 30 seconds of your own draft for a hook score and rewrites.
Check your draft against YouTube's advertiser-friendly guidelines before you record it.
Read this channel's public videos and transcripts, and download a writing brief for it.