Getting the transcript
Reading the captions from YouTube. A video nobody has opened here before takes 10 to 30 seconds; this page fills in on its own.
Getting the transcript
Reading the captions from YouTube. A video nobody has opened here before takes 10 to 30 seconds; this page fills in on its own.
Sanji Nai-Chien · @Sanji_Chien
This video has no Most replayed graph yet: YouTube shows one only once a video has enough views. These are the moments viewers replayed most in Sanji Nai-Chien's most watched videos.
Most replayed moment at 6:04
6.9x that video's typical replay level
free. Just install it onto your Chrome browser. Once you have VidIQ installed, go to Claude and create a free Claude account. And when you refresh your screen, you'll see that VidIQ appears just right there. The Chrome extension actually automatically adds itself to your Claude, but you do need to set it
Said at 5:56
The graph counts replays. It does not show where viewers stopped watching.
Words
4,160
Runtime
22:39
Speaking pace
184wpm
Reading time
17min
184 words per minute, just over the 181 median of 349 measured videos. That distribution comes from the 349-video hook study.
Opening (first 30 seconds)
What you just watched, every cut, every animation, and every transition was created by Claude within Cap Cut in less than 20 minutes. So far, there honestly hasn't been a single edit or really a single thing that this combination couldn't handle. But to get it to this point, I've spent weeks of trial and error and a ton of credits. But that way, you won't have to. So, in this video, I'm going to tell you everything you need to know to create stunning videos with color grading, motion design, and
92 words, the words spoken in the first 30 seconds at 184 words per minute.
Free, no signup. See how the first 30 seconds hold attention, with rewrites.
Sentence shape
| Measure | This transcript |
|---|---|
| Sentences | 302 |
| Average words per sentence | 13.8 |
| Longest sentence | 44 words |
| Questions asked | 2 |
| Sentences containing a number | 27 |
Most used terms
Filler phrases
27 in total: like 18 · actually 5 · kind of 3 · basically 1.
A literal whole-word count of the same phrase list the Prepublish browser extension uses, so a phrase inside another word is not counted and a phrase used in its ordinary sense still is. It is a count and not a judgement.
Run the check on the words above: where attention is likely to drop, with a rewrite for each weak line. The free check shows the scores and the one issue costing the most.
What this transcript is
Every word below is the caption track YouTube publishes for this video, pulled from the video itself and reproduced unchanged. It is not Prepublish's writing, not a summary, and not a re-transcription: it is the video's own published captions. English captions, generated automatically by YouTube, in the video’s original language. Source: the video on YouTube. A channel that would rather this page did not exist can ask for its removal through the contact page, and it is removed.
What you just watched, every cut, every animation, and every transition was created by Claude within Cap Cut in less than 20 minutes. So far, there honestly hasn't been a single edit or really a single thing that this combination couldn't handle. But to get it to this point, I've spent weeks of trial and error and a ton of credits. But that way, you won't have to. So, in this video, I'm going to tell you everything you need to know to create stunning videos with color grading, motion design, and animation.
And the best part is that it'll all be done by AI. So, here's the plan. I took one raw video and by the end of this tutorial, we will transform it completely. Every improvement goes into a different part of the same video. So, watch the before and make sure to stick around for the after. So, first you'll need to install Claude on your computer. And in the previous video, we talked about how to use one of Claude's features called design to create highquality motion effects.
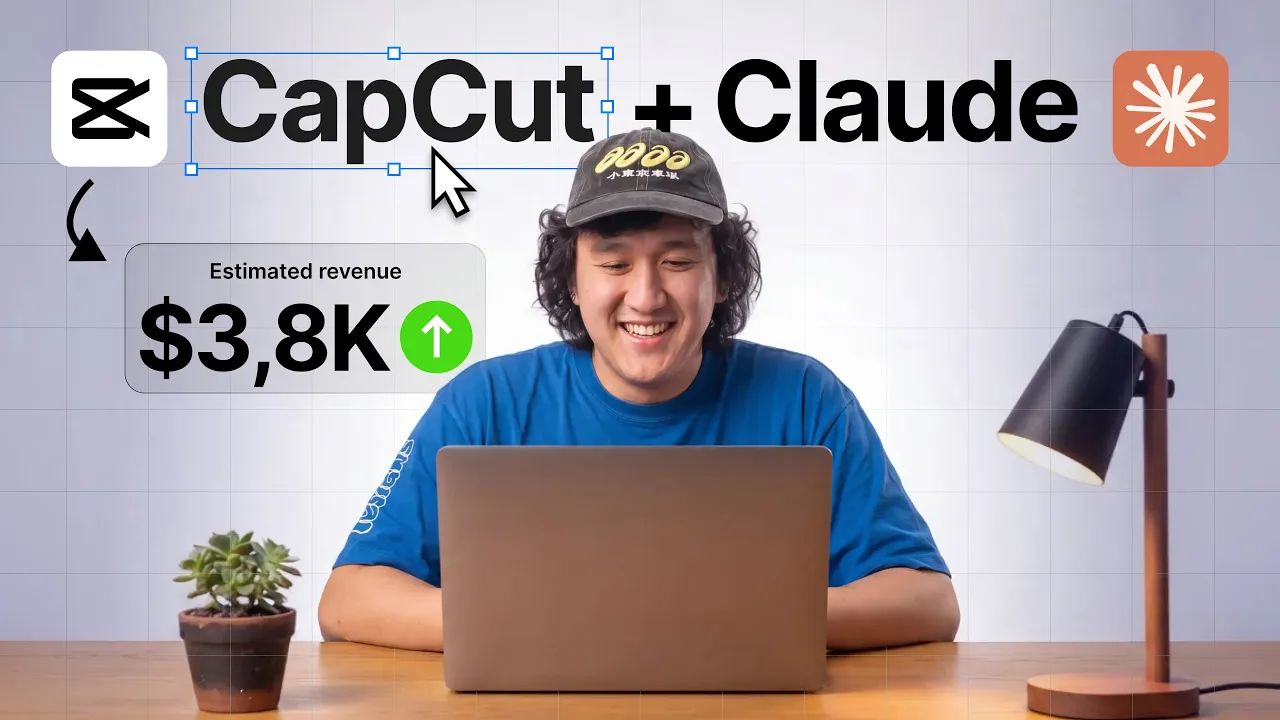
Today we're going to talk about another killer combination of Claude, Cap Cut and Claude. So if you don't have Claude yet, make sure to go to Claudeai and download the app for Mac or PC. If you don't have Cap Cut, you'll need to do the same. Now, let's jump back to Claude. When you log in for the first time, it'll likely appear exactly as you see on my screen. So, previously when I shot this video, we threw together a rough edit, and honestly, it looked bad.
Flat colors, no life in it. Now, normally this is where you'd give up or you'd hire a colorist, but instead we're going to fix the color foundation and we're going to do it right inside of Clot. So, let's take our single timeline, drop the raw footage in, and look at the first problem. Now, every editor knows the pain of spending hours tweaking color wheels just to fix flat log footage, only for it to still look washed out.
This is where we will need LUT. LUT is an instruction file that tells the program to replace each color in the picture with a different one. For example, make this shade of blue a little warmer, these shadows are greenish, the skin is softer, etc. We need an LUT, particularly because it's the only way to package an entire color grade into a single small file that Claude can generate from using a text prompt or any editor like Cap Cut, which can instantly apply it to your footage.
So all that I need to do is ask, "Please generate a clean soft pastel LUT file for my YouTube videos. Cinematic and clean." Then I just click send. Now after generating, Claude gives you a summary of the look. Lifted shadows, subtle teal and peach split toning, reduced saturation, low contrast, ultimately a clean studio aesthetic with friendly skin tones. Now, if you go a bit further, you'll find the actual file. Click on it and then find the arrow and choose download.
Save the file to your downloads folder or really any preferred location. So let's click save. And since I've already generated the file, I'm just going to click replace. Now in Cap Cut, go to adjustment and select LUT. Then click import to find and open the cube file. This imports it into Cap Cut for your project. Next, we'll click the plus icon to add a new layer to the timeline, which you can extend over your footage.
Switching it on and off will show the filter applied to your footage. Now, I felt like it was a bit too intense, so I adjusted the selection to about 50%. That looks great. Claude's main strength lies in its precise adjustment capabilities. For instance, I dislike the shadow in this design because it clashed with the clean look. I requested Claude to create a version without the teal, and the difference was evident. Now, setting this to 50% produced a gentle pastel studio vibe.
So, that's the entire base video graded. Now that the whole timeline looks clean, we can start layering effects on top of specific moments. Now that the color of our video looks great, let's take it one step further and make it even better by adding some visualization. Now, usually doing a dynamic counting animation means manually placing hundreds of key frames in in After Effects or buying a bunch of templates that ultimately break your project file.
Now, the first moment that I want to upgrade is right here. The part of the video where I talk about numbers. A static number on screen is boring. So, let's make it count up. For example, do you guys remember in the Mr. Beast videos when the dollar icon wildly spins up? That's the kind of effect that I want to achieve in this part of video, but without After Effects. Now, all that we need is an SRT file. This is an ordinary text file.
So, let's navigate to Claude and paste in our prompt. All it says is, "Generate an SRT file for me with numbers counting from 0 to 600. Make each subtitle.1 seconds long and add a dollar sign in front of each." Now, let's go ahead and click send. Once you've completed this, just like with the LUT, click on the file, find the arrow, and select download. Save it to your downloads folder, and then open Cap Cut and drag the SRT file directly onto your timeline.
Zooming into the timeline reveals how many small subtitle clips are being created. Now, [music] the great part is you can customize all of these directly in Cap Cut. Then you can adjust the font size, change it, or even modify the color. But you can see an issue. It's way too long for our timeline. So, staying selected on all of them, I'm going to create a compound clip. What this does is it groups all of our subtitles together.
In this compound clip, I can then go to speed and let's ramp up the maker speed to make it a lot shorter. Think I'll be going for 10 times shorter. Now, I can reposition that to whatever I want. And if we play that, then you can see that we have this really premium looking numbers counting effect. Usually to make this by hand, it would take about an hour. But we've been able to do it in just 2 minutes. But there's one last bonus trick.
If I wanted to hold on to, let's say, 600, if that's the point I'm making in my video, then I need to go ahead and doubleclick into that compound clip to access my subtitle files. And what I'm going to do is drag that individual layer a lot longer. So then I can go back to my compound clip. And let's go ahead and drag it. Now, when it reaches the end of our numbers, you'll see that it pauses for a few seconds at that 600 mark.
All right. So far, we've fixed the colors and we've added the counter to our clip. Now, we're entering the territory where After Effects usually eats away all of your RAM, crashes at 99% render, or demands another purchase of Adobe services just to keep working. Everything we've upgraded so far has been relatively easy. But the next three effects, the intro background, the explainer graphics, and the outro map, need heavier tooling.
So, let's set them up once and then knock out the rest of this video. [music] Now, in this segment, I'm going to demonstrate how to create more complex and applied motion effects. So, I'll break down how to install them and how to get ready for the generation. For the upcoming steps, we'll need to use Claw Code for handling code or [music] systems files. Now, if you're on the free version, you'll only see the chat option, but if you upgrade to the pro plan at $17 a month, you're going to gain access to co-work.
We'll be using Cloud Code for this next set of tricks. Once you have Cloud Code, the next step is installing Remotion, a tool that gives Claude all the knowledge it needs to create stunning motion graphics. But before that, we'll need one extra app, Node.js. So, click the download link that I've left in the description. Select get Node.js. js and install [music] it. This is what your computer needs to run remotion. So next, let's open cloud and paste the phrase npx create video at sign latest.
Choose bypass permissions so Claude can automatically install everything it needs without asking you and then simply press enter. Now if a prompt appears as code, just copy it and paste it into the terminal. Since I've already got a project on my computer, it'll show a file path with a complete Remotion template. But on your first install, it's going to ask you to create a folder where all of your Remotion projects will be saved.
Now, if you're confused at any point, simply ask Claude, "Hey, I don't get what we're doing right now. Can you please help me install this?" Now, after the installation, type the following and press enter. What this does is installs the additional packages and dependencies that optimize Remotion's performance. What you're going to see is 562 packages installed. Now, with Remotion set up, a wide range of creative possibilities open up.
You can truly create anything that you envision. All right, everything is set up. So, let's go ahead and get generating. Now, we're going to start with the intro to our video. Right now, it opens on a plain frame. Let's replace that with a premium motion background. We'll begin by creating some highquality motion backgrounds. First, I went ahead and visited Pinterest, which is a great resource because you can search terms like gradient background or gradient figures to find highquality references.
I especially like this one right here. So, let's go ahead and download it as an asset. Then, we'll switch over to Claude. Make sure that again you're using Claude Code. create a new session and drag the image directly into the chat. This lets Claude view the screenshot or image as a reference. Next, we'll paste my motion background prompt into the command bar. If you'd like to access all these prompts, there's a link in the description below that you can use to follow along.
Basically, the instruction is to use the motion skill to transform this into an attractive motion background without altering the colors, textures, or the overall appearance. It should look like a premium motion background. Additionally, I requested Claude to rotate the image 90° and set the aspect ratio to 16 by9. This entire project should have a duration of only 10 seconds. What you're going to do, just like we did with our installations, is go to accept edits and say bypass permissions.
You don't need to be on Fable 5 since it's super expensive. So, you can go ahead and select lower models. Let me walk you through what this process first does. It's super important to make all the manipulations and to insert all of your references into cloud code, not the regular chat. Now, it's going to show you something like running the skill reotion best practices and it'll state that it's using Remotion. Now, if it doesn't say that, make sure to revisit the session where you installed Remotion and ask Claude.
If you followed my steps so far, you should have successfully installed Remotion directly into Claude. There we go. Now that it's finished, after taking a couple of tries, Claude is then going to open your browser to display a preview of the file. I'll take a quick look and we'll see a short full HD video, which you can actually also upgrade to 4K. The blue reference color is going to remain consistent. And scrubbing through quickly, you'll notice that there's been some motion added to the blue glow, resulting [music] in this dynamic motion background.
Overall, I like the generation, but I'd like to change the speed of the effect. Right now, I find it to be really slow and a bit dim. So, I'll ask Claude to make the blue gradient move much faster, about three times. Then, I just click enter. Now, the great thing about this process is that there's no need to edit or really to know any code. You simply tell it in any language to Claude and it'll start editing the composition immediately.
Now, just in 5 seconds, if we return to the web browser without reloading, you'll notice that that orb is now moving significantly faster than before. Now, in this next segment of our video, the middle part, I'll explain the process step by step. Now, instead of just talking, let's visualize it with animated boxes and drop them right over the footage that we already have graded. That's exactly why we made the background transparent earlier.
Now, in this step, we'll look at how to create motion design generations that'll give a direct impact to your viewership if you're working with e-commerce or on a marketing campaign. Just imagine that you need to schematically explain a very complex topic in your video using just blocks. Now, creating such a motion design typically takes around 2 hours at minimum. I'll show you how to do it much faster in just a few minutes.
I began by visiting Pinterest and searching for square shaped UI boxes. I found something super aesthetic and good references. So, I downloaded the files that I liked. Next, I created a new session in Cloud Code, fed it the file, and dragged it into the session. Finally, I pasted the prompt that I used to generate that effect, the link for which you can find in the description below. So, let's [music] quickly go through the prompt.
This final line should be included in all of your creations. I didn't add it to the motion background initially because we were just starting out, but now I'm always going to end my prompts with this line. Ask me any clarifying questions so that we nail this spot on. Now let's press enter. Let's see what Claude does next. It comprehends the first part of our prompt, but some ambiguity remains about what it's actually going to generate.
So here we go. It begins by providing a list of questions using Remotion to guide these questions which we can then answer. So let's go ahead and respond to them. Let's go ahead and stack these [music] vertically. For that, I'm going to say sequential start. So 1 2 3 4 5. They're all going to appear in kind of a staggered order. Yes. Let's do text only. [music] We're going to use this in a horizontal video. If you wanted to use it in a vertical video, you could obviously type 1080 by 1920.
I'm going to say hold and then fade at the end. I'm also going to add while they're holding, add some motion to the boxes. Let's clarify the motion that we want. Add some subtle smooth motion to the boxes. That's good. Let's stick with pure black for now. So, now that we've taken the time to answer its questions, you can see that it's taking the time to do some final self- auditing and sanity checks. That's the amazing thing about Claude.
It kind of selfch checkcks what it's created. Now, obviously, we do sometimes have to do some manual tweaking. This pop-up that's just shown is now actually really important because what I didn't do is at the bottom left here where it says accept edits. I didn't say bypass permissions. So because of that, Claude is now asking us if it's okay to do things. It wants to check the PNG file that it created. So essentially access that PNG file on our computer.
I'm going to go ahead and say always allow. Now just to clarify, if you don't want those pop-ups to happen, then change this from accept edits to bypass permissions. and it's just going to allow Claude to do everything that it needs to do in the background. All right, you can see that it says done, which took about four minutes to create. Now, when we open the browser, you'll notice it's a part of our Remotion project.
Let's click play. Wow, [music] the result is even better than my previous tests. I really like the simplicity and the conciseness. The only adjustment I'd suggest is that it feels like it takes a little bit too long to appear. I'll make a few quick tweaks to demonstrate how easy it is to modify things when needed. I already like the current sizing, but for this demo, let's speed everything up by about 10%. I'll also update the font to enter semibold.
Now, aside from these three adjustments, the overall look really does appear premium. So, let's go ahead and click enter. If we play our sequence here, we'll see that we've now assembled a 9-second 29 frame composition. So, almost 10 seconds. The font does in fact appear larger and all of the elements are slightly bigger which looks good. But this setup won't work directly in our Cap Cut project because of the black background.
So at this point I'll tell Claude, "This looks great. Please make me the background transparent but keep the box's transparency off." Now I'm doing this so that I can download it directly from Remotion and incorporate into our Cap Cut project directly. Now, if you do prefer that black background, that's fine. But what I want to do is overlay it on my footage or on a custom motion background that I created in Claude. So, that's why I'm requesting a transparent background.
[music] Now, in 30 seconds, if we jump back to our project, you'll see that we now have a transparent background. Once you're happy with your motion graphic, go ahead and click render. You can save that to your computer and import the file directly into your Cap Cut and create something that looks about like this. And through these examples of the motion background and now this kinds of effects, square shaped motion graphic figures, you have a great understanding of exactly what Claude can do.
Honestly, it's mind-blowing. We've got two segments of our video left. In one, I quote an article on screen will highlight the keywords as they're read. And the ending where I mention the trip from LA to New York, that's getting a full map animation. The next feature that we can describe is designed for people who frequently work with large volumes of references such as news bulletins or article news searches. Now, those are just two examples of some wild motion graphics, and I've got two more to show you.
One is a highlighting effect and the other is a map animation perfect for travel videos. Now, the beauty of our system lies in the fact that you can also create several parallel projects, so you won't waste extra time implementing and creating effects gradually. Simultaneous or concurrent creation allows me to save an insane amount of time, which in the case of working with After Effects still meant having two separate windows open.
The first one is the highlighting effect. So, you'll actually need a screenshot of what you want to highlight. What I did is I just took a screenshot from a news site. I'll paste this prompt now, and I won't read it all, but what's important to note is that I've asked it to highlight specific words from our screenshot. For example, I requested this, this, and this. Now, if your screenshot contains a lot of different words, be sure to specify which ones to highlight.
Now, once that's clear, I'll click enter and see the results. So what you're seeing here is because we attached an actual image, Claude needs to then source that image from our computer. So I'm giving it access to the actual file in the web. [music] Now as we proceed, we'll create the final map animation. I'll start a new session and paste in this prompt. Then I'll change the accept edit setting to bypass permissions as I did in the beginning.
Finally, I'll click enter to continue. [music] All right, let's quickly answer those. Create new project 1920x 1080. [music] Yeah, let's do country state borders visible. Follow the line at low altitude. This is going to be whatever you want. And once I've answered those questions, let's go ahead and click enter. Currently, we're running two animation builds simultaneously. The first is our map and the second is the text chat featuring our text highlighting effect.
The highlight effect is now complete and generally it looks pretty good. But one thing I noticed is that it appears a bit choppy, which I'll want to fix. So, I'll talk to Claude and tell it the highlight effect looks staggered or choppy. Please make it smooth. Submit. And after 45 seconds, the adjustment is done. Now, returning to your project, you'll now see a smooth highlight that introduces the words as they're read.
And lastly, if we go back to Claude and we select our animated map project, you'll see that it says it's complete. We can go ahead and say please open this remote project. [music] And just like that, our map animation is done. Now, the important thing I need to show you when creating this map is an error occurred because Remotion tried to use a Mapbox token that we don't have. I then directed it to use a different open- source map and it successfully created our effect.
Since this requires a map, we couldn't render it in the usual way. You'll see here that the motion map rule suggests using GL and this specific code. I instructed it to render it with this code. And after the rendering finished, I located the output file on my computer. This is what it produced. Now, let's make some quick changes to this. I want the map to actually feel colorful. And I want to add a globe effect so it doesn't just look like a flat map.
And there we go. Now, if we go to Remotion Studio, we can go ahead and play our video. What we have is an animation out of Los Angeles. And if we swipe all the way over, we'll be in New York. and we have that globe effect with the color on the water. So, we don't need the black and white. Additionally, I plan to use Claw's extensions like Hixfield MCP and apply the Miniax H3 model to add effects to the map. To enhance the beauty of our animation, especially when the dotted line travels from New York City to LA, I suggested designing it to resemble the style of the Civilization game.
The model's simplicity is characterized by ultrarecise detailing of various objects which led us to choose a really accurate map design. Now to access the Hixo MCP feature, we just need to enable Claude's extension and request access which can be done through a careful subscription process. To render this, especially when the preview appears a bit spotty, I return to Claude, swipe up to copy the prompt, and then confirm that it's perfect.
I'll then paste the prompt onto my computer to generate the image. Now, we'll wait for a moment. And once the rendering is complete, you'll notice that the map is flawlessly rendered and the animations are looking great. Now, just zoom out, swipe across, and voila, our effects are in a designed background. That's crazy. And now, the moment of truth. Here is the video that we started with side by side. Raw footage on the left and on the right graded with the money counter, motion background, animated boxes with highlights, and the map.
One video, zero After Effects. Now, here are a few examples of the motion graphics, effects, and other features that you can create with Claude. We began with the free version of Claude, using it to generate a stylish LUT and an SRT file with animated counting numbers. Now later we switched the paid version and combined it with Remotion to produce motion graphics that continue to amaze me. I hope you enjoyed this video.
I really enjoyed creating it and experimenting with everything. Thank you so much for watching and I'll see you guys in the next
The words are the caption track's own and nothing is reworded or re-transcribed. Paragraph breaks are placed between sentences so the text reads as prose.
Free tools for your own script: paste a draft and see where it stands before you record it.
Paste your draft and see where viewers are likely to drop off, with a rewrite for each weak line.
Paste the first 30 seconds of your own draft for a hook score and rewrites.
Check your draft against YouTube's advertiser-friendly guidelines before you record it.
Read this channel's public videos and transcripts, and download a writing brief for it.