Getting the transcript
Reading the captions from YouTube. A video nobody has opened here before takes 10 to 30 seconds; this page fills in on its own.
Getting the transcript
Reading the captions from YouTube. A video nobody has opened here before takes 10 to 30 seconds; this page fills in on its own.
Jon Walland · @jonwallandcoach
Words
3,857
Runtime
16:49
Speaking pace
229wpm
Reading time
16min
229 words per minute, above the 201 75th percentile of 349 measured videos. That distribution comes from the 349-video hook study.
Opening (first 30 seconds)
How to use variation cycling to kill weak points in your physique and achieve infinite progression in your training. This is the cornerstone of the IP method. And the way that this works is that by rotating between multiple variations of the same movement pattern each time you pass through this cycle, you are not only carrying over all of the strength adaptations you make to the movement pattern, but you are also identifying and reinforcing any weak points that were exposed along the way. This is ultimately what sets the conditions for infinite progression. And over the course of this video, I'm going to explain how to systemize this process and implement this method
115 words, the words spoken in the first 30 seconds at 229 words per minute.
Free, no signup. See how the first 30 seconds hold attention, with rewrites.
Sentence shape
| Measure | This transcript |
|---|---|
| Sentences | 206 |
| Average words per sentence | 18.7 |
| Longest sentence | 62 words |
| Questions asked | 0 |
| Sentences containing a number | 1 |
Most used terms
Filler phrases
28 in total: basically 10 · actually 6 · like 5 · you know 3 · um 2 · I mean 1 · kind of 1.
A literal whole-word count of the same phrase list the Prepublish browser extension uses, so a phrase inside another word is not counted and a phrase used in its ordinary sense still is. It is a count and not a judgement.
Run the check on the words above: where attention is likely to drop, with a rewrite for each weak line. The free check shows the scores and the one issue costing the most.
What this transcript is
Every word below is the caption track YouTube publishes for this video, pulled from the video itself and reproduced unchanged. It is not Prepublish's writing, not a summary, and not a re-transcription: it is the video's own published captions. English captions, generated automatically by YouTube, in the video’s original language. Source: the video on YouTube. A channel that would rather this page did not exist can ask for its removal through the contact page, and it is removed.
No Script X-ray for this video: YouTube shows a Most replayed graph only once a video has enough views.
How to use variation cycling to kill weak points in your physique and achieve infinite progression in your training. This is the cornerstone of the IP method. And the way that this works is that by rotating between multiple variations of the same movement pattern each time you pass through this cycle, you are not only carrying over all of the strength adaptations you make to the movement pattern, but you are also identifying and reinforcing any weak points that were exposed along the way.
This is ultimately what sets the conditions for infinite progression. And over the course of this video, I'm going to explain how to systemize this process and implement this method directly into your training. In order for you to do that, you need to keep in mind a very specific exercise that you are either trying to prioritize in the gym at the moment or you are struggling to progress with. That way, once you get to the end of the video, you're going to be able to apply these principles directly to that one exercise, and therefore, you'll be able to actually benefit from what you're watching.
Now, in order for us to understand how this method works, what we first need to do is cover what constraint profiles are. Every exercise has a constraint profile. It is unique to the exercise. And this is something that you instinctively know. You instinctively know that a barbell bench press is not the same as a dumbbell flat bench. Even though they work the exact same muscles, even though you're pressing in the exact same direction, even though they belong to the exact same movement pattern, you know instinctively that those are two completely different exercises.
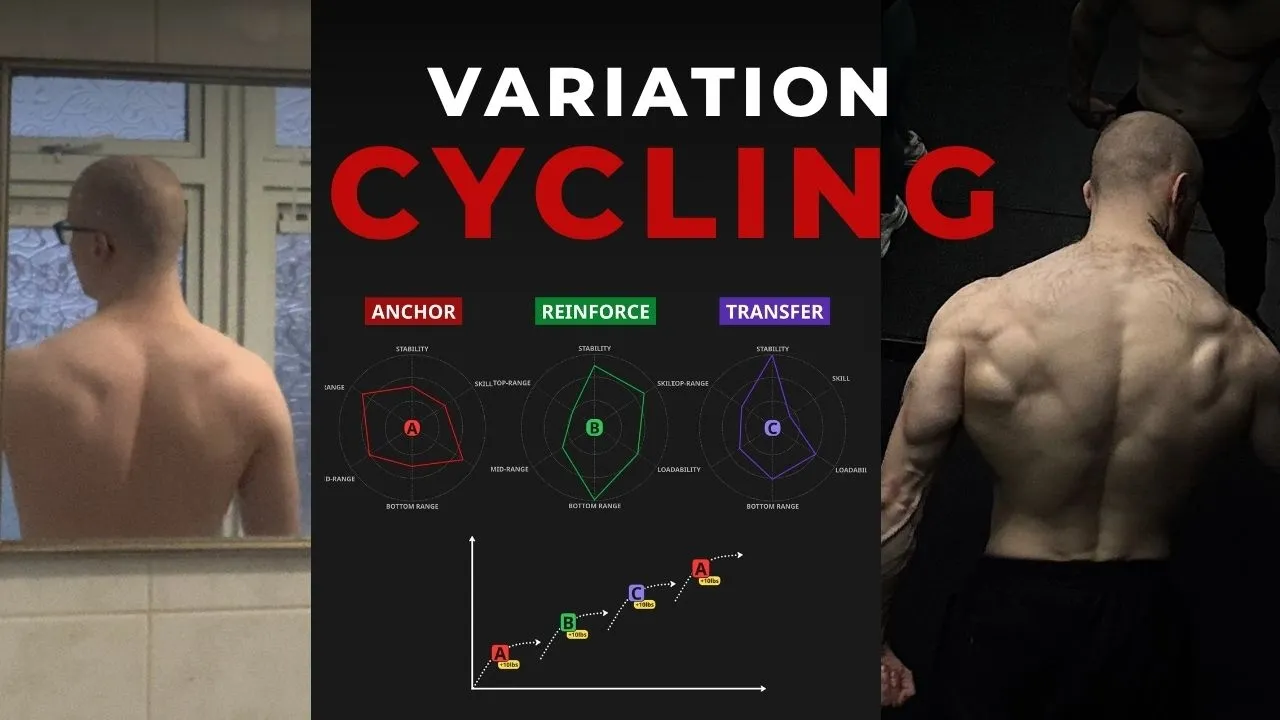
And that is because they have different constraint profiles. A constraint profile is basically the specific blend of demands and characteristics that an exercise has. And this is what determines how our muscles need to perform in order to meet those demands. So, what you're looking at here are three examples of constraint profiles. What we're going to do in this particular video is use the vertical press movement pattern as an example.
But of course, you can still apply these principles to any of the six fundamental movement patterns. And I've made videos in the past going through what movement patterns are and how they relate to the IP method. But what you're looking at right now are three separate variations with three distinct constraint profiles. And each variation imposes a different set of demands on the body. For example, variation A has a medium stability demand.
Variation B has a high stability demand. And variation C has a very high stability demand. An example of this could be a dumbbell press for variation C. And an example of variation A with a relatively low stability demand could be something like a machine press. And there are plenty of different ways that we can map this out. What I have decided to do is map this out over six different vectors. So, we have stability, skill, loadability, bottom range, mid-range, and top range.
And what we're going to do as we move through the video is show you how each of these can be employed and leveraged to fix weak points in the movement pattern, and how we can cycle between multiple different constraint profiles to strengthen different sections of the movement pattern. And when we can stack multiple constraint profiles on top of one another over a long enough time frame for us to be able to actually improve our abilities within each constraint profile, we generally just build a much wider strength profile on an individual basis.
So what I mean by this is that everyone has a unique strength profile. In the same way that every exercise variation has a unique constraint profile, it constrains the movement pattern in a unique way. Everyone has a unique strength profile. Everyone has particular strengths and weaknesses based on genetics, anatomy, many many different things. And our strength profile is basically comprised of our specific strengths and weaknesses within the movement pattern.
When our muscles have not adapted to the constraint profile of an exercise, this eventually becomes a weak point and the limitation that we need to reinforce in order to build the movement pattern. If you were to only ever train with one constraint profile and you never exposed yourself to anything beyond that, what inevitably happens over time is that we develop weak points. This is a natural process and what we can do within the IP method is employ the use of specific constraint profiles in other words specific exercise variations to improve our abilities in a much more focused and strategic way.
So an example of this if I scroll down here now what I have done here is overlaid a constraint profile which you'll see in red over the top of a strength profile in yellow. And this is a pure demonstration but what you can see is that there is pretty good alignment across all of these different vectors. The only place where there is a deficiency in strength is at this top range. And this would basically indicate that at the top range of the exercise, there is a deficiency in strength.
And the way that this would look practically if you were doing a press is struggling to lock the bar out. This would be a result of having a weak point in the triceps. We know that lockout strength is the limiting factor for the movement pattern because the strength profile does not match the constraint profile of the exercise. And if we were to do this exercise in the gym, what we would find is that consistently hitting failure will always be at the lockout portion.
And so what we can do is prescribe a specific constraint profile. In other words, rotate to a new variation that specifically targets this top range of the exercise. In doing so, what we're able to do is build adaptations in this very specific portion of the movement pattern. So again, if I scroll along down here, you'll see a new constraint profile has been overlaid. This is in purple. And we can see that it demands far more strength from this top range of the exercise.
And what happens is because there is such a massive gap between the strength profile of the individual and the constraint profile of the exercise that the body is forced to make an adaptation over here. And over enough time of training with this exercise, you'll see that the strength profile has to adapt in order to meet the demands of the constraint profile. In other words, lockout strength has been improved. And you can still see that there is a deficiency.
You can still see that there is a small gap here where the strength profile does not quite align with the constraint profile of the exercise. So what this means is lockout is still going to be the limiting factor for this one variation. But at the same time adaptations have been made. Strength has been gained in that lockout portion which is inevitably going to carry over not just to the movement pattern but also back to the variation that was originally being used.
And this is the exact same constraint profile but with a new adaptation that has been made in this lockout portion. And now that the strength profile of the individual has changed and the lockout strength has been reinforced, the individual now has a greater capacity to gain strength on this particular variation and therefore gain strength at the movement pattern level. We have killed that weak point and we have now just set the conditions for even more progress.
And the thing is our strength profile should be constantly evolving. It should be constantly upgrading. This is how we're able to kill weak points and express new strength. Our objective is simply to identify where we are weakest and find a variation with the correct constraint profile that reinforces this weak point. This is how we're able to continually build strength within it. And what we can do is basically systemize this process within three separate variations where each variation has a distinct objective, serves a specific purpose.
And each time you pass through this cycle, you are not only identifying where the weak point is, you are reinforcing it strategically so that when you return back to the original variation you started with, you have an increased amount of strength which you can then carry over to the next variation to the next variation. And this is a process that can be continued indefinitely. Every time you pass through this cycle, you are exposing, identifying, and reinforcing weak points.
And we can give a name to each of these three variations. The anchor variation, the reinforce variation, and the transfer variation. And what I'm going to do in the next section of this video is show you the exact step-by-step process that you can use as you keep in mind this same exercise that I said at the beginning. What we'll be able to do over the course of this next section is apply these principles into your specific situation.
So, as we move through the next section of the video, just keep that exercise in mind, and I'll show you exactly how to apply it. So, what we're going to do is start off with the anchor variation. So, this is basically the baseline variation that you are going to be using as a reference point to measure your true progress within the movement pattern. Now, I like to use the example of powerlifting here because powerlifterss all have the same objective.
They simply need to gain as much strength as possible on the bench press, the squat, and the deadlift. These are the baseline variations that will be continually referred back to, continually returned back to. So what the anchor variation does, not only does it serve as a foundational movement that builds strength within the movement pattern, but it also serves to expose the limitation as well. And there are several different traits of this anchor variation.
It's pretty much a middle-of the road time- tested basic exercise. You want it to have enough stability for you to be able to progress with it and it not become the limiting factor, but you don't want it to be so high stability that it masks weak points in the movement pattern. You want it to be moderate skill for the exact same reason. If it requires too much skill, then that potentially ends up becoming the limiting factor.
If the skill level required is too low, it begins to hide these weak points. You want it to be highly loadable. And this is something that again you will instinctively know what this means. But to give you an explanation, loadable is essentially the total amount of weight that you can load an exercise before the exercise itself becomes the limiting factor. A deadlift, a bench press, these are all very highly loadable exercises.
On the opposite end of the spectrum, you might have an exercise like a single leg RDL or a squat. These are not loadable exercises. It will eventually get to a point where the exercise itself becomes the reason why you can't add any more load to it. It needs to be non-specific in the sense that you want to train the movement pattern holistically. And it needs to employ the full range of motion as well. Because again, if you are constraining the range of motion at this point, you are potentially masking weak points.
You want to be able to see where the bar slows down. You want to see where failure actually is within the full range of motion. And the objective here, of course, is to expose the limitation. So, in this example, what we're going to do is use the barbell overhead press as an example. And I want to show you some of the potential weak points that could exist within this barbell overhead press. We are going to choose one and I'm going to show you exactly how we would fix it within the context of the variation cycling method.
So I've written down some potential weak points that could exist within the barbell overhead press. You could have a weak lockout strength that we've already covered. You could have issues with grip or wrist stacking where you know your wrists are just simply not strong enough to stack the barbell over your wrists. There could be a left to right asymmetry where maybe the barbell rises too quickly on one side and not quickly enough on the other. indicating some kind of imbalance.
Or you could have bottom stack loss. And this basically means losing your stacked position at the bottom of the press, which forces an inefficient unstacked position where energy begins to leak. And I've got an example of what this would look like. This guy here is leaning back way too much. He's pressing the barbell out in front of him rather than up and over his head. All of his body weight is on his toes. You can see his heels lifting up here.
All that you need to understand at this point is that there is a specific weak point in the movement pattern that we are now going to be able to address. Once you understand where the weak point is, you can now start to address it. And in order to do that, all we need to basically do is constrain the movement pattern to strengthen this very specific portion of the lift. This guy is not strong enough in the bottom portion of this exercise.
And because of that, it is becoming the limiting factor. It is the reason why this guy is not going to be able to build any more strength or any more size on his shoulders unless he fixes this weak point because this right now is the limiting factor. So in order to fix that limiting factor, we have to get really nice and specific. And we basically have to constrain the movement pattern in one of four different ways. We could either reduce the stability of the movement.
In this example, it could involve using dumbbells rather than a barbell. We could constrain the range of motion by simply cutting away a certain portion of the range of motion. We could manipulate the tempo by maybe even slowing it down in a particular portion of the exercise. Or we could start to implement things like pausing and dead stops. And there isn't a right answer to this. There are sometimes, well, often times, there are multiple ways to fix a weak point.
In this example, we're going to go with pausing and implementing a dead stop. Now, being able to identify the correct constraint, the right variation that fixes the weak point that you have is something that just simply takes time to learn. Um, if you did want any help with this, then I would say the best thing to do is to reach out to me on Instagram because I'm very active over here. Um, but what we then do is move over to the next variation in this cycle.
And this is basically going to be called the reinforce variation. The goal is in the name. It is here to reinforce the weak point in the movement pattern that has been revealed by the anchor. One of the most important qualities of the reinforce variation is that it needs to place the weak point that we identified in the anchor variation as the limiting factor. We want to bias that weak point. We want to build strength.
We want to make adaptations in that specific portion of the movement and therefore that has to become the limiting factor. So, we want to remove all of these other variables. In this particular instance, because we know that stability wasn't an issue, because we know that the anchor variation didn't expose any issues with stability, we're not going to use stability as the main constraint. We are trying to isolate the bottom portion of the lift as the main limiting factor, and we're going to double down on applying as much adaptation to that specific portion of the movement pattern.
So, in this example, we're selecting a movement that is high stability. We don't want stability to be the the limiting factor. It is moderate skill. It's relatively similar to the previous variation we used. There is a massive bottom range bias. You can see the demand from this particular exercise is crazy at the bottom and that is to build strength in the bottom of the movement. What is true for pretty much every variation that you select within this specific slot of this cycle is that it does need to be highly specific.
The whole point of this is to reinforce a specific portion of the movement pattern. And in order to do that, it's got to be highly specific. In other words, it's got to be very constrained. So you'll see from the constraint profile that we see here is highly biasing the bottom range of the movement. And so the specific variation that we're selecting to fix the weak point that we exposed in the previous variation is the overhead dead stop pin press.
And this is basically where you would be pressing the barbell off of pins. And what this does is it removes the momentum from the bottom portion of the exercise. It overloads the bottom range of the movement. It shifts the limiting factor over to the bottom range of the exercise and it reinforces that weak point and therefore strengthens the movement pattern. And what you'll do here is you'll run this through a typical life cycle.
I've made other videos on exactly what progression model to apply to this and how long this should take. This doesn't mean rotating exercises every two or 3 weeks. This requires spending enough time with the movement to actually build the strength required to carry it over to the anchor variation eventually. And once you get to the point where you're no longer able to add weight to the bar, what you're then going to do is move over to the transfer variation.
And again, it's pretty much in the name. The goal of this variation is to transfer the new adaptations that you've made back over to the anchor variation and back over to the movement pattern. Now, within this transfer variation, we are still overloading the limitation. You will notice that there is still a slight bias on the bottom range, but it's not quite as severe as it was in the reinforcing variation. The objective here is to continue overloading the limitation, but it's also now to build transferability.
So, this is going to be less specific than the reinforced variation, but also more targeted than the anchor variation. And what this does is essentially bridge the gap between the strength adaptations we gained in the reinforced variation so that we can then apply those strength adaptations back over to the anchor variation. And what inevitably happens if we go up here and we look at the strength profile that we had at the beginning compared to the strength profile that we have now.
Well, in general, it's wider everywhere. The top range strength has improved. You can see very slightly. The stability component has improved very slightly. The skill level has improved very slightly. These are all very slight improvements that should be happening over the course of this entire cycle because of course you are still going to be building strength everywhere. But the main difference as you can see it's very clear is the bottom range strength has improved enormously.
Look at the difference between these two strength profiles. There is a massive difference here. And when you apply these principles correctly and you build these strength adaptations in the correct places where you identify the correct weak point and you apply the correct constraint profile that fixes that weak point and you carry your strength over from one variation to the next and you're able to actually progressive overload on all three of these variations correctly.
Well, what happens is your strength profile eventually evolves and molds to the shape that you want it to. And what we'll now be able to do is apply all of these new strength adaptations back over to the anchor variation. Now, when you return back to the anchor variation that you started with, you're going to be able to do three distinct things. The first thing you're going to be able to do is apply all of the strength adaptations that you built as you moved through this cycle.
Your strength level and your strength potential are now considerably higher because you have removed the limitation that was previously hindering you and you have a fundamentally reinforced movement pattern with a wider strength profile. The second thing is you'll be able to test the efficacy of the variations that you selected and how beneficial they actually were to not just fixing the weak point, but also strengthening the movement pattern as a whole.
The third thing that you'll be able to do is test where the weak point is now. It may still be the same weak point only that you're now training with much heavier weights or it may have shifted to something different. And this is why we want to continue returning back to this anchor variation because what this enables us to do is figure out where this weak point may have shifted to and what that weak point might be. It may still be the same weak point and it may take multiple cycles of going through this method.
But either way, provided that you're still progressing, provided that each time you return to the anchor variation, you carry with you new strength. You know that you're making progress. Now, if you want me to install the IP method on your behalf, including this model of variation cycling where we identify and reinforce your specific weak points and I coach you through the entire process, the very first link in the description is to book a call with me.
And the link below that is to reach out to me on Instagram. I'm very active over there. So, if you have any questions about this method or anything to do with the IP method in general, reach out to me on there. I'm very active. I usually spend a couple of hours in my DMs most days. Beyond that, have a good rest of the day and we'll speak on the other
The words are the caption track's own and nothing is reworded or re-transcribed. Paragraph breaks are placed between sentences so the text reads as prose.
Free tools for your own script: paste a draft and see where it stands before you record it.
Paste your draft and see where viewers are likely to drop off, with a rewrite for each weak line.
Paste the first 30 seconds of your own draft for a hook score and rewrites.
Check your draft against YouTube's advertiser-friendly guidelines before you record it.
Read this channel's public videos and transcripts, and download a writing brief for it.