Getting the transcript
Reading the captions from YouTube. A video nobody has opened here before takes 10 to 30 seconds; this page fills in on its own.
Getting the transcript
Reading the captions from YouTube. A video nobody has opened here before takes 10 to 30 seconds; this page fills in on its own.
Stefan 3D AI · @stefan_3d_ai
This video has no Most replayed graph yet: YouTube shows one only once a video has enough views. These are the moments viewers replayed most in Stefan 3D AI's most watched videos.
Most replayed moment at 4:08
7.0x that video's typical replay level
and it will also have the access to full ai apis. Now let's do some serious tests. The first test will be to do an animation of a character that will be split in parts. The first test will be to create animation. Animation of a character that will be an
Said at 4:01
Most replayed moment at 9:39
5.7x that video's typical replay level
Overall I think this guy's made really amazing job, bring it it all together and I really had a lot of
Said at 9:41
Most replayed moment at 20:36
4.1x that video's typical replay level
Just also because I was playing that game when I was kid. Okay, let me see if I remember how to play that. Let's start with the road, right? Let's try to build a, oh, there are cars. There are cars. It generated nice cars and they're like, wow.
Said at 20:29
The graph counts replays. It does not show where viewers stopped watching.
Words
3,729
Runtime
18:56
Speaking pace
197wpm
Reading time
16min
197 words per minute, between the 181 median and the 201 75th percentile of 349 measured videos. That distribution comes from the 349-video hook study.
Opening (first 30 seconds)
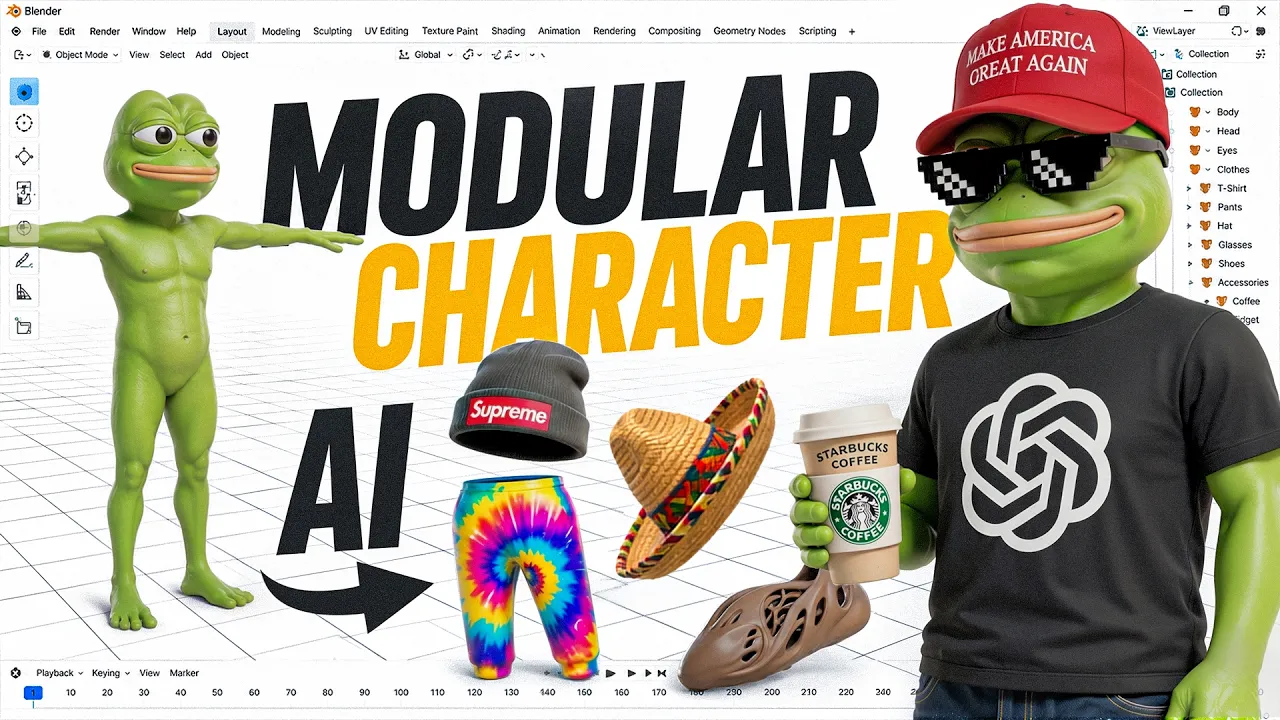
You've probably already seen that AI can turn one image into a 3D character. That's impressive, but honestly, what's the point of one static 3D object? That is not how things are in games. So here's the idea. How about I tell you just as easy you can create a whole customizable character with multiple assets, a full avatar with own wardrobe where you can change hats, glasses, outfits, shoes. In this video, I'm going to take you through entire workflow how to create this customizable character from concepting to generating 3D model, rigging, AI texturing, and we're going
99 words, the words spoken in the first 30 seconds at 197 words per minute.
Free, no signup. See how the first 30 seconds hold attention, with rewrites.
Sentence shape
| Measure | This transcript |
|---|---|
| Sentences | 295 |
| Average words per sentence | 12.6 |
| Longest sentence | 47 words |
| Questions asked | 18 |
| Sentences containing a number | 15 |
Most used terms
Filler phrases
74 in total: like 32 · actually 28 · right? 6 · basically 5 · I mean 1 · sort of 1 · you know 1.
A literal whole-word count of the same phrase list the Prepublish browser extension uses, so a phrase inside another word is not counted and a phrase used in its ordinary sense still is. It is a count and not a judgement.
What this transcript is
Every word below is the caption track YouTube publishes for this video, pulled from the video itself and reproduced unchanged. It is not Prepublish's writing, not a summary, and not a re-transcription: it is the video's own published captions. English captions, published by the channel, in the video’s original language. Source: the video on YouTube. A channel that would rather this page did not exist can ask for its removal through the contact page, and it is removed.
You've probably already seen that AI can turn one image into a 3D character. That's impressive, but honestly, what's the point of one static 3D object? That is not how things are in games. So here's the idea. How about I tell you just as easy you can create a whole customizable character with multiple assets, a full avatar with own wardrobe where you can change hats, glasses, outfits, shoes. In this video, I'm going to take you through entire workflow how to create this customizable character from concepting to generating 3D model, rigging, AI texturing, and we're going to bring it to Unreal Engine and we're going to even create a web app with Cloud Code.
And this one, guys, is really fun one. But just before we start, give me 10 seconds to thank you guys. Really, thank you a lot. I just received this award and I cannot believe it actually happened to me. I really thank you all for the support, for the trust. I do put a lot of effort and I read all the comments, guys, you left and many of my videos was actually inspired by your comments. So guys, leave comments, leave likes.
I'm going to read it. I'm going to try make better content for you guys. Thanks a lot. So what are we going to create? I was actually thinking quite a lot and we're going to create Pepper with all rights kept to original author, just a fun project. So the idea was about customizable character, but I already created a fantasy one once. I wanted to make fun and I want to recap on what happened like in the world in past five years.
And I think Pepper will do just fine because we can create a bunch of cool assets and you can already see how I was brainstorming that. So just wait until the end, like it ended up like hilarious. Also my inspiration was coming like from this cool demos on Reddit and X when people were showing like what they wipe code with design. I'm going to show you how to do that also in the end of this video, we're going to put it all together and there will be a link guys so you can play around with it.
Now the first step, we're going to need to finalize assets that we're going to generate with 3D. So here's my final list and I think we're going to start with the character. So for the character, here's my final one. Again, the character is pretty simple. There are four fingers. We don't need to split it even more, but I'm going to still create head separately. Then of course, let's bring it to triple and generate 3D models.
I'm going to use smart mesh. That's pretty much the best option when you work with such style. Again, I'm going to generate them optimized right away. I'm going to generate body and the head. And here we can see the results. I'm going to choose right poly count per each asset where I need details or not. So for head, I chose seven and that's pretty much the perfect result. It's not good. It's like perfect results. So before texturing, however, here's the trick.
Here's what I'm going to do. I'm going to bring both of the parts to blender on the part with heads. I'm going to cut the heads and I'm going to actually merge another head. The reason why I not generate body without head is just for the proportion overall reference. If you generate body without the head, so you don't know where neck looks, et cetera. So it's actually way easier to create body with head, remove the head and replace with detailed, more accurate one.
So which I going to do actually. So we're going to do that before texture. So there are a bunch of simple tools, how you can merge them. So for example, here, I selected the loop on bottom, on the top and right click and there are loop tools and there's bridge. So basically doing a bridge between two loops, boom. And yeah, that's pretty much it. We can add a little bit more segments. The last thing we're going to need to do, go to the object mode.
We're going to fix the shading and my favorite sculpting modes to just smooth the area after it's connected. Right. And boom, just like that. And there's also elastic grab. So we can adjust the shape guys. This is for real, super easy and give you so much control, especially when you're working with 3d AI. And there's a bunch of free videos on my channel, explaining basics, only basics in Blender. So you can do exactly the same very fast.
But if you are serious about it, great news guys. I just recently launched my complete 3d AI course to create a game ready character, where I share with you 10% of 3d skills, best 3d AI tools, how to combine them all together and get great results in just one week. With AI, it's really possible right now. So moving on, I'm pretty happy with my body already. I gonna hide eyes, gonna not remove them. We're going to hide them and export the mesh alone.
And also what I did, I actually did a quick UV because the mesh is quite good. So you can see like I just added like some seams just to get my texture safe and sound. And there are free items for Blender, such as UV packer that can help with it even better. That's a skill that you learn for five minutes and it's improve your workflow, working with AI generated and stuff. Now dropping this back to triple, we're going to set the rotation and we keep use original UV, which is great.
Now we go to texture, we're going to upload the very same image that we started with and just let's generate texture. And here is the result. This is amazing result. For eyes, we're going to create a simple texture in Blender, just a blank texture, name it eye texture, connect it and in Blender, there's quite easy texture paint. So what we're going to need, we're going to just fill it with the white color, then take a brush and we just need to do one brush stroke with a black color.
Boom. And Pepe eyes are quite easy and we can just adjust roughness. With realistic eyes is also very simple. You can create a sphere, unwrap it, generate eye texture with nano banana and just project it here. We do have our body ready. Now let's create assets. So what about assets? I prepared quite a lot guys. Let me know in the comments, if you agree with my list or if I missed something important. My idea behind assets was very simple.
Last five years was extremely intense for all of us. And there was quite a few historical moments. Of course I couldn't skip Macca, Apple vision pro spinner wave. I highly do not recommend to use this thing, but it was everywhere. The Starbucks, this culture, like grabbing Starbucks coffee. Well, and of course the period where we all have to wear masks and how about easy. Okay guys, I'm going to start generating models while you can drop a comment, what you think about for the assets.
It's quite simple. We're going to still use smart mesh again, like just set the right poly count and you get amazing results. So you see the results I'm getting and I'm pretty happy. I created like that all of the assets really. And for some assets, you can actually use the same mesh and just retexture it. So you don't even need to generate mesh. If that's a hoodie, like you can just use the hoodie, right? Which I actually did for GPT and borrowed a hoodie.
I think results were good, but there are of course some problems as such as this. So the text was not perfect. We're a little bit corrupted, especially with the Supreme hat, but there's definitely not a Supreme, but that's not a problem. I'm going to show you how to fix that in no time with another AI tool and Starbucks coffee, for example, was completely disrupted or on the backside. You can see it here. So we're going to fix it too, as well.
And to fix it, we're going to go to motive tool. And here it works pretty simple. Again, we're going to paint an area that is disrupted. Then we're going to generate an image and just project it with the right text. So yeah, look how it's done. I have a full video, especially about this tool. No, this is a free tool still, which is amazing. And I actually rate it quite high and just like that in no time, we just fixed the texture.
So, I mean, the same approach work for any texture. Again, like you can bring your object and then export back the color texture. You can fix it in no time. You can texture the whole object if you're not happy with any other, but my main workflow is to do the base texturing in triple and only fix on demand because that will save you so much time. And in case of simple object, you get them perfect right away. You can also add the PBR upscale.
They also recently updated segmentation to version two, which become way more usable and crazy 8K texture. Yeah, of course I tested 8K texture and it's quite nice. And according to the arena, it's top one still. So I'm using that with my team and recommend you to at least write by my link in the description, you get crazy 800 free credits. So give it a try when all assets are generated, it's time to bring them back to Blender.
Why? Because we're going to do assemble them and make sure they fit the body. So this one is the easiest and funniest part because you can go to sculpt mode. And again, there are a few brushes such as elastic wrap, smooth brush. You can work with low poly mesh and sculpt mode as well. That's legal for what? For just moving things around, right? And here you can see what I just did. I can just go through each assets, position it right according to the body and just make sure they overlay nicely.
We're going to do that for garment, everything except the holdables for holdables. We're going to do it a little bit different way, but with everything is pretty much the same workflow. You can just move around, scale, rotate objects. If that's not enough, just go to the sculpt mode and adjust them with elastic wrap or move brush, et cetera. So all process is recorded guys. And you can see that I'm not using anything, but the mentioned tools again, that's the cool thing about AI.
It already solves the difficult part. I like creating the mesh. That's truly difficult, especially if you want to learn how to do that in Blender, you're going to spend quite a lot of time. Now, when the mesh is done, we're going to need to put things together. And I truly believe that will be the biggest skill soon, how you put things together, like where you need your taste, your judgment. And in my course, guys, I'm focused on that 10% of skills that you need to know about 3D tools to be able to get max of AI and most importantly, get things done fast for your game, for your personal project, for 3D printing, anything.
And just in 30 minutes, I got my all assets done in aligned with the body, which means that we are ready to do the rigging. How are we going to do that? So we do have a tool called Acric. So we're going to export this right and bring it to the Acric. A little bit about export, of course, any holdables we're going to not export. And we technically do not need to export duplicates because later we can just swap material and rig it on only one.
And one thing that many don't know that you don't need to join the objects. You can actually export them all together, separate it. And we actually need to keep them separated. Then when we're going to get mesh back, it will be separated and we just can assign the materials if they are broken. OK, so we're going to export in FBX and let's go to the Acric. There is a separate free video on my YouTube channel about rigging, about this Acric tool and about some tips how to fix them afterwards.
Here, I'm going to move quick and explain my workflow. So, of course, we start with Acric. There is markers to set quite easy and fast. For hand rig, we're going to select four fingers. Do not skip that one because we do have four fingers. Then again, the process is pretty simple. You just do what it suggests and set the markers right. Then we're going to go press calibrate and here's the results. Well, it's quite good.
There are common problems usually in armpits or if you do have like fat belly character or like non-standard proportions, there are options to do pose offset for your specific character that might be actually needed if you style it. And in my case, we're pretty cool. Acric is free and there are a bunch of free animations, but how they earn, they basically sell other animations. They're not that expensive, but again, you're not forced to buy them.
You can just export. Just for the purpose of this video, I'm going to find two animations. One, the idle animation and one idle with something in the hand. Why are we going to need that? Because like we do have a state when he holds something. Two animations found. Let's export it to the blender. We're going to export them for blender because we're going to have fun creating web app with Claude, but I also going to do that with Unreal Engine.
So in that case, you export for Unreal Engine. Now we're going to check on the weights. So for rigid accessories, such as Apple Vision Pro or any hats or any glasses, we're going to need to make sure that it is attached only to the head bone. How do we do that? There is a trick how to do that. We can go into the vertex groups and we can lock the head bone. Then we're going to go to this arrow and delete all unlocked group.
Boom. That's how we actually leave only heads in the relation. We can go through each assets and do the same thing. That's pretty much equivalent to if we're going to go to asset and set it a hundred percent on the head bone. But this approach for this specific case is just faster. So we're going to do that. Rigid accessory can be not only around head, it can be something around waist. In that case, just make sure you attach it to the right bone to follow.
Then I also did some revision on the armpit area. Again, this is the most common issue. So I just fixed it a little bit with the brush. In my dedicated lesson video about rigging, I show how to do that. It's quite easy. You just work like with bones and skin. Basically the painted area means that this bone is affected by that skin. By controlling this distribution, you get different results. And the last thing we're going to do is that we're going to separate legs and body, and we will allow an option like body alone without the waist.
But inside games, we usually care about optimization, which means that if there is something covering the body, we do not want to show that covered part. So usually that mesh is hidden or removed at the moment or we're wearing like t -shirt or pants. So for that purpose, we're going to draw some lines and we're going to hide the body. And actually we're going to separate body and legs into a specific object and there will be in the same category.
So we either show legs or we show pants and they do not cover each other, which also causing some problems with animation sometimes. So that's good to have, but again, that's not always needed only when it's really covered. For head, even some hats cover some part. I'm not going to do that because they cover different part of head all the time. And that will be more mess. Just a game development tip from Steph. And lastly, let's enable animation where he have these hands, like he's holding something and we're going to attach these accessories to the hat.
So we're going to pretty much parent them to the bones the same way. As I said, you can wait it to any bone really. So yeah, I found this like right hand bone and we're going to parent to it. And now you can see it actually follows, right? Follows the bone. Same thing I'm going to do for the rest. And the idea is that we're going to only show this holdables in this animation. If there is no coffee, for example, nothing, then we're going to show another idle animation.
You're going to see that in the moment. Well, now we are ready to move to the fun part, which we're going to do first. Unreal Engine or web app. Actually, let's quickly add it to Unreal Engine. So the only difference here would be that I choose another skeleton when exporting from Acurig. That will be Unreal Engine 5 skeleton. Then we're going to bring the character with all the assets to the Unreal Engine and let's preview.
Again, some assets will be exported separately, some together. We're going to do retarded animation, replace it on the default blueprint of third person. That's my favorite template. And there will be some play with blueprints, how to replace that. And pretty much what happened next is depends on your game logic. You're going to build some UI or customization system. In my case, I'm going to build simple blueprints so I can actually just swap the objects around.
And if you're not familiar with blueprints and wonder if Claude can actually help, then next week there will be video on my channel when I show you how to connect Claude to Unreal Engine to do all that stuff. So subscribe to not miss this out. And just after a while, here we go. But you already saw that before. Now let's make real fun. We're going to create a web application. How are we going to do that? We're going to need Claude codes and bunch of skills, bunch of amazing skills.
We're going to need designer skill and stitch skills from Google. Here you can see the links, how to install them. You're going to see names of all skills I used on the screen. The idea is that we're going to start with grill me skill, which is one of the coolest Claude code productivity skill, which start asking you a lot of questions and you're going to create brief. Then you're going to use design brief to describe like what we want.
In my case, I actually wanted to make some simple UI where we can select that stuff. And while in the process, something actually hit me that we're going to sort of like measure the style and there is a slang word called drip. So we're going to do some serious drip. And that actually became the name of the app. So we're going to style our guy and measure his drip level. Then the main skill will be the stitch loop. So we're going to do the whole iteration and build the whole app and Claude scale called front-end design with them together.
You're ready to do the full application. I really recommend to ask it first, create a plan and you can review that that's respected. And there's a skill called brief to task that will make result more stable. And that's like a general tip using Claude code plan first set tasks and watch it work. And you really need to review that for best result. After things are done, there is a skill called design review that helps to double check himself.
And of course I had to export my prepared 3d files into GLB and told Claude to enable them. I explained to him that all my assets are already on the armature and he basically just needs to show them. I also gave right names in blender. So he will see the right object names. And after a while, we got this guys some serious drip. So how does it work? So we can actually select the preset. Basically, there's a bunch of assets.
Let's start with touch grass. I actually need to touch grass where this wipe. And here we go, guys, let's go. How cool is that? I think it's pretty sick, right? I actually enjoy making projects like that. The link will be in the description. You can play around with it. You can share with your friends with the card like that, the quiet flex, right? So how about that? Like we can actually change it and it will reevaluate boom.
Could actually remove that. Why do we need pants, right? And I also added skins here that replace the body. So you can see like that. And I actually plan a separate video about character with skins. So guys, you know, subscribe. You're going to be first to see that video. I can explain the power of texture work and show you quite a cool use cases. Well, that's it. See you in the next video.
The words are the caption track's own and nothing is reworded or re-transcribed. Paragraph breaks are placed between sentences so the text reads as prose.
Free tools for your own script. No signup, no login.
Paste your draft and see where viewers are likely to drop off, with a rewrite for each weak line.
Paste the first 30 seconds of your own draft for a hook score and rewrites.
Check your draft against YouTube's advertiser-friendly guidelines before you record it.
Read this channel's public videos and transcripts, and download a writing brief for it.