Getting the transcript
Reading the captions from YouTube. A video nobody has opened here before takes 10 to 30 seconds; this page fills in on its own.
Getting the transcript
Reading the captions from YouTube. A video nobody has opened here before takes 10 to 30 seconds; this page fills in on its own.
Meg Heckman · @itsmegheckman
Words
3,659
Runtime
19:46
Speaking pace
185wpm
Reading time
15min
185 words per minute, between the 181 median and the 201 75th percentile of 349 measured videos. That distribution comes from the 349-video hook study.
Opening (first 30 seconds)
This t-shirt has made me over $8,000 in the past two months. I made it in ChachiBT for less than 25 using a process I've spent months testing and refining. And it's not the only one. Every one of these designs was made the exact same way. Because here's the thing. If you want to launch a profitable t-shirt store, I always give the same advice. You need 100 designs first. And with AI, getting there has never been easier, cheaper, or faster. But only if you know how to use it. So,
93 words, the words spoken in the first 30 seconds at 185 words per minute.
Free, no signup. See how the first 30 seconds hold attention, with rewrites.
Sentence shape
| Measure | This transcript |
|---|---|
| Sentences | 256 |
| Average words per sentence | 14.3 |
| Longest sentence | 79 words |
| Questions asked | 5 |
| Sentences containing a number | 24 |
Most used terms
Filler phrases
39 in total: like 20 · actually 11 · you know 3 · basically 2 · literally 2 · kind of 1.
A literal whole-word count of the same phrase list the Prepublish browser extension uses, so a phrase inside another word is not counted and a phrase used in its ordinary sense still is. It is a count and not a judgement.
Run the check on the words above: where attention is likely to drop, with a rewrite for each weak line. The free check shows the scores and the one issue costing the most.
What this transcript is
Every word below is the caption track YouTube publishes for this video, pulled from the video itself and reproduced unchanged. It is not Prepublish's writing, not a summary, and not a re-transcription: it is the video's own published captions. English captions, generated automatically by YouTube, in the video’s original language. Source: the video on YouTube. A channel that would rather this page did not exist can ask for its removal through the contact page, and it is removed.
No Script X-ray for this video: YouTube shows a Most replayed graph only once a video has enough views.
This t-shirt has made me over $8,000 in the past two months. I made it in ChachiBT for less than 25 using a process I've spent months testing and refining. And it's not the only one. Every one of these designs was made the exact same way. Because here's the thing. If you want to launch a profitable t-shirt store, I always give the same advice. You need 100 designs first. And with AI, getting there has never been easier, cheaper, or faster.
But only if you know how to use it. So, today I'm walking you through my whole three-step process. Everything that you need to sit down and knock out your entire 100 designs that are print ready with zero editing required starting today. Now, I want to have a quick word on the tool before we get into all the steps. Why am I choosing ChachiBT? I have tried a lot of image generators and this one is the one that takes what's in my head and puts it on the screen the closest to how I've pictured it.
Now, Chachabt just released an updated image model 2.5. And honestly, I don't think there's a better one on the market for generating print on demand designs right now. So, that's what we're using today. Now, let's talk about price because you can do this for a lot less than people think. ChachiBT actually has four levels to their subscription model. Of course, there's the free version, but you are going to get capped on how many images that you can be designing at each of these levels. and free is going to be the least number of images that you can actually generate.
Beyond that, there's the go version, which is $8 per month. The plus version, that's $20 per month. And [snorts] then there's the pro version, and you can choose between 5x and 20x, which is basically the amount of tokens that they give you. And that goes from $100 per month to up to $200 per month. So, there's all these different plans for you to choose from. But the main difference for us is how many images each of these lets you generate in a day.
Free is again going to give you a handful. Go, you'll get a few more plus a few more and then pro will be the most. Personally, I am on the pro plan. It's the most expensive one, but it's because I use Chat GBT for a ton of things outside of just generating images. It's definitely not a requirement in order to generate all of these designs. Just know that depending on the plan that you pick, you will get capped out at some point.
But you can always upgrade and downgrade as needed. But I did want to be upfront about why we are choosing ChhatBT. And then I also wanted you to know all the different options that you have. So depending on the budget that you're working with, you have a ton of options with ChachiBT. So with that, let's get into the process. Again, this is a three-step process, and I'm going to run one design all the way through from idea all the way to upload so that you can watch it happen instead of just hearing about it.
Now, step one is our concept. And I'm going to be really quick here because I'm not going to teach you how to actually come up with the concepts in this particular video. In fact, I already made that video last week on my channel. It's the one where I break down a bestselling design and show you how to find out why it sells and then flip that into something brand new. So, if you haven't seen it, I've linked it in the description below and it may be linked on the screen somewhere here.
And you should watch that video after this one because no matter what image model you are using, it can't save a bad idea. And I honestly believe that the idea is the part that sells the shirt. The tool is just what makes that design for us. So, for today, I'm going to grab that concept straight out from that video. At the end of that video, I came up with a design I never actually made. It was a chunky raccoon sitting on top of an overflowing dumpster holding a fork and a knife with the line, "Famine was never an option, like feast or famine." Because a raccoon is honestly never going to go hungry.
They are scrappy animals. They will do whatever they need to do to survive. And that's the concept that we're going to use today. So, if you can say it out loud and somebody gets it and it clicks, you're already ready for step number two. And that's the whole first step. You need the idea before you ever touch the image generating tool. Now, most people will do it backwards. They will just open up chatg first, then sit there waiting for them to be creative, waiting for the idea to come to them.
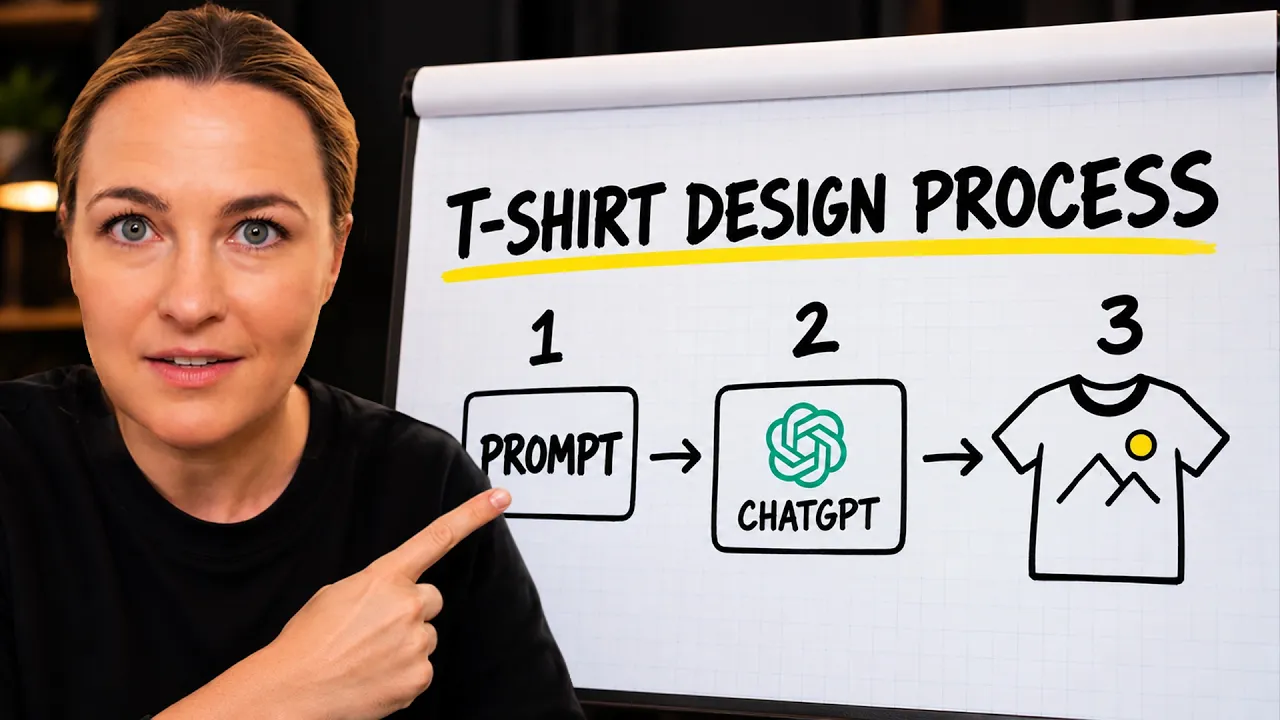
But we don't want to do that. Step number two is the most important part, which is the prompt. And this is the part that I spent months figuring out. So, I'm going to slow it down here so that it's really easy to understand and grasp because here's what most people do. They'll open ChachiBT. They'll type make me a funny raccoon design and then they get something that looks like clip art or something that someone wouldn't want to wear right here on their chest.
Then they decide AI looks cheap and then they give up. And the AI didn't fail. It was the prompt that failed. And a good prompt has two halves. The first half tells Chachebt what the design should look like. And the second half tells it what the file needs to be so that it's actually print ready and we don't need to do any editing outside. We don't need to have a canvas subscription if we don't want to. We don't need to make any edits or tweaks.
So let me show you both. Inside the W scale community, we call the first half of the prompt our design equation. And it's made up of three ingredients. The first ingredient is essentially the print press. This is how the design would physically go on the shirt. Screen print, direct to garment, puff ink, foil. Now, we're not actually printing in that way. Our print provider handles that printing, but that's the first part of this prompt.
But when you tell Chat GBT that this is a water-based screen print, it understands the look that we want. A soft, matte, slightly faded design. It is a shortcut for a whole visual style. Now, the second ingredient to our prompt is the design style. This is the art itself, like retro vintage or minimalist line art, handdrawn, cartoon, 8bit. This is what your eye notices first when you see a shirt. The third ingredient is the mood.
This is what you want someone to feel when they see it. Funny, sarcastic, nostalgic, cute, empowering. The same raccoon drawn cute and drawn as dark humor are two very different t-shirts. So, the first part of our prompt is print press, design, style, and mood. That's our equation. And I know what you're thinking because I thought it, too. Okay, but which combination? There are 15 print styles and 10 art styles and 20 or 50 different moods that I could select.
How do I know what works? And here's the answer. It is the same answer as the concept video. You don't guess. You let the best sellers tell you. In that video, we went and screenshotted the designs that were already selling in the marketplace. We then broke down the overall concept, why this design was working. Everything from the style of the design all the way to the graphics that they were using and then the typography that all came together and truly made the concept speak to the viewer.
So, we basically broke down our design equation. It would say something like a handdrawn cartoon line art or three different flatlay colors, sarcastic copy looks like direct to garment on a garment dyed tea. You could even take a screenshot, throw it into chat GBT and have it break down that design equation for you. That's going to probably be the easiest and the simplest move. Now that we have it written down in words that we can put straight into our prompt, we do this on five to 10 different best sellers.
And you'll start to see similar equations showing up. And when we see that, that becomes a repeatable pattern. So every time we sit down to the design, we can start using similar design equations to come up with new and different designs that we want to add to our store. So let's do it on the shirt that gave us the raccoon in the first place. This is the penguin from our concept video. You can see it says flight was never an option underneath.
I'm going to upload it and ask for a breakdown. And there it is. That vintage faded retro graphic tea look broken into words. So my equation for the raccoon is a water-based screen print feel, retro70s vintage design style, and the mood is funny with a little bit of punny. The concept is brand new. the look is now borrowed from something that's already selling. That's the whole idea. So, this is going to feel like a brand new design.
It's not going to be anything close to a copycat or anything that could get flagged as copyright. Now, let's talk about the second half of the prompt. This is the half that nobody likes to talk about, and it's the reason that I can upload straight from ChatBT without touching another editing tool. Three things need to go in this place. First, it's the size. I use 4500 by 5400 pixels as my starting point for every t-shirt.
This is based off of Printify standards. They also say that having 300 dpi is going to give you the highest quality for a crisp print. Under that, it'll come out soft and pixelated, and Printify will try to automatically upgrade the quality for you, but it never turns out that good. So, at 300, it comes out nice and sharp. You would never have any customer complaint about this being a faded design or a design that doesn't look crisp.
And I ask for it as a PNG in sRGB color because that is the file that Printify wants. That's what's going to get you the best prints. So there's no need to convert later. Next, I also add in that I want this design on a transparent background. So that way I never have to go into Canva and play around with background removals and getting into those little tiny areas trying to clean up a design. You'll tell it to generate the design on a transparent background.
No backdrop, no box behind it. And this is the one that saves you the most time because normally you'd have to take that design from Chat GBT, upload it into Canva or use some other background remover and clean up the design. And on a detailed design, that is where edges get chewed up and it starts looking cheap. Or you'll try to remove the background on a design you really like and it's just not getting it. And it's so frustrating when that happens.
When Chacht generates it transparent from the start, there's nothing to remove. Even the fine detail is clean. So, we're going to be able to download this design and immediately upload it into Printify without any issues. The third is we can put in a copyright check. You can literally tell it, do not use any copyrighted characters, logos, brand names, or trademarked fonts. Now, I want to be honest here. I'm not a lawyer.
I typically will just use my best judgment. If I feel this is borderline of stealing somebody's artwork or coming too close to a video or a movie or some brand's likeness, I stay away from the design. Period. I don't put that up on my site. But as you know, a lot of people are out there and they will put those designs up. So if you are nervous about that, you can always throw in, hey, run through a copyright check. I want to make sure I'm being safe.
But this is going to catch any obvious stuff. So if you're someone who doesn't know what could be copyright, what isn't, this is a great safety check for you. So here's the whole prompt built for our raccoon shirt. Create a t-shirt graphic. I want this to be print press waterbased screen print look soft matte slightly faded design style being a retro70s vintage graphic tea the mood funny and punny the design is a chunky raccoon sitting on top of an overflowing dumpster holding a fork and knife looking satisfied the text reads famine was never an option in a chunky retro syrup print ready 4500x 5400 pixels at 300 dpi I PNG with a transparent background, no backdrop, sRGB color.
Do not use any copyrighted characters, logos, brand names, or trademark fonts. That's the prompt. And the thing I want you to notice is that the concept, the raccoon, is the one line in the middle of all of it. Everything around that concept is the part that makes it print ready and makes it look like a real shirt instead of clip art or, you know, those typical AI designs. Once you build this once, you're not rebuilding it a 100 times.
You then save it and you can swap out the concept line if you got a really good output. That's how you get through 100 designs quickly. Now, step three is generate. And there are three ways that we can actually [clears throat] do this. So, I'm going to run the raccoon through all three so that you can see the difference of outputs that you get from the three different ways we can generate a design. The first way is the simplest.
You essentially take the prompt that we just built and we paste that into chatbt. We then hit enter and that's it. Chhatbt is going to do the rest. The second way that we can generate a design is essentially by putting in our original design. So for the raccoon, we can take a screenshot of the penguin design that we used as our original idea as like our original concept to build off of. We can take that screenshot, feed it into chatbt and essentially ask chatbt to describe this t-shirt, break it down of what it sees, the style, etc.
Break that down into a prompt. Explain the concept that we want to have. So add in our raccoon, and give it all of the specifics of it being 4500x 5400 pixels, 300 dpi on a transparent background, yada yada yada. Then it's going to create a prompt based off of that original image. So not just me looking at it and determining what do I think this whole breakdown is, but essentially starting from that original image, breaking that down granularly for the image model to interpret and then create a brand new image.
And as you can see, the two images that were created, the one from our original prompt and the one from chat GBT viewing the original and just creating a prompt for it and then generating it. We have two very different designs. So, it kind of depends on the style you're going for, what your idea was for that concept, what you wanted it to ultimately look like. This is what you should use when you can see the vibe, but you can't necessarily name it.
We want to let the tool name it for us and then ultimately create that prompt. Now, the third way is one that people probably don't realize exists. Instead of describing the look, we just hand it the look. This time, we can upload two different images. The first one is our penguin. That's where the concept came from, which gives context to the model. And the second one is a completely different design in a style that I really like.
And I tell Chachi BT that the first image is my concept reference. The second image is the one I want you to actually edit. This is essentially telling the model that they're going to take that second image and just edit that image. So essentially like if you threw this into Photoshop and you were really good at graphic design and you could totally tweak and play around a design and come up with something brand new in that style that you really like.
So this is what we'll tell the model. Make the raccoon the focus. Put famine was never an option across the top. Keep the second images style and give it to me in 4500 by 5400, 300 dpi, transparent, and sRGB colors. So, the concept is coming from one shirt and the look is coming from another. And what comes out is something that nobody has seen. It's the same line, weight, and texture as the style referenced, but with a brand new idea inside of this.
This is my favorite for building a collection because when you want 10 designs that all clearly belong in the same store, but don't have the same feel, this is how you get them to really stand out. One thing here, and it matters, you're borrowing a style. You are not recreating the exact same shirt that somebody used. Again, we are using this concept of the style and bringing it in with our own concept and idea. The concept has to be yours.
If I uploaded the penguin and said, "Make it with a different bird with the same line," you would just have made the same copy that sits on that Etsy page and everybody knows what I'm talking about when I say that. We want to flip the idea, then borrow a look, never the other way around. Now, here are our three generated designs. As you can see, they all have a similar feel. Our concept comes across. It really comes down to the style and the vibe that you're looking for for your brand, for your store.
Now, for me, the last generation is closer to what I had in mind, closer to what I wanted. Now, you could still put all three of these up. I would just scatter them throughout my collection so it doesn't feel similar, but then we can let the market essentially tell us which style people actually like. And that leads us into being able to create more designs like that in that style. And you can keep using and tweaking those prompts like we've talked about.
So we can now take all three of these and you don't need to open Canva. You don't need to remove a background. You can literally download them from Chat GPT and upload straight into Printify. And as you can see, Printify gave us no warnings, no issues. This is 300 dpi. It's going to come out crisp. I didn't need to resize anything. So, we just went from a one-s sentence idea to our design not needing any edits and uploaded immediately into Printify.
And every design from the beginning of the video went through this exact thing. So, that is the three-step process. We have our concept, our prompt, and then we generate. Concept is the idea, and you get that from those bestsellers. Prompt is the design equation plus all of our print ready information. You can build that prompt once and then just swap out the different styles and print presses that you're going for. Lastly is generate.
And there's three ways that we can do this. So you can pick whichever one fits the style that you see in front of you. Then it just goes straight into your print provider and uploaded to your site. And the reason I always say 100 designs first is this. When the design part takes this little time, the only thing standing between you and a launch store is sitting down and doing it. not needing to learn Photoshop, not needing to do a bunch of edits in Canva, not waiting until you feel like a designer and you're looking for inspiration, but just sitting down and knocking it out.
Now, if you're sitting there and you're thinking, "Okay, I get the designs, but what about everything else? The store, the products, how do I launch?" That's exactly what the million-oll brand blueprint is for. It is every resource that I actually use laid out in order from finding your designs all the way through building your store, going live with your first products, and actually starting to run ads. Wherever you are in your journey, it shows you the next step.
If you're interested, it's linked in the description below. Again, it's completely for free. So, if you want to steal all these resources that I use, you can grab it right there. And if you found this helpful and you want more videos like this, please like and subscribe to my channel. it would absolutely mean the world to me. Other than that guys, thanks for watching and I'll see you in the next video.
The words are the caption track's own and nothing is reworded or re-transcribed. Paragraph breaks are placed between sentences so the text reads as prose.
Free tools for your own script: paste a draft and see where it stands before you record it.
Paste your draft and see where viewers are likely to drop off, with a rewrite for each weak line.
Paste the first 30 seconds of your own draft for a hook score and rewrites.
Check your draft against YouTube's advertiser-friendly guidelines before you record it.
Read this channel's public videos and transcripts, and download a writing brief for it.