Getting the transcript
Reading the captions from YouTube. A video nobody has opened here before takes 10 to 30 seconds; this page fills in on its own.
Getting the transcript
Reading the captions from YouTube. A video nobody has opened here before takes 10 to 30 seconds; this page fills in on its own.
Ryan King Art · @RyanKingArt
This video has no Most replayed graph yet: YouTube shows one only once a video has enough views. These are the moments viewers replayed most in Ryan King Art's most watched videos.
Most replayed moment at 9:17
4.3x that video's typical replay level
the high poly detail to the low poly mesh now to make sure it's going to bake this correctly we first need to select the high poly mesh and then we need to hold down the shift key and select the low poly mesh last so they're both selected but the low poly object is selected last so it's the active object
Said at 9:10
The graph counts replays. It does not show where viewers stopped watching.
Words
4,362
Runtime
17:18
Speaking pace
252wpm
Reading time
18min
252 words per minute, above the 201 75th percentile of 349 measured videos. That distribution comes from the 349-video hook study.
Opening (first 30 seconds)
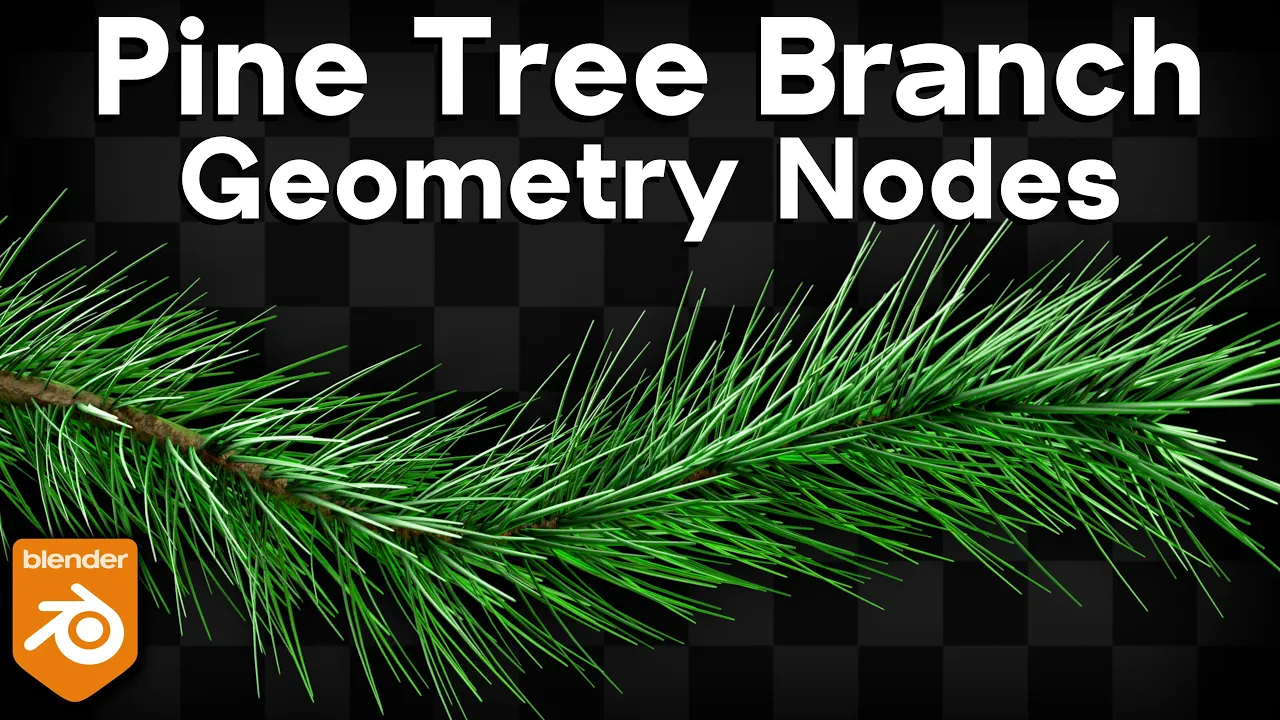
In this Blender tutorial, I'll show you how to create this pine tree branch with geometry nodes. And this pine tree branch will be added to a curve object, so you can go into edit mode of the curve, you can extrude out the curve handles, rotate the curve handles, and you can adjust the pine tree branch. So, you could use this to make many things like a Christmas tree or a Christmas wreath or a pine tree. And this geometry node modifier setup was originally used in my Christmas wreath Blender tutorial, so if you'd like to check out that tutorial series and learn how to create your own Christmas wreath, you can find the tutorial links in the description. Or you can also
126 words, the words spoken in the first 30 seconds at 252 words per minute.
Free, no signup. See how the first 30 seconds hold attention, with rewrites.
What this transcript is
Every word below is the caption track YouTube publishes for this video, pulled from the video itself and reproduced unchanged. It is not Prepublish's writing, not a summary, and not a re-transcription: it is the video's own published captions. English captions, generated automatically by YouTube, in the video’s original language. Source: the video on YouTube. A channel that would rather this page did not exist can ask for its removal through the contact page, and it is removed.
In this Blender tutorial, I'll show you how to create this pine tree branch with geometry nodes. And this pine tree branch will be added to a curve object, so you can go into edit mode of the curve, you can extrude out the curve handles, rotate the curve handles, and you can adjust the pine tree branch. So, you could use this to make many things like a Christmas tree or a Christmas wreath or a pine tree. And this geometry node modifier setup was originally used in my Christmas wreath Blender tutorial, so if you'd like to check out that tutorial series and learn how to create your own Christmas wreath, you can find the tutorial links in the description.
Or you can also purchase Christmas wreath asset pack, which comes with all of these different assets pre-set up in the lecture asset browser, so you can create and customize your own Christmas wreath. And then just one more thing before we start, I want to let you know about my Christmas ornaments asset pack. In this Christmas ornaments asset pack, you will get 160 Christmas ornament 3D models created with Blender. The ornaments are pre-set up in Blender's asset browser, so you can easily drag and drop the ornament models into your holiday scenes.
All of the ornaments materials are created with Blender's procedural shader nodes. If you'd like to purchase the asset pack, you can find the product links in the description. So, in a new scene in Blender, I'm just going to select everything, we're going to delete everything, and we're going to start out by modeling one single needle. So, I'll go to the add menu and let's just add a new cube. I'm going to scale the cube down to a much better size of a needle, so I'm going to turn it down to a .15, just a .15, press Ctrl A and just apply the scale.
So, that's going to be the length of the needle, but let's also scale it down on the X axis, and I'm going to type in .05 and hit enter. So, .05 along the X axis, so it's really thin. And then we'll also scale it down on the Z axis and make it pretty small, so scale it down so it's really quite flat. So, just like that, maybe a little bit thicker, but it should be pretty flat. And then we're also going to move it on the Y axis, we're going to bring it back here, so the origin point is at the very end of the needle, because where the origin point is, that is where the object is going to be distributed, and it's going to come out of the curve.
Let's go back into edit mode and I'm going to go into wireframe and I'm just going to box select the top here and we're going to scale the top down way smaller because it's going to get thinner as it goes up to the top of the needle. Now, let's add two loop cuts, so I'll hit control R, scroll my mouse wheel till I have two loop cuts and left click and right click so they stay where they are. And then I'll hit G to grab, bring it up on the Z axis just to bring that up there just a little bit.
Maybe that's a bit too much, but just like that so that it rotates a little. Let's go back to object mode and I'm going to hit control one to add a subdivision surface modifier with one level and let's use the object context menu and I'm going to shade the object smooth. If I go over here to the modifiers, there's the subsurf modifier and I'm going to turn the levels and viewport both just to one and then I'll hit tab to go back into edit mode.
I'll hit control R to add another loop cut and I'm going to click here at the very end and kind of drag it over here just to sharpen up the very end there of the loop cut. And on the other side, we'll hit control R, add a loop cut here, just drag that over so that it's also sharp there on the end. And then we can go back to object mode. So, let's now add a curve, so I'll go to the add menu, we'll go to curve and I'll add the default BZA curve.
We'll go into edit mode and I'm going to select the curve handles and I'll rotate them, kind of rotate them like that. Let's move it up here and I'll just stick this curve handle pretty much at the center at the bottom there and this curve handle just rotate it up like that. I'll go back to object mode and we'll click here to go to the geometry nodes editor. I'll zoom in here. Let's click on new to add new geometry nodes and I can just call this pine branch.
So, the first thing we need to do is give the curve some thickness because right now it's really thin. It's just made out of this single curve here, so it doesn't actually have any visible faces. So, to give it some thickness, we need to convert the curve to a mesh. So, here in the geometry nodes, we're going to search for curve to mesh. And we'll drop this here between the group input and the output and I'll drag it up here.
So, now we're converting it to a mesh, but there still isn't any face data because it doesn't have any thickness. So, this profile curve here can be used and if we put an object into the profile curve, that'll make the thickness or the shape of that curve. So, we're going to search for a curve circle, add the curve circle, drop it down here, and the curve here, that can go into the profile curve. So, now you can see that the shape of that curve circle is going to be the shape of the tree branch.
Let's select these, kind of drag them up here, drag this over here, and then here on the resolution, we don't need the resolution that high, so I'm just going to turn it down to a 10, so it's less resolution. Now, I also want to change the size of it because it's way too thick right now, and I also want it to get thinner as it goes up to the very top because the tree branch is going to be thicker as it gets closer to the tree.
So, what I can do for this is search for a set curve radius. Add the set curve radius and drop it here, and we'll just drag it right over here. So, now we have this radius value that I can drag to make it more thick or less thick, but I want to be thinner at the very top. So, what we're going to do for this is search for a spline parameter node. We'll drop the spline parameter here, and this is going to give us the curve data so that one side will be more thin and the other side will be more thick.
So, we'll put the factor into the radius, and this way now instead of it being one single value, it's going to be thinner and thicker depending on how far it is down the curve. So, it now has basically a cone shape, but I want to make it much more thin because it's way too thick right now. So, to do this, we can search for a color ramp. We'll put the color ramp between the spline parameter and the set curve radius. Also, let's save our project.
So, if you haven't done that yet, click on file and save your project. And I'll just save it as pine branch in my project files and just save the blender file, and then just press control S every now and then as you're working on it to save it. So, we've added this color ramp here, and so if I click on the white tab here, I can change the color. And if I turn this darker, that's going to make the bottom color more dark, and so if it's darker, that's telling it to be smaller.
Whereas the black one, if I turn this up, that's telling that the smallest one is going to be bigger. So, this one's going to be fully black, but then this one is going to be a really dark gray. So, just something like that. So, all of these nodes here are going to make the curve thickness. So, just to keep everything really organized, I'm going to box select all these nodes and I'll hit Ctrl J and that will join them into a frame and I can just kind of compress the nodes.
And if I click on the frame and press F2 to add a label, I'll just rename this to curve thickness. So, that way we can easily remember that these are the nodes which are making the curve thick. I'm also going to hold down the shift key and right click and drag over this wire and let go. And that's just going to add a reroute to this wire here, so I'll drag it up here. So, I can drag the group input right down here. So, now we want to add the needles onto the curve.
So, to do this, we're going to search for instance and we're going to add the instance on points. Now, this group input, the geometry can go into the points. So, what this node is doing is it's saying that whatever is in the instance, that's going to show up on all the points. So, we need to put the object data into the instance. So, to do this, we can just search for the object info node, drop this down here, and then if we use the eyedropper, we can select this cube here, which is the needle.
And you can of course rename the object if you want to. I can just rename it here in the outliner. So, I'll just call this needle. And then the curve here I can rename to branch. So, now it says needle here in the drop-down. So, we'll put the geometry into the instance. So, now it's going to instance or place one of these objects where every point is. Now, we can't actually see it showing up yet and that's because we need to put the instance here into the geometry because anything that we want to show up in the final viewport needs to be going into the group output.
So, if I plug it into the group output, you can see we now have a needle at the bottom and the needle at the top and that's because those are the only two points we have. So, one at the top and one at the bottom. So, I do want to add more points so there are more points along the branch. But before I do that, I still want to be able to see the branch thickness. So, we need to join these together. So, to do this, we can search for join geometry.
We can put the join geometry right here. And so, the instance on points as well as the curve to mesh are both going to be going into the join geometry. That way, we have the branch and we also have the needle. So, now we need to add more points because there's only two right now. So, to do this, we can search for the resample curve node. And we're going to put the resample curve right here after the group input but before the instance on points.
So, now we have this count and we can turn up the count and how I like to think about this is it's almost like subdividing it. So, it's basically cutting it and adding a lot more detail or it's adding more points to the curve. Now, there's a problem with this and that is that if I extrude curve handles, you can see as the curve gets longer and longer, each one of the points here are going to get farther and farther apart from each other.
And that's just because it's evenly placing them with the count. So, instead of the count, I can change this to length and this way even if I extrude up the curve or bring up the curve, it's going to add more points so that it has the same amount of space in between them. So, change the resample curve to length and then that'll be automatically adjusting. Now, here on the length, I find that a value of .0024 looks pretty good.
So, .0024. So, if I hit enter, you can see there's going to be a ton of these and they're all going in the same direction and that might look like a lot of needles but once we duplicate the needles and rotate them around the branch, it's going to look like there's a lot less because they're going to be distributed more randomly. Now, another thing that I want to do is make it so that when I extrude the curve and then rotate it that they all go along with the curve's rotation.
But you can see right now if I extrude this out and bring it over here, all of the needles are going in the same exact direction. So, to do this, we need to search for two nodes. First, we're going to search for the align rotation to vector. We'll put this right here. And then we also need to search for the curve tangent. So, I'll add the curve tangent, drop it here. Now, the curve tangent is going to have the data of the rotation.
So, we're going to put the tangent into the vector and then the align rotation to vector, this is going to go into the rotation of the instance on points. So, this way, it does look a little bit weird right now but if I select the curve handles and rotate them, you can see that when the curve rotates, the needles are actually rotating. But of course now they're not like rotating all around randomly, so we still need to fix that.
Now I do also want to add a random scale because they all have the same exact scale and that doesn't look very realistic. So we can change the scale of these by changing the instance on point scale. But I want to add random values, so we're going to search for the random value node. We'll drop this down here and the value can go into the scale. Now I can drag the minimum value, which is going to be the random minimum and the random maximum.
And so for the random minimum, I'm going to change this to like a 0.6 and the maximum I'll turn to one. So that way there's going to be randomly generated values or random scale values between 0.6 and one. So the scale is much more random. So that's going to be it for all the nodes that are going to place the needles on the curve. So if I box select these, I'll hit control J to add a frame and I'll hit F2 to add a label and I'll rename this to needles on curve.
So now we need to add the needles rotation and we're going to add this after the instance on points. So after the instance on points, we're going to search for the rotate instances and we'll drop this down here. So now I have this rotation value and I can rotate this around to rotate it on the X, Y and Z axis. But I want the values to be random, so again we're going to search for another random value node. We'll drop this here and the float type, I want to change this to vector and this way we're going to have control over the X, Y and Z axis.
So now this value here can go into the rotation of the rotate instances and I can now change the random value for the X, the Y and the Z. So first let's just turn all these values to zero so it's not rotating at all. So first let's change the maximum Z value, that makes the most sense because if I rotate this around randomly, that's going to actually rotate it around the curve. Now to make it rotate randomly, you can click on this value and you can type in TAU for tau.
So hit TAU and enter, that is going to do a math equation which is going to create this value which will rotate it all the way around randomly. However, if you wanted to, you could just turn it up to a really big number like 100 or 1,000, so it randomly rotates around, but you can also use tau, which is that value. So, now that's looking pretty good, but if you look at real pine branches, they move forward with the position of the branch or where the branch is pointing.
So, I can use the top values, and that's going to move it along the rotation or where the branch is pointing. So, on the minimum value, I'm going to turn this to a negative point five, so negative point five. And then here on the maximum, I'm going to turn this to a negative one. So, this way you can see that as well as the branches rotating all the way around along with the curve, they are also all moving up. And so, here's the bottom, and then here's the top.
So, all of them move along and kind of point towards the top. So, we'll box select these nodes here. I'll hit control J, and I'll hit F2 to add a label, and I'll rename this to needles rotation. So, that is it for the geometry node setup. So, you can now just select this, you can move it around, you can rotate it, and it's going to adapt with the curve. So, if you want to just end the tutorial here, you can, but I'm just going to do some quick lighting and some quick materials to make this look a bit nicer.
So, let's make the materials. So, I'm going to click here to go to the shading workspace, and I'm going to select the object. Let's click on new to add new material, and I can just rename this material to branch. And I'll go into the material preview. Now, if I take the base color and try to change this, you can see that it's not adapting. That's because I need to go to the geometry nodes, and I want to add the branch material here after the curve thickness.
Now, I don't want to add it here at the very end of the setup because if I do that, it's going to add the same material to the branch and the needles, but I just want to add it to the branch. So, let's go to the add menu, and we're going to search for the set material node. We're going to drop it here after the curve to mesh. And then if we click on the drop down, we can choose the branch material. So, if I go back to the shading workspace, you can now see that branch material is on the branch.
So, I'm going to make a very simple procedural material, but of course, if you wanted to, you could add some some of like texture, like a bark texture or whatever you want to do. What I'm going to do is just search for a noise texture, drop this here, and then I'm also going to search for a texture coordinate node. We'll drop this here. We'll use the object coordinates into the vector, so it places the noise texture on the object more evenly.
Now, the noise texture here, if we have the node wrangler enabled, we can hold down the control and shift key and select the noise texture preview it to preview what the noise texture looks like on the object. So, I'm going to turn the scale up to 80, and I'll turn the detail up to 10, so it's pretty detailed. Now, we can put the factor into the base color, and I can control shift select the principal shader, but I want to make some custom colors.
So, to do this, I can search for a mix color, and we'll drop it between the noise and the principal. Now, the factor can go into the factor of the mix, and that way we have two different colors. So, the two different colors are going to be the colors of the noise. So, for color A, I'm just going to make like a dark brown, and here's the hex value if you want to copy it. And also, for color B here, this is going to be kind of like a lighter brown, and also here's the exact hex value I'm using.
Now, also, I want to put the factor into the normal to give it a little bit of bump to make it look kind of like the tree bark, but then I need to go to the add menu, and I need to search for a bump node to convert the noise texture into bump data. So, we'll put the bump node right here, and the factor needs to be going into the height value to convert it to bump data. And then here on the strength, I'll just turn the strength down to like a point three, so it's not quite as strong.
So, now you can see we now have that nice bumpy texture. And also here on the roughness, let's turn this up to like a point seven, so it's more rough. And that's it for the simple bark material. So, now let's just select the needle here. We'll click on new add a new material, and I'll just call this needle. And this material is going to be pretty simple, so I'm first going to take the base color and make it a dark green, and here's the hex value if you want to use the same exact color.
We can also turn the roughness up a little bit to just like a point six, so it's a bit more rough. And because this is an organic plant, I do want to add a little bit of light to be going through the object. So, I'm going to open up the transmission here, and I'll turn the transmission weight up to like a point six. So, now let's add an HDRI to make the lighting look a bit nicer. So, I'll go back here to the layout. Let's go into the rendered viewport mode.
Let's click here to the world properties and I'll click on the yellow dot here next to color. I'll choose environment texture and then just open the texture. And I'll be using this Christmas photo studio 01. This is from polyhaven.com and I downloaded the 1K HDR version. The link will be in the description. So, I'll just click on it and click on open image. Let's also go here to the render properties and here on the color management, I'm going to use AGX and I'll change this to very high contrast so it pops out the colors and make things look more contrasty.
And also on the film tab, we can check mark the transparent button. And also if we go back here to the world properties, we can also turn up the strength a little bit to maybe like a two if you just want that to be a little bit brighter. And also if I kind of look right up here on the bottom kind of looking up, you can see by adding that transmission there, there's a bit of light going through the needles. So, that makes it look more like an organic object.
Now, I'll just add a few lights to make it look a bit nicer. So, I'll go to the add menu. I'll go to light and just add an area light. I'll scale the area light up and just kind of rotate it here to the side. I go to the object data properties, I'll turn the power up to like 600 so it's quite a bit brighter. And maybe I'll duplicate the area light and just have one more here on the other side just for a very simple light setup.
And there is the geometry nodes pine tree branch with some simple materials. So, thank you so much for watching this tutorial and I hope you enjoyed the tutorial. And if you'd like to purchase the finished project files, you can get that with the links in the description on my Gumroad store and Patreon page. And this method for creating a pine tree branch was used in my full tutorial series on how to create this Christmas Blender.
So, if you'd like to check out that tutorial series, you can find it on my YouTube channel linked in the description. You can also purchase the Christmas wreath project files which comes with all these different assets pre-set up in Blender's asset browser. So, you can just drag and drop the assets into your 3D project and you can create your own custom Christmas wreath and decorate your own Christmas wreath. And definitely check out my Christmas and holiday tutorial playlist to watch more of my Christmas tutorials.
So, I hope you found this helpful and thank you for watching.
The words are the caption track's own and nothing is reworded or re-transcribed. Paragraph breaks are placed between sentences so the text reads as prose.
Free tools for your own script. No signup, no login.
Paste your draft and see where viewers are likely to drop off, with a rewrite for each weak line.
Paste the first 30 seconds of your own draft for a hook score and rewrites.
Check your draft against YouTube's advertiser-friendly guidelines before you record it.
Read this channel's public videos and transcripts, and download a writing brief for it.
Sentence shape
| Measure | This transcript |
|---|---|
| Sentences | 211 |
| Average words per sentence | 20.7 |
| Longest sentence | 62 words |
| Questions asked | 0 |
| Sentences containing a number | 18 |
Most used terms
Filler phrases
47 in total: like 30 · kind of 10 · actually 4 · basically 2 · you know 1.
A literal whole-word count of the same phrase list the Prepublish browser extension uses, so a phrase inside another word is not counted and a phrase used in its ordinary sense still is. It is a count and not a judgement.