Getting the transcript
Reading the captions from YouTube. A video nobody has opened here before takes 10 to 30 seconds; this page fills in on its own.
Getting the transcript
Reading the captions from YouTube. A video nobody has opened here before takes 10 to 30 seconds; this page fills in on its own.
Stefan 3D AI · @stefan_3d_ai
This video has no Most replayed graph yet: YouTube shows one only once a video has enough views. These are the moments viewers replayed most in Stefan 3D AI's most watched videos.
Most replayed moment at 4:08
7.0x that video's typical replay level
and it will also have the access to full ai apis. Now let's do some serious tests. The first test will be to do an animation of a character that will be split in parts. The first test will be to create animation. Animation of a character that will be an
Said at 4:01
Most replayed moment at 9:39
5.7x that video's typical replay level
Overall I think this guy's made really amazing job, bring it it all together and I really had a lot of
Said at 9:41
Most replayed moment at 20:36
4.1x that video's typical replay level
Just also because I was playing that game when I was kid. Okay, let me see if I remember how to play that. Let's start with the road, right? Let's try to build a, oh, there are cars. There are cars. It generated nice cars and they're like, wow.
Said at 20:29
The graph counts replays. It does not show where viewers stopped watching.
Words
5,227
Runtime
29:33
Speaking pace
177wpm
Reading time
22min
177 words per minute, between the 160 25th percentile and the 181 median of 349 measured videos. That distribution comes from the 349-video hook study.
Opening (first 30 seconds)
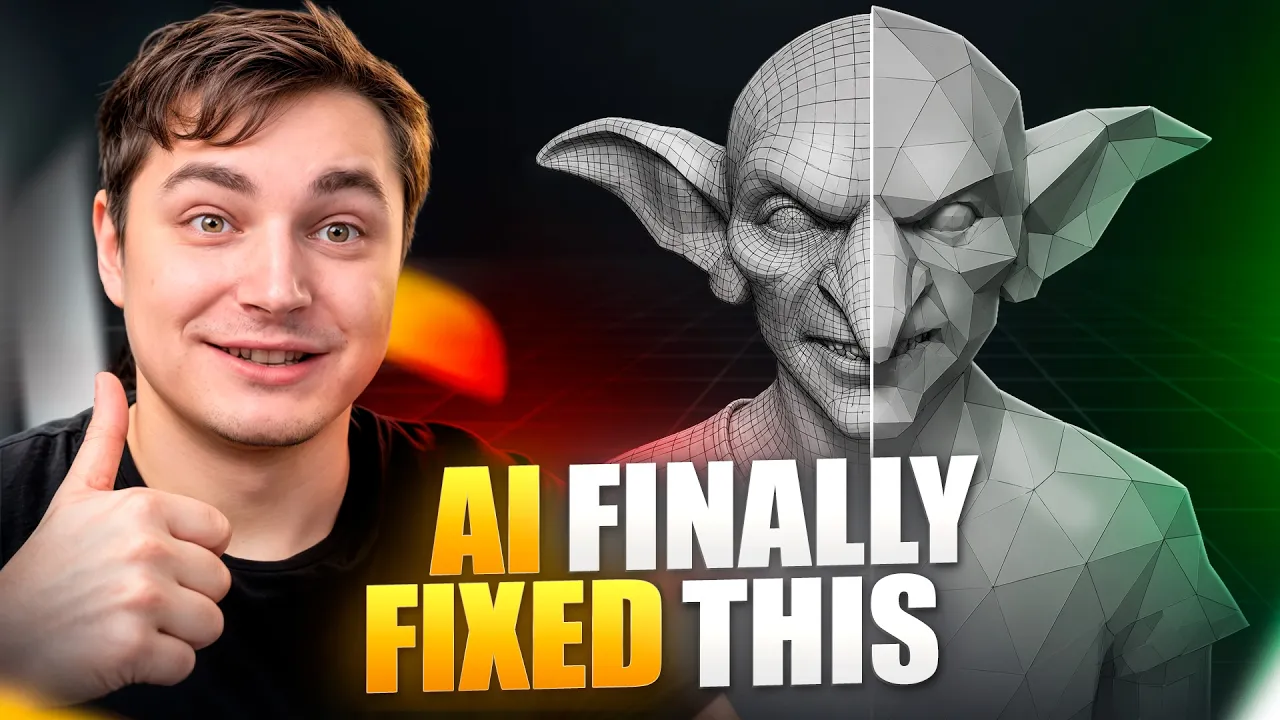
Take a look at these meshes, especially on the topology. This looks like a professional artist made them. Well, nobody actually made them. This is new AI guys. And this one is absolutely mind blowing. I actually feel that this one is revolutionary. It's not just new update. We finally get perfect quad topology. Geometry follows surface exactly like the artist would make that. And you can actually control the desired poly count. It's probably the first time we can generate low poly without need of further refine. If
89 words, the words spoken in the first 30 seconds at 177 words per minute.
Free, no signup. See how the first 30 seconds hold attention, with rewrites.
Sentence shape
| Measure | This transcript |
|---|---|
| Sentences | 614 |
| Average words per sentence | 8.5 |
| Longest sentence | 48 words |
| Questions asked | 20 |
| Sentences containing a number | 25 |
Most used terms
Filler phrases
235 in total: like 165 · actually 32 · basically 13 · right? 13 · you know 6 · I mean 3 · sort of 3.
A literal whole-word count of the same phrase list the Prepublish browser extension uses, so a phrase inside another word is not counted and a phrase used in its ordinary sense still is. It is a count and not a judgement.
What this transcript is
Every word below is the caption track YouTube publishes for this video, pulled from the video itself and reproduced unchanged. It is not Prepublish's writing, not a summary, and not a re-transcription: it is the video's own published captions. English captions, published by the channel, in the video’s original language. Source: the video on YouTube. A channel that would rather this page did not exist can ask for its removal through the contact page, and it is removed.
Take a look at these meshes, especially on the topology. This looks like a professional artist made them. Well, nobody actually made them. This is new AI guys. And this one is absolutely mind blowing. I actually feel that this one is revolutionary. It's not just new update. We finally get perfect quad topology. Geometry follows surface exactly like the artist would make that. And you can actually control the desired poly count.
It's probably the first time we can generate low poly without need of further refine. If that's not enough, you won't believe how fast it is. It's just real five to six seconds. The time I was talking about it, you can generate three to four meshes. That's insane. So it's obviously huge. So let's dive into it right away. We're going to check different cases and challenges, paying extra attention on the wireframe. And I guarantee you're going to be shocked.
And I'm also going to show you practical example with my AI character workflow and show you how faster it is thanks to this new update. But before we start, guys, click that like and subscribe button. I do my absolute best to keep you posted the day the news comes. Being first to make this video for you guys. Really appreciate your support. Let's get started. So the model name is Tripo P2, which is a continuation of Tripo P1, which also called Smart Mesh.
Smart Mesh, because the parts are logically built and I made a video about that. It was already huge at that time. So it's already been five months and we finally got the update. And this one is insane. Just so you understand, Tripo P1 still taking a lead on top three AI arena. And by the time you watch this video, we're going to add P2 here for comparison. So you'll be able to see how it performs. And I guarantee you will be top one in terms of settings.
We pretty much have the same functionality, except we finally have quads. Yes, these quads are worth waiting. Let's start doing tests. I will explain all the details along the way. First thing I was curious about how good it will handle faces. And I'm going to generate anime faces. I also going to generate stylized faces. I guess we're going to keep the similar amount of quads around 2500. And poly count choice is absolutely important here.
We're going to show you like how different the results are, depending on the poly counts. And they absolutely make sense. And here's the realistic. Let's say we're going to go with 2500 as well. And you can see the generations basically done while I was adding the next image. So let's check the results. Let's start with the anime. OK, what I want to point out here is that eyes made like anime eyes. So if you don't know, this is basically an approach to flat anime eyes.
There are no spheres usually. Also, I want to point that every eyelash, etc. is a separate mesh you can see here and here. So it's easy, very, very easy to control the brow as well. Thin brow. You can see like how it works. The mouse. And of course, if we take a look inside the mouse, we can see that there is like a mouse itself and is absolutely unbelievable. You might say like there is no backside overhead, but this is actually how to the artists make meshes because there will be hair.
If, for example, we add more polygons, let's say 3000 quads, we're going to set. Most likely it will regenerate a different way. Here we go exactly as I said. So basically, if you know what you need, like if you're an artist, this is basically the only setting you need to get any result that you need. This is absolutely insane. And guys, if you want to try this amazing low poly, it's available on Tripo only right now, since it's only released.
And by my link in the description, you will get extra 500 free credits. Even without this update, I still highly recommend Tripo because it's taking first places on the top 3D arena. And there there is almost 200000 votes already. So it's not only my opinion. You are also very welcome to just go here and take a look at it yourself. You can compare side by side and then like see which actually works Blender. Let's take a look on stylized generation.
Here is the reference I used. OK, and this one is different. Maybe here it already can do the spherize, right? But here we can something something in the middle, actually. But other than that, look at this. It's absolutely beautiful. Right. The quads, the mesh, the loops goes all around. I think it's just beautiful. Right. And here's the realistic one. OK, this is also very, very nice. Look at the loops. They are almost 100 percent perfect.
I would say this a little bit like loops go in circles. So it could be Blender. Well, actually, let's try to do one generation more with a little bit higher poly count. Here's the version with more poly count. And yeah, I mean, we can see the same pattern. And you can see the eyes are half spheres exactly as they should. Cool. I want to try to do it with small poly can. How about one point five thousand quads? I want to see Max Capacity in terms of the wireframe.
OK, here we go. Here on the lips, I can see very nice loops. OK, the nose is nice. The only thing I spot is that the polygons goes by a spiral here on the eyes while they look fine. Maybe that's the only thing that ideally should be looped. Other than that is just amazing mesh. And the eyes are not spheres, I guess, because of the low poly count. So we can actually replace the eyes, which I still usually do. And this, by the way, is one of the most difficult cases.
And it handles is way Blender than any ancestors. Let's see how it's going to handle some characters. I have this orc. Let's try him in five thousand polygons. Also, we're going to, of course, try the Mr. Mark, this big gentleman. And if you still not subscribe, Mr. Mark kindly ask you to subscribe because he's small. For Mr. Mark, we're going to go with four thousand quads. Let's try it out. Also, some small cat character.
Let's try it like to do it like quite low poly because it's quite simple. I'm going to try actually two thousand five hundred to see the result. Also some robot. There are quite a lot of details. So we can actually go try like eight thousand. Let's see how good it will be. And here's the first result is the orc. By the way, here is the setting like to preview shading. So by default, it's flat. You can also choose to smooth like depend on how you used to it.
Right. So maybe this one is like more how you used to preview it in your software. Right. I think like for character, that makes sense. So, you know, like that basically it's smooth, but it's flat. And you can see the polygons Blender. And guys, this is like absolutely insane. I would say some details might be omitted along the way. But like maybe I will fix this too. A little bit. But overall, look at this. This is absolutely insane.
Even eyes are all spheres. That's crazy. Take a look on the garment. And the cool part is that there is basically nothing inside. So it cuts the body where the clothing goes on top. While you can see that there is like a gap. So basically it keeps the volume right. This is absolutely fantastic for me. Honestly, I would say like, OK, there are like some small thing that I will fix as a professional artist, maybe one, two loops.
But compared to what it was before, this is like one hour to three minute of fixes, especially especially if you use the right approach, which still is to generate it parts to parts to have more control over it and get Blender results way faster. Crazy. Let's take a look on the piglet. Also, this is like almost perfect job. The mouse is open. We can see lower teeth. We can see upper teeth. We can even see the tongue, the hats.
Look at the topology of the hats. And you know what's cool? Let me show you. I got to quickly export it to Blender and explain why we love so much this smart mesh. Now here is our piglets. Now I got to go to edit mode and let's say I want to move the hat around. So here's what I'm going to do. Like this is the first time I actually open mode. I'm going to press control L and then the hat is selected. The control L in Blender basically selected by the linked.
Right. And each mesh, like I can press on the eye and I most likely going to have this result. So I'm going to press on the head and I have whole head selected at once. Neither AI basically does this great job. I want to remove the button. Boom. One click on one vertex, press X. I don't have this button anymore. I want to fix this one. Boom. Easy. Oh, OK. I think we found the issue. There's something with the tail, right?
I don't think it's like a real tail. Hey, but that's not a problem. We can fix that easily. However, I still recommend always generate it in parts. That way you will always have more control. But this is fantastic. If you're a 3D artist, I really will appreciate your comments on this particular feature, how important is for you. And just for those who are wondering, like why it's not texturing at this, because a smart mesh produces only topology very fast.
And of course, you can text for that. Just go to the texture tab and select the texture. Let's say let me show you here. And I'm going to show you the whole workload when we're going to do the complete character for now. Main thing here is like the wireframe, like how juicy is it, like how capable it is. And here you can see the texture version. So texturing also works quite nice here. While for texturing, it's still not that perfect.
So if you struggle with AI texturing, I have best possible tutorial about texturing, specifically how you can combine Tripo with motif all together, like it's like best combination. Like the video will be somewhere here. Now a little bit more meshes. Here we have the cat that I generated very low poly. Look at the mustache is like each mustache is like a polygon. And look at the wireframe overall. I think it's crazy.
And reminder, like we choose to go with one thousand five hundred quads, which here equals two thousand five hundred faces. And the calculations are a bit different. Nice. And the robots. Wow. For those who was wondering, like hard surfaces, how good it is, guys, it is good. So it actually decided to put one polygon here, not to add like a lot of loops, etc. Because this is a flat surface. It's how artists we actually do that.
Look, it's crazy. Look, I said eight thousand quads budget and it doesn't spend it like everywhere. If like, you know, like you have like a lot of budget, like why not add here more quads, but it doesn't because it doesn't make sense to have it more here and here. And look, look, all the shapes like it's beautiful. It uses quads where it actually needed or this small part. Look, look here, look here. Wow. And what I really like is that like the parts that are inside, it doesn't add some polygons rights, like it basically keeps it open.
Wow. This is an amazing job. One more thing that always bothers me and I'm struggling with is hairs. So we're going to generate a few hairs. They must be actually optimized. So we're going to give fifteen hundred budget here for this here. We're going to do another female here. We're going to give two thousand budget. Let's try it out and short male here. I think we also can go fifteen hundred here. So first result is ready.
OK, let's take a look here. OK, quads. Nice. Take a look. It's not making the inside part as a polygon. It's open because it sort of knows that you're going to put it on head anyway, and that's insane. I would say like here it's a little bit mistake because most likely this strands will be visible and you have to cover them or it does. Oh, actually, it does. Sorry. I think it's just difficult to see it here because it's thin.
It actually did what I said, right? So allegations dismissed. And look here, it's also beautiful, right? Maybe a little bit not perfect in terms of this double strands. I think like, yeah, it can be so, but probably not Blender be so. Right. Maybe because of budget. Let's take a look at one more. Here we go. OK. And I just made video about generating that with P1. And I was struggling with this sort of here. Here it's so much Blender.
Right. Look, strands are logical. OK, OK. We found an issue. I found an issue. There is a hole here. So sad. This guy was trying so hard and get so far. But in the end, because of this hole, he's going to say it's not perfect enough. But for me, guys, this is absolutely insane. And I cannot imagine not using this. It's like driving a car comparing to flying. And we have stylized it male haircut. OK, so OK, so this is the messed up.
This is a very difficult test. Actually, let's give it one more try. I did like fifteen hundred. How about we try three thousand polygons? Because I like the front view. But from the back perspective, there's a little bit of mess here. Right inside, like some some strange loops. And here a few strands like basically go wrong. Let's take a look if we give more polygons. Much Blender result. Way Blender results. Oh, nice.
Yeah, I guess. As I said, like the choice of polygons is absolutely important. This result is wow. Just look at this. Each strand individually done. Actually, let's try like six thousand. What's going to do? I think six thousand will make it worse, to be honest. Like this this three thousand is something like a perfect balance. And look at this. These strands that are not close to the head, it made the double side for them.
And the rest is open. This is absolutely beautiful. This was still looking at three thousand faces. OK, so six thousand generated head. I think it taught like I don't know where to spend this budget and a generated head. This is because on the reference, you see, there is a line. I think that's the reason. But the cool thing is that on the lower polygons, it did not do that. Technically, this should not be here. Next example is garments, anime garments.
Let's give it like three thousand budget. I have boots from Puss in Boots. For boots, we're going to give two thousand. I have classic human garments like boring. I know. Let's give it like four thousand boss and a complete costume. Why not? For this costume, I'm going to go with like, let's try seven thousand. Let's say anime clothing. OK, here we go. A little bit weird in terms of polygons. Yeah, definitely want to fix it like some some interesting stuff.
Otherwise, look at this. Wow. Look at how it does sleeves, right? So it adds one loop and nothing. It doesn't go inside. It just adds one loop on the edge. That's exactly how 3D artists would do. Maybe 3D artists can add one more small extension inside as a loop. Just depends again, like how close it goes to the hands. But if the hands actually touches this, you don't need that. Same goes here again. Like, look, this is a beautiful work.
This is absolutely beautiful work. Detail. I don't think like I specify detail, but I also didn't specify any other side view or back view. So that's potentially possible. If you want like 100 percent good results, you can specify like back view or one additional view. So there is nothing generated. I think like I think anime style might mean this like Necco girls or something. Look at the boots. Hmm. Beautiful. Like what to change here.
I don't even think like there's some changes needed. Like maybe like there's like small, thin line of polygons. That's really redundant. Maybe it's actually fits. OK, like I see like very, very small issues that technically can be considered like, oh, like it's not a professional, but overall, that's beautiful. The boots. OK, sometimes it also does it like this. So basically cap it. Also could approach. Well, I don't know what to say.
Like it's everything is good here, right? OK, laces is not a bad choice. Let's try more budget and see if it will do the laces as separate objects. I think it will do. I'm going to try four thousand. And last time I tried two thousand something. And indeed, with more poly counts, way more details. And look, each lace is basically there. The funny thing is that there are no laces visible on my view. And I think that's the issue, right?
So if I want like laces to be Blender, I think I definitely need to add the front. And unfortunately, there is a small hole here. Other than that, beautiful. And again, like, look, the distribution of the polygons is smarter, way smarter than it was before. Like it doesn't add like another loop where it's not needed. Human pants. OK, here we go. Right. I think this is probably the one first example. I'm not really satisfied over things.
The faults here. Right. So here we go for flat. It's not bad, but it's not the best way to go over faults here. Right. And since it tries to follow the shape. Yeah. Then this is not the best use of this feature, because probably this Blender made through simulation or something. Let's take a look on the jacket. Jacket has less faults, but we can see the pattern also follows here. Right. So it tries to do the faults, like keep geometry.
And I gave it like a budget, like four thousand quads. Going to be honest, this is not the best use case for it. Even though again, like, oh, look, there's a separate thing. Right. Cool. Even though it tries really Blender than it was before. But it's not ideal mesh, not ideal execution and full dress. This one is actually way Blender because it's like a neutral pose, a pose. And we have like less fault. So it follows nicely.
You can see each pocket here is like a separate mesh. Wow. Cool. All right. All right. Right. And maybe the budget here, like eight thousand is probably too much. Right. Let's try more hard surface. I have like this cool weapon prepared. We're going to try it like with two thousand five hundred. Right. Also, I have sci fi riffle flat surfaces. I think that should be very nice compared to what we just saw. Let's try three thousand five hundred here because there's like small details.
Or just three thousand. OK, first one. Nice. Wow. So this is like pretty much ready asset. OK. Like on the sides, maybe there are no need like of one loop here. Right. Just to not have like too much stretching. Other than that, it's ready assets to get textured again. Like, look, look, every button, look, have every button done. Look how it does the handle. Look here. Stunning. Amazing. Let's try to texture this one to take a look.
And the rifle. OK. Just look at the beautiful choice of the polygons here. Right. I don't know. If you're a hard surface artist, let me know like how you're going to rate this mesh. This one is an issue, I believe. I'm not sure this should be like that, like this, how it connects all the faces. I think Blender ways to connect it in the middle is technically OK. But definitely not the best way. And I see that's the pattern here like that.
Actually, I want to ask Chad GPT, is this how professional topology should look like? OK, so Chad GPT confirms it should not be like that. So we either go in the middle or we can also do the less polygons like dividing them. OK, so there is a room for improvement. Oh, by the way, here it's Blender job, right? All other surfaces, I think beautiful. Also, let's try to texturing it. This is, by the way, the textured weapon is a complete asset, right?
Just look at this. Right. Nice. And here's a textured rifle. Wow. You can also add PBR here. Let's let's actually try to add PBR as well. With PBR, it actually makes much more sense. All right. Can be more reflective, but yeah, definitely Blender. A few more tests before we make a character. Here's the Fox head. And here's the result. It's absolutely beautiful. Look, look, look. I that's so cool. I don't know what to say.
I think it does way Blender job with stylized. The realistic stuff like garment with folds less accurate. And here's the wolf. Here is the input. And here is the wolf itself. Also, look, it did not create any unnecessary polygons where it's not needed. That's amazing. You might wonder how it going to texture all of this. I also wonder that let's try to texture them and see. And here we have the folks. Nice. And here's the wolf.
Wow. That's just fantastic. There are no like skipped parts, you know, like a textured nicely. Absolutely nicely. Like look at this absolutely stunning guy. That's beautiful. And quickly, a few more examples. I was trying to challenge it with the text like Guild of Smith, for example. Unfortunately, still cannot do text. So you can see everything is fine except text. One more challenge with text. Absolutely nothing is just ignored the text.
And I gave like four thousand quads. Like, so maybe consider it's not enough. Let's actually give it like 10 ,000 quads for the coin. Also, 10 ,000 quads. Let's see if it can do the text. No, absolutely ignoring. I think the data said that they were using like this considered like as a texture. Well, actually, I just realized that technically that's Blender to make it as a texture. Right. This text, not as a geometry.
But let's say I want it as a geometry and that will be a big object. So that's not going to work. However, even if it decide to do the text as geometry, you can see, unfortunately, it's not going to work. So this is the bottleneck. It can't do the text accurately. Did some houses. OK. Also very interesting. Like, look here, it just made like one triangle. Wow. Interesting. This is a simple house, right? Oh, look, some parts are actually inside.
OK, OK, OK. Yeah, you cannot see them from here. It's like two solid polygon. OK, here you can see them. Also did a wheel. Oh, but this one is actually very interesting. Nothing here. OK, very good. Look, wow, this is what actually interesting. Look, look, each brick is done in exactly the same way. And there are grass blades. Oh, wow. This is so cool. We have these grass blades and stones. I really want to know how they're going to handle this extra here.
Like, this is so interesting. We're going to get back. Did the car also. OK, this is an issue. It should not be like that. So this is a problem. Other than that, wheels, the body. Look, it's almost great. But for this complex geometry, I would be honest, like there are some issues, obviously, like these parts here on the front glass should not be like that. But honestly, if I would have to make the car like that, I will definitely explain the parts like 100 percent, because again, there is inside part of the car.
Right. And Terrier. So like glasses separately, interior separately, and then you bring it up together. Or on the generation, I would make it like a blackout. So the glasses are not transparent. Again, here's a textured version. Wow. Well, just tell me this is not magic, because look, all grass plates are individually textured as grass. This is an amazing low poly assets on the three thousand six hundred faces. Look, we have geometry everywhere where we need geometry.
Look, look, look, this is just beautiful. Can't say anything else. All right. I think that's clear enough. That is amazing model. It has still some limitations, such as text, such as realistic objects, etc. Now, let's say you have a sterilized character and I want to create it. How fast in my workflow will be thanks to this new update will be significantly faster because they're going to keep whole headache with this low poly stuff.
And I got to generate this amazing cat and it's perfect. Challenger here. Why? Because everything is sort of stylized to niche. So let's generate it. So we're going to create all the objects first. You can see all the settings that I'm used. I got to try to go quite low poly. I got to actually generate body at once and just look at the results. Like everything is there. Like, I mean, I don't really need to mess a lot.
I also got to texture it here right away in Tripo. Oh, by the way, there is like a preview in TuneShader. If you intend to use TuneShader, you can preview it here and see like texture works well or like to do another regeneration. But I'm not going to generate everything at once. I definitely got a separate accessories such as boots, such as a weapon hat, etc. And I think like I can even generate the belt separate just to set the right amounts of polygons, etc.
So that was like 10 minutes in general. OK, maybe extra 10 minutes because I spent some time extracting the images, taking all of that to Blender and let's combine them into the character and cuts the unused geometry. One thing I spotted because I access this Tripo P2 in Blender. And when this video is out, it should be publicly released. I'm the Blender sister. Like somehow they give me access. One thing I spot that they can be some inverted normals.
I think this should be fixed before they release. But just to let you know, honestly, there was this small issue and I had to manually invert the normals. I think that was actually related not to P2, but to texturing, how the surface was recognized, like inside outside part. Anyway, that doesn't stop me to build up the character that was like a small hiccup, bringing all parts together, like very easy, like sculpting modes, align all the objects, etc.
If you work with texturing models and slow poly, you can also do that in edit mode. There are some settings like to keep the texture from stretching, etc. And one small thing that I did in this case is since I generated some parts separately, I was adjusting the colors to huge saturation a little bit and boom, the character is there already. Look, well, I mean, 30 minutes at most for me and you guys again, like following this advice is keep it in parts, learn a little bit Blender like this, how to do this movement around like manipulation, do it low poly right away, do the right texturing.
Like there's like all that stuff is amazing. I just recently dropped like huge video on YouTube, like explaining all that steps and this will be a huge addition or you're very welcome to join my 3D AI course where I going to guide you from A to Z. We have amazing team helping me like to answer all the questions we prepared, homeworks and I try to keep everything up to date when we have new updates. Right now we have more than 100 happy students.
Link will be in the description. Take a look. Now the next step is to rig the character. You got to quickly do that through Accurig. Very simple, right? Just go set markers for body, for fingers, etc. Like very, very simple again, when you work with low poly meshes, like it's absolutely easy. I really like this moment because it's like when the character first come alive, that's absolutely stunning. Then as I always say, like rigging is probably one thing that is not really sold at that level that always scares beginners, but it's not that hard.
Just looks hard, like weights, bones, etc. I think that's still worse and knowing this part or like learning a little bit. It's really not that challenging because you have the mesh there. You just need to distribute weights. You need to learn like how to work with these brushes, etc. I have like dedicated video about that. In my case here, I just reviewed some weights and added bones to the tail because I want to assign it as a physical bones in Unreal Engine, right?
So I can see here's how it works. And then it's time to Unreal Engine. I'm going to use that parkour template and just retarget my character onto it. I made a complete video where I explained this part as well, if you want. So in Unreal Engine, I set the physical bones or I set the clothed physics because I have some loose parts, constraints, of course, and replace it in the blueprint of that template so I can run around and have fun, right?
All together, a little bit more than one hour, guys. And look at this. Here we go. Probably. Yeah, I should have do the shoulders a little bit Blender. I can see it right now, but we're now already recording that. But everything else, absolutely nice. Well, that was Steph as usual. Don't forget to like this video, guys. Really, really appreciate your support and seeing in the next one.
The words are the caption track's own and nothing is reworded or re-transcribed. Paragraph breaks are placed between sentences so the text reads as prose.
Free tools for your own script. No signup, no login.
Paste your draft and see where viewers are likely to drop off, with a rewrite for each weak line.
Paste the first 30 seconds of your own draft for a hook score and rewrites.
Check your draft against YouTube's advertiser-friendly guidelines before you record it.
Read this channel's public videos and transcripts, and download a writing brief for it.