Getting the transcript
Reading the captions from YouTube. A video nobody has opened here before takes 10 to 30 seconds; this page fills in on its own.
Getting the transcript
Reading the captions from YouTube. A video nobody has opened here before takes 10 to 30 seconds; this page fills in on its own.
Arktal · @Arktal
This video has no Most replayed graph yet: YouTube shows one only once a video has enough views. These are the moments viewers replayed most in Arktal's most watched videos.
Most replayed moment at 10:04
2.9x that video's typical replay level
first though it will not rotate like the cylindrical constraint if you already know about that one and of course there's also limits enabled on this in the properties this time you can adjust the upper and lower position limits of the attachment one and it will mark a
Said at 9:58
The graph counts replays. It does not show where viewers stopped watching.
Words
5,367
Runtime
32:38
Speaking pace
164wpm
Reading time
22min
164 words per minute, between the 160 25th percentile and the 181 median of 349 measured videos. That distribution comes from the 349-video hook study.
Opening (first 30 seconds)
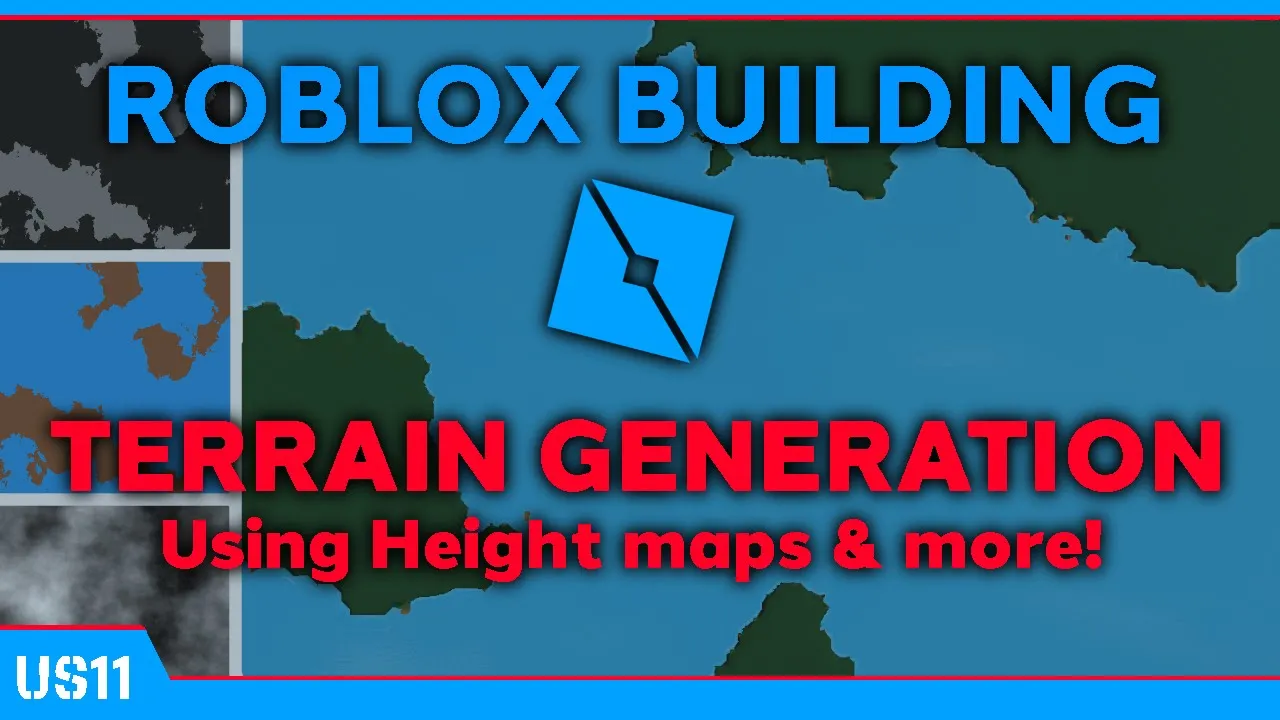
hello and welcome back to another roblox studio video in this case it's not really so much of a tutorial but there are tutorial aspects in it because today we're going to be making and generating terrain for your game or your place how you can design it how you can um make it using a height map and color map techniques like that that will make it very unique in your game and you can get exactly what you want for
82 words, the words spoken in the first 30 seconds at 164 words per minute.
Free, no signup. See how the first 30 seconds hold attention, with rewrites.
Sentence shape
| Measure | This transcript |
|---|---|
| Sentences | 1 |
| Average words per sentence | 5367.0 |
| Longest sentence | 5,367 words |
| Questions asked | 0 |
| Sentences containing a number | 1 |
Most used terms
Filler phrases
110 in total: like 42 · uh 29 · um 18 · actually 7 · kind of 6 · you know 6 · sort of 2.
A literal whole-word count of the same phrase list the Prepublish browser extension uses, so a phrase inside another word is not counted and a phrase used in its ordinary sense still is. It is a count and not a judgement.
Free, no account. See where attention is likely to drop, with a rewrite for each weak line. The free check shows the scores and the one issue costing the most. Or run it on the words above first.
Free · No login · See a sample audit first if you prefer.
What this transcript is
Every word below is the caption track YouTube publishes for this video, pulled from the video itself and reproduced unchanged. It is not Prepublish's writing, not a summary, and not a re-transcription: it is the video's own published captions. English captions, generated automatically by YouTube, in the video’s original language. Source: the video on YouTube. A channel that would rather this page did not exist can ask for its removal through the contact page, and it is removed.
hello and welcome back to another roblox studio video in this case it's not really so much of a tutorial but there are tutorial aspects in it because today we're going to be making and generating terrain for your game or your place how you can design it how you can um make it using a height map and color map techniques like that that will make it very unique in your game and you can get exactly what you want for your build and in this case we're going to be using the shed as our model to work with this terrain and we'll be placing it throughout the terrain whatever and we'll be making this rain around it so let's get right into it alright so getting right into this video i'm going to initially start by creating terrain the old fashioned and honestly the slower way by using the tools roblox provides and then afterwards i'll show you how to do height maps and maybe even color maps on both paint.net and blender okay so getting right into this you're gonna make sure you have the terrain editor open and then you're gonna go to the create and region and edit tabs and use your tools there i'm gonna speed up the process real quick and you guys can watch the buttons i'm clicking as i go through this as well as the keybinds that will show at the bottom left and you can follow along with what i'm doing but until then i'll see you afterwards when i'm done [Music] so [Music] um [Music] okay so i'd say this terrain generation and some of the editing that we've done is pretty much done um as you could see as you could tell it was pretty slow but uh i've made it look pretty pretty good we've painted we've uh checked out the grass changing the colors used the grow tool i didn't make any caves so i didn't use the road tool or any deleting tools but i uh put the shed over here and i added a free model jeep here and i added roads that we can drive on now so we have roads here and here i go i'm traveling across our terrain this works uh this jeep works pretty well with the um the terrain i sort of flatten it out i use the smooth tools use all sorts of stuff um i did not get into the region tools but i might do that with the hype map and stuff but uh if you guys want to learn about those tools you guys can go check out my other video i recorded it before this one and it was my latest so go check that out if you want to learn more about the tools but otherwise you could see it's not that hard to use terrain and it can turn out very nice so um now i'm going to show you guys how to do height maps and color maps and how you can make them so let's get right into that so to get rid of the strain i'm gonna go ahead and clear all these trees out first and then once i've done that oh i accidentally deleted the shed we don't want to do that just go to the folder that we made filled with trees delete that folder and that's why it's always good to have them in a group or trees so you don't have to single-handedly go select them in the workspace or in your your game window and to clear the terrain we are just going to either go to the create tab on the terrain editor and press clear or go to the command bar and type in workspace dot terrain bullen clear open parentheses and then there goes the terrain we're also going to delete that jeep and then we're going to leave the shed there for now because i'm going to go create the height map and then we'll move it around uh accordingly based on our height map and how that comes out if you don't have this downloaded i will leave a link in the description for you to go download it it is free and it is fairly simple to use there are tutorials all over the place on how to use it and i think they have a forum for people who want to figure things out or how to do things so you can go check that out first thing we're going to do is click this new button it's a page with a plus sign or you can also press ctrl n and this will load your create a new image we're going to set the width and height to 1000 pixels so it's a perfect square it's just going to be like this image that i already have loaded out we're just going to work with this one right now and as soon as you open 8.9 and create your new image you can go all the way to the right to the effects button or tab up here click on that it'll open a drop down click on render or it will you can open it by just hovering over it and click clouds and it'll load noise that makes the shape of clouds so you have two options here and well actually you have four options if you're including the blend mode and random noise scale and roughness are going to be your main two options and this will change the overall size of your image and your noise and what's going to be showing so if you have it really low it's going to be very distinct there's going to be a lot of noise or if you have it very high it's going to be separated zoomed in pretty much and you won't see that much noise your roughness will determine how distinct your noise is so it could be very blurry it could be very distinct and uh specific as to where the noise is on your image and we're gonna keep it right in the middle because we we don't want our land to be super distinct and because that would cause a bunch of little tiny bumps you see all these tiny little white spots that would be picked up in the height map and it would be considered in the uh generation so we're going to keep it around here keep it very smooth and simple and then you can also do random noise to randomize where your mountains or ditches might be and you can keep clicking that it's always going to be random so you can keep clicking that depending on how or what you want and once you get that you can stop you can also change the blend mode this won't change much but it can change a little bit of things it's not worth it to change the blend mode unless you're working with another image beneath it or you know you have another layer on top of it or beneath it so it's not really worth it um otherwise that's pretty much it for paint on that now we're gonna move on to blender okay so now we're in blender if you don't already have this downloaded make sure to go download that it is free i'll leave a link in the description as well i'd recommend that you download version 2.8 because that would be much easier for beginners this is 2.9 you can download it if you want you might have to go watch some tutorials to get to know some things but i will be jumping right into it and showing you what to do first we're going to delete this cube we're going to press shift a go to mesh and then we're going to also click plane and this is what we're going to be working with this is where we're going to make our image we're going to go on the z-axis we're also going to go down here into material properties off to the right going to go down to that little sphere it's kind of four split uh shapes on that sphere then we're gonna press new here we're gonna add a new material we're gonna press tab to go into edit mode and this will allow us to assign that material to this plane and now we can add a noise texture and shading in the nodes that we can work with yes we're going to be working with nodes here we can work with that to create our noise and that will be our height map we'll save that as an image so now that we have the material added we can go to shading we have the shader and then the material output we're going to press shift a in this window in the shader window and the node window really and then we're going to add our noise texture and if you have node wrangler enabled you can press ctrl t and this will add the mapping and texture coordinate if you don't you can go to the search bar by pressing shift a and typing in map mapping and the texture coordinate individually and you'll connect the texture coordinate to the mapping once you have it open like this or you have both of them you can choose generated normal uv any of these options depending on what you're working with for now i'm gonna do generated because we're trying to generate noise on our plane and then we're just going to plug this factor in from the noise texture into the shader and then we're gonna get our noise as you can see there now that we can see our noise we can start manipulating it with our uh noise texture node here works in a similar fashion of paint.net except you have more um customizability in blender you can change the like stretch of it and you can change the direction of your noise on the x y and z axis and all sorts of stuff you can change the coordinate um and what node is being plugged into what so it could be based on the object or as we said it could be generated but it's entirely up to you based on how you want it to be what i'm also going to do to add and make the colors more distinct is add a color ramp that way we can have specifically specifically our blacks and whites and we can change the intensity of them and we can change where they are on the image and how intense they are on the image like right now we just practically created a camo and there are no grays it's just black and white and so in certain spots we just have all mountains and in certain spots we just have like very deep canyons so if i was to save this there'd be like very very high mountains and then very very low uh ditches so that way that could look pretty cool we'll save that as an image so it kind of played around with it there you can play around with it in the noise texture as well you can change uh if it's facing you can change if it's dimension is 1d 2d 3d 4d this doesn't really change much but it can it can minimally change how it looks i'm going to keep it 3d because that's how it's default set you can change its scale to whatever but this is where it can get really interesting um you can change the color ramp to see how distinct your colors might be and if you want it to fade in and be less like a spike and more like it fades into a mountain or looks more like a mountain and it's not so jagged but i'm going to keep it this way as we had it i'm gonna keep it let's uh yeah let's do that i guess and then you can also change the detail of it and how distinct the shape of the mountain or ditch is so this is pretty interesting we'll keep it like this i'm going to up the scale and i'm doing this by lowering lowering the overall number of the scale i'm going to keep it somewhere around like this you can edit it to however you want it to be um whites are high points so let's let's actually swap this and then change the scale so there we go that should be good this is going to be this is going to look pretty funky in in roblox but it looks pretty realistic it looks like there could actually be these could actually be uh islands or um yeah islands on a ocean or something that could be pretty interesting you can also change the roughness of them this will kind of distort it and determine how rough your uh mountains or islands or points will be whatever you want them to be um so we're going to keep it kind of gives it of a kind of gives it a more realistic look as well looks more like actual land on earth so i'm going to keep it like that that should be fine for now we're going to upload that into roblox later but now i have to show you how to upload this into roblox you can also change the distortion by the way this kind of like makes it uh warp and curve and twist and turn stuff like this you don't really need to do that though so now i'm going to show you how to export this and save it as an image and stuff like that you know just work with these settings work with these nodes and you can get your output so there's two ways you can do this you could either bake it and save it as an image that way or you could um render it and you can save it as an image that way by doing like f12 and doing your camera manipulation and stuff like this we're going to go ahead and try and show camera manipulation and rendering the plane and then saving that as an image and then importing it into roblox and then we'll also do the baking method so first what we're going to go ahead and do is go to our render properties which will be indicated by a camera you can see where my mouse is right there we're going to click there i'm going to go to our render engine change that to cycles and this will allow us to bake and uh render our image as we want it to as we want it to be and next we're going to go ahead and go into our camera view our camera's right here for now and we're going to want to reset it to where it has an overhead or bird's eye view of our plane so we're going to go ahead and press alt r and alt g this will reset everything that has been done to it it's rotation and movement then we're going to press g and then z to lock it on the z-axis and we're going to drag it up above this image we're going to then go to the camera settings right here it's the object data properties and in this case it's a camera i'm going to go to the type up here and we're going to change the view from perspective to orthographic and this will make it so we can change how we view the image we can make it square if we want we can then change the size of the camera specifically if we go to our output properties and if you really want to get what the camera is doing while you change it you can press numpad 0 or click this camera icon i don't have a numpad because of my keyboard and so i click that button to access the camera and after this i will change the size of our resolution and if we want a 2k image we're going to use two 2048 2048 and this will give us a square and now we can zoom in oops and zoom in the image by going to our camera settings and we can change our orthographic scale and this will change how close we get to our image and because we made it a perfect square by it being 2048 by 2048 making it 2k we can zoom into the image and now we have what we want you can also press shift to slowly increase or decrease your values so now we have that into our cameras per second perspective we can now press f12 and we can render the plane i almost forgot to mention that to get your actual render output you have to go to this viewport shading option which is the actual render output and as you can see i deleted my light you want to make sure you do that if you want to get your render accurate and what i'm going to do is add a sun and that will light up my plane and my image so now my uh image has a light source you can change the intensity of that light as well by selecting it and you can be in the object data properties it'll show a little light bulb at the bottom you can go there and change the strength of it you can change how dark your image is and if it wants to be pitched if you want it to be pitch black or the black to be more gray or white and the whites will always stay as white as possible but you can change the brightness of your render and since i have somewhere around there that that looks pretty nice now you can press render make sure you adjust your light settings and check in the actual render viewport shading to get your final result okay so now that our render is complete we can actually go up here to the image in the top left it'll be the button image click that go down to save as and save the image to and whatever you want it to be whatever name and wherever you want it to go and once we have that you can also take it back into other places you could also and once we have that done you can either automatically upload it into your roblox game into the assets so you can use it as a hype map or what i would do is take it into paint.net and you can change it into a color map if you want by selecting specific locations on your image and then changing it to whatever color you want it to be whether it be water or sand or grass or whatever so we're going to go ahead and do that i'm going to show you how to do the color map one thing i almost forgot to mention is to save it as a png rgba with a color depth of 16 but make sure you do that when you're saving your image all right so what we're going to do to start with the color map is we're going to open paint.net and after you save the image the rendered image you're going to take it to paint.net you're going to go up here to this folder button it's going to be yellow with a green arrow you're going to click that and open your image it's going to open into paint.net and the first thing we're going to be working with is the magic wand tool which will be located in the toolbox or toolbar whatever you want to call it and what this will do is select the specific selection that you want to edit so let's say i want to edit this grey only it'll select everything connected to this area and the colors that are nearby it won't select anything that is detached from it or too far because it's only recognizing the certain area that you selected but you can also press shift-click and it will recognize all the other areas and it will select all other colors similar to it if it's another color it won't select it but if it's like two shades off it will or might select it so you might want to be careful with that and it's starting to round the edges here so what we're going to do to make it more specific is lower the tolerance so we only coloring what we want specifically and not making blobs and we get sharper edges stuff like this so now once we have that island selected we can change the color so i'm going to make the brush pretty big you can probably use the bucket tool if you want the fill bucket but you don't really need to and if you want it to be faster i guess just use the um the brush better to be safe than sorry so because i want sort of islands on water i'm going to use a tan sandy color and you know whatever is used in the color map will be picked up in roblox studio and it will try and match that color for you so i'm gonna try and oh that's orange so we're gonna try and make it more tan like sand make it like that yeah there we go and then we're gonna just brush over it now we have sandy looking terrain or colors and the same thing we're going to do with the gray and we're going to shift click because we have some lakes over here and there might be some other hidden areas like these little dots in here and we're going to try and see if water will work and i don't think it'll work and that's what the sea level buttons for but doing the same thing selecting your color brushing over it there we go we've got a color map same thing we're going to go up to file and then we're going to save as we're going to save that file and we're going to upload these into roblox studio okay so once you have your two images that you want to work with unless you're not using a color map then you have one image once you have those images or image you're going to go to view tab in roblox studio because this is where we're going to now upload these images so we can use them on roblox you can't upload them as decals you have to upload them as game assets so they work inside of your game and you can work with the terrain because you need them as an asset image in your game for the terrain editor to pick it up and work properly so we're going to open asset manager by going to view that tab and then right next to properties and above the toolbox button there's going to be the asset manager button you can open that and it's going to open your game assets you're going to have places images meshes packages and audio we're going to be working with images in this case and to add your images you're going to go ahead and press right click and you're going to add your images now what's going to happen is it's going to go through the process of importing sometimes it'll show an axe if if this is the case you might have to resave your image or just rename it or edit a tiny bit maybe change a little bit of the colors you know if nothing's working one of those methods should work because it worked for me uh but yeah you'll just add the images and once it's imported it'll show a green check mark saying it's good to go but then after that it's gonna go through moderation and it's gonna have to be approved before you can use it as an asset image and if you try to use it without it being moderated then it will not work and the terrain editor will actually tell you that it hasn't been moderated so you're gonna have to wait for that but once it's been moderated you can use it you'll see it and you'll see it as an option okay so now those images have passed moderation we have the ability to upload them as the hype map and color map make sure you have the color map setting on you can do that by clicking on it make sure it's highlighted green oops i close the drop down but now that there are past we can select the height map the gray and white and black or the white and black image that will define our mountains and ditches and stuff like this and we can also choose our color map the one we colored in paint.net now we can press import and it will actually load the hype map so as you can see it loaded as we wanted it to now the importance of scaling it is so critical here because this will like change how well your height map works like for example if we wanted it to be earth scale and look like actual islands we'd have to make it much larger than this but this is fairly accurate this is pretty nice i'm gonna go ahead and also show you guys a larger scale version of it um you can change the height of your uh the overall height of your scale of your height map so you can have your uh lake area higher or lower so your water could go very deep or it could be very shallow and as i expected it turned into ice instead of water i don't think water can be added through a color map so we'll have to do like uh sea level over here or we can do region select and fill with water even though that might i'm not sure it might erase some of the land i hope it doesn't but now i'm going to show you guys what happens if you make it an absolute grand scale huge realistic and it like like you could take a year or probably an hour to walk across the entire thing so let's go ahead and do that now it's going to go back to import select your height map in this case it's named blender for me and then we got the color map and then we're going to make this absolutely massive and you're going to see the distinct difference everything's gonna be so closely resembling to the uh height map and every specific detail and this is important if you want your details to be this specific i had it way larger than this last time and it lagged me out but it ended up loading and it was just massive so let's go ahead and do this this is uh pretty medium so i'll see you guys when this loads because it's going to take a minute and don't worry because when you freeze it doesn't mean you've crashed just means it's loading sometimes all right so here we go it's loaded up and as you can see the tiny little details that you may not have seen in our height map start to show such as tiny little item islands like this they become larger and have more of a distinct shape instead of just being a little like dot so this is very cool and this could have a lot of purposes this looks like the old terrain this looks like old terrain i'm surprised unless i'm stupid and i just never used wood planks and on my uh my terrain so now i'm going to upload the terrain for our shed and i'm going to keep it fairly small so we don't have like this giant map to work with but i'm going to also keep it square so i'm gonna change our x to let's say three to thirty five hundred and then once my little thing disappears i'll change the z to thirty five thirty five hundred there we go just had to copy and paste the value but now we have a square terrain platform we have our color map and height map loaded and we're just going to go ahead and import it this one shouldn't take too long all right so there we go i might keep the selection if it will be that large i don't know if i can and you can choose box selection so i wonder i wonder how large this can get we're going to try replacing that sand with grass so i'm going to work with this terrain now and i'll speed this up so you guys can watch what i'm doing and then i'll get back to you after i'm done adding it and we'll have the shed in place everything it'll be nice [Music] okay so we've edited our um hype map generation here and it's pretty it's pretty scuffed i just copied and pasted a bunch of pine trees on tropical islands practically pine trees don't really belong in tropical islands or on tropical islands so we've got a road that leaves leads straight into the ocean and wood planks surrounding the edges of holes so you'd probably have to fix that yourself and then we got our grocery store for our 7-eleven down the street we're just gonna cut right through we're gonna go to uh our 7-eleven that we free modeled into the game okay you know for sake of time and then we just walk in we can okay what what does this guy say what do you want give me all your monies okay i like this i like this is a nice 20 20 oh it's a 24 7 it's not a 7-eleven copyright 24-7 okay let's let's see what else does this guy say i'm just kidding we're not gonna care about what he says we got donuts here too though man crazy so this is our hype map this is our terrain generation you saw me use the replace button and replace uh the ice with water or the glacier with water in that case and then i also replaced the [Music] sandstone with grass because that's how it was supposed to be or it was supposed to be sand but i also decided that it should be grass so now we're back at our shed and look you can look outside and look there's big grape um and the glass destroys it destroys the images oh well well it turned out pretty well oh my gosh this jeep's about to climb the house the shed okay this is a pretty long video i hope you guys enjoyed it or you learned something new if you did make sure to go ahead and like and subscribe uh also share this video with others they might want to learn how to do terrain and hype map and color map generation and stuff like this how to find them how to make them all this good stuff so i'll see you guys in the next video like and subscribe share the video turn on notifications do whatever to help me help me help you you know all that good stuff i'll come out with more videos in the future and uh i'll see you [Music] you
The words are the caption track's own and nothing is reworded or re-transcribed. Paragraph breaks are placed between sentences so the text reads as prose.
Free tools for your own script: paste a draft and see where it stands before you record it.
Paste your draft and see where viewers are likely to drop off, with a rewrite for each weak line.
Paste the first 30 seconds of your own draft for a hook score and rewrites.
Check your draft against YouTube's advertiser-friendly guidelines before you record it.
Read this channel's public videos and transcripts, and download a writing brief for it.