Getting the transcript
Reading the captions from YouTube. A video nobody has opened here before takes 10 to 30 seconds; this page fills in on its own.
Getting the transcript
Reading the captions from YouTube. A video nobody has opened here before takes 10 to 30 seconds; this page fills in on its own.
DatBoiEle · @DatBoiEle
Where viewers went back to watch this video again, from YouTube's public Most replayed graph, lined up with what was said at that moment.
Most replayed moment #1
3:214.5x the video's typical replay level
it load. And there's my tree. After you upload it, usually the texture looks weird. I'll show you how to fix that. So, I'm just going to ungroup everything inside of it. And then I'm going to select the leaves cuz the leaves definitely need to be fixed. Go to its surface appearance properties and change overlay to
Said at 3:14
Most replayed moment #2
5:334.4x the video's typical replay level
PNG. Anyways, we're going to need roughness, normal, and diffuse. And that's it. Okay. I'm going to use my texture through the material manager thing. So, let's open this up and I'm going to actually replace the ground texture. So, this ground texture, I'm going to replace it. So, let's look up ground within material
Said at 5:25
Most replayed moment #3
6:343.4x the video's typical replay level
you go. And then I'm going to check the set as override. Again, its base material is ground. So then it will actually override the ground texture. Now I'm going to change it regular to organic. Lastly, I'm going to go to terrain, go to properties, expand this right here, and then change the ground texture cuz that's
Said at 6:27
The graph counts replays. It does not show where viewers stopped watching.
Words
3,457
Runtime
14:34
Speaking pace
237wpm
Reading time
14min
237 words per minute, above the 201 75th percentile of 349 measured videos. That distribution comes from the 349-video hook study.
Opening (first 30 seconds)
I see a bunch of YouTube videos where they explain how to make your game super realistic, and I think they're all fake. None of them are actually doing it correctly. Like, let me let me go on YouTube. Let me go on YouTube and just look up Roblox Studio. How to make your games look a game look realistic. Okay. Well, you see my videos. Okay. Well, um, ignoring my videos, which are really good. They always have freaking light sun rays. Like they always put sun rays in the thumbnail and that for some reason equals realistic, but it doesn't. Like this. I'm sorry. This is ugly. I'm It's not ugly. I take it back. I take
119 words, the words spoken in the first 30 seconds at 237 words per minute.
Free, no signup. See how the first 30 seconds hold attention, with rewrites.
Sentence shape
| Measure | This transcript |
|---|---|
| Sentences | 382 |
| Average words per sentence | 9.0 |
| Longest sentence | 36 words |
| Questions asked | 9 |
| Sentences containing a number | 13 |
Most used terms
Filler phrases
94 in total: like 54 · actually 16 · um 10 · kind of 5 · uh 3 · basically 2 · you know 2 · I mean 1 · right? 1.
A literal whole-word count of the same phrase list the Prepublish browser extension uses, so a phrase inside another word is not counted and a phrase used in its ordinary sense still is. It is a count and not a judgement.
Free, no account. See where attention is likely to drop, with a rewrite for each weak line. The free check shows the scores and the one issue costing the most. Or run it on the words above first.
Free · No login · See a sample audit first if you prefer.
What this transcript is
Every word below is the caption track YouTube publishes for this video, pulled from the video itself and reproduced unchanged. It is not Prepublish's writing, not a summary, and not a re-transcription: it is the video's own published captions. English captions, generated automatically by YouTube, in the video’s original language. Source: the video on YouTube. A channel that would rather this page did not exist can ask for its removal through the contact page, and it is removed.
I see a bunch of YouTube videos where they explain how to make your game super realistic, and I think they're all fake. None of them are actually doing it correctly. Like, let me let me go on YouTube. Let me go on YouTube and just look up Roblox Studio. How to make your games look a game look realistic. Okay. Well, you see my videos. Okay. Well, um, ignoring my videos, which are really good. They always have freaking light sun rays.
Like they always put sun rays in the thumbnail and that for some reason equals realistic, but it doesn't. Like this. I'm sorry. This is ugly. I'm It's not ugly. I take it back. I take it back. Like this is one of my realistic builds and I'll be showing you how to make something like this, but it's just not good enough. Like realistic lighting and you just put some rays. That is not good enough. You can see my videos here, which is really good.
This one actually looks pretty good. This one actually looks pretty good. Again, another sun rays. Every time there's a another sun rays, but they get so many views. I'm telling you, just adding sun rays does not equal realistic. It's not. I'm sorry, disobey the crab. I don't know if that's how you say your name, but this is not how you make it realistic game. I'm telling you, just slapping in sun rays as your thumbnail doesn't make it realistic.
But that sunrays thumbnail really gets a lot of views. You know, I'm going to have a sunray in my thumbnail because it gets a lot of views. Anyways, moving on. this video. In my video, I will actually break down how to make a realistic game in Roblox Studio. Okay, let's start. Now, before we do anything, first you need like a plan of what you're going to make. For me, what I want to do is make a realistic forest. Not any kind of forest.
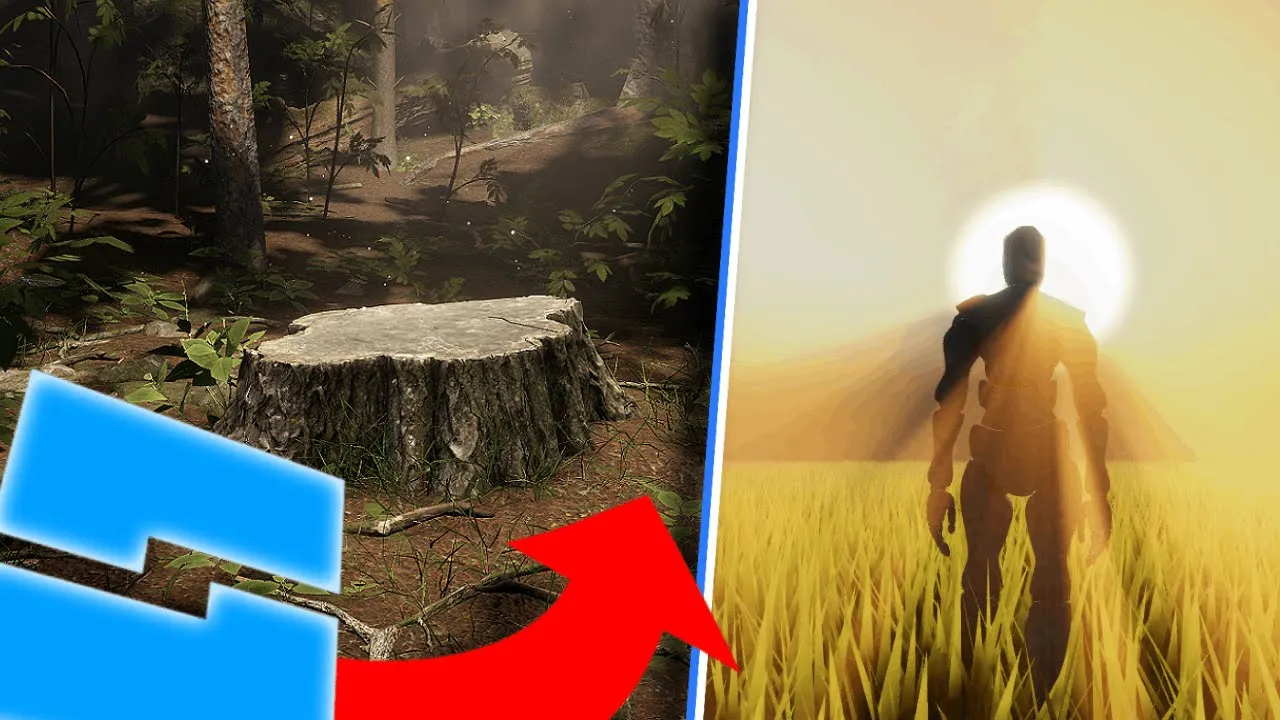
I mean, this kind of forest. You can see dirt ground, tall trees, and some growing trees. And I just envision this in my head for what I want to make. I'm going to get like a another reference. My other reference is this video made by 1231551. That's a really that's a really weird name for our YouTube channel. But anyways, you can see the video. It looks really good. You can also see they also did a forest. But what's different with this one is that they have a realistic tree trunk here and a light is hitting down on it.
And both of those two things really sell that realism look. So I want to try and do the same. I want to try to get a realistic trunk in the middle of my forest and have light hitting down on it. So, let's do a combination of my initial reference and this reference as well. And there you go. There's my plan. That's step one completed. Well, now that I know what I'm doing, how do I get my assets? How do I get the trees?
And how do I get the textures? Well, that's step two. The two websites I go to to get realistic stuff is Sketch Fab. And then just search up for anything. So, I'm going to look up tall tree and try to find something here. Or this one. Look at look at this right here. This one will work pretty good. And it's low poly, so it won't be laggy. There's also this one. This one actually looks really good. This one's pretty similar to the reference I had earlier.
Yeah. Yeah, I'm going to use this one. This one's pretty good. So, in order to download it is just scroll down and click on the download 3D model. And then you have to make an account. So, I'm going to make an account. I'll see you a little later in a little bit after making. Okay, I logged in. So, just click on download 3D. And then I recommend just downloading the GB. So, yeah, just download a GB version. So, download it.
Now, let's go back to Roblox Studio and just import it. So, click on this import 3D button and you just open up the SketchFab download of the tree. So, let it load. And there's my tree. After you upload it, usually the texture looks weird. I'll show you how to fix that. So, I'm just going to ungroup everything inside of it. And then I'm going to select the leaves cuz the leaves definitely need to be fixed. Go to its surface appearance properties and change overlay to transparency.
And there you go. Now, that's fixed. One more thing is select both of them and then go to properties and then make it so the render fidelity is at precise. And make sure double-sided is checked on. And then you get the exactly how it look like in the website. But there you go. There's my tree. This looks pretty good. I can 100% use this for my forest. Now I just do the same steps for the other things. And that is how I get my assets.
So let's go back to the website and get some growing trees. Okay, let's get out of here. Look up growing trees. And there you go. This one looks actually perfect right away. So yeah, here's my growing trees. Now just download them right here. Remember, save it as a GB and go to home and then import 3D and just open up. And after you open up, just let it load. Okay, where'd it go? Oh, there it is. And again, it's not usually with trees and leaves, it it leaves this white thing.
Again, just go to the surface appearance and fix it up from there. Surface appearance properties, change overlay to transparency, and make it double-sided and precise. And done. And there you go. Look at these. I already have assets that look similar to my reference. And lastly, I want to try and get a tree trunk, a realistic one. So, let's find that in the website. Get out of my face. Get out of my face. Uh, tree trunk.
Give me one. Give me one. Well, this one's really realistic. Well, this one's at 900 or not even 900. It's like almost a million triangles. If it's at million triangles, I I recommend just finding a different one. This one looks really cool. It's really high in triangle count, but I don't care. It looks really cool. Um, I'm hoping it will work. Let's see. Let's download it and put it in Roblox Studio. Import 3D. Okay.
Let's see how it looks. Please be fine. Okay. Okay. Actually, not that bad. Not that bad. There's my assets. Now, one last thing. I actually need the textures as well. Like where's my ground texture? I'll show you another website. Just use this website called Polyhaven. It has good free textures. So, let's go to terrain. Uh this one this one actually. Yeah, this one will work fine. It's leaves. Or I can use this one.
Actually, I like this one more. Let's download this. So, in in order to get it as a PNG, click on these three lines right here. And then just click on these PNG buttons right here to download it as a PNG. Anyways, we're going to need roughness, normal, and diffuse. And that's it. Okay. I'm going to use my texture through the material manager thing. So, let's open this up and I'm going to actually replace the ground texture.
So, this ground texture, I'm going to replace it. So, let's look up ground within material manager. Select it and then click on the plus icon right here. That creates a ground variant. So, this is my second ground. And now we just open up what we just saved in Polyhaven. So, color would be diffuse. So, over here you can see I have my diffuse, normal, and roughness. Again, color is my diffuse. So, we're going to open up diffuse and let it wait.
Oh, I got an error message. If you get an error, that's because the texture size is too big. You can see right there, file is too large. So, I have to get a smaller size. So, that I download them all in 4K. Let's just put it to 2K. So, download them all in 2K, I guess. Okay. I redownload them as 2Ks. So, let's open up and make our color, the diffuse. It should work this time cuz it downloaded in 2K, not 4K. Please, come on.
Okay. Yeah, there you go. There's like a failed to whatever. I don't care about that. So, let's open up the normal and the roughness. Okay. I just imported both of them. Come on. Load. And there you go. And then I'm going to check the set as override. Again, its base material is ground. So then it will actually override the ground texture. Now I'm going to change it regular to organic. Lastly, I'm going to go to terrain, go to properties, expand this right here, and then change the ground texture cuz that's the one that we are replacing to white.
And there you go. There's my actual ground texture. So now I can use this ground texture. Maybe I'll make it maybe I'll make the ground texture red. A little red and darker. And now I can use my assets as well. Put my tree down. put some of these growing trees down. Just like that. And then I'm going to have to place this in later. This is the key to making something super realistic, keeping in mind the small details.
So, what else can I add in small details that'll make this look even better? Branches, small rocks, bunch of different plants. So, let's get those. So, like these these small details of getting grass, getting branches, these little twigs and stuff. And I also recolored some of the assets like and if you want to know how I recolor them, you just go within the surface appearance of them. and then click this color thing right here.
And you can see this is how it was before. And then I just changed up the color to make it match the ground better. Now that I have all of these, now it's time for step three, making the actual build. So there's not much to like teach here. Um, I guess you just have to just do it. So watch this quick speed build while I do a voice over and maybe you'll still be enjoyed of the video of me doing a voiceover in the speed build.
Maybe it's interesting. I don't know. But you can watch my speed build and maybe learn off of it. I heard I've getting so much comments that are people of saying like, "Oh, I watched your speed build and now I know a lot more because of your speed build." And I honestly didn't think that is possible. But I guess it is. Um, but you can just watch me and just pick up of anything that you learn off of what I'm doing here.
But if you want to know what I'm thinking and what I'm doing while building, it's honestly just looking at the reference and seeing how do they how does it look like that in real life. I look at the reference and then I recopy it and then I copy it and that's it. Or sometimes it's just artistic intuition. You know, if you don't know artistic intuition, it basically just means um having a trained brain knowing what to do because they've done art for so long.
So that's what it means, I think. Don't Google it. Like don't Google it. That's what it means. And oh, that's what it means. But anyways, um the making a forest is actually not that difficult. Anyways, it's just placing a bunch of different trees next to each other. Placing a bunch of different plants next to each other. And then I'm just gonna have this tree trunk in the center and have light on it. Like how is that complicated?
It's really not. I feel like I already got the complicated part out of the way, which was just doing and getting all of these assets cuz it it just takes forever to do. But I showed it really quickly in this video and shortened it up for you guys. So I don't know, am I close to finishing the speed build cuz I don't know what else to say. Um um also I'm just going to quickly note that I am doing this new thing where I have my character speaking.
Like I have this character and it's there's like an animation of me speaking. Let me know if you guys like that cuz I honestly like it. I think it makes my videos more entertaining. I'm also did it because I'm copying other YouTubers. I looked at theirs and I realized, oh, they're doing they're using Moon Animator to like make an animation of their character as they're talking and I was like, oh, why don't I do that?
I know how to use Moon Animator. I have it bought. I have it downloaded. I have it as a plugin. So, let me do it the same. So, let me just copy other YouTubers so I can be a cool loop. So, I can be a cool YouTuber like them. So, yeah. Let me know if you guys like me speaking to you guys through my own Roblox avatar with these animations, like being in front of a table and everything, cuz I think it's cool. Anyways, I think that's it.
And there you go. That's that step completed. Now, it's time for the next step, which is changing the lighting settings. But with the lighting settings, I don't usually do the same thing over and over. I always do something different. So, what I'm going to do is just do whatever in the lighting settings and just tell you my thought process when doing it. So, maybe you can follow along with what I'm thinking and what I'm doing with the lighting settings.
So, first off, let's just change up the ambient color. Usually, I always just make the ammy color a little darker. And I always use like a a light purple and I just lower it down. I'm just going to leave it like that for now cuz it's not really doing anything. Now, with the brightness, I want to make it so the bright parts are even brighter. And you increase the brightness if you want to do that. So, let's just do like four for now.
And then now this is the part I actually really want to do is making the bright parts yellowish cuz that's how it looks like in real life when you're outside in the day. The light parts are pretty kind of yellow. And you want to do that you change color shift top. So I'm going to make this slightly yellow. Go like here. You can see it's really yellow but I don't want that. Just a little bit of it. There you go. You can see the before and after.
This makes it so it's definitely like it's in a forest. Make it so it's warmer. So I definitely got to add a little yellow to the color shift top. Now, for the lighting setting that a lot of people skip over, and it's kind of the secret in making your games realistic, enhancing your shadows. And in order to do that, you got to lower these down. I always lower both of them. Um, I just lower it down and see if I like it.
See, this is too harsh. So, I'm going to go in between, but making it kind of dark, but then not really. I'm going to make the lighting style to realistic. And whoa, that is so bright. Uh, flashbang. Let me fix that out. That's actually blinding. But I'm actually going to utilize the the shadows that it makes. So you see how when I add this light point, it adds even more shadows. I'm going to use that. Make it look even realistic.
So yeah, make sure you enable shadow. Like look at this. Turn off the shadows and turn it back on. So use light points to add even more shadows to your outsides. So there you go. Look at that. I like that so much. And you can get that if your lighting setting is on realistic. So make sure that's on. Now I'm going to add a color correction cuz I feel like it's too saturated. In real life, the saturation is low. Everything looks dull in real life.
So, we're going to get that dullness by lowering the saturation. Again, I'm just doing whatever I think looks good with these lighting settings. I'm not really doing anything that it's like by the book, a guide book, cuz there isn't any. You just do whatever looks right. So, again, like I said at the beginning, there's not really teaching with these lighting settings. You just do whatever looks right. You just change the setting, look at it, and if it looks weird, go back to the settings and change it up again.
That's all I'm doing. Okay, not bad. Now, that's completed. Now for the final final step, using scripts to make it look even better. One script I can use is making it so there's wind. This is the wind script. Um I'll leave a link in the description for it. So all you have to do add the script in and then you're going to have to add in a tag within what you want the wind to be. So select this plant right here. Let's go to its properties and then just click plus next to tags right here.
And then add in one that's named windshake. And then you just do that adding a tag within every single leaf or bush or whatever that you want to be shaking in the wind. So, let's do that. Okay. I think I added a windshake tag to every single leaf and bush and whatever. So, let's test it out. Let me see if the wind is moving. If the leaves are moving. Oh, there you go. Look at that. You can see all the leaves and the wind.
It's so nice. I like that. One last thing you can add is adding more scripts to my character. So, let me tell you a couple of scripts that I add to make my games look even cooler. So, let me just list them all out. Disable footsteps, change FOV, shift to sprint, a camera offset, custom footsteps, some motion blur, sunflare, character lean, a camera shake when walking, and lastly, changing the cursor to like a dot or something.
So, let's play out the game and see all those changes added in all those scripts. There you go. Look at that. Just a change to like make your game look even better. And that's basically it. One last optional step you can do is changing it so it's not the Roblox avatar and it's a different avatar. And there you go. Look at that. Now, this definitely doesn't feel like it's in Roblox Studio. Maybe it feels like Unreal Engine.
Maybe feels like real life. I don't know. Here's in full screen so you can get better look of this game. See, like it looks so cool. But there you go. That's how you make something realistic in Roblox Studio. Follow those steps. Plan out what you're going to do like getting references. Then get your assets from like Sketch Fab or another site. Then third step, make the actual build. Fourth step, changing up the lighting settings.
And then the last fifth step, add in scripts to add in small details like shaking trees or changing up your avatar and blah blah blah blah blah, whatever. You get it right? If not, then just rewatch the video, man, until you get it. But anyways, if you enjoyed this video, please consider subscribing or at least leaving a like. If you have any questions, tell me leave them in the comments and I'll try to respond. And that's it.
Bye.
The words are the caption track's own and nothing is reworded or re-transcribed. Paragraph breaks are placed between sentences so the text reads as prose.
Free tools for your own script: paste a draft and see where it stands before you record it.
Paste your draft and see where viewers are likely to drop off, with a rewrite for each weak line.
Paste the first 30 seconds of your own draft for a hook score and rewrites.
Check your draft against YouTube's advertiser-friendly guidelines before you record it.
Read this channel's public videos and transcripts, and download a writing brief for it.