Getting the transcript
Reading the captions from YouTube. A video nobody has opened here before takes 10 to 30 seconds; this page fills in on its own.
Getting the transcript
Reading the captions from YouTube. A video nobody has opened here before takes 10 to 30 seconds; this page fills in on its own.
Dave Ebbelaar · @daveebbelaar
This video has no Most replayed graph yet: YouTube shows one only once a video has enough views. These are the moments viewers replayed most in Dave Ebbelaar's most watched videos.
Most replayed moment at 15:10
12.3x that video's typical replay level
of things that you would like to have there then give a detailed report of what we can improve the llm will do that you now have a list of feedback points and we feed that back to the llm here's the original output here's the feedback now process all of that all right so
Said at 15:04
Most replayed moment at 14:01
2.4x that video's typical replay level
what do we need oh the user wants latitude and longitude oh I have to know the latitude and longitude of Paris let's give that back all right so now what we can do we now have the parameters that we need to plug into this function because we have the
Said at 13:55
The graph counts replays. It does not show where viewers stopped watching.
Words
7,058
Runtime
34:24
Speaking pace
205wpm
Reading time
29min
205 words per minute, above the 201 75th percentile of 349 measured videos. That distribution comes from the 349-video hook study.
Opening (first 30 seconds)
In this video, you will learn how to build this awesome company knowledge base and add an AI chat widget to it where you can ask anything about the website or the knowledge. It will go through all of the pages, list the resources, and then come back with the answer. We'll use Fuma Docs to create a beautiful documentation foundation. Then we'll add a custom widget on top of that, and we'll connect it to Sanity in order to enable the semantic search. And now you can follow along with this tutorial completely for free, even with limited coding experience, because we're
103 words, the words spoken in the first 30 seconds at 205 words per minute.
Free, no signup. See how the first 30 seconds hold attention, with rewrites.
Sentence shape
| Measure | This transcript |
|---|---|
| Sentences | 455 |
| Average words per sentence | 15.5 |
| Longest sentence | 89 words |
| Questions asked | 59 |
| Sentences containing a number | 6 |
Most used terms
Filler phrases
126 in total: like 59 · right? 42 · actually 10 · uh 10 · literally 4 · um 1.
A literal whole-word count of the same phrase list the Prepublish browser extension uses, so a phrase inside another word is not counted and a phrase used in its ordinary sense still is. It is a count and not a judgement.
Free, no account. See where attention is likely to drop, with a rewrite for each weak line. The free check shows the scores and the one issue costing the most. Or run it on the words above first.
Free · No login · See a sample audit first if you prefer.
What this transcript is
Every word below is the caption track YouTube publishes for this video, pulled from the video itself and reproduced unchanged. It is not Prepublish's writing, not a summary, and not a re-transcription: it is the video's own published captions. English captions, generated automatically by YouTube, in the video’s original language. Source: the video on YouTube. A channel that would rather this page did not exist can ask for its removal through the contact page, and it is removed.
In this video, you will learn how to build this awesome company knowledge base and add an AI chat widget to it where you can ask anything about the website or the knowledge. It will go through all of the pages, list the resources, and then come back with the answer. We'll use Fuma Docs to create a beautiful documentation foundation. Then we'll add a custom widget on top of that, and we'll connect it to Sanity in order to enable the semantic search.
And now you can follow along with this tutorial completely for free, even with limited coding experience, because we're going to do everything with AI agents. All right, so let's get it to work and build this thing. I am really excited to get going with this. If at any point you feel like I'm going too fast or you don't understand certain concepts, here's a little prompt that you can use. Pretty much just ask your AI agent to help you with certain setup steps.
You can just link it to this URL, which you can find by going to the description of this video. Give it to your AI agent because I've set up this documentation page so that not only we can use it during the video, but also to let your agents navigate it. So, we're go we'll go to the Fuma Docs section right now, because that's what we are going to be building off. So, Fuma Docs. What is this? This is an open-source tool, an open-source framework that you can use to build beautiful documentation websites.
So, I am now right here on the documentation page of Fuma Docs, which is built using, well, you guessed it, Fuma Docs. So, this has a very familiar look and feel probably for a lot of you, because this is pretty much how all documentation websites look like. There are couple of different flavors of this, paid ones, free ones, but Fuma Docs is really the best one that I have found so far. You can even look at their showcase to see which brands are actually using Fuma Docs to host their documentation pages.
You can also see how you can customize it and what you can do with it. So, that's what we're going to start with. So, first, we're going to set up the cookie cutter base install of Fuma Docs to see what we're working with. And in order to do this, you need to have Node.js installed. If you don't have this already on your system, just go to the following official download page. Just let Just let me just show you what it looks like.
Follow the steps here depending on the operating system that you are on. So, now we're going to create the sample. So, what we can do is we can run the following command in here. So, let's do this one by one. You can also run this all at the same time, but I'm first going to run the starter command. So, you can see Fuma Docs create. So, we're going to pull the Fuma Docs code pretty much, and we're going to create a project called Fuma Fuma Docs playground.
We're going to use a particular template, and then we're going to install it. And let's do that first. So, come back to our terminal. And I'm So, I'm doing this inside Cursor, but you can do this in pretty much any editor that you want to use or any terminal that you want to use. So, uh let's see. Let's run this. Let me actually clean up the screen for you. So, now you can see that this is creating that project setup, right?
There we go. And now we go into the Fuma Docs playground. So, let's see. We are now in here in the terminal. This is our setup. And what we can now do is we're going to run this. So, this is the run command in order to start up that development server. So, if we now do this, I can click on this uh or you can simply copy-paste this and open it in your browser. If I just click on this, let's see right now. This will open up the Fuma Docs playground, right?
So, you can see this is the home page. We already got that beautiful header in here. We even out of the box have that light and dark team switch. We can even press command K. So, that is out of the box what Fuma Docs offers. So, if we now go to Docs, so you can see this is the uh this is the home um the the home page pretty much. And if you can go to forward slash Docs, which you can see over here, this is now our setup.
So, out of the box you can see we got the sidebar in here. We got all of these beautiful components that we can already work with. We can copy to markdown. We can even open it up in our coding editors. So, you can see this comes packed with a lot of utility already out of the box. All right, so let's come back to the documentation. Make sure to follow along with this. Now, let's make one edit in here to get a feel for how we can work with this and then how we can make our agents do this, right?
So, right now, let's see, I have already opened it up in like cursor, but you can also for example use Visual Studio Code. We're going to content. You can see the index. So, now if I close this out, this is now a file over here. And what we can do in here, let's say I add something in here and I save that, you can see that we now change the title over here. So, this now gives us a setup for the particular files that we can work with.
And you can see this is the exact text that is showing over here. So, if I now for example take this and just put one more record in here, you can see that we are now creating and editing those files. So, that is the basic thing that you need to know about how this works, right? You can see below here we have these cards. So, I'm not going to bother you with the syntax, meaning like how to like write these cards and what the tags are around it because our AI agents will know, right?
The only thing that we need to know is what's possible and a high-level understanding of how does this project work and how do we create these files, right? So, we also have another one in here, let's see, that is called test. So, that is the components page that is now in here. Similar setup, we can have a title in there. So, that is the first step in order to follow along. Now, if you want to go deeper into where some of these files live and what we can do with it, you can read more into the documentation, but this is pretty much all you need to know for now.
So, before we go to the next page, what we can do right now is we can come in here again. Let me make this bigger. Open up the terminal again. I do that by pressing command J, but you can also go here to the top and you can like show the terminal. I'm now going to close this. I'm going to stop the development server. That pretty much means if I now go in here and I refresh, this is not available anymore. Because what we're going to do right now is we're going to start from the example that I all already created.
And why is that? Is I want to be able to like reverse engineer this. So, instead of saying we're going to start really empty, which I wanted to show you and then build it up, the new way of building software is just taking something that you like, make sure that works, and then just use AI in order to make the little edits and adjustments. So, what we're going to do right now is we're going to clone the GitHub repository, right?
So, I will also put this link in the description. I'm going to jump back one more time. So, depending on where you want to run this project, right? You can go to another folder within your terminal. And And then I'm going to run a git clone. So, you can see now we're creating that folder over here, which clones the whole company knowledge base. So, let's change directory into that knowledge base, so we are here as well.
And then, what we are going to do is we can first of all run the following command and then we also Let's just first run this. So, what this pretty much does is it sets up the whole project, creates the node modules, and we pretty much prepare the project for running everything. So, then that will take a couple of seconds to do. All right, got all the packages, all the node modules, so should be good to go. And then one more thing that we need is we have some environment variables in here.
So, what we can do is we can either run the following command, so that's a CP and that will copy it. So, let me show you what it does. So, if you look at this file over here, which has like our our passwords and later some other like keys that we need to set up. If I run this command, so this is copy and then pointing to this particular file and then putting a new file name in there, what this will do, you can see it will create a copy of it.
Now, what you can also simply do, let me delete this one again. I can also just like hit command C, command V will also do it and then just like change the name. But that's something that we need to do in there. So now the environment variables is an exact copy of the example and what we can do next is also start running this project. So one thing you can do right now is if you want to have a different password, you can change it in here.
So let me show you what we do because we're going to build this knowledge base not with like full authentication, but we are going to uh set it up with a uh password protection. So it's got what you have in here, you can change this to whatever you like. I'm just going to leave it for this. I'm just going to keep change this password. For now, we're also going to work locally. So that's all good and then next step is we're going to run the development server.
So that would be npm run dev. So once this is all stored, let me close these out. I'm going to run npm run dev. And again, if you have any problems with these commands or anything, it might still be that you need to install something. Just ask your AI agent in order to debug that. All right, so once this is running, we can see it's running on port 3000, but make sure you just use localhost and not this IP in here. So as you can see here in the browser, go to localhost 3000/login and then just put your password in here that you uh set up.
So open your handbook and now we are inside. So this should now be fully functional. You should be able to click around. You should be able to see the publishers, so the people in here. Let's go to the team directory. So everything is already in here. So now we have a very nice structure and layout in here that we can start working with. We got the like dark team switcher in here. So, this is all really exciting. All right, then up next in the handbook is the project structure.
Now, I'm not going to dive into great detail in here. If you want to learn more about, okay, how is this application set up? Why do we have all of these files? What's the purpose? It is explained in here. So, this matches the setup that we have over here, right? But, like I've said, your AI agents will know, so it's much better to just like look at the official output and then guide your agent in a way where you mention, "Look, I want to change this.
I want to have a new title. I want to have a new page." So, it's more important to understand how this whole project works, right? Because how few my docs works is you start with that homepage. So, that would always be what we have over here. So, that's what that would be the root of your domain. And that homepage is a little bit different from the documentation pages because if you then go to forward slash docs with one forward slash or you click on any of the items, right?
That's where you jump into like the main navigation where we have the sidebar in here and we can go through all the pages. We can click in here. We can start to edit this. We can add more information to this. So, that's the high-level structure over here. So, then if you want to design your knowledge base, first of all, you need to think about what are the high-level groups, right? And the groups in here can be those those high-level categories.
So, in this, I've split it by department and also so then the team directory. So, depending on your use case, this can be any type of structure that makes sense for you. For example, if we go over here to this handbook, which is exactly the same, you can see the sections are the trap the chapters pretty much or like the high yeah, the high-level chapters with like the subsections in in in between it. If you create a documentation website, so for example, let me go to the documentation website that we use for our software for Glydo, you can see there's a similar setup, but then we just have the different screens and the different utilities and all of the different settings that people like need to go through and need to understand.
So, there's different ways that you can work with this. All right. Now, then in this case, we have the team directory, we have the resources, and what is interesting about this, which is really helpful for a company wiki, is that every page is also also has a owner. So, you can see if we go let's go to marketing we go to customer stories, you can see the owner in this case is Noah. So, Noah is head of marketing. And this helps to set up your company wiki in such a way that if people ask questions, not only can they find the information themselves or can they like ask questions to AI, but they can also find okay, actually if I want to know more, Noah is in this case the person that I need to go at.
Cool. So, that is the whole setup of how that works. And then also, you can look at the individual files, right? So, how is that build up? And it follows a very simple [clears throat] markdown structure. That is what I really like about Fuma Docs. So, if we go into the content, the docs, and then let's go into the pages, let's go into like support, data request, you can see the structure that we saw before, right? So, there is a little bit of front matter in here that has the title, the description, and also the owner.
And then this is just markdown. It's literally just markdown with headers in here, links that allows us to create these pages in here. And now, then another that I would recommend is do something like the following. So, use your coding agent, use one of your favorite speech to text tools. I'm using Glydo and say, "Hey, can you create a research department and add it to the docs as well? Create one research document in there as well." You can think about what that is and who the owner of that is.
So, just putting some text in there and give a prompt to an agent just to get a feel for what this looks like. All right, and you can see there it starts to create everything. You can see the research folder is now in there. We got a site observation protocol. We got a new owner, Hannah Burke. So, this is now all in here. So, if we now come back to our website, and if you look on the left over here, if I refresh this, you can now see there's a research page.
And there's this site observation protocol with also a new head of research, Hannah Burke. So, this is this is just amazing, right? I look at how easy it is to like manage and maintain all of this and just create new and add information in here, which is super valuable inside an organization and is one of the big struggles, especially as organizations grow. And now, as you can imagine, this is also an awesome project that you could sell to other companies who might still be dabbling with a bunch of Word documents, right?
So, if that is interesting to you, make sure to grab my free proposal template from the link in the description. That's the exact proposal template that I use to sell all of my data and AI freelance projects, right? So, we already got a pretty amazing setup right now. We also know how we can create new sections and new pages and how we can edit all of that in here with our coding agents, and even out of the box, Fuma Docs supports very basic search.
So, if I, for example, search for like the site observation that we just added, I can even get in here. But, now we're going to take this to the next level. Because if you really want to use this as an internal company knowledge base or even a personal knowledge base and you want proper search and you want to be able to let other people update this information as well, you're going to need another tool. So, let's come back to the handbook over here.
And that tool is called Sanity, which is really the best setup that I found for something like this. So, let's get into the Sanity setup and I'll show you why this is It's awesome tool. I've used it in the past a ton to manage a whole bunch of websites and that's really where it is the strongest because pretty much if you go to what Sanity is, it is a content operations platform. It can do a lot, so let's dive into things.
So, let's come back. So, why do we need Sanity, right? So, in order to take, let me scroll down, in order to take our company wiki or knowledge base to the next level, we need two extra things. So, first of all, in order to make this usable within a company, we also need to provide a way for non-technical people, pretty much anyone in the company who is a content owner, in order to work with this as well and update their content.
So, not everyone, of course, is going to be comfortable like opening an IDE and working with these markdown files and even if you use AI agents, Sanity provides an interface and also MCP service for it, so you can also like connect it directly with ChatGPT or with Claude to essentially abstract all the code and complexity away from people and to, for example, let's say, in here just give Henna an interface on how to navigate through her own research compartment or department and handle just that.
So, more on that in a bit, but that's reason number one that Sanity is really useful for this. But then, the second thing is once we put the data inside Sanity, the data set, you can on that you can automatically create embeddings. Now, and what that's going to mean is that's going to help us with the search widget that we create over here that is going to really take this to another level. So, it's not just like a documentation website, but we can come in here and actually ask the questions that I showed you in the beginning of this video, right?
That is not possible without embeddings and Sanity is just the simplest way in order to do that. And if you build something like this yourself, it gets way more complicated and it's also rather more expensive in the beginning because if you come in here and you use this link or the one in the description, you can actually get a free 60-day trial using my link. Now, what's crazy about this is that you get all the embeddings, the usage, the data.
You can get all of that for free to like learn to follow this tutorial, to experiment with it. You don't even need to have a credit card or plug that in so that afterwards you can just decide if you actually use this for a company or for another project, then you can decide does it make sense to spend a subscription on this. But for this tutorial, follow along for free. If you want to do it, for example, without Sanity, you would need to use embedding models.
You need to have way more code and probably a back end related to this as well. So, it's actually going to be more expensive if you don't use something like Sanity. So, once you have that set up and you have your account, let me let me go into my account. I completely reset it everything to make sure you can easily follow along. Let's go into manage. And now, what I really like about Sanity and why I've used it for so many website projects is that they have a super good API and it's completely AI first.
So, let me show you how this works. You can now just create your first project and we can call it let's do just company knowledge base. So, you can name this whatever you want, but if we go in here, we create a project. It's currently empty. What we can then do is we can get an API key for that project. So, we have got company knowledge base and let's see in here API and now let's grab a token. So, let's create this one and let's just I just call it default.
It doesn't really matter what you name it. No expiration. And we're going to give it developer access. And I'm going to copy this one and then we're going to come back to our project into the environment variable and then I'm going to paste the Sanity API key in here. All right. So, once we got the API key in there, we also need to get our project ID. You can see so you can see this one over here. So, let me also just plug that in and store that.
So if we now come back to our documentation setup, you can see we can keep everything the same and then project ID developer token set up. Now we can run these imports. So we can connect Sanity to our local project because there's already some code in here. Pretty much if you look into the Sanity folder, the data schema is already created. So what I'm going to do is I'm going to open up a new terminal. Uh make sure you're in the company knowledge base project, right?
So whatever your structure looks like, how you're following along, make sure you're in the root of our knowledge base project and then we're going to run the following commands one by one. So first we're going to run the setup. So NPM run Sanity setup. So you need those two environment variables set up. So the API key and the project ID. So if anything goes wrong with this, it's either you're not in the right folder in the terminal or those environment variables are not set up correctly.
So uh now we can indeed run the import, right? So that would be the next step, the import and then the status to like verify it. So we're going to import it. So if you now come over to datasets, you can see that we now have that knowledge dataset that is created. So we'll have a closer look at that in a bit. All right, so scrolling down in the guide, here's an example of how you can see that dataset, right? We just looked at that.
So now we're going to make a small change and that is we're going to set our content source in our environment variable to Sanity. So this is going to make a switch from like using the local markdown files to using what is inside Sanity. So if I now save this, that is reloaded and now come over to our website, I should be able to refresh this. And at first, you don't really notice anything, right? It should all be the same.
But let me now show you. So this is still all localhost, right? Let me show you if I now go to let's say the site protocol. Uh let's see. So, we go to our content. Let's come in here. Let's go to the docs research. Now, if I come in here and uh let's say I delete this. So, this is now gone and I refresh this. Text still there. Why is that? Well, we are now using the data that is inside the Sanity data set. So, those markdown files will no longer work in this case.
So, where does that data live and how does that work? Let's continue with that. So, let me make this a little bit bigger. We now set that up. So, let's look into the Sanity Studio. So, what we can do inside our project is we can come over here and we can come back to our terminal and we can run npm run studio. So, this is locally going to set up the Sanity Studio. This will run on another port and let's see where are we?
This is port 333. So, let's go to local host and then let's do 333. You can now see that we are loading the Sanity portal. So, you can just use the same account that you used to create it, right? I just log in via Google. And now you can see that we have our data set in here because this is inside that project. So, you can see our content. We have our knowledge pages. So, this is where all of the pages live. So, you can see this is all the structured text right now.
And if we go back back to our content, you can also see the em- ployees. So, you can also see all of the profiles in here. Now, the cool thing is that the interface that we're looking at right now, this is already an interface that you could make available to someone that is not technical. So, currently we're running this on local host, but we can also make this available via the Sanity Studio on a hosted URL. So, anyone with a team account on your plan can come in here and can now start to manually edit the information here without needing to be a developer, without needing access to GitHub.
So, you can play around with the studio to get a feel for what this looks like, and all the data models below this are customizable, and your AI agent can do this because it now also has the Sanity API key, right? So, we can change the schema, we can upload it, we can import it. So, now let's continue with that hosted version because this is now running on localhost. If I now scroll down, you can first of all go and use the Sanity CLI tool in here.
So, we can first of all log in and then deploy. So, that is pretty much how you work with colleagues. So, if I come in here, and let's say I'm going to start up Let's actually use the same. I'm going to close this one, then I do a Sanity login. Let's see. I I might already be logged in, so right? So, now the terminal is authenticated via the CLI, and I can run an NPX Sanity deploy. So, now coming back in here, NPX Sanity deploy.
So, what this will now do So, now you can you can need to create a name for this. So, I can do just company We'll just use the same name, right? So, company knowledge base. That is what I will do. This is now going to set everything up. Right, so you can now see the confirmation that this studio is now published under this URL. So, we can either go here directly. So, let's open this up in the browser. This is the hosted version.
So, so you can now see we are actually on sanity.io, and we have a hosted URL. So, this is now very convenient because we now have a place in the cloud where we can give team members access to, and also our AI agents, and we can start to work with this and edit. So, let's come back to the example that we had, right? So, let's say we had that site observation protocol. We can now come in here, and let's say we we want to make a change to this.
We do site observation protocol demo. We Let's say we edit this in here. So, now it's saved in here. This is currently a draft. I can now publish this. So, I'm now publishing this to our website. And now, if I come in here, because our website now dynamically loads the content from Sanity, I can now refresh this, and you can see we now have the demo in here. So, we moved the logic from doing everything in markdown within our codebase to now having a professional content management systems that's hosted in the cloud where we can update all of this.
So, that's the first thing that you should understand about where Sanity comes into play. So, that is how you can give your team access to this to start working with this. Now, you can also read the instructions over here about how you can connect with the Sanity MCP server and add it to your favorite AI tools. Because we are here inside the development environment, and we already have the API key, if I ask something in here, our coding agents will already do it.
But, if you have another colleague, let's say you want to give Hannah Where is Hannah? You want to give Hannah access to this and be able to like manage all of this right from her Claude desktop application or from Codex, this is the information that you need to follow. You just add the MCP server, you authenticate, and then you just start chatting in ChatGPT, and then once it's published, it will show up on the website.
So, that's going to be really cool. What we're now going to dive into is the final piece of the puzzle, because we now know how to manage everything, how to set everything up, but now search. How can we create that amazing search utility in here? Now, this is the other piece of the puzzle where Sanity is amazing, because out of the box, what we already have right now, is we have semantic search, because Sanity creates embeddings behind the scenes.
Now, if you don't know what that is, doesn't matter. I have videos dedicated on this channel entirely to embedding models, retrieval augmented generation, but in this video, we're just going to We're just going to use the tools. So, in the beginning, I showed you how few my dogs out of the box comes with this search window, right? So, if you press command or control K, you can, for example, ask something about, let's say, if you lose a laptop.
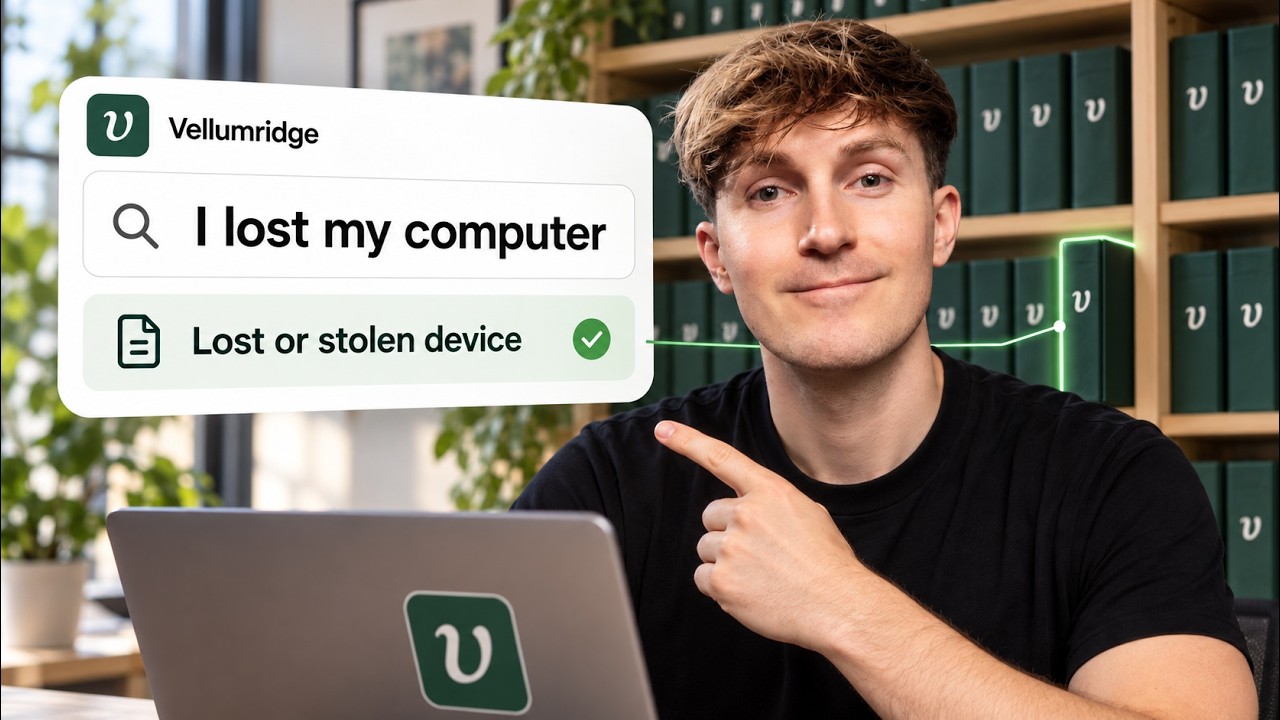
So, I can do a keyword search in here. This is few my dogs. So, it will list the operations over here. So, let's say I have a the stolen device. Now, I can search for that. Now, the problem with keyword-based search is that it needs to be literal, right? So, laptop is literally then in here probably is a mention of a laptop, right? So, that is that is in here. But, what let's say if I say I lost my computer or I lost my notebook.
You can see that is now not showing up in here because the keyword dimension of a computer is not in here. Now, in this simple knowledge base, right, it would still be very easy to just navigate around, and people will probably find it. But, that's not the point, right? The point of the knowledge base is to make it bigger, to make it organization-wide, and to have more and more information in here. So, that's where semantic search comes into play.
So, this semantic search, you will see that over here once you've connected everything to Sanity, and you've set your environment variable to content source also Sanity. Because Sanity out of the box supports these embeddings. And through those embeddings, we can do a semantic search. So, we can search for meaning rather than exact keywords. So, that now allows us to instead of only saying like laptop, we can also do computer, and then you can see that lost or stolen device also shows up because laptop is similar to computer.
And we can even do a hybrid in here. And for your application, you can decide like what the default search is, right? For this example, I wanted to show the difference between keyword, semantic, and combining all of them. So, you can actually see if we can do computer on keyword, you see nothing. If you do it on semantic, we all of a sudden see lots of information in here and we can also combine the results, which is often the best if you want to have a search system that works.
So, that is step number one that is now powered. But, we're going to take this to the absolute next level. This is what we've been working towards and we can now dive into it. That's this ask the handbook widget over here, which is just amazing. And just imagine, right? Also beyond scope of this video. This widget that I created here for you, you can add that to pretty much any website. If you take someone's existing website and you replace the content and you put it into Sanity, which you can do completely for free, you can add this widget and it will just work.
So, let's see how to set this up. So, make sure content source is Sanity. Now, we need one more API key. And in this example, I'm going to use OpenAI and I'm just going to use one of these models, but you can use any large language model that you like. You can even use Ollama and use a free open source model. It will be a little bit slower, results will not be as good, but you can hook any model to this. Just ask your AI coaching agent to say like, "Hey, I'm using the models from Claude.
How do we adjust this?" So, let me set up the API keys and you're going to do that over here. So, in the Invid example, right? This is where you need to plug in your OpenAI API key and I'm using this model. If you want to follow along with this one, you leave it as is. Again, ask your agents if you want to use another model provider. So, we can ask some questions. So, let's say, "What can I claim for meals after visiting a visiting a customer?" So, let's come in here and let's see if this all works.
So, now we can send this query in here and if we So, we can first of all see this running. If we now come back to our application, let's see. Let's show this over here. You can see the search queries in here and you can also follow what's going on behind the scenes, but it's more interesting just look at the chat experience over here. And I really took some time to get clear on like the UI UX around this. So, out of the box this will just work really well.
You can see the pages it looked at and we just get an we just get an answer over here and it even links back to the page, right? So, this is under travel expenses. You can see what the information was in here. Now, we can even start new chats. I lost my laptop, what now? So, this is all locally stored here right now. No database needed. It streams the text in here. So, for me like this is just amazing to see how now in a matter of like a couple of minutes really.
How long has it been since we since we since we've been working on this? We can now add this to our website and start using this. So, this is really what puts everything together and what's going to make this different from hey, here is like a simple SharePoint website or documentation website that anyone can build. So, let's show one more example because we can also ask pretty much who is responsible for who, right?
So, for finance we have Daniel. So, if we come in here and let's do let's do a new chat. Ask the following question and you can see this all runs here in the background. I can even go back to my previous chats. We can see what we work on and come back to payments. You can see it finds out Daniel Brooks is our guy. So, if I now want to know anything about customer payment terms, I'm going to send Daniel a message via Slack.
All managed in here. So, that is how everything comes together. So, really happy with how this turned out. I love the look. I love the visuals of this. So, now you just need to start experimenting with this and see how you can make it your own or just leave it here and use this as an awesome portfolio project. And you could even use this to go out to companies to show this to pitch this and say, "Hey, I can I can build this for your company." And this can literally a a like this and a website like this can sell for thousands of dollars, like literally.
If you go to local businesses and you say, "Hey, do you want something like this? I can add this to your website." Also, not even internally, right? But also just on their website. Sanity and this setup with this can all power chats like this without needing to go any deeper into the complexity on factors and betting and rag and all of that behind it. So, the final thing that you can look into, which I'm not going to cover in this video, is how to like customize this and really tailor it to your own and then deploy it and protect it, right?
So, of course, this right now, while Sanity hosts all of your data already, this currently, of course, lives locally. This is localhost. So, no one else but me can access this right now. We also have a simple password login in here, right? So, if you really want to use this for pretty much anything, right? You need to deploy it and you probably want to have a better like sense of security in here with user authentication.
Maybe you hook it up to Google, so only people from like your Google workspace can log in, you can authenticate via GitHub, or just with a username password. That is all as a next step that you can look into, but I'm not going to show you that in this video because it really depends on what where do you want to deploy it, how do you want to do that, but your coding agent should be able to help with that by linking at this page.
So, that's it for this video. So, I want to thank you for watching. If you made it all the way to the end, please leave a like and also consider sub- scribing. And then, next I recommend to check out this video where I show you my entire agentic coding setup. So, this is what I use every day right now in order to work on all of my projects. So, if you're interested in building software, building anything, I highly recommend to check out this video next because it will 10x your workflow.
The words are the caption track's own and nothing is reworded or re-transcribed. Paragraph breaks are placed between sentences so the text reads as prose.
Free tools for your own script: paste a draft and see where it stands before you record it.
Paste your draft and see where viewers are likely to drop off, with a rewrite for each weak line.
Paste the first 30 seconds of your own draft for a hook score and rewrites.
Check your draft against YouTube's advertiser-friendly guidelines before you record it.
Read this channel's public videos and transcripts, and download a writing brief for it.