Getting the transcript
Reading the captions from YouTube. A video nobody has opened here before takes 10 to 30 seconds; this page fills in on its own.
Getting the transcript
Reading the captions from YouTube. A video nobody has opened here before takes 10 to 30 seconds; this page fills in on its own.
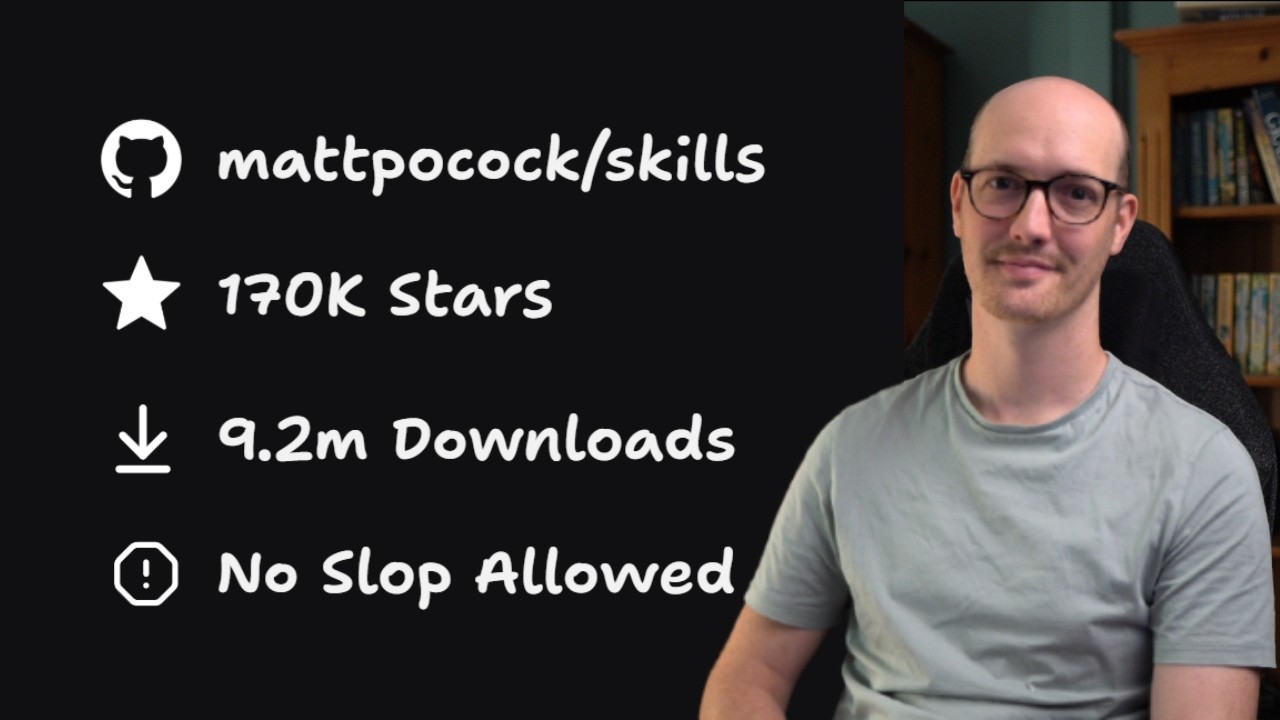
Matt Pocock · @mattpocockuk
Where viewers went back to watch this video again, from YouTube's public Most replayed graph, lined up with what was said at that moment.
Most replayed moment #1
10:122.5x the video's typical replay level
for this. I was actually in auto mode in claw code, which is kind of like the default mode. And you now have a fork in the road. If you think that this work is going to be big enough that it will need multiple agent sessions, then you can skip numbers two and three here and go
Said at 10:05
Most replayed moment #2
4:402.4x the video's typical replay level
it's very, very light in terms of context load. So, okay, we got the skills. Now, what we have to do is we have to run set up Mac Pocock skills. And this will do a few things. My skills rely on some uh configuration inside the repository, and this does a few things
Said at 4:32
Most replayed moment #3
15:021.9x the video's typical replay level
.7k, and it's now about to, as part of the implement, run the code review. As part of the implement script, it goes and runs all the type check, runs the build, run is doing even more verification, checking AI Hero internal help, shows only edit commits, and it's
Said at 14:55
The graph counts replays. It does not show where viewers stopped watching.
Words
3,717
Runtime
17:17
Speaking pace
215wpm
Reading time
15min
215 words per minute, above the 201 75th percentile of 349 measured videos. That distribution comes from the 349-video hook study.
Opening (first 30 seconds)
Hello friends, it occurs to me that I've never actually put together a proper tutorial for my skills repo. At the time of recording this repo is up to 162,000 stars. We have 7.5 million downloads and I've never made a tutorial for it. I get questions all the time like what is the sequence I should use these skills in, how should I install them, how should I set them up? So this video is going to be a walk through of the main flow you use when you're using these skills. We're not going to look at the advanced stuff, we're not going to look at
108 words, the words spoken in the first 30 seconds at 215 words per minute.
Free, no signup. See how the first 30 seconds hold attention, with rewrites.
Sentence shape
| Measure | This transcript |
|---|---|
| Sentences | 240 |
| Average words per sentence | 15.5 |
| Longest sentence | 57 words |
| Questions asked | 8 |
| Sentences containing a number | 16 |
Most used terms
Filler phrases
49 in total: kind of 12 · like 11 · actually 7 · uh 7 · basically 3 · sort of 3 · literally 2 · um 2 · you know 2.
A literal whole-word count of the same phrase list the Prepublish browser extension uses, so a phrase inside another word is not counted and a phrase used in its ordinary sense still is. It is a count and not a judgement.
Free, no account. See where attention is likely to drop, with a rewrite for each weak line. The free check shows the scores and the one issue costing the most. Or run it on the words above first.
Free · No login · See a sample audit first if you prefer.
What this transcript is
Every word below is the caption track YouTube publishes for this video, pulled from the video itself and reproduced unchanged. It is not Prepublish's writing, not a summary, and not a re-transcription: it is the video's own published captions. English captions, generated automatically by YouTube, in the video’s original language. Source: the video on YouTube. A channel that would rather this page did not exist can ask for its removal through the contact page, and it is removed.
Hello friends, it occurs to me that I've never actually put together a proper tutorial for my skills repo. At the time of recording this repo is up to 162,000 stars. We have 7.5 million downloads and I've never made a tutorial for it. I get questions all the time like what is the sequence I should use these skills in, how should I install them, how should I set them up? So this video is going to be a walk through of the main flow you use when you're using these skills.
We're not going to look at the advanced stuff, we're not going to look at the new stuff really, we're just going to focus on the main flow. The stuff you need to get started. To walk you through this, I'm going to be using one of my work repos which is the AI Hero CLI. This is the command line interface that drives a lot of my exercises that I use on my courses. I've never actually set up my skills to work with this repo so now is a great chance.
If you want to set up my skills on a brand new project, you just do this except you do it in an empty directory. So it works the same whether you're using a brownfield code base or a greenfield code base. I'm going to open up the command line interface here and I'm going to type NPX skills at latest add mattpocock/skills. This assumes a couple of things. It assumes that you've got Node.js installed. This NPX comes from Node.js and it runs the skills.sh command line installer from Vercel.
What this basically does is it installs a GitHub repo of skills called mattpocockskills and it can walk through a few setup questions here. It first says it needs to install the following packages. Yes, that seems fine to me and then it did a couple of things and we now have a long long list of all the skills that we could install. It found 38 skills here which is a lot and you can see if I scroll up and down that they're in two groups.
We've got the mattpocockskills and then we've got other skills. So the mattpocockskills are the ones that I have blessed as the skills that I think are good enough to be public facing. The other ones are ones that I'm experimenting with right now and may delete in future. What I recommend you do is you go to the top here and you can kind of go up and down. It's kind of broken, I have to say. And if you press space here, and you should see that if you scroll up, okay, they're now all selected.
You press space, and then you press return, and now uh you've selected all of the official skills. I'm not terribly happy with Versel's CLI here, so I may change it in future, or maybe even just ship my own. But uh for now, that's as good as it gets. One thing that is good is that it will set up your skills to work with any agent. So, I use Claude Code, but you can go down here and sort of just select the ones that you want.
I'm using space to select. I think by default, if I zoom out a touch, then it supports all of these universal ones up here. So, cursor, Codex, Claude, etc. But anything that uses like Claude skills, such as Claude Code, then you need to set up yourself. So, I'm going to press return here, and it should now be configured to set up my skills for Claude Code. The installation scope defines where your skills are installed, whether they're installed just in the current directory, or whether they're global.
This will depend on what your team's conventions are. If you're working in a team, I would say that project skills are the right way to go. That way, everyone is using the same skill set on every project, and it means that you can contribute to the skills together and make those decisions together. But global is fine if you're just a solo developer working on your own stuff, like I am. So, I'm going to press return here, install it in my home directory, and I'm going to choose symlink as the recommended way.
The choice here is whether you copy it to the agents folder as well as the dot uh Claude folder. And it's kind of not a nice way to do it. Symlink is just the nice, easy way to do it. So, I wouldn't even make a decision here, just choose symlink. So, it now gives you a summary of all the things that you're installing here. There seems to be an alert on Socket about to spec. I'll take a look at that later. But yes, we can proceed with installation, and it's now installed all of the skills.
This means then that I can run Claude inside here, or whatever your agent is, and I'm going to create a new So, I'm just going to say hello to get out of this agent's view here. Now, depending on the harness you're using, this will show up in different ways, but on Cloud Code, I can press forward slash and I now see that I have a few skills available to me. I have grill me, grilling, way finder, grill with docs, etc.
Loads of stuff. Now, the difference between my skills and lots of other skills repos that are out there is my skills are mostly user invoked. That means that if I run context here, not many of my skills actually leech their way into the description. And the descriptions I have are quite short and precise. So, that means that even though we've downloaded all of my skills, the skills only take up 660 tokens here. So, it's very, very light in terms of context load.
So, okay, we got the skills. Now, what we have to do is we have to run set up Mac Pocock skills. And this will do a few things. My skills rely on some uh configuration inside the repository, and this does a few things for you. The first thing is it means you need to use an issue tracker. We're going to be saving um specs, we're going to be saving tickets, and we need to save them somewhere. You've got kind of an infinity of choices here.
You can use GitHub, you can use local markdown, or you can literally use anything. The way that the skill works is that it looks at your local configuration. And so, you can set it up for Jira, you can set it up for Linear. And the way you do that is you just tell the agent what you want to set it up for, and it will go and set it up for it. I just want to emphasize that. People are asking me all the time, "How do I make my skills work with Jira, work with Beads, work with Linear?" It already does.
All you need to do is just run set up Mac Pocock and just say, "Set it up with Jira." Except, I don't want to set it up with Jira. I'm just going to set it up with local markdown, please. So, that's fine by me. The next question to answer here is about triage labels. So, there are a set of labels that the skill relies on to communicate information about the tickets that it produces. It's not really that important here, so I'm just going to accept the defaults.
You can look at the docs on the triage skill if you want to learn more. So, defaults is fine. The next one is about the domain documentation. So, my skills like to have a little bit of docs, a context .md file, and an ADR inside the repo. And it's basically asking if it's going to be a single context or a multi-context. I think single context is the way to go here. Multi-context is if you have a big mono repo and you need lots of different bounded contexts within it.
But for 99% of people, a single context is going to be fine. All right, so it's gone ahead and written a few things here. The first thing it's written is inside claw.md, it's added a few little links here. So, this is the new stuff. It's just linking to the issue tracker docs, linking to the triage labels, and linking to the domain docs. And each of these are at docs, agents, domain issue tracker. So, we can see here that it's going to save all of the issues and specs inside a scratch file.
So, with that, our setup for this repo is complete. And so, you might be thinking, how do I get started? Well, before we get started, I'm going to show you one more really cool thing. You can, if you're following along, just stop the video now and use one skill. You can use the ask Matt skill. This ask Matt skill is essentially me as a skill. It knows everything that is needed about the skills repo and what you should do first.
So, we can say, ask Matt, how do I get started? I want to make some code changes here. What is the main flow I should use? I can now submit that and see what it says. By the way, I'm using Whisper flow as my transcription. So, here we go. It's saying the main flow, idea to ship. Since you have a code base, start at the top of the main flow and walk down in it in one unbroken context window. So, it's very um kind of really telling you how to use your sessions as well.
I I believe that being conscious about the context window that you're using, the tokens that you're using is essential to using AI well. It says you should start with grill with docs. It interviews you to sharpen the idea and because you're in a repo it's stateful. It records what it learns in context.md and ADRs. This is where you turn I want to change X into a crisp defensible plan. Defensible is such an LLM phrase, honestly.
Can you settle every open question just by talking? If a question needs a runnable answer, then you can use prototype, which I've done a video about on it. Bridged in and out of by handoff, if not skip this. Once you've done the interview and grill with docs, you can either go straight to the implement skill, or if it needs multiple sessions to go through, then you can go to to spec and to tickets. Let me make this a little bit clearer for you.
The default flow looks like this. You start with grill with docs, and this interviews you based on the idea that you want to produce. For instance, if I clear out of ask math, of course I could go and ask follow-ups here, use it as a tutorial itself, but let me just show you. I'm going to say grill with docs, and I'm going to kick it off with an idea. I'm going to say, I would like to remove most of the internal tooling on this CLI to make it just only public-facing.
There's a lot of craft here. I want to just take this repo down a notch. It really can be as vague as this. You don't need to do too much here. Grill with docs is going to do the heavy lifting by asking you a bunch of follow-up questions. It's going and exploring a bunch of code here. And by the way, I'm [clears throat] using Claude Code, I'm using Opus 4.8 on medium effort, but you really don't have to use the same setup as me.
These skills are being used by a bunch of different people, bunch of different harnesses, different models, different effort levels. And we can see it's already asked the first question here. So, it's gotten a clear map of the entire repo. It's looking at the internal namespace with 11 subcommands. So, this is what a grilling session looks like. You go through all of the questions until you feel or you and the agent feel that you've reached a shared understanding.
I'm going to do that now, and then I'll check in with you once I'm done. Okay, it didn't end up taking too long. We ended up with what, six questions? That's not very much for grilling session. Usually mine end up being about sort of 20 questions depending on the size of it, but we've ended up with a decent plan. We're going to delete uh 10 command files, delete three tests, rewire shared modules. And all I did here was I just answered questions until it said, "Okay, we've walked the whole tree.
We've reached a shared understanding. Let me lay out the plan." Notice here, I wasn't using plan mode for this. I was actually in auto mode in claw code, which is kind of like the default mode. And you now have a fork in the road. If you think that this work is going to be big enough that it will need multiple agent sessions, then you can skip numbers two and three here and go straight into implement. The way you would do that is you would just say, uh forward slash implement this.
And in this case, I do think that is what we should do. I've still got about, uh I think of my context window is kind of like ending or getting significantly dumber around 140k mark. I think of that as kind of like the smart zone of the LLM. If you go above 140k, you end up sort of with, you know, attention degradation. It ends up getting stupider, does weird hallucinations. So, I think of having like, okay, we've got 100k of budget here to remove 10 commands.
That seems super easy. Definitely something, you know, we can definitely do that. So, this is what I would usually do. I would just say implement and then I would leave it, let it run, and it would finish the work. However, in the interest of showing you everything, I'm going to pretend that this work is going to take more than one session, that I've maybe run out of context window in the current or run out of smart zone in the current window, and I'm going to need to spread this out over multiple context windows.
So, I'm going to call to spec here instead. So, instead of writing implement this, I'm going to say to spec here. And that's it. What this is going to do is it's going to take all of the discussion that I've had, all of this 46.1k tokens, and it's going to compress it into a document that we can use later. This is where our issue tracker comes in. So, this issue tracker we're just going to use local markdown files and so it's just going to spit out the spec into a local directory.
This spec is going to be the destination that we're heading to over this multi-ticket sprint. In other words, this is what we're going to end up with. This is the description of everything of how it's going to look at the end. And then the tickets is the description of how we're going to get there. Okay, we can see it's been written and published to the issue tracker. If I open this up, we can see it is in here. So, it's very nice and detailed.
It's got a problem statement, a solution, a bunch of user stories, implementation decisions, testing decisions, a lot of stuff here. And this is going to be really useful cuz we'll be able to compare this at the end to make sure that our implementation matched the spec. So, now that we've got the spec, I'm going to go into the same session, not going to change sessions here, and now I'm going to say to tickets. And this is where it will basically try to turn the spec into an implementation plan.
Each one of these tickets is supposed to just be the size of a single context window or a single smart zone. And if we look here, we can see that it's kind of given us three tickets here. So, three slices. I think that these three slices are a little bit much. I actually think it can be done in one slice. Do it in one slice instead. And so it's now put this in a file. So, it's put the ticket in tickets.md. Now, this is quite a bad example cuz it's kind of copying the stuff that's in our product requirements documents.
So, let me show you an actual real example. Here is a spec that I implemented a couple of days ago to remove a bunch of stuff from a repo. So, I'm on a real removal spree recently. And you can see that this is the spec and underneath it has 11 sub issues. So, 11 tickets underneath it. And each of these tickets, so this is a very detailed spec, each of these tickets is a single context window session. So, if we click into here, we can see it's just pretty short.
Most of the acceptance criteria is already in the main spec, and so this one is just literally what do you build in this session? So, that's number session one, then session two, then session three. You can see that how this breaks down a huge chunk of work into manageable pieces that the agent can then go and do. However, here we are left with a single manageable piece. So, what I'm going to do is I'm going to clear the context here.
Now, we have everything we need so that we can just run a bunch of agents to tackle this problem. So, I can clear the context, and then I'm just going to say at tickets here, and I'm before that I'll say implement this. So, now because we have the spec that decides where we're going and the tickets that decide how we get there, the agent has everything it needs and we're ready to implement. Now, when you're doing this by hand, the idea is that you then implement each ticket one by one.
So, you don't say do every single ticket, you say okay, we go and implement, then we see if we've hit the smart zone. If we haven't, maybe we can squeeze in one more ticket here, but usually I would say you clear in between every single ticket. Then, once you've done all of the implementation, you've got your full thing all implemented, then you can go and code review and do the final check against the spec. We can see here it really was a very small piece of work actually.
It's only 42 .7k, and it's now about to, as part of the implement, run the code review. As part of the implement script, it goes and runs all the type check, runs the build, run is doing even more verification, checking AI Hero internal help, shows only edit commits, and it's gone and loaded the code review skill. This review is based on two axes. First, it compares the work done against the original spec. This is really useful when you've done a huge chunk of work and the agent might have forgotten things in tickets or the tickets might have been unspecified.
Doing a final pass means you actually nail everything. And then it also checks against the standards documentation that you've got in your own repo. In this repo we don't really have any coding standards documented anywhere, but if it doesn't detect any, then it uses some classic ones kind of from Martin Fowler. So it looks at code smells, tries to figure out if there's any bad stuff. Doing these in sub agents is really important because if you do it in the main agent, it means that the main agent already has written the code and agents are often really bad at editing code or improving code they've just written.
Because they've wrote it, so they just think, "Okay, that's fantastic. That's fine." Whereas if you spawn some agents, then they're going to have a clear context window and they're going to do a much better job reviewing the code. Okay, we can see that both came back. So cross-checked every acceptance criteria against the spec, checked everything against the standards, and cool. We're good to go. And it's now committed against the current branch.
Beautiful. So that is our flow complete. We aligned before we got started. We created some spec and tickets in order to make sure it worked over multiple sessions. We then implemented it and the implement skill itself used the code review. This is the main flow that all of my work runs through. And the stuff that isn't in the main flow is stuff that I'm experimenting with, stuff that I'm improving, always trying to get this loop faster, better, easier to run.
And for that, if you're interested in that, then you should check out my newsletter for these skills. This YouTube channel is a great place to be for subscribing to understanding more about the skills, but really the good stuff is on the newsletter. If you want on the day updates when I ship new skills, when I add updates to kind of that you need to keep updated with, then this is the place to be. But thank you so much for watching.
Hopefully this tutorial gives you an idea on how to get set up with the skills and what the main flow is supposed to be. Thanks for watching, happy skilling, and I will see you very soon.
The words are the caption track's own and nothing is reworded or re-transcribed. Paragraph breaks are placed between sentences so the text reads as prose.
Free tools for your own script: paste a draft and see where it stands before you record it.
Paste your draft and see where viewers are likely to drop off, with a rewrite for each weak line.
Paste the first 30 seconds of your own draft for a hook score and rewrites.
Check your draft against YouTube's advertiser-friendly guidelines before you record it.
Read this channel's public videos and transcripts, and download a writing brief for it.