Getting the transcript
Reading the captions from YouTube. A video nobody has opened here before takes 10 to 30 seconds; this page fills in on its own.
Getting the transcript
Reading the captions from YouTube. A video nobody has opened here before takes 10 to 30 seconds; this page fills in on its own.
Dave Ebbelaar · @daveebbelaar
This video has no Most replayed graph yet: YouTube shows one only once a video has enough views. These are the moments viewers replayed most in Dave Ebbelaar's most watched videos.
Most replayed moment at 15:10
12.3x that video's typical replay level
of things that you would like to have there then give a detailed report of what we can improve the llm will do that you now have a list of feedback points and we feed that back to the llm here's the original output here's the feedback now process all of that all right so
Said at 15:04
Most replayed moment at 14:01
2.4x that video's typical replay level
what do we need oh the user wants latitude and longitude oh I have to know the latitude and longitude of Paris let's give that back all right so now what we can do we now have the parameters that we need to plug into this function because we have the
Said at 13:55
The graph counts replays. It does not show where viewers stopped watching.
Words
5,865
Runtime
28:40
Speaking pace
205wpm
Reading time
24min
205 words per minute, above the 201 75th percentile of 349 measured videos. That distribution comes from the 349-video hook study.
Opening (first 30 seconds)
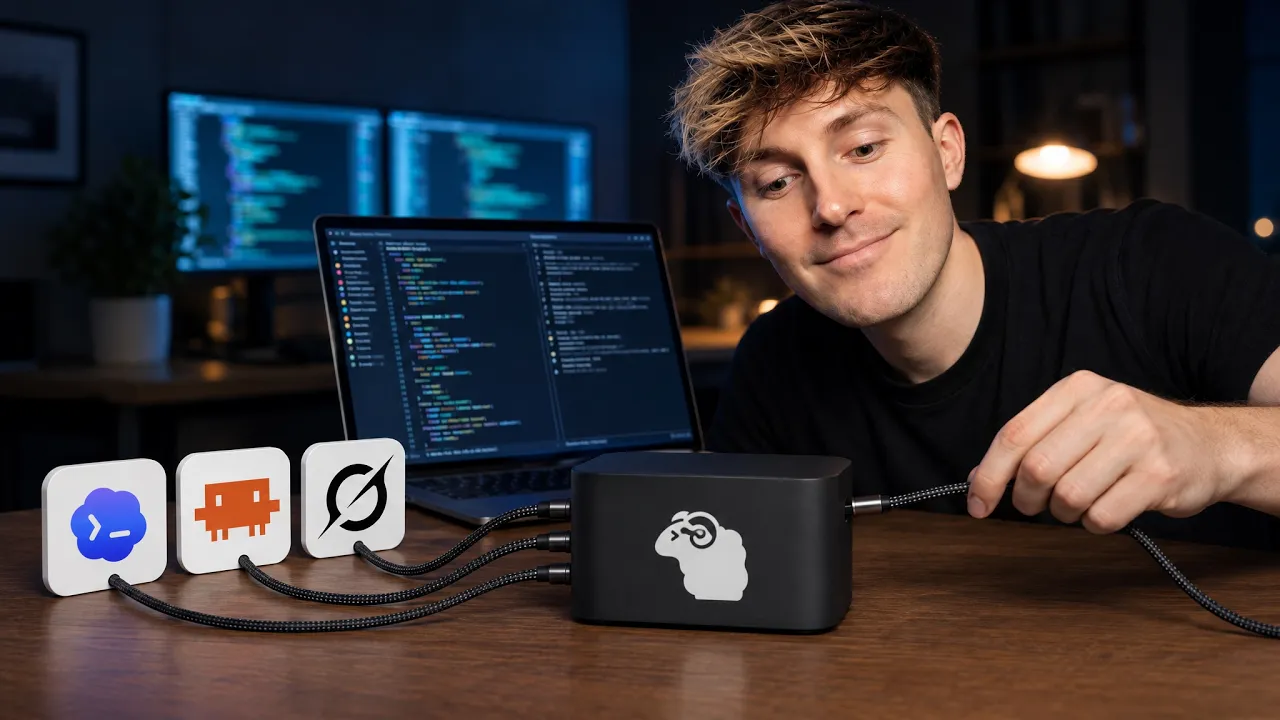
So Herder has been making some waves in the developer community. It appears to be the new meta to work with your coding agents. We even got DHH talking about this on the Lex Fritman podcast explaining how he even ships it default in the Omachi Linux distribution. So naturally, this got me quite excited to try it. But as I installed it and as I started to work with it, I had quite some questions and things that I needed to figure out in order to turn it into my daily driver. So that's the goal of this video. I created this
103 words, the words spoken in the first 30 seconds at 205 words per minute.
Free, no signup. See how the first 30 seconds hold attention, with rewrites.
Sentence shape
| Measure | This transcript |
|---|---|
| Sentences | 385 |
| Average words per sentence | 15.2 |
| Longest sentence | 210 words |
| Questions asked | 25 |
| Sentences containing a number | 8 |
Most used terms
Filler phrases
86 in total: like 56 · uh 11 · right? 8 · literally 3 · you know 3 · actually 2 · I mean 1 · kind of 1 · um 1.
A literal whole-word count of the same phrase list the Prepublish browser extension uses, so a phrase inside another word is not counted and a phrase used in its ordinary sense still is. It is a count and not a judgement.
Free, no account. See where attention is likely to drop, with a rewrite for each weak line. The free check shows the scores and the one issue costing the most. Or run it on the words above first.
Free · No login · See a sample audit first if you prefer.
What this transcript is
Every word below is the caption track YouTube publishes for this video, pulled from the video itself and reproduced unchanged. It is not Prepublish's writing, not a summary, and not a re-transcription: it is the video's own published captions. English captions, generated automatically by YouTube, in the video’s original language. Source: the video on YouTube. A channel that would rather this page did not exist can ask for its removal through the contact page, and it is removed.
So Herder has been making some waves in the developer community. It appears to be the new meta to work with your coding agents. We even got DHH talking about this on the Lex Fritman podcast explaining how he even ships it default in the Omachi Linux distribution. So naturally, this got me quite excited to try it. But as I installed it and as I started to work with it, I had quite some questions and things that I needed to figure out in order to turn it into my daily driver.
So that's the goal of this video. I created this outline and guide for you where I document everything that I learned over the past 7 days all the way from setup and installation but also to configuration commands and even color themes that you can copy paste from my setup if you like it but rather so show you how to do it so you can customize this really to how you want to set things up because that's really the goal here because while herder out of the box is really powerful in order to turn this into your daily driver you need some specific configurations and even other tools that I will show to you as well.
So in order to get started, you first run a simple install command Linux or Mac or on Windows. If you run that into any terminal or PowerShell session and then followed by the herder command, you will jump straight into a server. Now what you're seeing over here is the setup that I'm already working on. So what I did is I created a new session which is called demo which is completely empty. So if you run this for the first time, you should see something like this.
And when I got to this point, I got a little bit confused because now the installation here, super simple. But what's next? How do I set this up? Now, in order to understand what Herder does, the closest thing that you can compare it to is T-Mix. But if you were like me and you never used T-Mix before, then it can be quite hard to wrap your head around this. So T-Mix allows you to work on and with multiple terminal sessions and keep them persistent.
So if you close out on this, if I hit the X button on this, the session will still run and will still continue. And when you open it again, everything is still there. Now this is of course super convenient when you are working with CLI based coding tools. So if I open up a cloud session in here, let's say, and this is now running inside her, I can now close this and when I start running this, all the information will be here.
So this is also the first exercise that I recommend you to do if you're following along. So if I just give a prompt over here, say hi there. This is now just in a root folder. And now what I can do for example is I can completely close and quit my terminal. So when I then open up a new terminal and I run the herder command again. So this should be your command. I'm going to add the session demo in here. You can see I jump straight back into my workspace over here with literally the same window, the same prompts here.
Now if you compare that to working with let's say clot in a normal terminal or powershell session you know that it can be quite annoying. You have to manage multiple tabs and windows and when you accidentally close it out the session history can still be retrieved with the commands but it's always hard to like remember and it just gets messy real quickly if you work with the CLI like this. So that's also why I personally for the past months pretty much have never worked much with the CLI and I was just using the cloud code desktop app and the GBT or codeex desktop app which are great by the way and I love working with those tools but at some point where I run into an issue is I use different coding harnesses and different models for different tasks.
I use a combination of Grock built, I use the GPT models, I use the entropic models and I have a particular way of how I like to set things up and even use certain agents to review other agents work. And this is where it gets interesting because that's where managing and working with the different desktop applications gets messy. If you do all your work in codecs, this app is great. This app is phenomenal. But once you start to throw other agent harnesses into the mix, other model providers harnesses, that's where a tool like this is a mustave.
And once you get used to working like this in Herder, it's really hard to go back. All right, so now let's walk through my setup. And we're going to start with a terminal because in order to work with her, you need a terminal. And this is the first thing where I ran into an issue. Before I was using iTerm and for some reason iTerm was blocking some of the mouse capabilities that are available within herder and even some keyboard shortcuts.
So make sure that you use a terminal that you're comfortable with that has some customization options into it and then whenever something is not working make sure to do a double check use cloud use codeex to ask for that specific terminal if there are some overrides that you can adjust. So that's the terminal setup. I use Ghosty right now. I think this is only available on Mac and Linux, not on Windows. But this is just a clean setup that really works well for me.
I have been using it. So there are some configurations. I'm going to just show it on the screen. I'm not going to go over it. If you want the setup to look exactly how I have it, just tell your agent to work on this. The cool thing about Ghosty is that it has a configuration file. So if I open up the settings, let's see. The settings is just a file. You can see this is really cool. So you can put point your agents to it.
Color teams, all of that sizing. Just tell your agent to fix it. Okay. Then once we're in, we got this empty shell pretty much. For you, it may look a little bit different because I styled it a little bit. So again, remember, right, we go from a terminal, we just do the herder command. And uh for me, I do the demo session. And then we're here. So you can see we're currently in what's known as as a space, which has a a terminal session over here.
Now, in order to do anything useful, you want to first jump into one of your projects. So, what I can do, for example, I can go over here. Let's say I want to go in my AI cookbook. I copy the path over here. And I'm going to show you first kind of like the noob or the dummy way to do this. And then later, I will show you how to do this way faster. But I like I was not I am not a terminal wizard. So a lot of the stuff like how to like quickly navigate through files like I know the basic bash commands but just finding and going into a repository for example I at least before had not really configured my terminal in a way that I can easily search through folders and jump into things.
So let's say I want to work in my AI cookbook. This now becomes a space and you should really compare that to for example how in codeex you have your projects right? So in codeex I can essentially create a new project and I can select a folder. So this is now how I can import that. In her you can use this exact same mental model but you just go in there by changing the directory into your terminal or powershell session.
So now this becomes a space. Now the next thing that you should do is really try and click around within her itself. So if I now do a right click in here you can see stuff happens. I can click on those those items over here. I can come in here. I can close that. And that's one of the first things that I really like about Herder as well. It is a terminal guey, but like I've said, I'm not a terminal wizard, and I know a lot of you guys are also not terminal wizards.
So, if you have to do everything via the keyboard, it's just like you get stuck and it's really annoying. So, I really liked how they did that as well. So, I can come in here. I can create multiple panels. I can split to the right. So I can start to configure workspaces. So that is super useful. So now I am inside my AI cookbook. Let's say I want to start a codec session in here. Boom. I'm now in here and now I can just work with the CLI in this case codeex as per usual.
Right? You can see I can also create different tabs. So within a space which is a project I can also create a new terminal session and I can start a gro session in here. So now we have two agents running over here. You can also see them appearing over here in the agent section. So how herder is set up by default spaces top level projects at the top. Agents are all the sessions where you essentially invoked an agent. So if I open up a new tab and you can see I have just a terminal session in here.
So that so there's nothing going on yet. It will not show up in here. But once I configure or set up codeex or grock, then it will show as an agent. Now, how do we get this native integration really well with the coding harnesses? So, the first thing that I recommend you to do is click on menu, go to settings, click through this, play with the themes, the indicators, the sounds. This is all very customizable. But then go to integrations.
So, here in integrations, you can see all of the agent harnesses that are supported. So you can see I installed grock, I installed codeex, there's even a new update that I now had to select for cloud. So this really helps. So you can do that all from the UI here by going through the integrations. If you want to install all of them via the uh commands, you can do so as follow. So that is explained over here. So herder integration install cloud codeex crock.
So that is the first thing that I recommend you to do because this will create a better integration between the harnesses that you are using. All right. So that's setup 101 in Herder. So we got multiple agents running at the same time. Now let's say we want to have another project in here. So next to my cookbook, I'm also working on another project. If I now create a new one, you can see that it defaults to that same path again.
So I am now in my cookbook. But let's say I go one level higher. Let's see what's in here. Let's go into my fast API tutorial. Let's go in here and let's clear this up. You can now see I've now created another project here in another space. And in here I can now also start a codec session. Let's run this here. And I can start to work. You can see the agent showing up here as well. And remember the cool thing about this is don't be afraid that if you close this out everything will be gone.
I can simply quit Ghosty in this case, close everything, open it up again, and then when I or when you do herder and for me, Herder session demo, you can see everything is still there. So, you can really start to configure your sessions similar to how you have that in, let's say, the Codex desktop app where you add all of your projects. So, there's a little bit of a one-time thing that you need to go through. Now, as you can see, I created a demo session.
You can also create multiple sessions if you have certain projects where you want to group repositories together. This can also be super useful. So if I go in here and I detach it once more, you can see I can start a new session. If I do herder and I do d- session again, if I now let's do a test in here. If I use this command, if the session does not exist yet, it will create a new one. If it already exists like the demo one, it will jump into it.
So I can now create a test session. And you can see it is currently empty. So let me detach that again once more and then do a herder session list. So you can see all of the sessions that are running. So I got my default one which is the one you will jump into if you just run the herder command. I got most of my work in there right now. But as a next step what I want to do is I want to split things up and create multiple sessions where I have one project with let's say five repositories in there.
Now, if you want to know what other commands are available, you can always do a herder-help and it will show you everything that you can set up. The cool thing is your AI agents can do this as well. So, they can run those same commands. So, let's jump back into our test or know our demo session and continue with this. So, that's pretty much the installation and the basic setup required. You now have Herder, you have your agents connected, and you know how to create and jump between different projects.
Hey, now real quick, if you're configuring Herder, you are most likely a developer. You're working on projects, you have lots of side projects that you're working on right now with AI, probably next to your day job because we can do so much with coding agents. If you ever thought about the idea of freelancing, taking on small paid projects next to your full-time job, but don't know where to start, don't know how to find that first client or how to price it or really where to start, you might want to check out the first link in the description.
There's a video of me going over exactly how I can help you to get started with this. It's what I've been doing for the past 7 years. It's super fun and the timing has never been better right now to start doing this next to a full-time job because of how capable these AI agents now are. Okay, now let's continue with the Verdder customization. What is awesome about Herder is that there is this config.toml file and in here you can specify everything from how it looks, how it feels, keyboard shortcuts, everything can be configured here.
So the cool thing is you can also point your AI coding agent literally to this file or to this page and the herder documentation. You can say we're going to configure her. What can I do? Here's what I want. And then what will happen behind the scenes is let's say here's my configtomo file. So you can see there's just a whole bunch of stuff in here. I haven't read a single one of these lines in here. I just used codecs in order to go through this ask what's possible.
You can set up things like the colors you see over here. The spacing between different elements. This is really fun to play along. Now as with the other things I've included my setup so you can point it to this. You can copy paste it exactly the way how I have it, but I highly recommend you to play with things and ask your agent. Go into the docs, what can I change to make this really look and feel like the way you want it.
So that's for colors and spacing, but you can do the exact same thing for keyboard shortcuts because that is a big big thing as well. So now that you are able to create these multiple projects and kick off different agents and move between different things, you can really make this a supercar because everything is fully customizable and you can navigate everything all the way from tabs to spaces up and down in it using the keyboard.
And that's where it gets really fun, especially when you are more working with multiple agents at the same time and you're constantly jumping between them. you quickly need to figure out where I am I how do I get to the next one and how can I continue to give a prompt in there right so I have set up my keyboard shortcuts in a very particular way because the default setup pretty much in her is that you use a prefix keys so out of the box for her on Mac that is controlB and when you hit that it will essentially show you the other keyboard shortcuts that you can use now I have set it to a different hotkey key on my keyboard already but for you or uh it should be controlB I don't know what the default is on Windows could be the same but you use this paired combination where you do a prefix and then let's say you hit C to create a new tab so this is similar how you work in let's say in T-mix or in Vim and I am not used to this I don't like prefixes I just want to use this like a normal application so I've also shared my setup over here so what I can do I can just do a command T to create a new tab in here.
So I can create a new tab. I can create a Gro session in here. I can do a command W to close that. I can use my arrow keys with a modifier to jump between different projects and then also left and right between different tabs. So for me, especially if you have lots of projects in here, just like cycling through everything and then within a project between different tabs, that is super cool. You can even jump to work that's finished.
I have that set up as well on a different hotkey that is all in here. So you can get a ping when an agent is done. Press the key. Boom. You're instantly going to that particular agent. Super fun to work with. Now the last thing that I want to cover here is the command K to go to any workspace. So let's say I'm in here. When I press command K, you will see the following uh panel. So I can cycle through this and then just quickly jump to things.
So this is where it gets really cool. I can even like search in there and by hitting a forward slash and then specifically go to let's say my my AI cookbook. So this is really where this becomes a superpower. So let's say you're working on something. You just got back from a break and you're working with multiple agents, multiple projects, and you want to kick off a new agent, right? How do I do that right now? Well, I have a keyboard shortcut first of all to open her.
So that's one tap. So boom, it's there. So now I think about okay this was in the let's say it's I want to add something to the fast API tutorial. Now I can cycle here quickly but I can also if there's multiple projects I can do command K. I will do forward slash I will do fast API. Boom. I'm inside this project right now. I hit command T to create a new tab. Let's say this is a codeex task. I then quickly check okay which model do I want to use?
Well Astra high. That's totally fine. And I come in here and I use my favorite dictation tool, Glido, in order to yap into this, like get clear on what the prompt should be. And then when I let go, boom, the text will be there. And then I hit enter and I'm good to go. So that's my flow. And I wanted to show you that in here so I can get you excited on trying to play around with this, trying to set up the key combinations, trying to make it look and feel the way that you would like to see that because there is a little bit of a learning curve if you're coming from just working with codeex or just working with cloth code.
But I can tell you, get used to working with the different harnesses. Set it up the way you like it and it's so fun and so quick to get used to this and to work with this. Okay, next we need to talk about agent delegation. And this is probably one of my favorite features of Herder itself. So, Herder has a skill, the skill file, which is essentially an instruction for agents on how to use the Herder CLI. And with this CLI, you can kick off new agents, you can start sessions, you can create multiple tabs.
So, this becomes really powerful. So, let me show you what you can do with this. So, first of all, you can follow the instructions over here because in order for this to work with all of your agents, you need to have this herder skill globally installed for all the agent harnesses you want to use. So, in my case, that's for Grock, that's for Codex, that's for Claude. Because if you install it globally, if you then instruct, let's say, Codex to say use the herder skill to create another agent and do XYZ, it knows how to do that.
So this is where work becomes really fun and where you can start to think about what specific work do I want to delegate to which particular agent. So let me show you what that looks like. So let's say we're in my fast API tutorial in here. Let's start a codec session and let's see as for the model. So we're on GPT6 Astra right now. Very powerful model but also expensive, right? Let's uh let's put it on medium. And let's say we want this to be the orchestrator or the refuer and we want let's say cloth to handle some of the work because let's say we can use opus 5 in there or another mix do that with grock.
What I can now do is I can say the following. Can you kick off another agent using the herder skill? Do it here in the right tab in this session. Use opus 5 to review this codebase. Now little bit of a random prompt in here, but you can see what it now will do is it will read the skill.mmd and this is super useful for uh multi- aent work refuse. So you can see it's literally using the herder CLI. It now creates the new tab in here.
Awesome. Starts the cloud code session. You can see it's it uses opus 5. And now look boom there. You see you saw that. Now it puts the prompt like to me this is what AGI feels like. just like you give it a task and it just like it navigates. It knows what to do and it just runs. And this is just one example, right? You can do this with multiple sessions, multiple different models. If you have all the harnesses correct uh connected, you could say like kick off five sessions.
I want to see what this looks like. So now this just gets to work. And now the cool thing is you can see right now here on the left um Austra is now essentially the refuer. So this is now started. These tabs can also communicate with each other via the herder CLI. So once this is done, it can give a ping back and it could resume that session. Now this to me super cool. You have full transparency into what's going on over here.
You can see the different sessions in here. You can browse through them. So that is agent delegation. Make sure to set that up as well. One of the most powerful features. Okay, now that should already get you excited about Herder and to dive into things. But there's one more thing that I'm going to share with you because this for me made all the difference and made Herder a tool that I could use as my daily driver without touching any other apps.
So I come from working with cursor or visual studio code first. It was that. So I am used to looking at my projects, looking at my files whenever there are changes. I look at the divs, I do my commits, I do everything in here. Once you switch to herder, you now all of a sudden have this disconnect. Which branch am I on? What is the agent touching? What's uncommitted sitting on my uh work tree for example? What like what's the status?
What's going on? So in order to solve this for me personally, I did two additional things and these are not herder specific. So these are connected disconnected from her but they're terminal tools that you can use. So let's say in this fast API tutorial I want to see my file structure. So what I did I installed Neoim with a particular setup and configuration which I will all dump in here. Again this is all stuff that I just like got to with AI by asking questions.
And what I can now do is I can come in here and I can do a neovim and then a dot in here. And if I just move this to the beginning to the first tab I now have a file viewer in here and I can just browse through things. I can search things. I still have to like learn or look up the commands and the keyboard shortcuts because like Neoim is a whole world. I never really like dabbled into that. And I know a lot of developers are similar.
I know we probably have some like Neoim Vim wizards watching and like dude your setup sucks. I I don't know. Like I just set it up. But now I got my file fewer in here which to me is really exciting now. But then which branch am I on? What work is committed? Like how do I even do all of that? So another tool and again I don't come from a software engineering background. So for some of you all these tools may be very familiar but I never heard of lazy git because I just used VS code and cursor but now this is another terminal tool where that also comes with its own setup configurations that you can use to push pull do all of your commits.
Uh again, all of it is set up in here how I have set it up. But this is a work in progress. But I wanted to show you this because this for me made it a like a complete solution. So if I now go down in here, I have my terminal in here. So you can see right now I have my agents. I'm working on a project. I'm asking questions. I'm working on stuff. Then I come here to like my let's say my main point of view. And this is all saved.
This is all there. Once I set it up and I run these commands, it will be there. So I have my terminal session to run and start for example the development server and if I am on a branch let's say or a repo where there is some work you can actually see and review stuff right so I even have it set up that whenever I am in a particular session I have another hotkey boom I can open up lazy git and I can exactly see what's going on which branch am I in so like this this is the stuff that got me got me sold on this like yes I want to invest time in learning all of this because if you bring all of this together, this really becomes a supercar and this is the only screen that you need to pretty much do all your work.
Like that's what I want to optimize for. I want to move away from the screens. I just want to come in here like yap a little bit into AI, let my agents run and then review and off I am again onto other things in life. So this tool I believe I can do it and it's very fun. So, one final tip that I'm going to give you like quality of life improve improvements jumping between different folders. Also, this was new to me. I'm not a terminal wizard.
Again, for maybe some of you watching, you're like, "Dude, how did you not know that being over like being working in tech for over 10 years?" I just use the IDs and then you don't have to do that. So, Zoxite, this is a tool, a terminal tool that you can use in order to like quickly browse through projects. So let's say I want to add a new space, a new project. So it defaults to your previous one, right? So now I am in my in my AI cookbook.
What I can now do if I do ZY and I hit enter, I get this list where I can actually search. So I can now browse through things and I can say let's say I want to find my AI cookbook. Well, there it is. And it will also then if you come in here and you do Z, let's say Z, and you do AI cookbook tap, it will allow you to autocomplete and tap as well. So that's all stuff that you can do in there. So that makes it a little bit easier to get to your particular working directories other than like doing it really the noob way coming in here and then saying okay I want to copy this path name and then do a cd I mean also works you know also works but this just zy makes it a little bit better.
Boom. You can go through let's go into the docs now. Boom. This is another project. So that is herder in a nutshell and how I set it up. So, I'm going to show you one more tip that I use as well, which completely changed my workflow yet again. And once you understand that everything in Herder can be done via the CLI, it unlocks so much potential. So, what I did, I created a custom MCP server in Glido that I can connect to Herder.
So, for those of you that don't know, Glido is the world's best dictation app for developers and you can also create custom MCP servers for this. So with this integration set up what I can now do coming to any particular page whenever I'm working on a project or someone messaged me in Slack I can pretty much copy paste all of this let's say and I can say can you kick off a herder agent in the executive assistant for me to help me understand how I can configure my own herder to do this.
So I will now select this kick this off and the custom MCP server will run in here. I can simply allow that and now I can kick off work without even opening my other applications. This will all run in the background. So you can see I can now get a confirmation in here. Once I close this out, I go back to her. You can now see that with that context explain how to configure a personal herder. This is now kicked off. And I have it set up because it's custom, right?
You can decide what's what is your default agent, which harness do you want to use? You can select text in the future. You can also do screenshots in here. So that's glido. If you haven't tried it out already, if you're using other apps like Whisper Flow, Aqua voice, whatever. Those are cool, but Glido is really on another level if you ask me. For developers, it does dictation really well, but where it gets really fun is the command mode feature, which is currently in beta.
You can go to account uh general and then enable the beta features and you can use this. So if you want to give that a try, link is in the description. And then with that out of the way, that's it for this video. If you found it helpful, please leave a like and consider subscribing. Let me know if you want to learn more about my Herder workflow, particular setups that I do. For me, this is still experimental, right? I've been using this tool for a week.
I've been loving it, but I am constantly thinking about new ways of how I can use this. So, yeah, you just need to play with it. You just need to play with it. That's it's so customizable. Uh, and you can use your agents to do so. And that's what makes it the most fun. So no reading docs or configure tweaking with lots of the little things. You just tell your agent, go build this and it will work. All right. Well, thanks for watching.
I will link two videos up here which I think you will like and I suggest you to check out
The words are the caption track's own and nothing is reworded or re-transcribed. Paragraph breaks are placed between sentences so the text reads as prose.
Free tools for your own script: paste a draft and see where it stands before you record it.
Paste your draft and see where viewers are likely to drop off, with a rewrite for each weak line.
Paste the first 30 seconds of your own draft for a hook score and rewrites.
Check your draft against YouTube's advertiser-friendly guidelines before you record it.
Read this channel's public videos and transcripts, and download a writing brief for it.