Getting the transcript
Reading the captions from YouTube. A video nobody has opened here before takes 10 to 30 seconds; this page fills in on its own.
Getting the transcript
Reading the captions from YouTube. A video nobody has opened here before takes 10 to 30 seconds; this page fills in on its own.
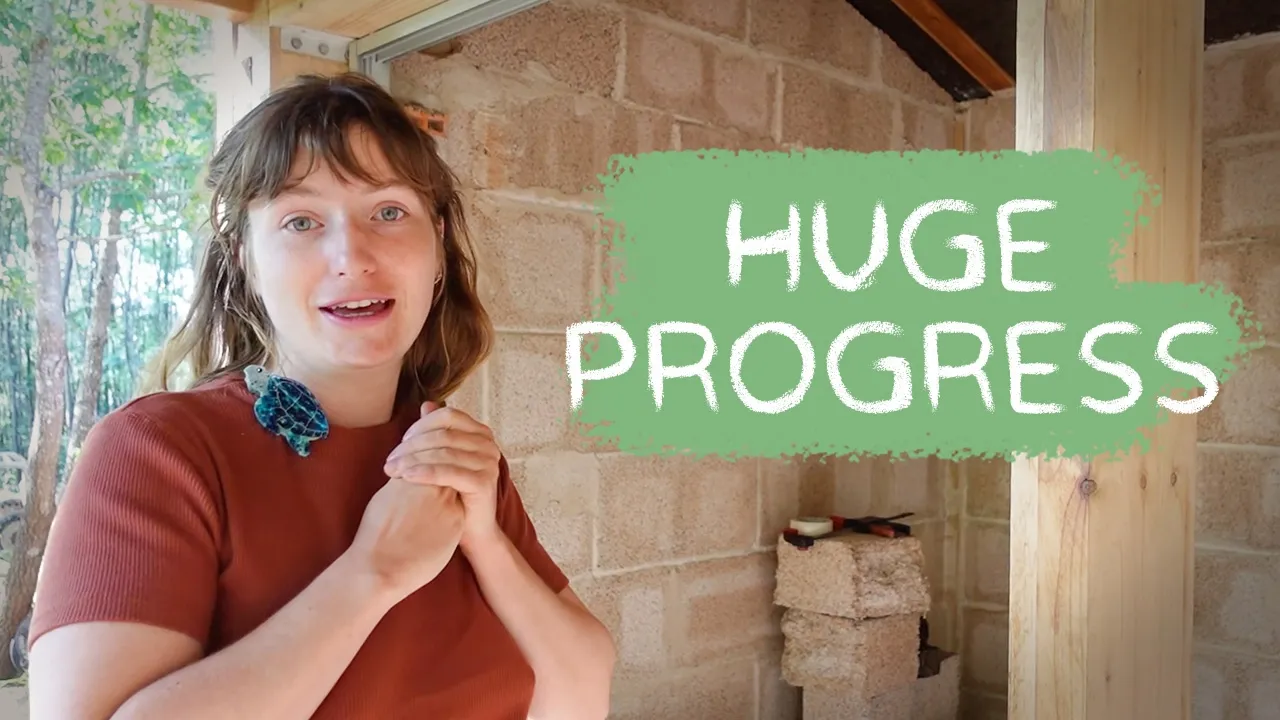
Project Kamp · @ProjectKamp
This video has no Most replayed graph yet: YouTube shows one only once a video has enough views. These are the moments viewers replayed most in Project Kamp's most watched videos.
Most replayed moment at 22:50
5.7x that video's typical replay level
butter is dangling on a thread. So, if any rats get comfortable enough to check that out over the next few days, we see what we find when we wake up. Maybe there's a rat. Maybe.
Said at 22:43
Most replayed moment at 10:05
12.6x that video's typical replay level
is not doing anything at the moment. And I'm quite lucky with the rest of Portuguese people and whoever. But imagine Dave.
Said at 9:59
Most replayed moment at 9:16
8.0x that video's typical replay level
I'm going to put it in a big jar. And after a little while, we're going to refrigerate it. >> [music] [music]
Said at 9:09
The graph counts replays. It does not show where viewers stopped watching.
Words
3,734
Runtime
36:05
Speaking pace
103wpm
Reading time
16min
103 words per minute, below the 160 25th percentile of 349 measured videos. That distribution comes from the 349-video hook study.
Opening (first 30 seconds)
Six years ago, we bought this abandoned piece of land in Portugal to find a new way [music] of living. And since then, we have been discovering old ruins on the land, rebuilding them with used materials, and documenting what we do [music] so we can all learn from it. And in
52 words, the words spoken in the first 30 seconds at 103 words per minute.
Free, no signup. See how the first 30 seconds hold attention, with rewrites.
Sentence shape
| Measure | This transcript |
|---|---|
| Sentences | 414 |
| Average words per sentence | 9.0 |
| Longest sentence | 44 words |
| Questions asked | 11 |
| Sentences containing a number | 9 |
Most used terms
Filler phrases
46 in total: uh 16 · like 12 · um 6 · kind of 3 · right? 3 · you know 3 · actually 2 · I mean 1.
A literal whole-word count of the same phrase list the Prepublish browser extension uses, so a phrase inside another word is not counted and a phrase used in its ordinary sense still is. It is a count and not a judgement.
Run the check on the words above: where attention is likely to drop, with a rewrite for each weak line. The free check shows the scores and the one issue costing the most.
What this transcript is
Every word below is the caption track YouTube publishes for this video, pulled from the video itself and reproduced unchanged. It is not Prepublish's writing, not a summary, and not a re-transcription: it is the video's own published captions. English captions, generated automatically by YouTube, in the video’s original language. Source: the video on YouTube. A channel that would rather this page did not exist can ask for its removal through the contact page, and it is removed.
Six years ago, we bought this abandoned piece of land in Portugal to find a new way [music] of living. And since then, we have been discovering old ruins on the land, rebuilding them with used materials, and documenting what we do [music] so we can all learn from it. And in this video, we will build the heating system for our brick ruin and plaster [music] the interior walls. Welcome to a new project camp update. [music] >> [music] >> In the past year, we've been clearing, demolishing, reinforcing, rebuilding, unbuilding, [music] and continuing to convert the brick rune on our land into a cozy home.
Now, we will build our long- aaited [music] heating system. Let me show you the design. The inside is a traditional wood stove that is fed from the galleria. The masonry built around it [music] serves as thermal mass that radiates the heat slowly into the two separate [music] bedrooms. The pocket where the wood stove sits in is open on the galleria side. This opening will create a draft of cold air [music] that will heat up and move to the top of the brick chimney.
In [music] the future, we will place a concrete slab that closes off the chimney and creates a pocket of hot air. Beneath this cap, we create air vents to let warm air flow into the two separate bedrooms. As you can see here, a little disclaimer, [music] we had all of our forces working in a parallel on two projects in the brick ruin. So, we will jump between both teams. Now, let's get this place ready for the next steps. >> Our first step is going to be finding the center of the room, and then we can work all of our measurements off that center line. >> Yeah. in there.
I'm going to mark that. [clears throat] >> Mhm. So, my feet are on the center line. Um, we are laying out bricks at the moment to see if what is in the design is actually correct, [music] and it seems to be. Uh, we're going to build a row of three bricks there and three and a half [music] there. And then we are going to start with the base. We want it to hold a little bit before it falls off. >> So that's great. There we go.
Brick laying 101. So this is where bricks come to die. We might use them. And we want this part off. So, we make a notch here in the middle. And then we clean it up. >> Russ, what do you think of this? >> Oh, yeah. >> A bit pointy. >> Oh, couldn't have done it better myself. With the bricks and the mortar ready, we can now actually start laying bricks. We're not masons, so if there's any pros with feedback, feel free to comment.
[snorts] You ever buttered a brick, my guy? Don't come around me when I start laying. >> So, we got a couple layers of the uh the outside base, and now we're [music] going to fill in the middle. And the part in the middle is the base for the wood stove. So the wood stove will sit on that. So it [music] is a little bit elevated off the ground. [music] >> See, I knew it was perfect >> just before lunch. Amazing. Ross, >> the way you're on the mortar >> and and and all the other people. >> No, I'm not on the water. >> And all the other people. >> Everybody.
Team effort. >> Team effort. >> Team. >> Yeah, but you said Ros >> but under the guidance of >> Ross Ross effort >> of Ross Mercury. >> I say nature effect >> for this. We use the showcase bro. >> Guys looking to get some brick. >> Don't hire me. >> No. >> Yeah. >> Hire get. >> We got to think we're doing great for non brick layers. >> Mhm. Yeah, it's fun. I like it. [music] So, we ran out of sand. So, now we're back to our little sand pile, but we have to sift it.
So, that's what we're doing this morning, sifting sand. Yeah. Camera. I don't know who's going to carry this wheelbarrow up the hill. Being shaky. [music] Oh, you right there. >> [music] [music] >> D. These are different than these because these are fire bricks and they make a nice solid foundation. They have no uh holes in them. So, it's a nice surface for the stove to sit on. >> Good morning. We're back in the brick ruin and today we're going to prep for plastering.
So, we're going to plaster lime. can be very messy and we don't want the lime to get onto the wood because it could stain it, but also the wood moves differently than lime. So, we just don't want them to be in contact. And we also don't want lime to fall onto the window seal to make the window crunchy. You know, that's terrible. And we're going to also protect the floor because it's going to be a bit of an explosive process.
We also uh have that the plaster comes here, right? We want to have a little line of cork here [music] that is going to absorb the movement of the wood and prevent the plaster from breaking. And landscape team is making so much noise. Good morning. It's uh the plastering day, the first one. Made sure that our work environment was protected. And we also at the last moment of the day watered this wall. And it's still a bit damp.
And today we're going to rewater it again. We don't need to have a projection layer because the surface is quite full of holes and ready to have something to clean on. But if the surface was completely flat, we would have needed to do a super watery projection lime scent. We're not going to do that. We're going to immediately move on to the 1 cm to 1 and 1/2 cm of lime plaster. And another detail that's going to happen is that we're going to put these little baguettes of things of cork.
And we're going to put them in between the lime plaster and the wood. We don't want any cracks. So, we're going to put some cork to absorbate the chucks. The chucks. [laughter] Okay. So, Oh, man. Let's go. Let's do it. Okay. We're doing [music] it. >> [music] [music] >> Heat. [music] Heat. [music] I'm just making sure that I'm getting all the corners. The corners, huh? >> We're going to prepare the wall by wetting it.
This is the food. Okay, we've made these little baguettes of exactly 1 cm and a half and I've wet one side. I've put some tartin of lime mix and we're just going to see if it sticks. And if not, we're going to have to improvise. So, let's see if it sticks. If it sticks, we're golden. So, we're kind of cheating, not cuz it's busting against the floor. It's not very sticky. Yep. Maybe I should have just screwed it. I don't know.
I like not using screws, but good enough for me. Oh gosh. We safely climb the ladder. [music] Don't hit. [laughter] >> Should I help you somehow? >> All good. All good. All good. >> No. Wiggle a bit. We're putting a lime patty here, blocking it, and then putting it on the wall. And from down to top, we are placing the lime. For now, the mix is very, very liquidy. So, we're just going to make sure it's evenly placed. And when it's going to be more leather hard, meaning that I can do that without pulling it.
You know, this is too liquid. But if I touch it and it will move but not come with me. That means it's time to and level everything. So now we're just applying it to the wall and making sure it stays. [music] Heat. Heat. [music] [music] >> [music] [music] >> We finished the whole wall with putting on the plaster. And because we're a little sloppy, we need now to smooth it. Usually, we could wait a couple of hours to dry, but at this time, it's really hot in Portugal, and it's 35°.
Okay, not 30. I'm exaggerating. It's 30° [snorts] >> and it's not ideal. Lime likes a good 20° with a bit of humidity at night. We're doing it, but we don't want the lime to dry too fast. So, we sprayed the wall again after putting all the plaster. And I'm coming here with a TR to make sure everything is kind of flat. And we're gonna have to come back and check regularly on the lime plaster to make sure that it doesn't get too wide too fast because that would potentially make cracks.
We are making progress. It is slow and steady, but I'm liking the result. And I think it looks pretty good. >> I'd say we're getting faster by the brick. >> I was going to say we're getting speed. >> [music] >> These are cut to size. Let's see if Ross can use them. >> Ross. >> Yeah. >> Got some bricks for you. >> Ooh. Wow. Clean. Last row, right? >> Although done with >> done with this [music] step. >> Exactly. This is the pocket.
The >> stove pocket. >> The stove pocket. Let's call the stove pocket. >> The stove pocket. >> Yes. >> One more brick to go over there. And from there, we need to taper. >> Taper. Yes. >> But this is already a very big achievement. >> Look at that stove pocket. >> Stove pocket. This baby right here is still drying. We're going to accompany him through his drying process. But this is not all that we're going to do. We're also going to do this wall here.
And you know the drill. We're going to come, we're going to wet it, going to prepare a mix, come with a bunch of ladders, and it's going to be done. >> [music] [music] >> We're done with the applying on the wall the plaster. And now we see that there is a bunch of space where we weren't super regular because we're not professional. Sorry. We step away from the wall and we're going to look where the light makes shadow pockets.
And we're coming with a tel and a sponge to sometimes wet it, smooth it, make a better repetition of the mass. So we're working the wall a bit better and a bit more precisely. [music] Heat. Heat. [music] >> [music] [music] >> We're going to swing back to the fireplace and we're going to reuse our lintil from the inside as the new lintil for the fireplace. So, got to prepare this edge up and make it look pretty. [music] >> [music] >> So, look how smooth these edges are.
Before, after. Let's dry fit it. We got a lintil. Now >> the lintil is in place. Um Ros and I are going to continue building the chimney. But before that, we take the wood stuff out so Mariana can start restoring it. [laughter] [music] >> Ross, your hand should have been on the other side. >> Okay, >> go now. Yeah. Yeah. >> Oh, yeah. >> All that work. But for a functioning heating system, we need something that produces heat.
We're going to go with a wood stove. Uh we have plenty of wood. So, that's always a a good way to heat here in in Project Camp. We're going to treat the stove with some metal brushes. And then with a specific product that can withstand high temperatures and like give some polish and shine to the cast iron. We'll clean it first. But yeah, let me show you how it looks before we do anything. These are vents, I think. Like especially here on the feet.
Yeah, she just has this like surface rust which hopefully it's going to be really easy. Uh here it is a bit more rusty. Uh again like surface rust. This is also okay from the other side also. Very nice. Then uh this is the ashtray which doesn't look [clears throat] good but it's okay cuz it's just the ashtray. You need to be careful in there. This is the base. We're going to give a touchup to this. And then the door also looks very good.
Um, it had a glass, but it was broken. So, we went to the factory and got a new one. The door looks very good from the outside. On the inside, we'll take care of this. Make it look good. And yeah, let's start. [music] >> [music] [music] >> So after all the grinding, it's really nice to apply this thing and see it transform. And I'm doing both brush and cloth, especially like here in the front. [music] >> [music] [music] >> Okay.
Uh mixed results. We wiped off um all the excess paste and the stuff is looking very good. That's good. But as the manufacturer said, if you if you touch it, like this is my finger. If I go here, I will always like get something. And depending on the areas, I get a bit more. But we're going to put it in place. And no one's going to touch it. So that's that's okay. Since the plastering team was advancing quickly, we decided to pass a chimney for a moment to build the outer wall for them to plaster.
Um, and to build that wall, we need half hand blocks. Fire season officially started today. High fire risk. So, we're going to cut them by hand because we can't use a chainsaw this afternoon. If we use exactly half a hemp block, we have the right sides. Here we go. So, these beams are not fully straight. Like the this gap is a little bit tapered. So, these are too small. But the nice thing is that we need some cork um on both edges because the wood expands.
We're going to plaster it. So, we want a flexible layer uh to prevent the more the plaster from cracking. So, we're going to build it up all the way, use the brackets to connect it to the wood, and both sides will have a nice strip of cork. And then we'll plaster them and we're going to look awesome. Smack it on there. Flop. Flop. Flop. Smack. Smack. Smack. [music] Okay. Try and error. Then we plaster it afterwards. It has to be a little bit higher so the bracket is in the mortar dress.
[music] >> Should I go higher than that? >> I think that's good. >> Well, we'll put a second one just in case. >> Exactly. Lots of bracket. So, the hemp wall is connected to the wooden structure. The mortar will uh go around the stainless steel bracket. So it will form a joint. Am I right? >> Yeah. Well, it's okay. That ain't going anywhere. That one's been high, but I think it's okay. Some water first and then you put this back. >> Exactly.
[music] That's how it works. >> See the jelly? >> Yeah. You might need to squish down from the side, too. >> See how this goes. Oh, wait a minute. [music] That's in there. Doesn't move anymore. It's good. We have the other clothes to go. [music] >> [music] >> We're drilling holes for our electrical conduit to run through the wall cuz we're going to have an outlet here, maybe a light switch, but we need space inside the assembly so we don't mess up our beautiful exterior wood.
Should have done the holes earlier, but it's okay. We can still do This side has a little bit more space for the core while we need to fill up the [music] gaps so no air can go through. Will be plastic very nicely, but for us first is filling up the gaps. And we're using tiny bits of pork, but we make sure that it's light and tight. There we go. And Oh, that's perfect. There we go. Uh, so we're pulling wire while we have space uh above the walls.
And we have some wire here for this one will be for a future socket. But we have enough wire that goes till the end of the wall just so that we future proof ourselves and then later on decide where we want to place things. And there's also this wire which is for the light switch which will be here. When you come in into the bedroom, slide the door open, turn on the switch, and there's a light. So, this is for light and switch, and this is for the socket.
So, we're going to label everything and pull wire so that we can close the walls. Hello. So, we're bringing two cables down in this area. We're in the galleria. One for the sockets. We're going to have a socket outside here. and one for the light. Okay, nice. I think we leave it here loosely in place. Ross can start filling this gap and we can keep going with the electric system. And then some more cable and junction box number three.
And this cable is also going to go here temporarily so it looks better. So we are all for the loops, aren't we? >> Also so that Ross can build the wall. >> Last row of hemp for now. >> For now. It's messy, but this will be officially closed off. And we got to do this part next. >> This guy >> in the middle. And we are finishing the wire so that blaster can go. >> Here we have our last block. >> I want to hold the >> Wow. >> Sorry. >> That is satisfying. >> I'm glad that's done. >> So, regarding cable management, uh Caroline tucked away the cables here.
So, we made a small chamfer on the cork and this is behind the bracket. So, the idea is that the plaster can go on top easily. Don't mind this. This is going to be the light. So, it's going to be out of the way and the light will be there and the socket will be there. There is also a little channel in the hemp here for the socket. The electrical is about to be finished and the hemp wall is closed off. And as you can see, Colleen has started plastering.
Look at that. >> She's finishing. >> I mean, you can just say I'm killing it. I think that's accurate. >> You heard it here, folks. She's killing it. Heat. Heat. [music] Here we are adding the ventilation [music] shafts. As a quick reminder, the hot air from the stove is directed into the bedrooms through these shafts. And now we're doing the hemp blocks for our final wall. So, our lintil that we cut down, we're now cleaning up and we're [music] going to use as the gap filler for our fireplace/ chimney.
This [music] gap little hole. >> Because of the fire regulations, we can only use power tools inside the buildings. The grinding of stones can create sparks and that's a [music] fire hazard. Outside there's a lot of flammable dry grass so the risk of starting a fire inside is way lower. Lentils on the side looking good. We'll add a lot of abrasion so there's a good bind [music] between or bond between the lentil concrete wood [music] and masonry.
So hopefully this works. But looking really nice going all the way up and down. So pretty happy that we could use the lint tool in a fun, playful way. I'm going to now drill big old holes so we can put metal supports on the bottom so it doesn't topple over and hopefully long lasts as long as the brick rune does. >> [music] [music] >> and see if our marks line up. Holes are drilled. Look pretty good. Let's see how it fits on top.
All right. Why do I always choose to do this by myself? Ah, fits on. Just need some mortar. We'll mortar these guys today and then wait a couple days and put the top piece on. But we still need to connect them LIKE THIS. SO AFTERWARDS THEY CAN BE one long piece. [music] Woo! [music] Got the knobs cut up. Time to do our last mortar mix for this fireplace. Uh, as you can see, you got this nice overlapping joint. Very similar to some joinery, but with concrete.
I'm very happy with it. It's crazy to think this is all because of the brick wall that space that it created. And now we're just kind of filling the gap. But we're using the materials. It's going to look really cool at the very end. [music] I'm very happy. Let's finish it. Our [music] [music] heating unit is complete. We have our beautiful stove that Mariana fixed up and polished inserted in with our brand new chimney.
The masonry is done and we've reused the concrete lintil that we took out. We also used it on the sides where the brick was supposed to be. They had a large gap. So now we have a continuous piece of concrete. Let's go check out the inside. As you can see, our beautiful masonry is done. Got a big base, a lovely taper all the way up to a lovely vent at the top. The concrete lintil you can see is still curing, but the idea at the top to close the gap is to make a little shelf so the people in the room have a nice shelf.
Building the masonry was a big milestone in a Burke ruin. [music] The next step is installing the exhaust and testing out our hybrid heating system. If you like what we do, you [music] can support us on Patreon. There you will see the next video two weeks ahead in 4K and without ads. If not, [music] we see you here in 2 weeks.
The words are the caption track's own and nothing is reworded or re-transcribed. Paragraph breaks are placed between sentences so the text reads as prose.
Free tools for your own script: paste a draft and see where it stands before you record it.
Paste your draft and see where viewers are likely to drop off, with a rewrite for each weak line.
Paste the first 30 seconds of your own draft for a hook score and rewrites.
Check your draft against YouTube's advertiser-friendly guidelines before you record it.
Read this channel's public videos and transcripts, and download a writing brief for it.