Getting the transcript
Reading the captions from YouTube. A video nobody has opened here before takes 10 to 30 seconds; this page fills in on its own.
Getting the transcript
Reading the captions from YouTube. A video nobody has opened here before takes 10 to 30 seconds; this page fills in on its own.
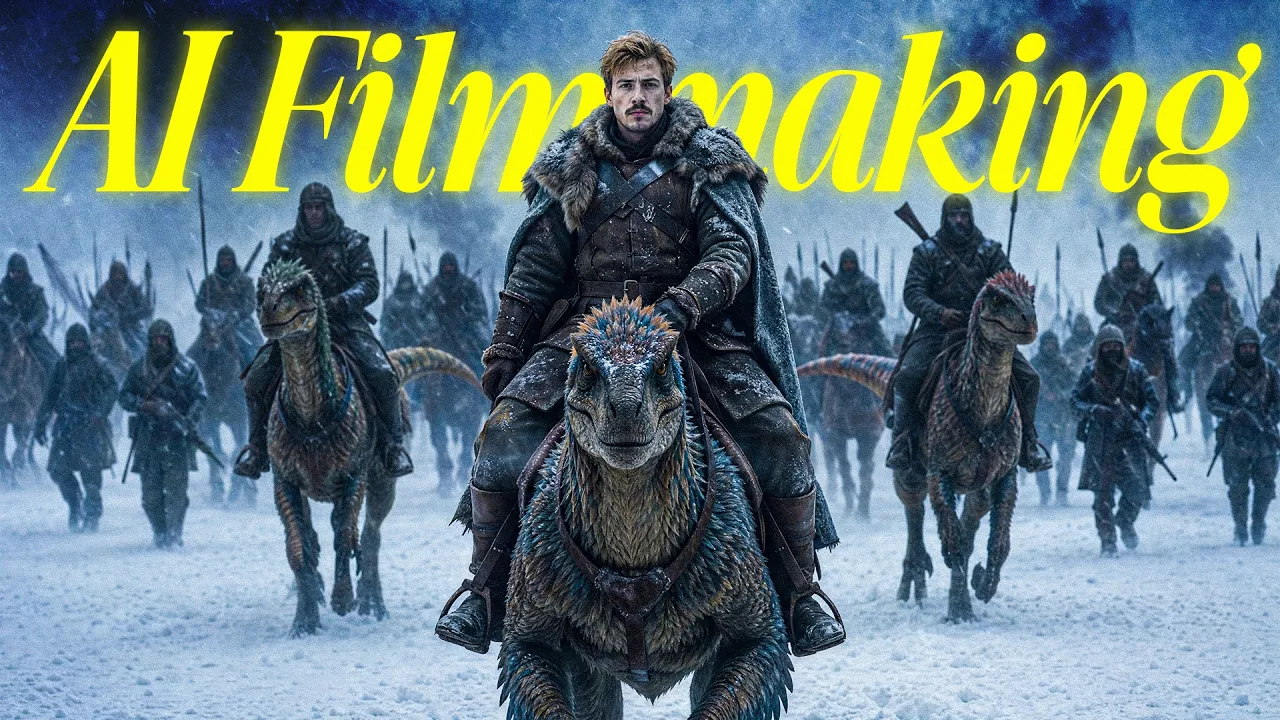
Dan Kieft · @Dankieft
Where viewers went back to watch this video again, from YouTube's public Most replayed graph, lined up with what was said at that moment.
Most replayed moment #1
13:345.6x the video's typical replay level
reference and then we have a reference of what the T-Rex looks like so it doesn't come up with some random [ __ ] T-Rex. Then we basically just take these things again for character consistency. If you do this, you get something like this.
Said at 13:28
Most replayed moment #2
18:313.3x the video's typical replay level
cavewoman character sheet, then we have the location, and then we have the baby dino. The AI now understands everything. So, now we just hit send and now it will start writing a prompt for you. So, now you get this prompt and when we generate this into the AI, then we get something like this.
Said at 18:23
Most replayed moment #3
5:333.2x the video's typical replay level
overexposed. If you look here and here, you can see it's actually way more overexposed than I would like. If we now use the same prompt, but this time we use the gray character sheet as a reference, then we get a much better image in my opinion. So, if we look now
Said at 5:27
The graph counts replays. It does not show where viewers stopped watching.
Words
5,907
Runtime
30:50
Speaking pace
192wpm
Reading time
25min
192 words per minute, between the 181 median and the 201 75th percentile of 349 measured videos. That distribution comes from the 349-video hook study.
Opening (first 30 seconds)
Okay, today Oh [ __ ] what the [ __ ] is happening? Holy [ __ ] Where the hell am I? Send me back. Hey, come on. Oh no, no, no, no. I have to get back to the studio. I have to record this video. [ __ ] [ __ ] [screaming] [groaning] >> [panting] >> Nah, screw this. I'm getting out of here. Yo, guys. Hey, can you help me out? I got teleport here and I Whoa. Calm down. Um there's a TV back there and I need to get back to
96 words, the words spoken in the first 30 seconds at 192 words per minute.
Free, no signup. See how the first 30 seconds hold attention, with rewrites.
Sentence shape
| Measure | This transcript |
|---|---|
| Sentences | 439 |
| Average words per sentence | 13.5 |
| Longest sentence | 50 words |
| Questions asked | 14 |
| Sentences containing a number | 20 |
Most used terms
Filler phrases
100 in total: like 68 · actually 9 · kind of 6 · you know 6 · basically 5 · um 5 · literally 1.
A literal whole-word count of the same phrase list the Prepublish browser extension uses, so a phrase inside another word is not counted and a phrase used in its ordinary sense still is. It is a count and not a judgement.
Free, no account. See where attention is likely to drop, with a rewrite for each weak line. The free check shows the scores and the one issue costing the most. Or run it on the words above first.
Free · No login · See a sample audit first if you prefer.
What this transcript is
Every word below is the caption track YouTube publishes for this video, pulled from the video itself and reproduced unchanged. It is not Prepublish's writing, not a summary, and not a re-transcription: it is the video's own published captions. English captions, generated automatically by YouTube, in the video’s original language. Source: the video on YouTube. A channel that would rather this page did not exist can ask for its removal through the contact page, and it is removed.
Okay, today Oh [ __ ] what the [ __ ] is happening? Holy [ __ ] Where the hell am I? Send me back. Hey, come on. Oh no, no, no, no. I have to get back to the studio. I have to record this video. [ __ ] [ __ ] [screaming] [groaning] >> [panting] >> Nah, screw this. I'm getting out of here. Yo, guys. Hey, can you help me out? I got teleport here and I Whoa. Calm down. Um there's a TV back there and I need to get back to the studio.
I have to record this YouTube video. >> Ooga booga. >> S- Stu? >> What? >> No. >> studio. >> Ooga booga. >> Camera. You know, like for filming. >> Booga! >> [screaming] [groaning] >> Wait, what if this is all simulation? >> Hey Siri, get me the hell out of here. >> Sorry, I didn't quite get that. >> [panting and sighs] >> Ooga booga. >> Come on, come on. Let me add in a reference image. >> [screaming] >> Okay, send image one.
Back to the studio. Generate. Come on, generate. Generate. Faster, generate, generate. Come on. >> [screaming] >> Woah. Woah. That was weird. Um either way, let's go back to recording this video. So, by no means that video was perfect. But, after burning over $1,000 worth of credits, I've learned quite a few things that I'd like to share with you in this video. So, in this video, we're going to go over the advanced AI filmmaking techniques.
We will cover everything that you need to know on character consistency and world building, and I will teach you everything from motion transfer to keeping your voice consistent. So, let's get into it. So, for this video, I've used OpenArt. They were kind enough to sponsor this video. So, if you want want them out, I will leave a link in the comments down below. They have some cool features which are used in this movie.
For example, their AI re-light video and their VFX tool is super useful. So, I would definitely check that out. The first segment that we will cover is pre-production. This lays the foundation for all of the images and videos that you will be generating. In here, we will be building our characters, the locations, and even the objects that appear into our video. Starting off with the character. So, in this movie, I am the main subject.
What I did is I actually took an image of myself from this video. And then, [music] I changed myself into a caveman like this. Ideally, if you're using references of real images, instead of making a character sheet, the absolute best thing that you could do is to take pictures of yourself, use those real pictures as references. I was a bit lazy, so I just used AI to make me look like a caveman. This is the shot that I used to make my character sheet.
And for the next part, the thing that I want to point out here is I have this character sheet and the main thing I want to point out when you create your character sheet is not to make a white background, [music] but to use a gray background. I've got this tip from Joey, very experienced good filmmaker. You should check him out on YouTube. He just got started, but he's been killing it. So, shout-outs to him. He pointed out that if you do a gray background, it might look better.
Let me explain to you why. So, if I use this white character sheet to make a close-up of the side of me walking through a dense long grass prehistoric forest, then we will see that it is a bit overexposed. If you look here and here, you can see it's actually way more overexposed than I would like. If we now use the same prompt, but this time we use the gray character sheet as a reference, then we get a much better image in my opinion.
So, if we look now at my character, it doesn't look overexposed at all. And that is because the white might be transferred from the white background. So, gray is a bit more of a neutral color, which doesn't overexpose your characters. The other thing that you might notice here is we're still lacking character consistency. Like my hair is way too blond, and there are a few reasons why. One, I'm using Nanobanana Pro here.
I would actually recommend you to use GPT Image 2 because you can get much better results. For example, take a look at this one. [music] And two, it is because I'm only using one reference image of me, which is a character sheet. In this character sheet, we don't have close-ups of my face. What I would actually recommend you to do if you want to keep your character consistent across every generation that you do, whether it is image or video generation, is to add in three references.
So, the first reference that you add in is your character sheet. The second reference that you add in is a close-up, and the third one is what we call a close-up reference sheet. I will leave all the links of how I make this in my free school community. So, check it out. You can hang out there. You can ask any questions. It is also the best way to find all of my prompts. Using all of these three references, I went back over to GPT Image 2.
I added them in there, and I said, "A close-up of the shot of the man image one walking through the dense long grass in period prehistoric forest, blah blah blah." And then I'm adding in the end image two, which is the close-up for character consistency, and image three for skin and hair details cuz I wanted to keep it consistent. And then you want to make sure that your quality is set to high, and then you can use 4K or 2K to generate your image.
This is a bit more expensive than Nanobanana Pro or Nanobanana 2, but it is well worth it because we're getting images like this one that looks a lot more like me. Now, you want to make sure that you do something like that for each of your characters that play a prominent role in your video. So, for example, I've done this for me. I've done it for the main caveman. I've also done it for this dinosaur, so we get a bit of that skin texture going on.
Reason why is if we just have that dinosaur in there, we don't have much texture or detail that the AI can use because it is not zooming in that much and it also doesn't look as good as it does right here with a high-quality image. Next up, we got the location and this is just as important as your characters are because if your location doesn't match in every scene, people notice that something is off. So, you want to have some kind of mood board going on of what your locations look like so you can look that in and you know what to use as references every time you create videos.
I've been doing a lot of research how pro AI filmmakers do this and I read this blog by PJs. Shout out to him. He has some really good content. You can check out his newsletter. I will also link it in the description of how people are using these locations for their movies. For example, here he's breaking down how a movie was made and he really goes over how to look in your master location and all the details and all the angles that you can generate with them.
We have objects, just as important because if your objects are moving around or they're not the same or they're glitching, morphing, whatever, then your scene will look off again. For example, take a look at this scene. Now, at first, I really liked that scene, but upon further inspection, you can notice that we have this TV here and then I jump out of the TV and then the TV is gone. Same going on with the dinosaur that the other dinosaurs are eating.
It gets yanked away right here. If we are continuing this scene, we got to make sure these things stay consistent as your scene is developing. Now, if I were to pinpoint why this went wrong is because I didn't add this as a reference and it all comes down to prompting. So, I have this long ass kind of like timeline prompt and I've used a couple of references of me, of the scene, and the issue is I didn't include the TV.
And that is a bit of a learning curve that you have to overcome. You will generate something, then you notice what's wrong, and then you can fix that in your next generation. So, that's exactly what I did here. So, in my next scene, I actually added in this reference image of the TV, and then we generated this again. So, now we press play, we have something like this. Still, that jump out of the TV was pretty weird, but at least we have our TV consistent.
And that's what I want to point out here. As you generate, you might notice that scenes don't seem to work, and that maybe because you need to give it extra context. And because with C dance, you can add in all of these references, you should add in the references where you can. So, how do you actually create these reference images of your character or any object? Well, the main tool that I'm using for this to help me with this is using cloth.
So, I've created this MD file that you can use. Let me actually show you. This MD file contains everything that you need to know in order to make a cinematic AI movies. Every prompting technique I've used for this, and there's a lot to go over. So, we have some time to go here. So, you want to drag that in there, and then you also want to drag in a image of your character or of your object. So, in this case, I'm using an image of me.
Then you simply give the prompt. Using this MD file, create my character's full body character sheet, front-facing main image sheet, close-up detail sheet. Then we're using cloth opus 4.8, and now we hit send. So, here we go. We now have three prompts that we can use, a full body turnaround sheet, a front-facing identity portrait, and also a close-up detail sheet. You can just copy these prompts, put them with your references into OpenArt using GPT image 2, and then you can generate your images.
You can do the same for your object, and you can also use this for your location. In fact, you can even use this to generate yourself a shot list, which I would recommend. My downfall in this video was that I kind of like let my creativity get the best of me. This was supposed to be a 1-minute video, and we turned it into 3 minutes because we we had so many more ideas, which is also a creative process. But, if you have thought out this process, which the pros like PJ's do, then you have a detailed shot list that you can go through and help it to generate your scenes.
For example, if you have an idea what your video is about, you can simply say, "Using the MD file, create me a shot list." And then you give some details about what your story is about. So, for example, I'm just doing this first scene here where I am being teleported to the prehistoric jungle from my studio. I get ejected from a TV. I start banging on the TV asking to return me to the studio. So, if I were to send this, it would create a shot list for me, and then it would help you go over everything to make these scenes.
Okay, let's go to segment number two, production. This is the fun stuff. Let's first go into prompting. I will show you three different techniques of how you can prompt and how I've prompted these videos in various different ways. All of those can be used using the MD file that I give you. But, let's start off simple. We're starting off with the first prompting technique, which I call the simple prompting format. This is basically doing this as follows.
So, for this example, I have these four references that I will be using to make a video. And I'm using the following prompt, tracking shot, which is basically describing what's going on with the camera. So, I call that camera plus our subject, which is a caveman. And then we have the action. So, the action is that they are creeping through the jungle with a spear ready to fight a huge T-Rex. T-Rex is also a subject in this case.
Then further describe the action, like what's happening. So, they they're trying to fight. T-Rex turns around whipping his tail hard into the guy, sending him flying into a tree. What we're doing here is we're making use of this reference feature that you can do inside of OpenArt, which is describing what's happening to what image. For the first image, the caveman, we're tagging image one. Then we have image number two to give it more details of what the caveman actually looks like.
Then we have him creeping through the jungle. Then we have described like this is what the jungle looks like as a reference and then we have a reference of what the T-Rex looks like so it doesn't come up with some random [ __ ] T-Rex. Then we basically just take these things again for character consistency. If you do this, you get something like this. >> [screaming] >> So that already was really good. Keep in mind I did never prompted to include slow motion.
See dance did that on its own. The second technique that you can use is called timeline prompting. That will give you a bit more control. And to make timeline prompt, you can again use the MD file that I've given you. So I'm in the same chat where I already have added in the MD file. What I simply did is I made a screenshot of these references and this is a good way to do this. So the AI also understands what references you're adding in there.
So I just literally screenshot this prompt box like right here and then I just dropped that into cloth. Then I'm asking it to using the MD file create a timeline prompt for this action. So now it's analyzing everything and now it will create a timeline shot that looks something like this. And this is what we call timeline shot because you're describing what's happening in each section. I've got one note on this. It's not mandatory that the AI is using these timestamps.
You could also just use shot one, shot two, shot three and let C dance decide how long each shot should take. To explain this timeline prompt, what it does is we have a setting so it sets out the mood for the video. So it's a pre-stored jungle, cinematic, realistic, natural lighting, hand held energy, no music, and 24 frames per second. I'm adding that in there because I'm noticing with C dance I sometimes notice that it's a bit laggy.
Since I've added in these 24 FPS, it's doing a bit of a better job. Then we're basically describing what's happening in each scene. And now if we hit send, then we get a video like this. >> [panting] [groaning] >> Okay, so I like the beginning of that a lot more. It is crawling, we have the T-Rex appearing, and then the only thing where it messes up is this part. He's kind of like kicking him, and then his foot becomes a tail, which is kind of strange.
This is also a matter of regenerating your shots. And I have a tip for that, because now I just wasted these credits, but later in this video I'll show you a tip on how to save credits, so you don't have this happen to you while you're testing out your prompts. The third method, which might be best but requires a little bit more time, is doing the time that prompt but in Chinese. So, reason why Cidence is a Chinese model, and it tends to understand the context better in Chinese.
Now, I don't speak Chinese. I'm not sure if you do. If you do, that's super cool. To solve this, what I've done in this MD file is I've generated a version where it allows you to generate your prompt both in Chinese and in English. So, the English translation is for you to understand if you like what you see. You don't like what you see in English, then you just prompt it and say like, "Hey, change this and this and this." And then it regenerates again in Chinese, and you can now copy this and you can use that as a prompt.
So, again, using that method, I generated this one. >> [groaning and screaming] >> Again, pretty cool. But, for this scene, the simple prompt works just fine. I just wanted to show you the different ways of how you can prompt to get better results. Because if you might notice that your prompt is not working, try it in Chinese. Sometimes that that does wonders. The main thing that I want you to know is that Cidence works best when you give it a lot of context.
So, really think about what you want to see in your scene. Think like a director. Like, set the stage. We do this with this setting, where we explain, for example, this prehistoric jungle, very cinematic, realistic, and natural light. That is already describing it. Think about like how many shots do you want to have in there? Do you want to have two shots in there? Do you have one continuous take? Do you have 20 shots in there?
I won't recommend doing that, but just to give it context of what you want to see happening there. Then make sure to structure it nicely. Like Claude will help you with that, but just in your head, think about what you want to see. Once you have that written down, give it to Claude, ask it to help you structure it. And maybe don't use the exact timestamps, just use shot one, shot two, shot three. Assistants will figure it out.
You might be wondering like, "Dan, sounds cool, but what does that look like in reality?" Well, let me show you. So, here I got this reference image that I'm adding in there. Then I'm giving it this prompt. And I'm basically saying, "Using the uploaded MD file" MD file is already in my chat, so I don't need to upload it again, but you could. "I want to create a 12-second cinematic scene where cavewoman sneaks into a dinosaur nest and steals an egg.
As she sneaks away, the egg cracks and she is shocked. Cut to the egg hatching and the baby dinosaur starts calling out to its mom. The cavewoman starts shushing the baby, but it's too late as we already hear heavy stomping coming." 10 scene. Then I'm adding in what these references are. So, I'm just saying like image one is the cavewoman, then image two is the cavewoman character sheet, then we have the location, and then we have the baby dino.
The AI now understands everything. So, now we just hit send and now it will start writing a prompt for you. So, now you get this prompt and when we generate this into the AI, then we get something like this. >> [snorts] >> So, yeah, that is one way to do it. And I think this result is pretty good. But like I said, let's say your result doesn't come out great, then you've just wasted a ton of credits. What I do and what I used to do a lot for this video is instead of generating it in 1080p right away, I generate it first in 480p.
And I believe Cidence is even launching um Cidence 2.0 mini, which is supposed to be cheaper and faster, I think. I would use something like that. Like, for example, this is 840 credits compared to a whopping 4,800 credits. So, if you want to save a lot of credits, just do 480p first, see if your prompt is good, and then generate again in 1080p. You're probably not going to get the exact same result, of course, but if your first generation is really [ __ ] then you know that you have to fix your prompt and try and something else.
You've now generated your first scene. That was the easy part. The hard part where a lot of people mess up is scene continuity. And scene continuity means the consistency and the logical order in which your film flows. So, for example, if you remember that scene where I jump out of the TV, I want to follow that up with the next scene. I need to make sure that everything in terms of the aspect is in the same shape and way and form, so that I can continue with in different angles.
With traditional filmmaking, this is easy because you have your set. Everything stays in one place, and you just continue. With AI, it is harder because you have to regenerate new, different angles, and you need to make sure that every detail is correct. Let me show you how you can do that. I added in this reference of that previous shot, and I added in the TV, and I also added in another angle of me, and I added in the details of the dinosaur.
These are all screenshots from the C dance video. That's why this is so unsharp. And I again added in references of me with my character sheet. And then for prompting, I just did a simple prompt right here. This is not that advanced. Now, that made me this clip. But if we go back to our video, then we can see there's some dead dinosaur right here next to me. And we don't have that in this generation, like you see. So, to fix that, all I did was I just added in this reference, then I added in an image of the dinosaur, and I said like, "Add a small dead carcass reptile beside the man.
Keep everything else exactly the same, like the color grading and the framing and all of that." So, that made us this variation. Now, we can continue our scene into the next one. Holy [ __ ] Where the hell am I? So now we're making this scene right here. So we have that start frame that we just made, then we have a close-up of me, and then we have another overhead shot with this new [music] dinosaur. And then we have me again.
If I were to tell you that this was one generation, I would be lying because I generated this a couple times and then I used the best segments from each generation to create one clip. And that's why I want to tell you that you don't need to take one generation for granted. If you generate your scenes more often, it will of course be more expensive and sometimes you might not have those resources, but if you do have the patience and the credits, then I would definitely suggest generating more often and try and stitch these scenes together.
I've explained that in previous videos as well. We do this all the time. Everyone [music] does this. No one really gets a perfect generation in one shot. Next up, we have voice consistency. And this is super important because this makes or break your video. This is where I felt like my video had a bit of a short coming. And let me explain why. You see my image, you associate my voice or the sound that you're hearing right now, you associate that with me.
So if I were to take an image of me and I put that into SceneDance and I ask it to generate a talking scene, then it probably has some American accent. It doesn't sound like me and you'll be like, "That's not Dan." That's what happened with me, too. Now there are a few ways to fix that. For example, in this scene right here, just have a listen to my voice. Um there's a TV back there and [music] I need to get back to the studio.
I have to record this YouTube video. So that sounds like me because that is me. That's my actual voice recording. What I used here is video-to-video in SceneDance. If you just upload your video of you acting and you talking, it will take over your voice. Then we have this next scene. Okay, send image one back to the studio. Generate. Come on, generate. Generate. Faster. Generate. Generate. Come on. So, here I used a different technique.
Here I just simply added in an audio file of me saying, "Generate. Generate. Come on." And that made this scene. The most important thing that I want to say here is make sure you're using a good mic. For example, in this clip I wasn't using a mic. Um there's a TV back there and [music] I need to get back to the studio. I have to record this YouTube video. So, yeah. As you can hear, the audio of that is not that's because that one I was just using a mic for my camera because I got lazy.
But for some I'm using this mic and now you hear the difference in audio quality, which is annoying. But then again, I had to deliver this video. So, don't make that mistake. Be very consistent with your audio. It is much, much easier to get your voice consistent if you have AI-generated characters. So, no characters that you associate a certain voice with. So, for example, if we think about LeBron James or Cristiano Ronaldo, in your head you know what they sound like and you have certain expectations and you know when it sounds off.
If you have an AI-generated character, it's much easier because it's the first time someone is seeing that AI character talk. The best way to get that voice consistent is through prompting. Let me explain why. So, here I have two scenes and in that scene both characters sound pretty consistent to me. >> Stop complaining. We'll return soon. We've been tracking this stupid stag for hours. My feet are >> Shh. >> Pew, pew, boom. >> Ryan, come and help me with the clothes. >> So, to get the voices of both character consistent, we need to describe them.
And this can be done very simply by just thinking about it and just writing it down, adding it to your prompt. Or you can do something like this where again you're adding in the reference images of the characters that you have. And then you say something like, "Using the uploaded MD file, create me a prompt for my 12-second scene. Then you're describing what your scene is about, what they're saying, and then you can also include like what's happening in the scene.
Then you end it with what they sound like. So, the boy voice is a young and 12-year-old American cave boy voice. Then the cavewoman, we go with a rough, deep, gutteral adult woman voice. And by doing so, you have added tiny few more details into your prompt. So, you now hit send and then this will start generating this based on the MD file. So, that is the simple way of how you can get your characters to sound consistent.
If you have no idea how to prompt what your voice sounds like, what you can also do is you can go over to Gemini. You can upload an audio clip of you or of your character, and you can just describe in detail what you think it sounds like and ask Gemini, because Gemini can listen to these audio files pretty well. Ask it to describe what your voice sounds like and put it in some kind of prompt. Then you hit send and this will give you a whole paragraph of what your voice sounds like and you can add that to your prompts.
The great thing about Seedance is that if you already have an audio file, so for example, I I here had that audio file, you can just add it into as a reference and you can just have it say these things while describing like what's happening on the screen. Okay, the last part of production, which I want to show you, I've already teased this a little bit, is motion transfer. I've done this a ton of time for this video.
Now, doing this is super simple. All you need to do is you need to record your video. So, I have this clip of myself, pretty cringe. >> What? No studio camera. You know, like for filming. >> Then you need to add in a reference. It doesn't have to be the same character, but make sure that either you or the character that you want to have the motion transfer happen on is in somewhat of the same shot. So, for example, both of these shots are like the upper part of my body that I'm filming.
All you have to do is add in a simple prompt like have image one play the performance and dialogue of video one. It should replicate the exact hand body lift movements. Make sure the leaves in the foreground and background naturally swaying in the wind. I did that because what I found out is the background becomes quite stiff. And that's because this is a aesthetic shot, which didn't quite come out as nice as I wanted it to be.
Another thing that you can also use, which is a lot cheaper and it's not using C dance, I believe, is using the AI VFX tool of OpenArt. So, here we have the VFX tool. You can replace your background easily. So, you can just upload your image and you can here upload the background that you want it to be in. And then you can hit generate and it will put your character into a new environment. Or the favorite one that I like to use is the VFX one.
So, here we have the same exact clip. So, it's just me walking in New York. Then, what you can do is you can mask it. And now I have myself selected. I click on preview and now the area behind me is gone. You can clean this up. Then you hit confirm. Now it's saving that. And then you can add in here an image of what you want it to look like. For example, I can add in any type of image that I want. I add in my prompt.
I hit generate. And boom, then I have something like this. You can also do this with relighting your scenes. For example, here we're using golden hour glow and it gave me something like this. Like everything is exactly the same. We just have that golden hour glow. And the other tool that I used quite a lot is the AI VFX tool. For example, this scene on the phone. There's a lot of text on the phone and that is quite hard to do with C dance.
So, what I did instead of generating this from a still image, I recorded me on my phone tapping it. And then I used this replace background tool. And here I added in my background. So, I added in this image right here. Then I open it. And then I said, "Replace the background outside the phone into the image reference in the jungle with dirty hands. The phone screen must follow the video. Then I hit generate and then I got this.
This is amazing for making complex scenes that are hard to do with AI alone. Okay, for the last part we have post-production. It all comes down to editing to how good your video actually looks like. I can tell the people that have an editing background and now have pivoted towards AI. They are some of the best AI generators because it's all in the editing. It's all those little details. It's knowing where to cut. It's knowing how to add things.
It's knowing how to make things look nicer that make the difference. So, let me show you a few things that I did to make this video look better. The first thing that you want to do is you want to organize your generations. You want to trim them. You want to stitch them together and you want to make them flow well. This also allows you to organize your clips and see if you're missing anything. Then what you can do is you can do a bit of editing by adding some color grading or also adding in some small effects.
Then the other thing that you can do is adding in some sound effects. This will elevate your video. Here you can fix any small minor things like for example, if your voice sounds off, if one of those dinosaur screams sound weird, you can fix it with your sound design. The main thing that you want to be sure of is that the flow of your video is good. Don't just stitch together 5-second generation to 5-second generation to 5-second generation.
Just look up tutorials on like filmmaking editing basic stuff. You don't need to look up a specific AI editing tutorial. All of these techniques can be applied to AI video. So, those are all the advanced techniques of how you can get into AI filmmaking. It is quite a lot. So, hopefully you have learned something. If you want to check out the MD file that I used to create all of my prompts including some more like behind-the-scenes stuff in terms of scripting, then please join my free school community.
Also, make sure to check out OpenArt for all of the tools that we used throughout this video. And if you want to learn how to prompt, then click the video that's on the screen right now because that will probably help you to become a better prompter.
The words are the caption track's own and nothing is reworded or re-transcribed. Paragraph breaks are placed between sentences so the text reads as prose.
Free tools for your own script: paste a draft and see where it stands before you record it.
Paste your draft and see where viewers are likely to drop off, with a rewrite for each weak line.
Paste the first 30 seconds of your own draft for a hook score and rewrites.
Check your draft against YouTube's advertiser-friendly guidelines before you record it.
Read this channel's public videos and transcripts, and download a writing brief for it.