Getting the transcript
Reading the captions from YouTube. A video nobody has opened here before takes 10 to 30 seconds; this page fills in on its own.
Getting the transcript
Reading the captions from YouTube. A video nobody has opened here before takes 10 to 30 seconds; this page fills in on its own.
Hoj Dee · @HojDee
Words
2,853
Runtime
25:20
Speaking pace
113wpm
Reading time
12min
113 words per minute, below the 160 25th percentile of 349 measured videos. That distribution comes from the 349-video hook study.
Opening (first 30 seconds)
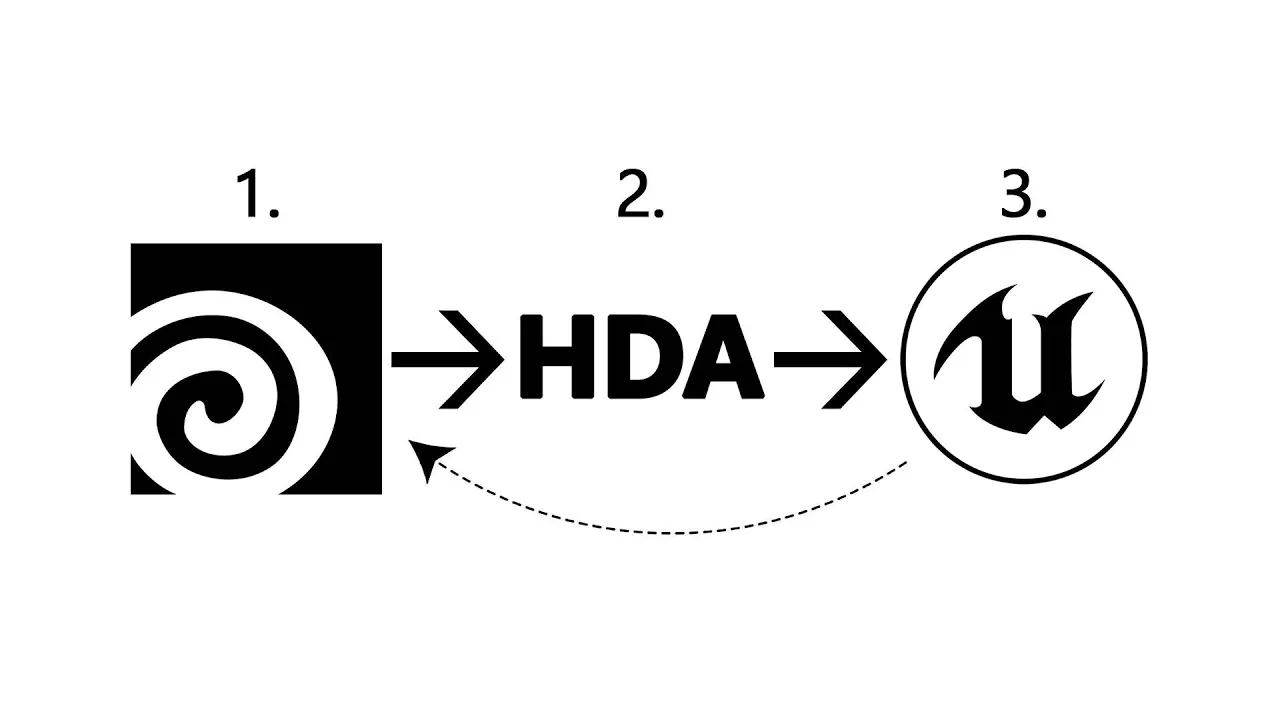
Building tools in Houdini that actually work in Unreal Engine can be frustrating at first. Hey everyone, HD here and in this video I'll show you the exact workflow I use to create HDAs in Houdini that work perfectly in Unreal. We're going to build two simple tools and take them all the way into Unreal Engine.
57 words, the words spoken in the first 30 seconds at 113 words per minute.
Free, no signup. See how the first 30 seconds hold attention, with rewrites.
Sentence shape
| Measure | This transcript |
|---|---|
| Sentences | 289 |
| Average words per sentence | 9.9 |
| Longest sentence | 37 words |
| Questions asked | 0 |
| Sentences containing a number | 8 |
Most used terms
Filler phrases
13 in total: like 8 · actually 4 · uh 1.
A literal whole-word count of the same phrase list the Prepublish browser extension uses, so a phrase inside another word is not counted and a phrase used in its ordinary sense still is. It is a count and not a judgement.
Free, no account. See where attention is likely to drop, with a rewrite for each weak line. The free check shows the scores and the one issue costing the most. Or run it on the words above first.
Free · No login · See a sample audit first if you prefer.
What this transcript is
Every word below is the caption track YouTube publishes for this video, pulled from the video itself and reproduced unchanged. It is not Prepublish's writing, not a summary, and not a re-transcription: it is the video's own published captions. English captions, generated automatically by YouTube, in the video’s original language. Source: the video on YouTube. A channel that would rather this page did not exist can ask for its removal through the contact page, and it is removed.
No Script X-ray for this video: YouTube shows a Most replayed graph only once a video has enough views.
Building tools in Houdini that actually work in Unreal Engine can be frustrating at first. Hey everyone, HD here and in this video I'll show you the exact workflow I use to create HDAs in Houdini that work perfectly in Unreal. We're going to build two simple tools and take them all the way into Unreal Engine. We'll also cover how to update the HDAs once we're using them in Unreal. There's a lot to cover, so let's dive in.
This tutorial was possible thanks to my supporters. Creating the tools inside Houdini. Right click and let's add a geometry node. I'll name it test and open it. Add a line node and let's set its direction in the x-axis. We're starting simple to master the fundamentals. In this video, I'll focus on the process rather than creating an actual tool. Now, for the first tool, we're going to copy a mesh on this line. So, let's add a reample node.
And let's click here to see the points. As you can see here it is without reample and here it is with reample. It adds some points on the node and we can control the distance between those points with this parameter. Add a copy to points node. These are going to be the target points. And for the geometry to copy I'll add a sphere. and connect it to this input. Now let's enable this node. The sphere is actually too large.
So let's set the uniform scale on the sphere node to something low like 0.05. And let's disable the points option. Let's actually add another node, a transform node to control the scale. So here I'll set the uniform scale to one and on the transform node I'll set it to 0.05. So this is the first tool. Now we can control the distance and number of the objects to copy with this parameter. The second tool is going to be a simple bevel tool.
Let's add a cube and uh poly bevel not. Now we can change the distance parameter to add bevel to the mesh. And we can also change the divisions and the convexity. Let's set the default value to 0.1 and the divisions to three. After the polybevel node, I'll add a divide node to make sure the topology is correct. Polybevel can create end guns [music] and divide turns them into triangles. Then let's add a normal to fix the normals because the bevel operation creates its own custom normals to make the edges look as smooth in Houdini and this can cause weird shading artifacts in Unreal's lighting.
The normal node recalculates and unifies all the normals. So these are the two test tools. Next I'm going to convert them into HDAs. If you need help with anything covered in this video, join our Discord community. I'm in there regularly and you'll find a supportive group of Unreal developers and artists who are always happy to help creating the HDAS. First, I add some null nodes for my inputs and outputs. Nodes are empty nodes.
I only use them for clean interface management. On the spline tool, this is going to be input one spill line. Let's connect it here. This is going to be input to mesh. I'll put it here. And this is output spline tool on the bevel tool. This is input mesh and this is output bevel tool. Next, I'll select the nodes and click here to create a subn network. This is going to be the spline tool. Let's also select these nodes.
Click here to create a subn network. And this is going to be the bevel tool. On the spline tool, I want the line to be the first input and the mesh or the sphere in this case to be the second input. So let's change them and move them like this. Let's also double click on the sub network to open it. And we should change the first and the second input here as well. So this is the second input and this is the first input.
Now let's move this here. Save the file. Right click on the subn network. And down here, select create digital asset. HDA stands for Houdini digital asset. Now in the new window that opens, we can set the asset label. Change the tab sub menu. I'm going to set it to HD. This is where we find the node when we right click in the graph. On the internal name, I'll set it to HD. And the author name changes as well. I don't want the branch, so let's disable it.
And we can also add version to the name. I'm going to keep this one enabled. Down here, we can select where to save the HDA. Let's change this one as well. I usually create an HDA folder next to the Hudini file and save it here. Let's copy the name. Paste it here. And I'm just going to delete the first one. This part is enough. Click on accept. Now, if you want to use the HDA for a specific Unreal project, it's better to put it in the content folder of that project.
Manually create a folder inside the content folder of the project. Name it Hini assets and save the HDA there. For this tutorial, I'll put it next to the Hudini file. Click on create. Now the type properties window opens. I'm going to get back to this. Let's first create the HDA for the spline tool as well. The process is the same. The type properties window. Right now we have created the HDAS but we don't have any parameters to control actually what happens.
Also, if I hover the mouse on top of the inputs, we can see that the names are not correct. So, let's fix that. Right click on the bevel tool and down here, click on type properties. There are a lot of panels here, but most of the time we only use three of them. The basic panel, the parameters panel, and the input output panel. The basic panel is where we can change the label, the icon, and the number of the inputs and the outputs.
The parameters panel is where we add the parameters. And the input output panel is where we can change the name of the inputs and the outputs. So for the bevel tool, I'll name the input mesh. And let's just leave the output blank. Click on apply. And now when I hover the mouse on top of the input, it says mesh. Click on accept. And let's do the same for the spline tool. The first input is SP line and the second input is mesh to copy.
Apply and accept. Let's open the type properties again. Go to the parameters panel and let's open the HDA. To add the parameters we want to the HDA, we can just find it and drag it here into the existing parameters section. So let's move it here. Select the poly bevel node. I want the distance, the divisions, and the convexity parameters. So, let's drag them here. And now we can rename them from here or change their orders like this.
We have some raw parameters on the left as well, but I'm not going to get into them. So, let's apply and let's go up. And here are the parameters. So, on the left, let's also add a folder and select the parameters and drag them onto the folder to move them into the folder. We can even add separators and spacers. Building a clean UI for your tools is what separates a good HDA from a great one. So I'm going to name the folder bevel control.
Apply. And here's the bevel control tab. And these are the parameters which are inside it. By default the folder type is set to tabs. That's why we have the tab option here. You can also select any of these other options. Let's for example test the collapsible option. Apply it. And now here are the parameters. I'm going to stick with simple. Yeah, that's better. Accept. And now let's tweak the parameters to see how they work.
So now let's do the same for the spline tool display it right click and open the type properties and let's go inside the HDA. So in this one I want the uniform scale parameter and the length parameter. Now uniform scale is not a good name. Let's rename it to mesh scale. Label is what the artist sees in the UI and name is the actual variable name the HDA uses internally. So we should change both of them. Here under channels we can control the default value of each parameter.
I want mesh scale to be one by default and length to be 0.1 by default. Click on apply. Accept and let's go back here. Here are the parameters. This is the mesh scale and this is the length. When working on HDAs, the parameter interface can become too complicated. That's why clean userfriendly interfaces and parameter grouping can elevate the professional quality of HDAs. Full their spacer and separator are the ones I use in this case.
After we're done, we should right click on the HDAs and click on save node type. Now we can use them in Unreal Engine using the Bevel HDA inside Unreal Engine. First of all, make sure that you have the Houdini engine plug-in installed. I've already made a video on this subject, so if you don't know how to do it, watch the video. I'll put the link in the description below. So, let's first import the HDAs. Right click, click on import.
Browse to where you have saved the HDAS. Select them and click on open. Now let's save them and let's click on reset filters. I don't want the filters here. So click on hooding engine and create a session. After a few seconds, the session is connected and we can use the HDAS. And as you can see, we have the stop session option here. So, let's start with the bevel tool. Add it to the level and in the details tab, scroll down until you get to the Houdini parameters option.
Here are the parameters we added in Houdini. And here's our input. So from here, let's add a basic cube to the level and move it next to the HDA. Select the HDA under hooding inputs. We have three input options. Geometry input, world input, and curve input. Geometry input is for when we want to add a static mesh to the HDA directly from the content browser. World input is for when we want to select the meshes in the level and curve is for when we want to use a spline like what we have with the spline tool.
I want to use the cube that is in the level. So I'm going to set it to wall input. Click on start selection. Select the cube and use current. Now let's hide the actual cube. And here's the result. Let's set the distance to something lower like 0.05. And right away we see a problem. If I set the view mode to wireframe, we can see the issue. The tool is beveing all the edges. That's what is causing this issue. So now we're going to go over how to update the HDA to fix this issue.
Updating the HDAs for Unreal Engine. To update the HDA, we have two options. We can either go back to Houdini, change the HDA, save it, and rebuild it here in Unreal Engine, or we can connect to Houdini from inside our Unreal Engine project. I'm going to show you both of them. So, let's go back to Houdini. Enable the bevel tool. Let's first change the box so it matches the one from Unreal Engine. And for that we have to increase the axis divisions to three.
Here's what the simple cube from Unreal Engine looks like. Now let's enable the bevel tool. And we have the same problem. Let's open it. Select the poly bevel tool. And here under exclusions, we just need to enable ignore flat edges. And now it's fixed. Go back one level, save the HDA. And now let's go back to Unreal Engine. Here, right click on the HDA. We have two options, reimpport and rebuild all instances. They both reimpport the HDA.
The difference is that rebuild all instances reimpports it and rebuilds all the instances in the level. But with reimpport, we got to rebuild them manually. So let's click on rebuild all instances. And as you can see, the shading issue is gone. And if I set the view mode to wireframe, now this is the result. Now let's go over updating the HD straight from the Unreal Engine project. Click on Houdini engine up here and and select open Hudini session sync.
Now as you can see it opens Hudini. So let's wait now. After Houdini is opened go back to Unreal Engine and scroll up. Click on rebuild. And now the HDA is added here. Let's open it. Set this one to hide other objects. And here it is. This method is for when we're actively building or fixing an HDA and need immediate visual feedback in the engine. So [snorts] let's reorganize Houdini and Unreal. I'm going to press F10 while the view port of Unreal Engine is selected and let's move it here.
Now, by default, the HDA is locked. This is to protect the HDA from accidental changes. Right click on it and select allow editing of contents. Now, we can change it and it updates in Unreal Engine. So, let's open it. For example, let's select the polybevel node. And from here, let's select the parameters tab. I'm going to disable ignore flat edges and click here. As you can see, the issue has returned. This is why HDAs are powerful.
We have live iteration. Now, let's enable it again and again. Click here and it's gone. After we're done, we should save the HDA. Then in Unreal Engine, click here and close the Houdini session sync. And there we go. After closing it, we just need to create another session. This simple bevel tool is the foundation on which I've made my procedural damage tool set. A tool can start as simple as this bevel tool and then become as complicated as the procedural damage tool set over time using the spline HDA inside Unreal Engine.
So make sure the Houdini engine session has connected. And now let's test the spline tool. For the spline tool, let's scroll down. We should set the SP line input to curve input. And there it is. Here's the curve or the SP line. We can select either end and move them. We can also select them, hold alt while moving them to duplicate them. So now let's move this one here and move this one here and this one here. For the mesh to copy input, I'm going to set it to geometry input is fine.
I'll just go to a starter content props and I'm going to use this chair. Let's drag it here. And here's the result. We have so many chairs. Now let's set the mesh scale to 0.5 and the length which is the distance between each point and controls the distance between each copy to let's set it to 1 m. Yeah, baking the HDA into a static mesh. Now, after we're done, we just need to select the HDA. In the details tab, scroll up and click on the bake option.
And as you can see, it turns it into a static mesh. So, let's hide the bevel tool. And here's the static mesh. Press CtrlB on the keyboard to find it. And here it is. Let's open it. And now we have it in our project. And if you want to change it, we just need to hide this one. Select the bevel tool. Change the parameters. For example, let's set the distance to 0.0 or 0.1. And let's for this one change the convexity to minus one. and click on bake again.
And now we have the second one. So let's hide the tool. Now we have two static meshes. And here it is. You can get early access to my videos and download the tutorial project files, including the project file of this video. By becoming a supporter on Patreon, you'll support the creation of more tutorials like this, and also get access to exclusive material, VFX, and Hudini project files. So, that's it. As always, massive shout out to my amazing supporters for making this possible.
Click here for more Unreal Engine tutorials and thank you so much for watching. Like this video, subscribe and join our community. If you have any questions, leave them in the comment section below. So, see you in the next one.
The words are the caption track's own and nothing is reworded or re-transcribed. Paragraph breaks are placed between sentences so the text reads as prose.
Free tools for your own script: paste a draft and see where it stands before you record it.
Paste your draft and see where viewers are likely to drop off, with a rewrite for each weak line.
Paste the first 30 seconds of your own draft for a hook score and rewrites.
Check your draft against YouTube's advertiser-friendly guidelines before you record it.
Read this channel's public videos and transcripts, and download a writing brief for it.