Getting the transcript
Reading the captions from YouTube. A video nobody has opened here before takes 10 to 30 seconds; this page fills in on its own.
Getting the transcript
Reading the captions from YouTube. A video nobody has opened here before takes 10 to 30 seconds; this page fills in on its own.
Stefan 3D AI · @stefan_3d_ai
This video has no Most replayed graph yet: YouTube shows one only once a video has enough views. These are the moments viewers replayed most in Stefan 3D AI's most watched videos.
Most replayed moment at 4:08
7.0x that video's typical replay level
and it will also have the access to full ai apis. Now let's do some serious tests. The first test will be to do an animation of a character that will be split in parts. The first test will be to create animation. Animation of a character that will be an
Said at 4:01
Most replayed moment at 9:39
5.7x that video's typical replay level
Overall I think this guy's made really amazing job, bring it it all together and I really had a lot of
Said at 9:41
Most replayed moment at 20:36
4.1x that video's typical replay level
Just also because I was playing that game when I was kid. Okay, let me see if I remember how to play that. Let's start with the road, right? Let's try to build a, oh, there are cars. There are cars. It generated nice cars and they're like, wow.
Said at 20:29
The graph counts replays. It does not show where viewers stopped watching.
Words
3,856
Runtime
20:14
Speaking pace
191wpm
Reading time
16min
191 words per minute, between the 181 median and the 201 75th percentile of 349 measured videos. That distribution comes from the 349-video hook study.
Opening (first 30 seconds)
While many argue whether AI will replace 3D artists, or whether 3D AIS sloped or not, Big and mid -studies already realized what's going on and started to wire AI deep inside their workflows. Thinking that they will skip opportunity for 2 -3x cuts in production time is absolutely naive. No one from big players want to be left behind, but it's not about magical AI that will generate 3D assets, absolutely not. If you take an amateur and provide him with best 3D AI tools, it won't get far. While giving this set of tools
96 words, the words spoken in the first 30 seconds at 191 words per minute.
Free, no signup. See how the first 30 seconds hold attention, with rewrites.
Sentence shape
| Measure | This transcript |
|---|---|
| Sentences | 257 |
| Average words per sentence | 15.0 |
| Longest sentence | 52 words |
| Questions asked | 10 |
| Sentences containing a number | 21 |
Most used terms
Filler phrases
80 in total: like 45 · actually 12 · basically 10 · you know 5 · right? 4 · I mean 2 · sort of 2.
A literal whole-word count of the same phrase list the Prepublish browser extension uses, so a phrase inside another word is not counted and a phrase used in its ordinary sense still is. It is a count and not a judgement.
Free, no account. See where attention is likely to drop, with a rewrite for each weak line. The free check shows the scores and the one issue costing the most. Or run it on the words above first.
Free · No login · See a sample audit first if you prefer.
What this transcript is
Every word below is the caption track YouTube publishes for this video, pulled from the video itself and reproduced unchanged. It is not Prepublish's writing, not a summary, and not a re-transcription: it is the video's own published captions. English captions, published by the channel, in the video’s original language. Source: the video on YouTube. A channel that would rather this page did not exist can ask for its removal through the contact page, and it is removed.
While many argue whether AI will replace 3D artists, or whether 3D AIS sloped or not, Big and mid -studies already realized what's going on and started to wire AI deep inside their workflows. Thinking that they will skip opportunity for 2 -3x cuts in production time is absolutely naive. No one from big players want to be left behind, but it's not about magical AI that will generate 3D assets, absolutely not. If you take an amateur and provide him with best 3D AI tools, it won't get far.
While giving this set of tools to a professional artist will boost him as crazy and that can't be ignored. Smart one don't treat it as replacement, they treat it as amplification, and I know that for sure because I'm the guy who advice on that matter, and I gonna open that door to inside kitchen for you. This video will be a little bit different, and set of fastest and easiest, I'm gonna show you professional commercial workflow that is used right now by high -paying professionals, includes most recent updates such as custom mesh -to -medic human in Unreal Engine 8, best 3D AI tools and platforms.
We're gonna go through a whole process from concepting, 3D generation, 3D processing, low -power UV, then they're gonna show you shortcuts for rigging, animations, facial animation, mo -cap, all new updates that Unreal Engine provided with new meta -human it's already in wide use, and I'm gonna show it all together. So let me show you what the future 3D workflow looks like, because future is now. Hit that like and subscribe button guys, I really appreciate your support, and that helps me to make this great videos for you.
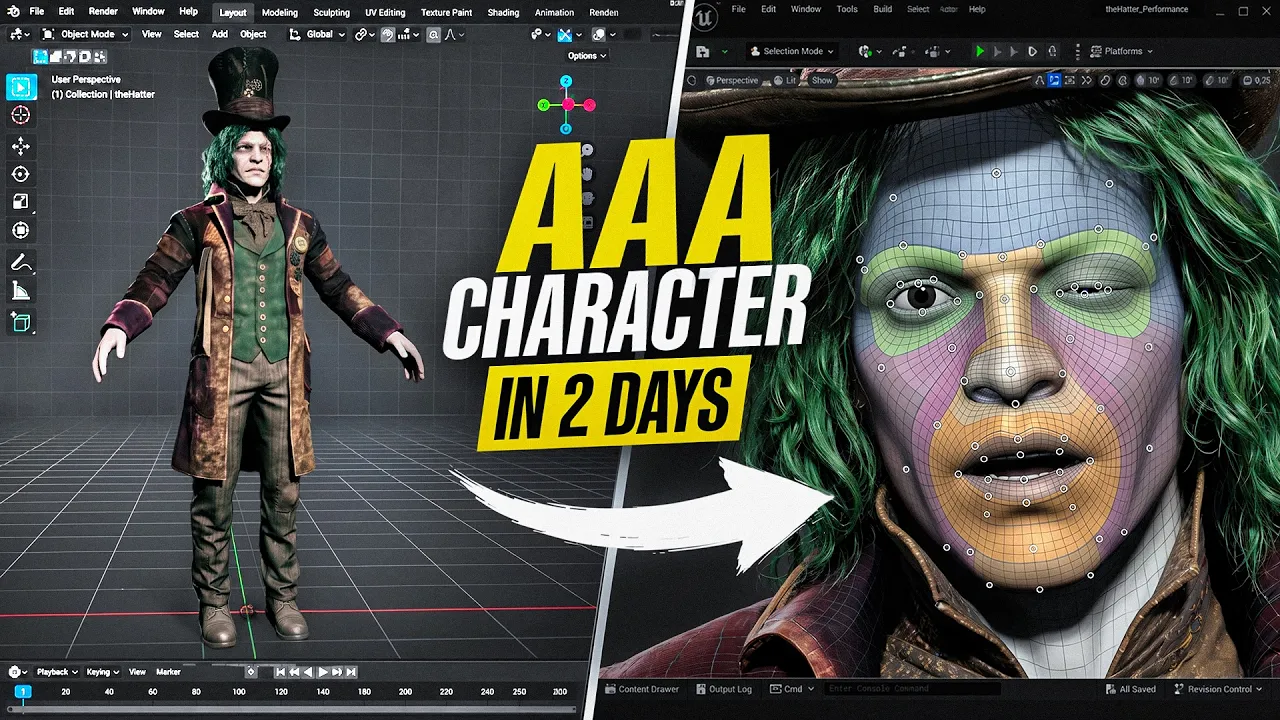
Alright, where do we start? What is the concept of course? And for this video, I prepared this amazing mad pattern. There are a few unique things about it, their faces very unusual, and I want to show you facial animation and how to tackle this case easily. Also, it looks simple, there's a lot of details, there's a watch, straps, hats, hair, etc. So let's start processing. Of course, first stage working with images and separating parts, etc., is not going anywhere, that's their important part, and to be honest, the better 3D became, I see that this step is even more and more important.
And for this video, we're gonna use new tool that helps to organize things that allow the canvas in all access to 3D AI. So let's bring our reference to the canvas and start extracting parts. And for this process, if you ever did it like once, you know that it takes quite a lot of time, if you do that manually. You definitely can do that manually, can just go and extract it one by one. Also, in one of my videos, I showed my setup with agent, that I have locally and described all the process that can repeat it.
But it's definitely easier, that it's all in one canvas. And for that one, we have more and more solutions. And in this video, I'm gonna use one new tool that just released, but already got very good feedback from professional community. Including my team, and what's really cool about this one is that it's probably the smoothest one right now. We've faced zero bugs, everything works as expected, and that's pretty much what you want from this tool.
And yeah, there is a very nice props extraction node, that works absolutely amazing. So you basically can select props only, props with the body, you can select amount of details, then it will figure out the parts, you agree or disagree, you can add custom part and then generate it all together. You can also plug multi view to this node and it will output multi view as well. Well, there's quite a lot of cool thing, but most importantly, it works very, very smooth.
And just like that, you extract part by part. It is essential to understand how you gonna combine parts together. And that's a big difference within the beginner and the pro artist. If you think this tool will predict best parts splitting, the way that it will be most convenient to assemble it later, well, then I have to disappoint you. You have to plan it and understand. So for this character specific, they will be body and the head, they will be garments.
And also, we're gonna remove accessors from the garments and generate them separately. For the head by the way, since we're gonna process it through metahuman conform mesh, and we're gonna need to face a neutral position, and pretty much I did that through variation. You can click edits on any image, and just annotate, select, just remove that part and boom, just like that. And it also stores the history of all edits.
While keeping everything organized, I absolutely love it that way. I don't like when there's a lot of destruction and many tree autos will agree. And of course, when the reference is ready, you can generate the tree model. And of course, that is not the final tree objects. The first step is to get high poly models and process them in blender. In the rare cases, for small objects such as bow or watch, we can do low poly generation right away, and then do the texturing and then just refine the texture.
That can work again for small pieces, but for anything else, especially, if you are going to do the baking again, and it's up to you to decide like whether like big object need to be baked. And that depends on the style you're doing and the quality you're gonna reach. I think for me, baking step is very important. That's why usually for getting to best quality, and it usually starts with high poly model sculpting, then rate of apology with UV, baking, and texturing in AI.
And this is actually what we're gonna do later. Now, let's bring all these high poly models to blender. I know in some studios, some artists only work with ZBrush because like the whole studio work with ZBrush. And this step basically can also be done in ZBrush, right? Well, actually, those who use ZBrush can do everything in ZBrush, but again, like that is a page software. And in my team, we all use blender, and I mean, we do get the same results exactly.
I don't find myself in a position anymore when we need advanced sculpting tools when we work with this AI generated high poly mesh. We usually need to refine it. And sometimes we need to refine it a lot, right? We need to merge the body to access areas like refine the details, remove the noise. There can be plenty of small things that you want to address, including, I don't know, basically the proportions. But that doesn't require any advanced sculpting things.
There in blender, there is elastic wrap that I'm using like 80 to 90 percent of cases. And that's more than enough like to adjust the shape. Of course, the more brushes, you know, like the easier and faster or like more professional, you can address any issue. But if you approach it in the right way from the beginning, you will most likely not face that much. Let's say if you generate character in parts such as myself, you will have quite sharp detail geometry on that specific parts like boots, pants, coat.
If you try to generate same character at once in one mesh and maybe in some weird pose, well, then you can spend hours more in sculpting, separating, detailing, all of that, etc. But that is just wrong approach. So now after the sculpting phase, we usually do the roots of polygium. And there are a few ways how to do that. For some simple, small objects, it can be faster to do quadramesh, for example. But for bigger details, here's what we do.
We're going to say all high poly and bring them back to canvas so we can actually do texture and roots of polygium. The idea of this process is the following. So for high poly, we're going to do the texturing, keeping all the details. Then we're going to do the low poly and do the baking. Well, I do texture first because I steal about to do the baking, right? So I'm going to take that high poly, low poly, put it in one position and why not to bake all maps together?
Like, so there will be color map, there will be ambient occlusion map, there will be normal map. The color map, by the way, like, is subject to change. So I most likely will want to adjust something and I'm going to show you how we process it usually. So I did all the low poly, brought them to blender and set them in the right position. So now we do have like, high poly, low poly, etc. But we're going to circle to metahuman because of this new amazing feature, custom mesh to metahuman.
So first thing I adjusted the size to that metahuman conform body. I do have dedicated video explaining every detail. I did like four characters showing you different cases. So take a look, link will be somewhere here. And here we're going to do the same thing for the body. And this is amazing how much time now we can save because email. We're going to create metahuman. And we're going to process a traumatic human, conform metahuman, nice mesh with nice UV, nice topology with skeleton, conform to our mesh, we're going to export metahuman with skeleton and export metahuman for baking texture.
But the first one you can export on the input tab, true, safe pose. I also show that in my dedicated video. On this stage, by the way, I also had to take care about the eye. So we're going to need to close it because there will be a scar. And that is not difficult to do. Just go to head and body, head sculpt, and you have a lot of points to move around. So yeah, as you see, like I did not really struggle about it. What's happened next?
You can set the skin, eyes, etc, tees. And again, like if you're happy with the options here, just use these options. But you can of course replace the texture later. One thing that I will not do with AI is here. And for this purpose, I had to find metahuman hair that will fit my character. And in my opinion, this case is not yet sold. And I'm not sure how soon there will be AI that will be able to create haircuts or metahuman haircuts.
But reading and video papers and Unreal Engine releases, I have a good feeling that it's going to happen soon. For now, it's way easier to go on fab and buy $10 asset. Well, that will have everything set in order. So practically, the hair is the only thing that we are not going to replace later. And from Unreal Engine, we're going to need to export that conform pose. And also, we're going to need to export that body with the skeleton.
Well, now we're ready to do the baking. The good thing is that head and body is already unbroped. Nicely, the only thing is that they use U -Deems in Unreal Engine. So you have to split body and heads and move the body U -V minus one. I did quick baking and brought the sexual rights to the Unreal Engine to show you. And it works and feels quite nice. And this one is actually the metahuman. So like, you can pretty much start doing animations and stuff right away, but we're going to do that all together later.
First, let's finish the rest of the objects, of course. And for nice baking, we need nice low poly and nice U -V. And truth be told, that AI generated low poly is 100 % perfect. And to be honest, I mentioned that in every of my video. I would say it's like 80 -90 % there. My favorite workflow is to work with P1, bring it to blender and process to re -top of flow, add -on and blender. I cannot come up with any faster workflow than this right now.
You basically P1 generates perfect bass. You get most of the shape nice. On some complicated area, there might be a mess of polygons, so you simply select that amount of polygons, go inside re -top of flow and just redo them as you want. Or you can use relags brush to make the wireframe, smoother, etc., etc. Also, re -top of flow helps a lot to see imperfections in the mesh covering. Again, for good baking, you need the low poly to cover the mesh, so again, like it's in that information is basically baked.
It's not go deep inside in some areas. And yeah, in re -top of flow add -on, you can sort of see that area and just adjust the polygons. And of course, you do the U -V later. To be honest, for me, U -V was always the easiest part because mostly I work with very nice optimized meshes. And I would say, yeah, I mean, the cleaner the mesh is, the easier the U -V is made. There are some AI solutions for U -Vs such as in Hoonion 3D Studio Buds.
That's like sort of random thing. Every time I do the testing there, I can get very nice results. And the next time I can get extremely shitty results. So that is like throwing dices. You might get or not. And this process overall is not that long, and it also helps to verify the topology. And when you work in big city, of course, the optimization is expected. The packing is expected, et cetera, et cetera. So that's exactly what we're doing here.
We packed some objects together. There's plenty of add -ons. It's not like 20 years ago you had to do that, like manually position all the islands. No, maybe that's not AI, but that's an algorithmic approach that takes a lot of time, not like before. And with all that done, you do the baking. In my opinion, Marma set tool bag is one of the best tool. I know some professional team also use Substant Painter for baking purposes as well.
That also a very good approach. And I also use Substant Painter, but for the next step where we're going to need to set the material properties. To be honest, I hate Adobe for the price increase and the monopoly, but the Substant Painter tool, which they acquired actually like few years ago, is one of the greatest in terms of materials. You can also add PBR textures with AI. For example, you can use just texture nodes and remove the texture.
And that will only do the PBR on top of the existing texture. But don't forget to provide texture it's treating model as an input. And here's by the way how complete workflow looks like together with all the steps, like high poly, low poly. And I'm going to share a link to this workflow in the description, of course. And if you're a professional or a studio, I really recommend you to take a look on this tool right now, because they just launched.
And there's a free tier with crazy amount of credits. You can create one complete character with all the images and 3D for free basically. So far, this is one of the most robust workflow tool I tested. And good news for teams that this looks like a Figma. So you can actually work together on one canvas in a multiplayer mark. And there is zero lags or problems. Now back to Substant Painter, one thing of course, why everyone like it so much, because there's a lot of presets, team plays for many of materials.
And for the experienced 3D artists, this step will not be soon replaced by AI, because the quality of materials you can get here is just way higher that you can get with AI. But you know what, I would split color map and the PBR map set. And color map is actually done really nicely with AI. Materials not, but you got them on top when you already have the color base. And I was talking about this issue with some of the pro artists.
Well, that's easier to do the material at once in Substant Painter. I get that point for some parts, it can be so. But when I showed my workflow as the results that we get inside my team, then they agreed that actually makes sense. So texture that you generate it with AI, at least the color texture is quite, quite usable. And I found myself in a position that we don't even edit it really. We might fine tune it a little bit on the post -processing stage, but overall it's just getting better and better.
And now the biggest chunk of work is done. Time to get our hands on some accessories, which I generated the same way. They all will be on my canvas. And I also check geometry, check the shading, then processed materials a little bit in Substant Painter, or sometimes Blender is enough to tackle again, like just small shiny objects. We're well done. Now, how do we bring this character together? We have body baked with you have all the assets, garments, accessories.
What we're going to do, we're going to go back to Unreal Engine and grab that rigged metahuman that we experted. When metahuman is created, it basically consists of two parts, body and head. So you're going to go to created metahuman, that one completes in that metahuman weird pose. And we're going to need to grab that body and head with the skeleton. And let's bring it here. Now, we're going to additionally adjust the pose because that initial pose was for body baking and assets already done baked.
And now we're going to do the weight transfer. And that is why I was so excited about this new custom to metahuman because not only we can bring custom bodies and custom faces with all this animation stuff, but we can also get that skeleton with that body. Because again, that will be the body that we are going to use. And we can just simply transfer weights from that body to our assets. So we are entirely skipping going to Acaric or Mixamo or God forbid during that manually.
And we're getting better results. That metahuman body is actually that great, but we got so many requests for Unreal Engine. If you work with Unity or metahuman skeleton is not for you, you can also watch my other videos. There is solution for everything. Again, there is Acaric that you can do. But for Unreal Engine, this workflow is absolutely the best. In my and my team opinion, all right, weight transfer, let's bring it to Unreal Engine and see if that actually will work.
Also here is very important to export things right to not break the skeleton that we imported from Unreal Engine. Otherwise, it will not fit on that blueprint. And again, I met a separate video about this new update and I explain all the settings how to export what not to do and how to make it work with all details. Take a look by the link. Now I have a multiple part. Now my job is to bring the skeleton meshes, assemble the materials, set textures, set materials, put them all on the metahuman blueprint, and make sure all the weights work.
It might take a few iterations, but here we are. And here is our guy. Look quite cool. First, as we're going to do, we're going to connect it to the live link. And since the face is rigged, we can do that right away, right? And here it is working. Someone was complaining that I'm not showing results enough, so we're going to take a look on this 15 seconds, okay? It's working. And I want to point on that closed eye. It moves a little bit.
If you want completely removed any moment, you can actually re -experit from blender and remove all weights from the bones on that area. But I thought in my case, it will look more natural. The next test we're going to do with markerless mocap, that's another amazing update from Unreal Engine. And that basically there was a tool called Quick Magic that everyone was using for like this video to animation and then processing blender, bring it to Unreal Engine.
Now, they basically killed that platform with this update. You can now do that in Unreal Engine. You know, I just bring the video, bring the skeleton, but don't forget to install that plugin. It's not natively preinstalled in Unreal Engine. And by the way, the video you see on the left was also generated with the O3 in Gemini. And by the way, the mocap video was also generated with AI. You can see the Gemini logo there.
And what I like about the mocap is not only it captures the animation, but it also synchronizes it with the face. You know, even like four years ago when I was approaching this task, we was doing like this costumes to track the motion, synchronize. There was like a setup like when you have a phone capturing your face and there was so much involved to do this thing. And that was done in five minutes from the video. That's insane how fast it moves.
And lastly, let's actually play it. Behind the scene, I added some physics for the clothing. Also adjusted here is some stuff, some settings in Unreal Engine. There is of course video on my channel about physics, clothes, physics in our Unreal Engine. Take a look if you're interested. And here's how it plays. I think that is just amazing. This looks like a very good game character. And this is exactly how pro workflow is starting to look right now for any major big studios.
And tools like leechy studio are widely used by big studios. And I know that for sure, and the good thing if you are a studio, for example, you can basically contact them directly, explain needs of your team and they will easily deliver adjustments to the workspace and make it even better tailored for you. That was stuff as usual. Let me know in the comments what you think about this workflow guys. Like and subscribe and I'll see you in the next one.
The words are the caption track's own and nothing is reworded or re-transcribed. Paragraph breaks are placed between sentences so the text reads as prose.
Free tools for your own script: paste a draft and see where it stands before you record it.
Paste your draft and see where viewers are likely to drop off, with a rewrite for each weak line.
Paste the first 30 seconds of your own draft for a hook score and rewrites.
Check your draft against YouTube's advertiser-friendly guidelines before you record it.
Read this channel's public videos and transcripts, and download a writing brief for it.