Getting the transcript
Reading the captions from YouTube. A video nobody has opened here before takes 10 to 30 seconds; this page fills in on its own.
Getting the transcript
Reading the captions from YouTube. A video nobody has opened here before takes 10 to 30 seconds; this page fills in on its own.
Stefan 3D AI · @stefan_3d_ai
This video has no Most replayed graph yet: YouTube shows one only once a video has enough views. These are the moments viewers replayed most in Stefan 3D AI's most watched videos.
Most replayed moment at 4:08
7.0x that video's typical replay level
and it will also have the access to full ai apis. Now let's do some serious tests. The first test will be to do an animation of a character that will be split in parts. The first test will be to create animation. Animation of a character that will be an
Said at 4:01
Most replayed moment at 9:39
5.7x that video's typical replay level
Overall I think this guy's made really amazing job, bring it it all together and I really had a lot of
Said at 9:41
Most replayed moment at 20:36
4.1x that video's typical replay level
Just also because I was playing that game when I was kid. Okay, let me see if I remember how to play that. Let's start with the road, right? Let's try to build a, oh, there are cars. There are cars. It generated nice cars and they're like, wow.
Said at 20:29
The graph counts replays. It does not show where viewers stopped watching.
Words
3,176
Runtime
16:45
Speaking pace
190wpm
Reading time
13min
190 words per minute, between the 181 median and the 201 75th percentile of 349 measured videos. That distribution comes from the 349-video hook study.
Opening (first 30 seconds)
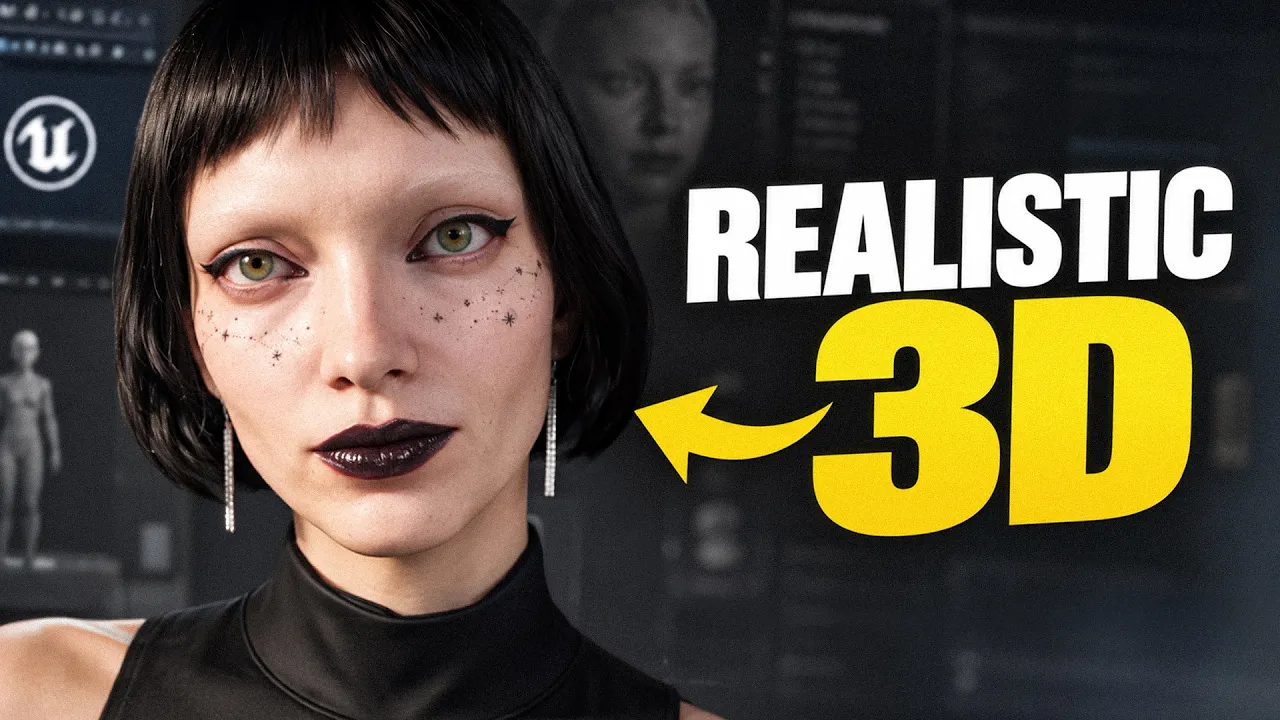
Look at this hyper realistic character with facial animations that I got running in Unreal Engine and I made her completely from scratch with AI in less than a day. We have new 3D AI that generates ultra detailed meshes in 2K resolutions. So creating realistic characters is more than possible right now, but you guys can learn this in one weekend right now. How cool is that? And few of you guys was actually quite consistent spamming in comments for me to use high 3D. Well, it's time to use high 3D. I'm going
95 words, the words spoken in the first 30 seconds at 190 words per minute.
Free, no signup. See how the first 30 seconds hold attention, with rewrites.
Sentence shape
| Measure | This transcript |
|---|---|
| Sentences | 309 |
| Average words per sentence | 10.3 |
| Longest sentence | 42 words |
| Questions asked | 2 |
| Sentences containing a number | 20 |
Most used terms
Filler phrases
63 in total: like 35 · actually 17 · basically 4 · I mean 3 · sort of 2 · right? 1 · you know 1.
A literal whole-word count of the same phrase list the Prepublish browser extension uses, so a phrase inside another word is not counted and a phrase used in its ordinary sense still is. It is a count and not a judgement.
Free, no account. See where attention is likely to drop, with a rewrite for each weak line. The free check shows the scores and the one issue costing the most. Or run it on the words above first.
Free · No login · See a sample audit first if you prefer.
What this transcript is
Every word below is the caption track YouTube publishes for this video, pulled from the video itself and reproduced unchanged. It is not Prepublish's writing, not a summary, and not a re-transcription: it is the video's own published captions. English captions, published by the channel, in the video’s original language. Source: the video on YouTube. A channel that would rather this page did not exist can ask for its removal through the contact page, and it is removed.
Look at this hyper realistic character with facial animations that I got running in Unreal Engine and I made her completely from scratch with AI in less than a day. We have new 3D AI that generates ultra detailed meshes in 2K resolutions. So creating realistic characters is more than possible right now, but you guys can learn this in one weekend right now. How cool is that? And few of you guys was actually quite consistent spamming in comments for me to use high 3D.
Well, it's time to use high 3D. I'm going to create this beautiful lady and I intentionally wanted her to look very unusual so I can show you how we can handle that uniqueness. And the first step of course going to be generating 3D models. And you might already guessed we're going to need to split her into the parts and then assemble for better quality. I prepared this bunch of parts, but if you're tired to always go to Nano Banana and split all these images manually, I have great news for you.
High 3D just recently launched a high 3D agent, which is powered by GPT -6 and a lot of useful skills that can help you with this task. Well, I actually tested it. Here's the prompt that I provide and I provided these two images that I had. And you can see after working for around 20 minutes, it provided with me with set of pretty, pretty decent images. We. Not going to need here, but other parts are pretty, pretty good.
I even tried to ask it to generate all models and it. Did quite great job providing me with all the assets and some variations. You can even ask this agent to put everything in one Blender. File and provide it to you. It will still not do good job assembling character together. So you still have to make your hands dirty a little. Bit Now, I still going to do that in classic way, because this process also helps me to think and maybe find better.
Options because task is clear. But along the process, you might see better trousers that will fit more or. Like better view for the heads, better variation of facial tattoos, et cetera, et cetera. So there might be a lot of things. Along the way that you might adjust. And I also just enjoy this process, like we're going to generate heads. We're going to do a few retries. And see which one is the best. But the whole point is to get best closest 3D model, highly detailed.
For this approach that I'm going. To show you, it's totally OK to actually use high poly. Yeah. And the quality here is outstanding. I really think that high 3D. Strongest side is how detailed measures can be. So it really works for realistic characters,. Accessories or for 3D printing. I mean, that's probably one of the top choices to go. with. 3D printing because shapes, details are extremely accurate. And if you also want to try it by my link in the description, you're going to get some.
Extra credits. Now generation is done. And we're going to bring it all to Brenda. But we also got the need to go on. FAP and find this free human conform topology, which we're going to need to use as size reference. It's absolutely free. Just download it. Now I have this reference here without texture. So it's shown in violet, but we don't really care. I just need it for a size reference. And I have all my parts together.
What are you going to do next is pretty simple. I can adjust. A line, my head and body along this reference conform body. The thing is that later we're going to bring it to. Unreal Engine and transfer like sort of conform meta human body with all the facial rigs, with all the. Animations to our body. What are you going to do in Blender is very simple. Again, I'm going to go in sculpting mode and use just a few brushes.
Like masking to cut some parts. Then I'm going to use brushes like elastic Grab, maybe smooth brush somewhere, etc. The task. Is just to assemble the body. One more thing that we might need to take care later is to align colors, body and. Head Well, we're going to get there soon. So meantime, I already aligned. the. Shape and right now I only take care about body. So there is a smooth transition on the neck because we're going to conform it to another body.
And my character is not naked for a known reason, because I'm making a video on YouTube. But when you're going to do that on your. Side I recommend to gently take that off because the original mesh in Metahuman will conform better. This part of the. Mesh here will also be conformed. But I have to do the sacrifice, guys, to make this video and not violate any policies. OK,. Body shape is ready. So now I'm going to export it to GLB or you can also export it to FBX.
And we're going to continue in. Unreal Engine. And if you guys wonder where is hair and why I not generated hair, that's because that AI cannot really handle. Hair cards in that realistic way that Unreal Engine handles that. It can do stylized hair, et cetera. I would say that's the. Only annoying gap. So full disclosure, I actually going to use ready hair card that I figure out on Fab. It cost me 10 bucks. Now of course, we're going to need Metahuman plugins installed.
In news Unreal Engine 5 .8, the cool thing is that it. Is just plugins. You don't need to bother like to install all that stuff. One thing, however, you're going to need to install Metahuman Core when. You install the engine. And. I actually made a complete video about Metahumans and describe all this installation process. Take a look if you're going to be stuck here. OK the process here is quite simple. We import our GLB and then we create new Metahuman character.
We're going to go внутри. And here we're going to choose from custom mesh where we're going to choose that body that we just imported. And as you can see, what you see. Here in viewport is that conform body that we used for reference. If you did everything right, it must look something like this. And our body will be very close to this one. And we're going to need to hit this outer soft, which will align. The Metahuman mesh to our body to repeat that shape, keeping all support for animations,.
All support for skeletons, facial animation, of course, et cetera. That is probably the easiest and best approach. So far. How you can get custom and realistic characters. Actually, I also tried this approach with stylized characters in. Very very different proportions, and it still works. So here you go. If something went wrong, you can. Also do additional manual alignment. But in most of the cases when I was doing that, like I was.
Pretty happy with how it actually ended up. I think there was just few times when I had to realign fingers on the very custom characters,. When there was only four fingers instead of five. Now, one important. Thing that we need to do here in this menu in additional actions, we're going to need to save pose. Safe pose will save this Metahuman in that same exact pose as our reference high quality model, because if we're going to go on next tab like head and body, you might see that our character will actually change pose in hands.
Now, in next steps, you can actually set like some settings for a skin, eyes, et cetera. But we're going to bake skin color because it's quite unique. And there are some facial tattoos that we want to preserve. However, for ice, we can actually do them here. So that's exactly what I'm going to do. I'm going to set ice because we're going to preserve ice. Well, other parts like head, lips, et cetera, we're going to transfer from our reference and I'm going to add my haircut that I already bought before.
So here we go. Now we can already preview our character in Unreal Engine, but we are only half there. Now, let's find that pose that we exported. It looks like this. It's a DNA file. And what we need to do with it, we're going to right click on this one, find generate skeletal mesh. And when we have the skeletal mesh generated, right click on skeletal mesh, not skeleton, find acid actions and export it as FBX. Great.
Now I have this FBX. We're going to drop this to Blender. And here's. Where the main magic going to happen. This FBX again will repeat exactly the shape of that high poly model that we prepared before in Blender to use as a reference. The only issue with this DNA file is that it uses UDIM for UV. And you can see that there's two objects merged together and uses one space for baking. That's not going to work. So I'm going to go in UV mode and just separate head.
Like it's very simple. Is it just two squares and separate by selection and for the body, I'm going to Shift this UV by minus one. So it takes the complete square. That's the only thing. And the cool thing is that when we're going to bake textures like this, it will be nicely supported in Unreal Engine where we don't need to do anything extra there. Again, in my dedicated video about MetaHuman in 5 .8, I explain that in more details.
Now, before baking the color, I did one extra step. I just corrected the color with Blender nodes. This was very easy. I just added RGB curves. I want heads to match better the body color, right? When that's done, we're going to just do the baking process. Quite simple again, we select high poly, low poly. I mean, basically that MetaHuman DNA body. Don't forget to create a new texture. We're going to go to cycles and bake the color here in setting in baking settings, which is diffuse.
Unchecked contribution for direct and indirect light sets the cage a little bit. Let's say cage will be. Zero zero point one. I think it conforms body really nice and press bake. Here we have this texture already prepared. Pretty,. Pretty good job. I can repeat this process for the body. As a result, we're going to get just two texture. We don't really need to bring that 3D model back because. We already have it here.
So to this MetaHuman, we're going to export these two color textures. So let's import these two color. Textures and connect them to the materials on my MetaHuman. And here we go. And well, now it is. Actually looking like my character. Well, at this stage, if you only needed the body, you have the body with right proportions. With right face. Pretty ready. You can dress it like with some MetaHuman clothing that you already have here or some other assets.
But I'm going. To move forward and create some clothing. Now, to do that, we're going to need to actually export different MetaHuman. We're going to need to go to. The body and find this skeletal mesh and export it through asset actions and export. And same thing when I'm going to need to do with. The heads. I can MetaHuman, they usually separate head and body. We're going to need to export both of them and bring them to Blender.
It will look something like this by default. Let. me. Hide the armature, the bones, and it looks black because we didn't actually export it to texture. We only. Export it skeletal mesh. Skeletal mesh is armature and mesh. And we don't really need those textures. If you want, you can connect them for. Reference What we really need is these final MetaHuman in final MetaHuman pose. You might see that hands are actually in.
Different pose. And that's the main difference. We couldn't do the baking in this pose because hands mismatch. Here, we don't. Really care about that because we're going to just align some garments. I do have top wear and bottom wear and. Also some accessories. The process will be the same again. We're going to just work in sculpting mode and align these garments with my body as. Simple as it can be. Again, I'm not going to do anything advanced at all.
But if you struggle with all these tools, with this Blender. Stuff guys, I do have complete beginner's guide on my channel where I explain all these tools in details. But trust me,. You need just bare minimum that will unlock so much passability for you working with AI tools. AI advancing crazy. Fast and maybe in one or two years it will be doing all this for you. But right now to get best quality, you need to balance this.
With some bunch of 3D skills. And by the way, if you want to take it really serious, I'm really. Happy to welcome you on my 3D AI course. I'm going to guide you from A to Z how to create characters and environments with 3D AI. I'm going to introduce for you most important 3D concepts and bare minimum of 3D skills that you need to know to access 90 % of anything you can imagine. All links will be in the description. In the meantime, I already aligned all my garments around the body.
And the last thing really is to optimize it and big the textures. So I'm going to use QuadraMesher. Like you didn't expect that, but I guess you asked it for a while. So I think this is like one of the case where QuadraMesher can be used. If you have this plugin installed, it can really work well with some simple shapes like this. Alternatively, I can suggest you to do retopology with AI and maybe baking also with AI.
Basically, for our final meshes, we want to optimize them. Meshes are optimized and ready. What additional thing I did is that I cut in their parts and also did quick UV before I going to bake the color. All right, here we go. And then we're going to bake the color the same way exactly as we did for the character. OK, so here is my garment. I also did the same for accessories. And we can do the last parts basically just to assign weights for accessories, automatic transfer my network.
So we're going to actually try to find like that ear bone in bones. You know, I figure out like this is the ear bone. And for me, it works actually pretty well. So I'm going to just assign 100 percent weights for this earring to this very bone. There are plenty of bones. Imagine doing this rig by yourself. But for the garment, it is much easier. We don't really need to mess with bones at all. We're going to just select all body parts, then select the armature.
And here we're going to select parents and armature deform. That will assign it to the armature. And here I want to introduce you one small trick, which will work better than automatic weight transfer. So what we're going to do, we're going to add data transfer to our top wear, for example, and you can do that for each here in data transfer. We're going to need to move it like in front of armature as a source. We're going to select the body, that body that we exported from an engine and set these settings, verdicts, data and verdicts groups.
Boom. That's pretty much it. And now we can apply it. So what it does, basically, it transfer rates not only based on bones, but from the existing body that works so much better. Like as you can see, because on that body, they are already professional distributed. Like in most of the cases with garment, this is. More than enough to get professional weights distribution. So after I have all my garments weighted, accessories, etc., we can actually export them.
You can export them all together if that's a costume or you can export it one by one and set it up in Unreal Engine later. Finally, let's bring it to Unreal Engine. One small thing that I want to advise is that when you import textures, you're going to need to make sure this flip normal map green channel is selected. That is a known issue with the normal map that you do in Blender. Now we can go to Metahumal Blueprint and simply just drag and drop this skeletal assets to our Metahuman.
And since they are reusing like one similar skeleton, you can see that it's all already here. And wow, that's just wow. Like, look, this character looks even better than on my reference images. Wow. This is cool. Unreal Engine 5 .8 introduced some cool features such as markerless mocap animation. And of course, there is a live link that you can test speaking, talking like that will be translated in real time to your online character.
So I tested both of them to prove that my Metahuman is legit. First, let me show you the mocap. I generated this video with Jamie and I. There is like a watermark. Here is the action. It take a while, depending on your computer, because it runs внутри the Unreal Engine. But the fact that. This mocap is free is insane. Again, the quality is outstanding. Just look at the results. Absolutely crazy. Again in my dedicated video about this Metahuman update, I explained like more the setup, but it's pretty, pretty easy for mocap.
However,. Like the plugin, you're going to need to find it on Fab marketplace and install it's free. Absolutely crazy. And I also going to connect my iPhone to the live link so we can test the facial expressions. And wow, just look at this, guys. I think Metahuman is such a cool thing. And the moment they allow to bring any custom,. Even StarLight characters, it becomes so much better. Before, it was an issue that they all was looking sort of like Metahumanish.
What I just proved it wrong. Like this character look completely custom. Look at these eyes, lips, et cetera. Like, I mean, it. Looks absolutely cool, guys. If this video was useful for you, don't forget to subscribe and like this video. And I see you in the next one.
The words are the caption track's own and nothing is reworded or re-transcribed. Paragraph breaks are placed between sentences so the text reads as prose.
Free tools for your own script: paste a draft and see where it stands before you record it.
Paste your draft and see where viewers are likely to drop off, with a rewrite for each weak line.
Paste the first 30 seconds of your own draft for a hook score and rewrites.
Check your draft against YouTube's advertiser-friendly guidelines before you record it.
Read this channel's public videos and transcripts, and download a writing brief for it.