Getting the transcript
Reading the captions from YouTube. A video nobody has opened here before takes 10 to 30 seconds; this page fills in on its own.
Getting the transcript
Reading the captions from YouTube. A video nobody has opened here before takes 10 to 30 seconds; this page fills in on its own.
Stefan 3D AI · @stefan_3d_ai
This video has no Most replayed graph yet: YouTube shows one only once a video has enough views. These are the moments viewers replayed most in Stefan 3D AI's most watched videos.
Most replayed moment at 4:08
7.0x that video's typical replay level
and it will also have the access to full ai apis. Now let's do some serious tests. The first test will be to do an animation of a character that will be split in parts. The first test will be to create animation. Animation of a character that will be an
Said at 4:01
Most replayed moment at 9:39
5.7x that video's typical replay level
Overall I think this guy's made really amazing job, bring it it all together and I really had a lot of
Said at 9:41
Most replayed moment at 20:36
4.1x that video's typical replay level
Just also because I was playing that game when I was kid. Okay, let me see if I remember how to play that. Let's start with the road, right? Let's try to build a, oh, there are cars. There are cars. It generated nice cars and they're like, wow.
Said at 20:29
The graph counts replays. It does not show where viewers stopped watching.
Words
5,534
Runtime
29:59
Speaking pace
185wpm
Reading time
23min
185 words per minute, between the 181 median and the 201 75th percentile of 349 measured videos. That distribution comes from the 349-video hook study.
Opening (first 30 seconds)
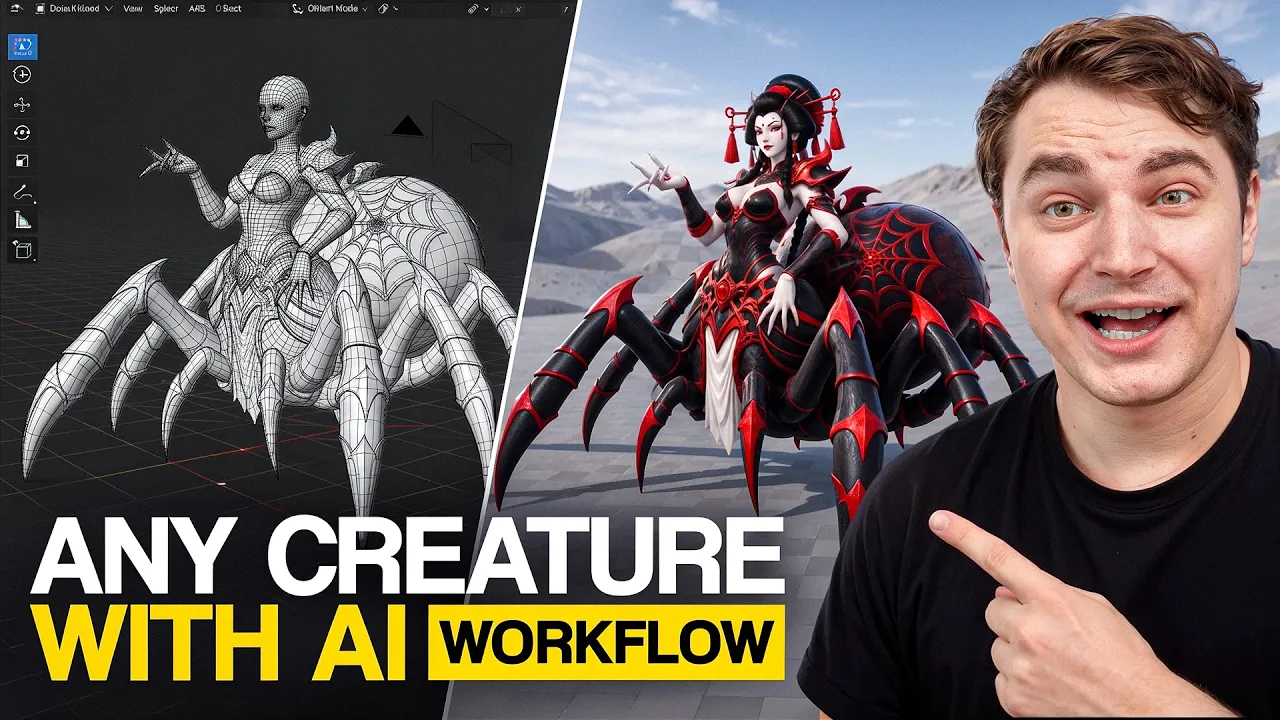
There are plenty of AI tools for humanoid characters, but what if you need to move beyond that? Animals, creatures, monsters. That becomes a real challenge. Generating such things falls short immediately. So that is why in this studio I'm gonna break down complete step -by -step workflow how to create any creatures with AI. And we cover not only generation, but also rig and a bit of animations. And I'm gonna create this cool Japanese arachna. And thanks for you guys who actually helped to decide on this character in my discord.
93 words, the words spoken in the first 30 seconds at 185 words per minute.
Free, no signup. See how the first 30 seconds hold attention, with rewrites.
Sentence shape
| Measure | This transcript |
|---|---|
| Sentences | 173 |
| Average words per sentence | 32.0 |
| Longest sentence | 3,195 words |
| Questions asked | 3 |
| Sentences containing a number | 7 |
Most used terms
Filler phrases
199 in total: like 131 · actually 41 · basically 15 · I mean 6 · you know 4 · kind of 2.
A literal whole-word count of the same phrase list the Prepublish browser extension uses, so a phrase inside another word is not counted and a phrase used in its ordinary sense still is. It is a count and not a judgement.
Free, no account. See where attention is likely to drop, with a rewrite for each weak line. The free check shows the scores and the one issue costing the most. Or run it on the words above first.
Free · No login · See a sample audit first if you prefer.
What this transcript is
Every word below is the caption track YouTube publishes for this video, pulled from the video itself and reproduced unchanged. It is not Prepublish's writing, not a summary, and not a re-transcription: it is the video's own published captions. English captions, published by the channel, in the video’s original language. Source: the video on YouTube. A channel that would rather this page did not exist can ask for its removal through the contact page, and it is removed.
There are plenty of AI tools for humanoid characters, but what if you need to move beyond that? Animals, creatures, monsters. That becomes a real challenge. Generating such things falls short immediately. So that is why in this studio I'm gonna break down complete step -by -step workflow how to create any creatures with AI. And we cover not only generation, but also rig and a bit of animations. And I'm gonna create this cool Japanese arachna.
And thanks for you guys who actually helped to decide on this character in my discord. And if you wonder how I actually create all these character image references, this time everything is captured in notes. So you can see how I actually do the thinking. Well basically it's always the same thing. I do the prompt with chagypt or clods. Then I do plenty of variations. Here you can see like each image actually regenerated up to five times.
And then I find something that I like. And then I do the processing. Then I do another version. And then sometimes I mix them up etc. And then eventually I got this amazing reference. Of course link to this complete workflow will be in the description for your exploration. Now what comes next? Well the same thing as for characters. We're gonna need to split this creature in parts. And here it's more crucial than ever.
I mean trying to generate it at once will definitely not gonna work. And for this project I chose to go with Lychee studio which has an amazing tool called prop extraction which will save me a lot of time. Alternatively of course you can do that manually with any image edit model. You're gonna need to iterate through your model and try to split it into logical parts. How you're gonna later assemble that. And that's both important for assembly and for animation later.
And also that's somehow related to optimization. Let's say we're gonna create one big leg and one small leg and one big leg will be actually multiplied like six times. While using same texture etc. We're gonna show that later. Now here in this prop extraction you can do that automatically. It will detect some parts but you can also add more parts. And that's super easy. You basically select them with the box. Tell the name of the part.
And here it is. Again of course can do that your own any image edit model. But that's so time consuming. So I added most important parts and that's just the beginning really. Like we're gonna extract those parts and then we're gonna see if they actually work. For example this small leg extracted a little bit broken. So what I did I actually drew a little bit around saying like that there's a missing part. And you can see like the most successful one.
And I also needed some additional I don't flash to connect it. Basically well I don't know how to how this thing's called on spiders. But I needed that additional limb. Something like this will do. But not mechanic. Then the hair I definitely wanted hair without accessories because I gonna generate hair low poly right away. If we mix them up the generation will go wrong. I already know that like for sure. And hair ornaments again we're gonna do separate right.
So I'm gonna go внутри this generated image and just say like extract the accessor only. And it works pretty pretty nice. And what I like about Lychee Studio again like it's all very compact and organized here. And again how you prepare your references. How you do the generation. That's like half of success. For real same thing I'm gonna do with most of the parts. Again I did same thing with the another leg. So for some reason it was always generates like mechanical part.
But yeah maybe we're gonna retexture them but I needed something there to connect nicely to the body. If some part not generated at once we can iterate on that. And yeah from second try I actually did the head. You can see this look amazing. I mean this is amazing head. Spider body by the way generated nicely right away. But I also needed to extract the body itself. Like the human body right. And I needed to change the pose.
Because again like doing that in that pose will not gonna get as far. Especially there will be a rigging at some point. So that will be a nightmare. So of course that we extract that and then we do the multi view. So I'm gonna choose that one. And yeah this cool thing that you can do multi view right away. Then I realized I missed some parts such as a shoulder armor. So I'm gonna add this as well. Okay so you can see how I do that.
There's like two actually modes here to select the part. Like you can select it with the box. But if box not work you can actually do with points. Like just very simple again. Plus add some area minus exclude some area. And then you define the shape. And then you extract that part as a separate image. So here is our shoulder armor. It's a little bit broken so I had to regenerate it a bit. And four times it took me four times to regenerate.
And again that's absolutely normal. Sometimes you're gonna do the iteration. Like when I come up with characters I do like 20 -25 generation until like something that I really like. So I got this generation and thought like I'm gonna just do the image editing on top and extract that part alone. Now the next step will be is to generate 3D models. And here we have two main options. First generated high poly. Later do the retopology and baking.
Second is to go low poly right away. And we have an amazing Tripo P2 released which is already on litchi available. And for some parts such as hair, head I definitely recommend to go low poly right away. Why? Because look at this. This geometry is already textured and low poly and it looks what I expect it to be. You can see the hair. You can see the accessories. That's cool. And one thing though it might not happen from first try.
And here's what you need to do. Tripo P1 which is available on litchi as low poly is very sensitive to the poly counts. Cool thing about litchi it will suggest you the right amount of polygons but you still need to verify what amount of polygons give you the best output results. So sometime I have to do like one, two, three generations until I'm happy with the result. For the rest of the poly such as arms, legs, the general body I did high poly.
You can see how they look like. This is low poly. Low poly is where wireframe visible. This is high poly. Wireframe not visible. For some armors because there are a lot of like cool details that I want to preserve and I want to bake them into the normal map. Spider body by the way like was really really good. All right first step done. Now let's bring all these models to Blender and assemble our character. What's going to happen in Blender is very simple.
For high poly models we're gonna process them through sculpting mode. And again there are just few things that we need to know. I mean I like sculpting mode and masking mode because I can easily cut some parts and splug them together. That's exactly what I gonna do along with editing realigning shape. And for that purpose there is an amazing brush called elastic wrap and you can see I'm just you know like set the size and you know reshape it.
It's like working with clay. That's my favorite brush. Like I mentioned that in every of my video. I'm not going to start explaining every tool here. I do have free videos on my channel explaining like this sculpting mode. There's basically like five six brushes that you need to know to work with these AI models extremely efficient and be able to assemble in it. Again when you realize that generating in parts is actually not that scary and you can bring it to Blender and address polish something here.
Then you have like all the options and you can create anything. That's But if you want to take it seriously I recommend to join my 3D AI course for characters where I can explain everything from A to Z how to actually start with Blender like where I can introduce to you bare minimum of 3D basic knowledge and right approach to 3D AI tools. So you can create your first character in a week. And more than that there is also a course about making game environments with AI.
So you have full package now all links in the So again in sculpting mode what I do I want to achieve one final look of my character where I want most detail to be preserved. Let's say I generated body with hands but again when you generate it at once there are less details on the hands. So what we're going to do we're going to cut the hands that goes along with the body and just attach the hands we generated. For all symmetric objects of course we're going to use mirror to not duplicate our effort.
And again very simple just activate mirror modifier later. That's also going to be very very needed for legs and stuff. So as you can see I just made one small leg and one big leg and later I'm going to just multiply them. You can preview them in mirror like that the position is right or no. Actually I needed to edit a size a little bit. All right so now it starts to look Take a look all positioning all this alignment is done like with just few brushes.
There is snake hook that's something like you can like turn these shapes around and elastic wrap like these two brushes like do any magic again like so for limbs like this for legs etc it works very well. And again on top of that you can use standard sculpting tool to smooth the shape maybe rework the shape a little bit all that works pretty well. And now take a look on that. I think it looks quite quite good and these connectors now actually make sense.
Well I made them to make sense. So well that looks super fun right. I haven't added any low poly stuff because this particular object we're going to need to take through additional step which will be retopology. We're going to also do that with AI and then baking. And here are my low poly. I also located them around again the similar similar way but I keep them in separate collection for now. And the good thing they're already textured so you can see how they look like in low poly mode by the way alternative to this elastic wrap there is proportional editing which is again also ridiculously simple and I explained that in my course is again can learn that in five minutes and then like you have so much options how to you know like adjust any shape.
So basically it works like that you select any And while moving it's with proportional editing and navel it's everything else try to align together like it's basically within this radius that you control with a mouse wheel. It aligns the shape around. So here we go. My character is assembled but we're only halfway there. Now let's hide low poly and for all my high poly objects are going to apply rotation and scale can press control a well selected all the objects and I also going to hide mirrored objects because I can do retopology for one side and then just mirror it's when it's already low poly it definitely doesn't make sense to do them all together when it comes to mesh only we can export it in OBJ.
So I'm going to quickly do that for each object of high poly and then we're going to go back to leachy studio or you can you can do that with any other AI There are a few options that I'm going to recommend is Tripo retopology which is used here and I think this one is the best so far or you can try the Hunyuan retopology it's longer it can do better job in some cases again like you can take a look at my other videos on my channel where I compare side by side but Tripo retopology is still the best.
So in leachy we have Tripo retopology presented and here again very important is how much polygons you're request per retopology. So you have to address it smartly and for smaller parts I try less polygons for bigger parts more polygons. I disable bake texture everywhere because I don't have color textures here baking is for color textures mostly and again it might require some iterations we're going to review the meshes and if something is wrong then we're going to try again here we go with head and again if you don't like the results you can just go try lower polygons for example for heads I didn't really like like 5 000 so I tried with 3 000 and this one I think is actually better it's more accurate again like shading and again don't pay attention to the shading like it's intentionally like this here so you can see the polygons nicely and I think this one is actually really really good.
All right retopology done I had to do like up to three retries per parts to make myself happy with the results but now I'm happy now let's bring him back to Blender now what I'm gonna need to do is to align low poly with its original high poly with Tripo models is a bit of a pain in the ass that the models come up back not in the same position in Hunyon like which produces like less in quality but at least it returns the model in very same position and some people actually choose to work with Hunyon because of that because like that saves some time but yeah that's a trade -off I hope at some point Tripo fix that thing and while I'm gonna do that guys if you want to try Lychee studio this is the best time to do that they provide a lot of free credits on first sign up and you can create at least few characters and of course there will be a link in the description to this workflow that I created so you can explore it in details now a little bit more retry quality and low poly in general so if you want to get like the max possible quality I recommend of course to review this low poly that AI generates and sometimes again like it fails short there might be holes that still happens even with Tripo p2 which is amazing model and sometimes can do a flawless job there are always still some small things to want you address like I remove some loops fix some holes etc and me and my team we figure out like the best possible workflow which I also introduce in my course is to combine AI generated base with tools like retopo flow basically you enter retopology mode right in Blender with this free add -on called retopo flow you have this high poly as a source low poly on top and then basically can rebuild some broken pieces very very quick the tool itself is very simple again you just draw some polygons in most convenient way on top of that high poly so you can see some footage how I did that I consider it as an advanced step again if you just want to try to create a character for your mobile game that you develop that might be a little bit too much or not really necessary to get start with but if you work in a team or you want to this will be the best approach again one thing I always repeat you're gonna get best outcome if you treat AI as a tool and combine them nicely with this too and this of course that's how you're gonna create something that will be noticed anyway if you want to know more about this approach there is free video on my channel or you're very welcome to join my course okay retopologist step is done then there is one more step that still AI cannot do really I mean there are some AI that promise that they can do UV map but to be honest I tried all of them most of them are based on some algorithms that's not really work or there is like AI from Hunyuan that you can access for free in Hunyuan 3D studio but it is extremely random it's not really that reliable so you either just do that automatically right in Blender with UV smart projection I free video on my channel about UV and baking that take a look so for this character I decided to just put seams myself to get nice texture later and get more control over it again nice UV give you some other options later you can generate textures with AI or some additional textures like a mission map etc because most likely it will be logically structured so if you drop that color texture to nano banana it will be able to understand that it's like a body this is like a hand or anything like that and there's nothing crazy about this step so basically you draw some seams mark them and make sure that this is possible to be unwrapped in some flat pieces right so I'm gonna do that set seams unwrap it and then preview in UV editor here you can enable setting called UV stretch and it will basically preview your islands like that and you need to make sure that there is not much of red color right in my case I did it all good so blue color like light blue it means it's fine so there's not much stretching no crazy angles and I really like to use this UV packer free add -on just to pack it more nicely before I gonna do the texturing same process I gonna do for the rest of the parts and then I gonna do the baking first of all the reason I wanted to do baking for this high poly and why you might consider doing this baking instead of just to you know texturing this low poly object right away again like alternative option you can just take this retopology object and texture right there in leeching but what I want to do is to big that normal map from that high poly and so it becomes a normal map normal map it's not just a color map it's like geometry imitation so it will interact with light so here I show how I did that in Blender again I have a dedicated video exactly about baking and Blender and marmoset those are my two favorite tools for those who work in ZBrush you can do the baking and ZBrush or you can do the baking in substance painter as well like there's plenty of options the easiest option in my opinion is Blender or marmoset so basically process is simple you select low poly high poly create a new map and do the baking you can see I did the baking for a few objects and look how amazing it looks it's a low poly but it looks like it is high poly that's the whole magic about it and of course you can do the texture on top of that alternative way is marmosets also an amazing tool I think like for beginners this one is even easier you just export high poly low poly then you do the baking like normal map color map like any other map you can transfer and here there is like a nice cage that gives you so much options and like there's so much less artifacts here you can see the result there's another map that we can also bake is ambient occlusion pretty much the same as normal but again like it creates these shadows like it adds depth and just look at how amazing it looks right now even without textures I think that's super cool now finally we can do the texture one thing however if you're gonna bring these models back to litchi or any other 3d AI such as Tripo and try to texture it you might have one issue the texture might mismatch the normal map that you picked so unfortunately that's how AI models work right now so this is like a known issue and I've been actually addressing this to all of this developers team like asking like why we cannot like take into account the normal map and hopefully new version of 3d AI will be able to handle that nicely but I definitely want to keep my normal map and I want color map to actually fit so what I'm gonna do some objects are gonna texture in litchi such as head for example it was working pretty well you can see because there's not much normals and it was fitting nicely but for other objects like bigger objects where it will be very very noticeable and I'm gonna bring them to Moondiff in my opinion it's really one of the best AI texturing tool so far and you can use it for free which is an amazing tool there is paid tier but it only unlocks 4K textures now the coolest thing here is that it respects normal map and there are plenty of settings that you can control here I actually made a complete video about this amazing tool it's on my channel two main approaches that you're gonna use here is first is projection you generate one view and project it completely and you can go side by side like that super super fun and easy and the second stage of this texturing process or you can also again like use it as a separate approach is to do the patching so there might be some small issues so you basically paint on top of that some bad transition or like whatever and select the reference generate the image and you only patch that specific region like with a convenient brush and that is the whole trick just like that I'm gonna go over all the details and you can see how much better it started to look like perfect perfect perfect perfect now let's take it back to a Blender you can export it like as a complete 3d object here or you can export like the color texture alone I mean whatever works best again like since I already have everything set there I'm just gonna take the color texture connected to my shader where my normal map is connected already and just look at this beauty like this is absolutely cool now there are a few things missing that I need to assemble my character completely it's an eye texture okay I also gonna generate it in litchi and I'm gonna assign this to my eye material so I created a simple sphere cut it in half and here you can I just need to align it UV a little bit to take right the texture boom here we go and I have my nice eyes done and also recently in my one hour beginners guide to 3d characters with AI I showed how to create eyelashes very simple approach you create simple planes then you generate texture of lashes and basically add them here again this part of the workflow is very similar to general character workflow so if you want more details again guys one hour video it's on my channel for you or if you starve for knowledge there is 3d course always waiting for you okay lashes done amazing and before we actually go to the next step just one more thing again when you have nice UV or something like reminds nice UV we can actually take the color map and go and try to create any other property map so here's one cool trick that really works right now you can drop it back to litchi to any edit model rights and just say like okay create me a roughness map based on this so and you can specify like which color should be like more reflective etc and then you can generate something like this and yeah that looks super good well congrats to myself my character is ready well at least the 3d model now let's talk about most questionable part how do we rig it and there are different options really here and instead of just giving you one approach that is only applicable to this specific character let me give you few so you have options later when you have like different kind of character so you can decide what will work best now first thing what i taught is that half of my character is humanoid so i can rig it using some standard options such as Mixamo or akrig and the other part is spider so if i figure out where to rig spider and where to rig humanoid and then join them together that might work so i actually had to cut body like a nice seam and i also closed the gap so my mesh is not hollow and the first tool that worked well for me is animate anything you basically create a project and it has quite a lot of animals insects in so there was actually the spider template again when i was choosing what character select i didn't know that but it actually worked again it supports much more like animals like dogs foxes and even like again like different insects so you can see like this is quite a big library so i did that and the rig was actually not that bad and it even created me a few animations such as idle walk and attack well that is actually cool another option there is mesh to motion and guys are liking it a lot on reddit you can try it as a good alternative but again they can fall short so don't be afraid to experiment and try sometime okay so i got my body rigged that's already half okay and so what should we do with my humanoid body so first of all i tried to do it with Mixamo and Mixamo actually failed i even tried to bring it together with the body and it also failed so i surrendered and i tried another approach i actually exported like Mixamo skeleton you can export it from any character in t pose so i'm gonna do that like with just a standard body can delete the character itself and i only need to use the skeleton so what i did i just positioned bones and skeleton on top of my character and then tried this i selected mesh skeleton and parent parent with automatic weights and see if this actually gonna work and surprise surprise it was working very well and this is actually free the reason why i like Mixamo skeleton for this case because like we already have a lot of bones and Mixamo skeleton is like quite optimized then on top of that i assigned some other parts such as hair hair accessory to follow only head bone and just like that i got my character rigged at least the first option but the only stake on this is that you can't really avoid messing with weights if you're gonna deal with creatures or something like that that's impossible especially again like if they're gonna be difficult so there is a transition parts on the belly so i had to spend some time there like to setting the weights nicely how they interact with the body you can see it was a bit broken there and here you can see it actually runs with that animation from animate anything another option which i tried is to rig that top part with acric and to my surprise it actually worked and acric is similar to Mixamo you just place markers etc and here it's done and you can see it's working then i bring that rigged body to Blender gonna position it again everything like try to mess with the position so okay i'm gonna position it again reassign the materials then we're gonna need to clean up the unused bones so it creates it created like leg bones as well we definitely don't need them so we're gonna go to edit mode and remove that bones and now the difficult part is to join the skeletons again joining skeletons it's not much of a drama but later you're gonna need to set weights nicely and i still had to spend the same amount of time like addressing like this waste transition etc and making sure like i'm not missing anything so it's definitely possible but you inevitably need some skills with weights and 3d modeling to make this final final step right good news on my channel there is a rigging animation lesson there is nothing crazy really but i agree it looks scary if you guys struggling with that and you think i need a separate lesson about rigging let me know in the comments the next part is animation and here i'm gonna briefly cover that because i'm actually working on AI animation workflow so you definitely need to subscribe guys to not miss that out i'm basically checking all the options to come up like with the best workflow for not only humanoids but for creatures as well combining most advanced AI tools such as Claude code of course so how did i actually animated my character so first of all of course you can combine ready -made animation so you can take animation from exam or or accurac depending on the skeleton and mix it with the spider leg animation and that can be done with Claude code actually you can do that with or actually i took it further i generated few videos with cdance 2 .5 to figure out what motion i actually want and i thought that having this pose is actually nice so i generated idle and walk animation and it seems like to make it natural i just need this shoulder and waist movement like a little bit because when she walks her body goes like left and right in a balance so i took my rigged character with the right names on all bones final videos that i liked and went to Claude code and unity well i actually tried unity and Unreal engine and i asked it to create procedural animation first of all i wanted like legs to have a kinematic animation so it actually can go with legs all around and for the top part ask it to add this motion to look natural the only thing i had to do manually is to set this pause this initial pause like this with hands so after a few hours of conscious vibe coding again i provided Claude with quite reasonable inputs i got playable character with a bunch of animations just look at this i mean to be honest behind the scene it took a bit more figure out the right approach the approach that i thought kind of work didn't work that well and surprisingly Claude code with Blender with Unreal engine and unity did quite a crazy job right so it helped me to do all these animations and yes definitely not one shot guys no one shot at all but after a few iterations i got something that looks more or less good i definitely gonna work more on AI animation workflow because right now i'm developing my game where there will be a lot of creatures so i need this workload to be efficient and by the way if you want to be updated what i'm building and all recent news about 3d i definitely consider to follow me on x all right that's all for today like and subscribe and i see you in the next video
The words are the caption track's own and nothing is reworded or re-transcribed. Paragraph breaks are placed between sentences so the text reads as prose.
Free tools for your own script: paste a draft and see where it stands before you record it.
Paste your draft and see where viewers are likely to drop off, with a rewrite for each weak line.
Paste the first 30 seconds of your own draft for a hook score and rewrites.
Check your draft against YouTube's advertiser-friendly guidelines before you record it.
Read this channel's public videos and transcripts, and download a writing brief for it.