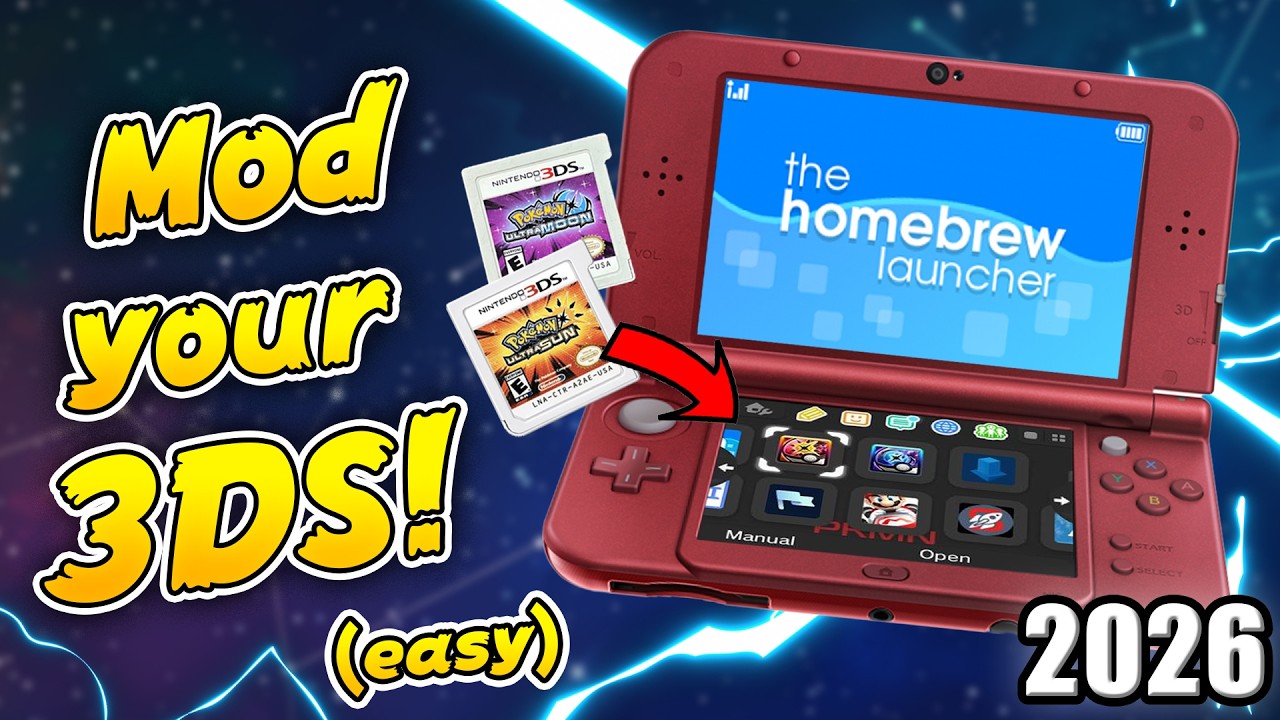
How to Mod your 3DS in 2026! (Full Guide) | Homebrew Launcher, Install Games, + more! transcript
FunkyScott47 · @funkyscott47
Words
5,422
Runtime
25:32
Speaking pace
212wpm
Reading time
23min
212 words per minute, above the 201 75th percentile of 349 measured videos. That distribution comes from the 349-video hook study.
Opening (first 30 seconds)
This video is going to be an in-depth guide to modding your 3DS to unlock its full potential. You won't regret doing this as you can do so much after you've set up custom firmware. Some of those things include having a library of games from different consoles ready to play on your home screen, getting a new look with custom themes, reviving online play, and more. So, let's get into it. This guide will work on any model in the 3DS family. So, whether it's a 3DS, 2DS, old or new model, it doesn't matter, you can mod it. The latest firmware currently is 11.17,
106 words, the words spoken in the first 30 seconds at 212 words per minute.
Sentence shape
| Measure | This transcript |
|---|---|
| Sentences | 365 |
| Average words per sentence | 14.9 |
| Longest sentence | 58 words |
| Questions asked | 0 |
| Sentences containing a number | 76 |
Most used terms
- sd44
- 3ds43
- press43
- card33
- sd card32
- console30
- guide26
- install23
- custom19
- different19
- screen19
- sure18
Filler phrases
20 in total: like 13 · actually 4 · sort of 1 · uh 1 · you know 1.
A literal whole-word count of the same phrase list the Prepublish browser extension uses, so a phrase inside another word is not counted and a phrase used in its ordinary sense still is. It is a count and not a judgement.
What this transcript is
Every word below is the caption track YouTube publishes for this video, pulled from the video itself and reproduced unchanged. It is not Prepublish's writing, not a summary, and not a re-transcription: it is the video's own published captions. English captions, generated automatically by YouTube, in the video’s original language. Source: the video on YouTube. A channel that would rather this page did not exist can ask for its removal through the contact page, and it is removed.
Transcript
This video is going to be an in-depth guide to modding your 3DS to unlock its full potential. You won't regret doing this as you can do so much after you've set up custom firmware. Some of those things include having a library of games from different consoles ready to play on your home screen, getting a new look with custom themes, reviving online play, and more. So, let's get into it. This guide will work on any model in the 3DS family.
So, whether it's a 3DS, 2DS, old or new model, it doesn't matter, you can mod it. The latest firmware currently is 11.17, but this guide will work even if you're on older ones as well. To summarize quickly, I'm going to show you how to set up Luma custom firmware, which makes the fun stuff afterwards possible, how to back up your NAND with GodMode9, install custom themes, download homebrew apps directly on your 3DS, and at the very end, I'll show you how to install 3DS games directly to your home menu.
Here's what you need for this guide. Of course, you need your 3DS, and again, doesn't matter which model. And along with that, you need an SD card. If you still have the 2 or 4 GB SD that it came with, you can absolutely use that to mod it. You can always upgrade later, but I would definitely recommend getting a larger one like this 32 GB one I'll be using, which has a lot more room to add games later on. Just make sure the plastic tab here is pushed up to avoid right lock issues.
You can even use a microSD card with an adapter as well. Fair warning, it's not recommended to have SD cards larger than 128 GB as it can cause issues with custom themes and DS and GBA game graphics, but you will also need to connect your SD to your computer in order to download and transfer files. My PC doesn't have an SD slot, so I have to use this USB adapter here. There'll be Amazon links in the description for everything I'm using in this video if you're interested, and I'll be doing this on a Windows computer, but it also works on Mac and Linux.
But with all that out of the way, let's begin. I'll have a link for this Google Doc down in the description, and if in the future this looks different, then I finally set up a website, but who knows when that'll be. I do have a disclaimer. When you mod any console, there's always a slight chance you can brick your device. It's very rare, don't worry, but make sure you follow all the steps correctly the first time. If you're new to this sort of stuff, it's a good idea to watch the video to understand the process before trying it yourself.
Because it's a video guide, make sure to read the description and pin comment to ensure this method is still up-to-date. I'll either inform you myself, or I'll pin comments from you guys that have the date you successfully followed the video. But that's pretty much it. This doc is going to have everything we need, but the first step before doing anything, we need to make sure that you don't already have custom firmware on your 3DS.
Sometimes when you buy it used, people try to hide that they modded it, and then the custom firmware is still there. So, let's just double-check. So, to do this, hold the select button and power on your console, and keep holding select until you see your home menu. And if you get to the home menu, that means your 3DS is not modded. But if you see any other screens, like the Luma configuration menu, then your console already has custom firmware, and you'll actually have different steps because you don't have to do the exploit.
So, over on the doc for you guys, I have a 3DS already has CFW link, and that'll tell you what to do next. So, you can head over there and check out what next steps there are for you. As you can see, there's different options for different versions, so just check out what you have and then follow the instructions here. But for everyone else that is not modded, let's continue with the guide. The first step is to format our SD card to FAT32.
If you're going to be using the existing SD that you already had in your console, you can skip this formatting section as it's already the proper format. But if you plan to upgrade to a larger one like I am, we're going to back up all your files from your old one so that you don't lose any of your data. But if you plan to upgrade to a bigger one, we'll back up your files so you don't lose anything, and then we'll make sure that the new SD card is properly formatted.
I can only show you guys on Windows, so if you're on Mac or Linux, there will be a link on the guide for the programs or the steps that you can use. So, go ahead and plug your existing SD card in, and if you do not have one, just plug in your new SD card. So, I have my SD card plugged in, and the first thing we need to take notice of is the drive letter. As you can see, mine is drive G. It says USB drive because it is an SD to USB adapter, but I'm going to go inside, and here is my existing one.
You will also have a Nintendo 3DS folder. You could also have a DCIM, but if you do not want to lose anything that you currently have on there, we're going to highlight everything inside, copy it, and then place it in a safe spot. So, I'll just do it quickly on my desktop. The reason we're doing that is because formatting your SD card will wipe everything. And now we are good to format it. So, if your SD card is 32 GB or lower, we can format it through Windows.
So, in the left side of the file explorer, click on your drive letter. Remember, it's very important you choose the right one. Right click, go to properties. As you can see, mine is FAT32, but I'll show you how to do it anyways. So, if we right click again, we'll have the option to format. Make sure it is on FAT32 at 32 KB, and press start. And remember, this will wipe everything, so please be sure you know which drive letter your SD card is in.
But once you're sure, it'll give you a warning, press okay, and format complete. So, if you have a SD card that is 64 GB or larger, anything larger than 128 isn't really recommended for [music] the 3DS anyway, but if you have a 64 or 128, you need to do it a different way. So, on the doc, I have a link here for Ridgecorp, and you'll just have to download it. Click the image to download the GUI format. And because mine is already FAT32, I will put in some footage here.
Make sure you have the proper drive letter selected and 32,000 allocation unit size. If you get issues, make sure all your windows are closed when you format it. But once you have it formatted as FAT32, we are good to place our Nintendo 3DS folder back on and any other folders that you had, and we are ready to proceed with the guide. So, let's go back to the Google Doc. And for this video, we're going to be using the official written guide as that's going to be the safest way to mod your 3DS.
So, go ahead and click on the link and it'll take us to the official 3ds.hacks.guide, and this is where we'll grab all of our files needed. Please also note this yellow box that this guide is for Windows, Mac, or Linux. So, if you have an Android phone, tablet, iPhone, or iPad, you can select the right link for you. If you do run into any issues, the quickest way to get help will be joining the Nintendo Homebrew Discord server, which is right here, and they do take donations if you want to donate to their guide.
[music] But anyways, let's get on with it. So, scroll down to what you need, and we are going to be grabbing the latest release of MSET9. That is the exploit we're going to be doing, so click on it and grab the zip file. We can exit that, and now we need to have Python installed on our computer. So, I do not have it installed, but if you are on Linux or Mac, you can check by opening the terminal window and entering Python 3 {dash} V, and if if it returns a version number, it will work for this guide.
But if you do not have Python, click on the Python link here. It'll take you to this page, and we can download Python from here. And it downloaded. Just click on the file, and we can install it. Okay, setup was successful. We'll close that. We can exit this website. So, now with downloads on the left and your SD card on the right, going to open up the zip file here, and you do need an extraction software. Windows has a built-in one, but 7-Zip is better and it's free, [music] so that's what I use.
But highlight everything inside and drag it to the root of your SD card. Now that's good. We can go back, and then you can delete these files. And now over on your SD card, we're going to run the MSET9 script. So, I'm on Windows, so we want the {dot} bat, the Windows batch file. If you're on Mac, you have the macOS command. You double-click that, and then you might have to enter your password. And if you're on Linux, I'll put the instructions from the guide on the screen.
But if you're on Windows, double-click the {dot} bat. This command window will open up. We'll have different options for old or new. Now, if you're not sure which model you have, the best way to tell is if there is a C-stick nub, and that means you have a new model. And then your firmware also matters. So, I'm sure a lot of you will be on 11.17, but if you're on a different version, take note of that, and then choose the right one.
And I'm also going to mention if by chance you're on a version lower than 11.4, so if you're on 11.3 or older, there's actually an easier method called Soundhax. I'll have a link in the description for the written and video guide as well. So, personally, I have a old 3DS on 11.17, so I'm going to hit one, but of course, pick the right number for you. Press enter, and here you can double-check your choice. It'll tell you the model and version, and we're just going to hit one to create MSET9 ID1.
Enter. There'll be a disclaimer, and we're just going to input one again to confirm, and then it will create the ID1, and [music] you just press enter to exit. Now, if you did get any errors, hopefully you're following along on the guide. There is a troubleshooting link right here that you can check out. And then also, just so you're aware, your console will will appear to lose most of your data on the home menu, but this is expected, and your data will come back at a later step, so no worries there.
But now you can eject your SD card and put it back in your 3DS. So, let's insert our SD card and double-check that your tab right here is pushed up. Power on your console, and once it's turned on, we're going to go into the Mii Maker. If you haven't ran the Mii Maker before, you will see this screen, and that means it created the proper data for our exploit to work. Otherwise, if you have ran it, you will see the welcome to the Mii Maker screen, and you'll be good to go as well.
You already have the data. We are good to go. We can press the home button, and close it. Next up, we're going to go into system settings, go into data management, Nintendo 3DS, software, and hit reset. And don't worry, this isn't going to wipe any of your data. Press okay, and now we can power off our console. Make sure to press that one as well. And now we can take our SD card back out and place it into our computer again.
So, back on your SD, we're going to run that same script. So, click the file that you need. It'll bring this back up. Type the same number as you did before for your model and version. Press enter. Now, you should see ready up here, but if not, if you see not ready, check mset9 status, then over on the guide, you can follow these steps here to make sure it says ready. But, as long as it says ready, just type zero and enter to exit.
Goodbye. And now, you can eject your SD card and put it back in your 3DS. So, once your SD card is back in, power on your device. And without pressing anything, when you turn on your device, system settings should be selected here. If it's not, go over to system settings. And once it looks like this, power off your console and then back on, so that when you turn it on, it is on system settings. And at this point, we are at part of the guide where it is very important you follow each step correctly.
So, if you are more comfortable following the written guide, we're on section two, mset9. But, if you do need the visual assistance, you can follow my video, but make sure to watch it over once to know exactly what you need to do. But, now we are good to press A on system settings. We're going to go to data management, Nintendo 3DS, extra data. And then now, we don't press any buttons. And at this point, be very careful not to press any buttons.
We're going to remove the SD card on this screen. Zip. So, carefully remove it. It should give you this screen right here, no SD card found, and it is in my hand. I found it. Set your console down, and we're going to place this into our computer while leaving your screen on there. And then back on your SD card, we're going to run the command again. So, click the file you need to run the script. We're going to do the same thing, select the number for your model and version.
Enter. And now, we're going to hit three to inject trigger file. Press enter. You should see successfully injected. You can press enter to exit. Now, you can eject it from your PC and put it back in your 3DS. So, pick it up carefully, and now we're going to insert it without touching any buttons. And then it should load. And you should see this screen. This is the safeB9S installer. If you got a red screen or the console gets stuck on the loading screen for more than 10 seconds, I'm following the guide exactly, so there is troubleshooting links as we go in case you do run into these issues.
And on the top screen, it says to enter a key combo. Now, if by chance your top screen is blank, and on the bottom screen, you see crypto status all checks passed, you will have to enter the key combo blindly. But, just hit the buttons in this order: D-pad left, D-pad down, D-pad right, D-pad up, and A. But, I'll put the instructions up on the screen for you, too. Just go ahead and do that. Up and then A. You should see this screen.
Press A to continue. And now is the Luma configuration menu. Now, if you continue your journey in modding after this video, you might need this screen, but we are going to leave it blank for now. We're not going to make any changes, and we're going to hit start to reboot the console to save and exit. And now, we're going to power off our console fully. And this next step is very, very important. We are going to be removing the mset9 inject.
So, take the SD card out yet again and place it into your computer. And now, it's time to remove mset9. And this section is very important, especially if you had data previously on your 3DS, this will get it back. And no, it's not removing Luma custom firmware. So, once again, we're going to run the script. So, back here, type the same number as you have been before for your model and version. Press enter. You should see injected.
And now, we're going to type four to remove the trigger file. Press enter. And now, we have an option to remove it. So, now we're going to type five. Press enter. And you should see successfully removed mset9. We're all good. Press enter to exit. And now, our console is going to boot to Luma 3DS by default every time. And now, we're ready to move on to the next part. So, on the guide, if you happen to be not following along, we are at the bottom where it says continue to finalizing setup.
So, click on that. So far, we have successfully installed custom firmware, but this part is going to finalize everything, hence the name. But, that includes the NAND backups and a handful of different very important homebrew apps that we're going to be using later, too. So, on this page, scroll down, and we're going to get these direct downloads. So, the finalize_helper.firm, it will download and finalize.romfs. And once you have those, downloads on the left and SD card on the right again, the first file, we're going to grab finalize.romfs and just drag it onto the root of your SD card.
Press yes if Windows prompts you. And once that's dragged over, you can delete it off of your PC. And now, on your SD card, go into your Luma folder. If you do not already have a payloads folder like this, you can create your own, but go inside, and then we'll put the finalize_helper.firm in this folder. But, there we go. We can delete that from your PC. Exit the downloads. But, now we can eject the SD and head back to the 3DS.
And we're going to do the same CFW check as before, just to confirm that we did everything properly. So, hold select, power on, keep holding select, and hopefully, you will be in the Luma 3DS configuration page like so. That means we did everything properly. So, just hit start. It'll save and exit and reboot your console into Luma 3DS. And at this point, in our system settings, if you are not on 11.17, if you did not update before starting this guide, it is safe to do so now, and you can just update it normally as you would for a 3DS.
But, I'm on 11.17, and you most likely are as well. So, let's move on to the next step. So, once you're on the home menu, we are going to press left shoulder, D-pad down, and select. And that should open our Rosalina menu. If any of your buttons are broken that we used for that combo, check out the guide because there are alternatives. But, once you're here, we're going to go all the way down to miscellaneous options.
Press A. Go down all the way to the bottom, dump DSP firmware. Press A. Press B once you see this screen. Go up one to nullify user time offset. Press A. And then press B once, twice, three times to exit the Rosalina menu. And now, the next step, we're going to power off our console. So, now with your console fully powered off, hold the X button and power it on. If when holding the X button, you booted into the home menu, just double-check the spelling of your payloads folder, and make sure you have your x_finalize_helper.firm file in there.
But, now we're in GodMode9, and going forward in the future, if you want to get into GodMode9 again, you have to hold start while powering on your console, as we only hold X here for the first time loading it. But, now we're in. If you get prompts, just go through them. If you're asked to select your language, make sure to select English, otherwise, you'll encounter problems later on. The language choice only affects GodMode9 menu options.
You might be prompted to create an essential files backup. Just press A to do that and then A to continue. And then you also might be prompted to change the date and time, like my screen. And then you should see the GodMode9 menu. But, now once we're on this screen, we're going to hit the home button to get the action menu here. Go down to scripts. Press A. Press A on finalize. It will load. It gives you a warning, this script may take up to 15 minutes.
So, if you're okay with this, just press A to continue. We'll press A to unlock the writing to sysNAND, and then a key combo for us to enter. So, up, down, up, down, and A. And now, it's going to back up our NAND and install some very important stuff. So, I'll meet you back when it's done. And you should see setup complete. And now, we're going to press A. That'll power off your console. And once again, we're going to take our SD card out and go back to the computer.
And then back on your SD, you should see it is much more clean. It got rid of all the files you didn't need. And now, we're going to place our backup that just And now, we're going to place our NAND backup somewhere safe. So, inside of your GM9 folder, in your backups folder, in the event of a brick, which again, is pretty rare, but these files here will help restore it to a working state again. So, these are very important.
We're going to go back. We're going to copy the backups folder, and then I'll place it on my desktop. And then it never hurts to rename it to the date that you actually backed up your NAND. Because once you start adding things to your device, if you want to update your NAND backup, so as you add more things to your console, it never hurts to back up your NAND again, and then you can update your NAND backup. But, it's also a good idea if you have a cloud storage, if you have Google Drive or anything like that, you can put it there, too, so that it's just foolproof.
You can't lose it, and then you always have it just in case. But, now that we have it in a safe place, you can go back into your backups folder, and then you can delete the two sysNAND. Essential exefs is so tiny that it doesn't really matter, but you can delete it off your SD to save space. And now, for the last time on the written guide, we can place our SD back in our console, and you'll see all of the new stuff you have.
So, eject it, and I'll meet you over. And before we open the presents, some important information are some key combos that you should be aware of. Holding select when you boot up your console will go into the Luma 3DS configuration menu. If you want to get into GodMode9 later on, while your console's off, hold start while booting it. The Rosalina menu is same as before, if you hold the left shoulder, down on the D-pad, and select while your console's on, then you'll go there.
And those are the three that you should be aware of. But, now that you're back on your 3DS, you should see a bunch of new presents. Let's go through them. The homebrew launcher made by paolo mk7, this looks fantastic, but most of the time, you won't need this because your homebrew apps will be on the home menu like the all the other ones that we're going to open up. If you ever get a homebrew app formatted as 3DSX, you'll find it in here.
As you can see, we don't have anything right now. Checkpoint was made by Bernardo Giordano. It will allow you to manage your save data including adding 100% save files. Universal Updater is very important. It allows you to download homebrew apps directly on your console including updating Luma 3DS. FTP D is by mthell. It will let you access your SD card over FTP. Anemone 3DS, this is our custom theme manager which I will be showing you how to do that coming up next.
And then lastly, FBI, this is how you install content to your console. And we're also going to be using this today to install 3DS games. But now that we are fully set up, I'm going to show you how to get custom themes and install 3DS games. But I will say over on the Google Doc, I have a few different videos on what you can do next. Uh Pretendo, fast way to install games, DS games, and there's tons of different things you can do.
You can check out my 3DS modding playlist on YouTube or the official guide does have their wiki and it has lots of different information on what you can do next as well. So now if you're sticking around, I'm going to show you a quick guide on how to set up custom themes and then after that, we're going to install 3DS games to your home menu which there is a few different methods that we'll talk about. But if you want a custom theme, Anemone is the app we're going to be using, but there's something we have to do first.
We have to create some X data. The top left icon, the house and the wrench, click on that one and we're going to select change theme. And there we go, we are creating the data we need. And now we can go and load into Anemone. So right now there's no themes found. We have to get it ourselves. So I'll have in the description themeplaza.art and this has tons of different custom themes. As you can see, you can sort them by most downloaded, newest, most liked.
And when you hover over them, there's a QR code. So back on your console, just hit the right bumper and now we'll be able to scan a QR code. And then you can just hold it up. And then it'll begin downloading. Now that we have it downloaded, hit the left bumper and you should see that same theme that you picked. Press A on it. And now you have options to normal install, shuffle installs. So if you like a surprise, you can get a bunch of different themes and shuffle them for every time you turn your 3DS on, but we'll do up on the D-pad for a normal install.
And it will install the theme. If there's a checkmark, that is what you have. Perfect. And now if you press the start button, you can power off your console, turn it back on, and now we have our custom theme just like that. It's that easy. So that's custom themes and now let's go ahead and install 3DS games. So when it comes to installing 3DS games to your console, there's actually three different methods that you can do.
The one I'm going to be showing you is FBI, but the simplest is the top left video in the doc on the second page and the fastest will be the video below that which is using the custom install. But I'm going to be showing you FBI. To do that, we need to get our own CIA files and then place them on the SD card so we can power off our console. Take your SD card out and I'll meet you over there. So over on your SD card, we're going to make a new folder and we're going to call it CIAS.
Press enter, go inside and this is where you place all of your CIA files which in our case is going to be games, but if you have an app that you want to install, you can also do it the same way. So I'm going to move this over and I'll show you that I have these games here. I have a handful of different ones. Now if you're wondering where to get them, can't tell you in the video, but anyways, feel free to join the Discord server if you'd like.
But all you're going to do is place your game CIA files in your CIAS folder. Press yes if Windows prompts you here. We'll let that transfer over. So they're all transferred on. You can eject your SD card and go back to your 3DS. And now we're going to go into FBI. You'll see options on the bottom here. We're going to press A on SD. Go down to your CIAS folder. Press A. And then you should see everything. If you want to install them one at a time, you can go ahead and do that or you can go to current directory, press A.
And here we're going to go down to install and delete all CIAs. Now that's because once they are installed, we no longer need the CIA file on our SD card so it frees up some space. So press A on that. It'll just give you a confirmation. Press A and then it'll go and install all of your games. Obviously, the bigger the game, the longer it'll take. And if you are disappointed by the speeds of FBI, I recommend checking out my custom install video because it is a lot faster.
But this gets the job done nonetheless. So I'll meet you back when it's all installed. But you should see install finished. Press okay, press the home button, and new software has been added. Press okay and we'll see what we got. So now I now have Pokémon Ultra Sun and Super Smash Bros. for the 3DS. Now I had a couple that failed to install so I'm going to have to go and get a different CIA or install them a different way.
But there you go, that is how you install your 3DS games or any game that's in a CIA format. And that's all for what I'll be putting in this video, but there is a lot more you can do with your 3DS so feel free to check my other videos in my 3DS modding playlist and that way you can get even more out of your console. If you found this video helpful, I'd love it if you could hit the like button and if you want more modding guides in the future, make sure to subscribe and hit the bell so you don't miss any.
If you do run into issues and you need help, I do have a homebrew help Discord server with a bunch of great helpers in there. But remember, they don't have to help so please be respectful. Thank you for watching and I hope you have a great time with your newly modded 3DS. I'll see you on the next one. Stay funky and happy modding. Goodbye.
The words are the caption track's own and nothing is reworded or re-transcribed. Paragraph breaks are placed between sentences so the text reads as prose.
Use this transcript
Three free tools that work on the material around a video like this one. No signup, no login.
Hook Analyzer
Paste the first 30 seconds of your own draft for a hook score and rewrites.
Policy Pre-Flight
Check your draft against YouTube's advertiser-friendly guidelines before you record it.
Channel Skill Generator
Read this channel's public videos and transcripts, and download a writing brief for it.