Getting the transcript
Reading the captions from YouTube. A video nobody has opened here before takes 10 to 30 seconds; this page fills in on its own.
Reading the captions from YouTube. A video nobody has opened here before takes 10 to 30 seconds; this page fills in on its own.
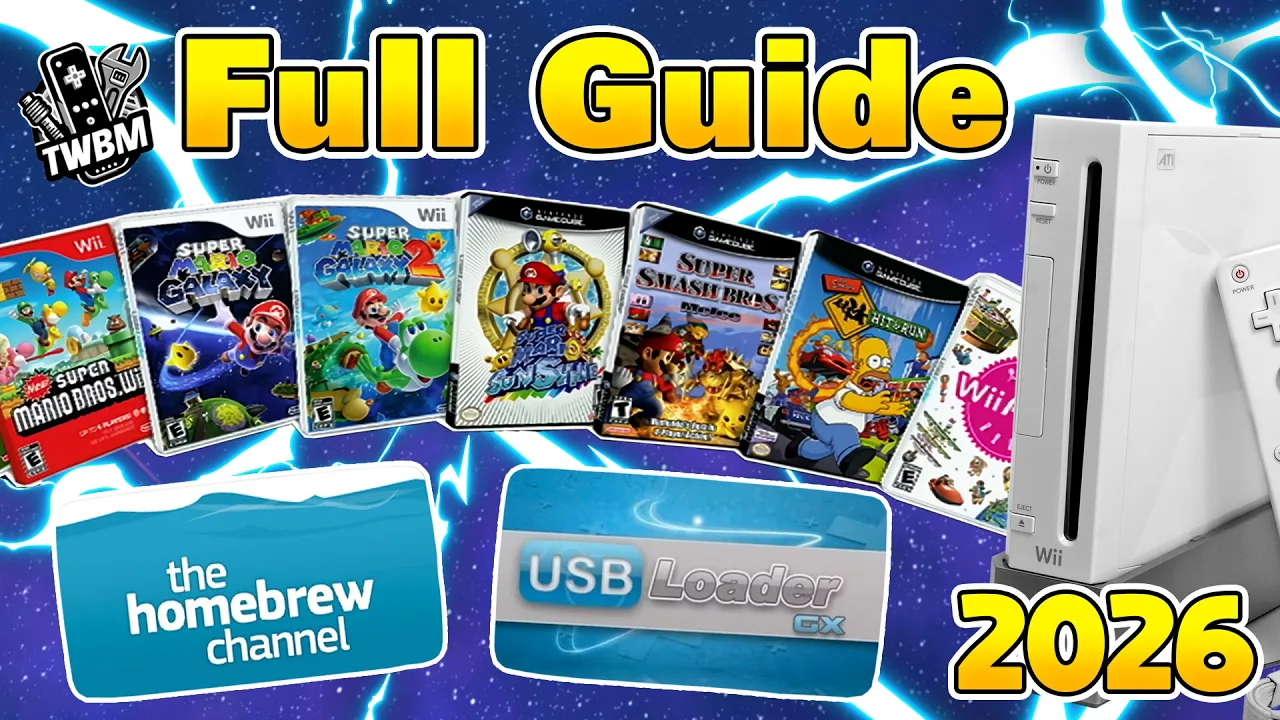
FunkyScott47 · @funkyscott47
Where viewers went back to watch this video again, from YouTube's public Most replayed graph, lined up with what was said at that moment.
Words
7,363
Runtime
35:57
Speaking pace
205wpm
Reading time
31min
205 words per minute, above the 201 75th percentile of 349 measured videos. That distribution comes from the 349-video hook study.
Opening (first 30 seconds)
My last Wii modding guide helped a lot of people, but there were some changes since then to make the process even better and easier. So today I'm going to be walking you through [music] the process of modding your Wii so you can get the most potential out of your console. To summarize, here's everything we'll be setting up in the guide. I'll be showing you how to install the Homebrew Channel whether you have an internet connection or not. I'll walk you through how to protect your Wii from the ninjas, aka getting a brick. Don't worry, it's super low risk,
103 words, the words spoken in the first 30 seconds at 205 words per minute.
Free, no signup. See how the first 30 seconds hold attention, with rewrites.
What this transcript is
Every word below is the caption track YouTube publishes for this video, pulled from the video itself and reproduced unchanged. It is not Prepublish's writing, not a summary, and not a re-transcription: it is the video's own published captions. English captions, generated automatically by YouTube, in the video’s original language. Source: the video on YouTube. A channel that would rather this page did not exist can ask for its removal through the contact page, and it is removed.
My last Wii modding guide helped a lot of people, but there were some changes since then to make the process even better and easier. So today I'm going to be walking you through [music] the process of modding your Wii so you can get the most potential out of your console. To summarize, here's everything we'll be setting up in the guide. I'll be showing you how to install the Homebrew Channel whether you have an internet connection or not.
I'll walk you through how to protect your Wii from the ninjas, aka getting a brick. Don't worry, it's super low risk, it's just better to be safe than sorry. We'll learn how to set up and play your favorite Wii and GameCube games using USB Loader GX. And when it comes to setting up your games there's a new program I'm excited to show you that works on Windows, Mac, and Linux. I'm even adding a troubleshooting section at the end of the video for the most common errors you might encounter.
I'm also going to show you how to install forwarder wads like the shortcut to USB Loader GX. And lastly, we'll get the Homebrew browser, also known as the Open Shop Channel, to be able to download Homebrew apps and games directly on your Wii. It might seem like a lot, but this guide will set you up to turn your Wii into a beast. Here's everything you need. And if you don't have them already, I have Amazon links in the description for your convenience.
Of course, you need a Wii and it can be any model other than the Wii Mini. That is a different process completely. While technically you can do most of this guide without an SD card, it is highly recommended to use one so you can install BootMii to back up your NAND, aka your internal storage. And you'll also need a storage device to store your games, which can be an SD card or a USB storage device. The best combo, in my opinion, is having an SD card for your apps and a hard drive for your games.
You can use a USB flash drive, but almost 80% of the issues with Wii games comes from using incompatible ones. I know these two I have here work since I use them regularly, but I will link a compatibility list so you can check out which brands and sizes work. You'll need a computer or just any way to download and extract files to your SD card or hard drive. And yes, this guide will also work for Mac users. If you don't have an SD slot on your computer like me, you can use an adapter like this one to connect it to your PC as well.
But that's basically it. To get started, I have a link to this Google Doc where I have everything organized to what you need. So over on the Doc, I do have a disclaimer. This guide is for the Wii, it does not work on the Wii U's virtual Wii or the Wii Mini. They are similar, but require different files and steps. I'll have videos linked in the description for other consoles. If you're unfamiliar with this process, it is good practice to watch the video through once to get an idea of how it works before doing it yourself.
Take it slow and you shouldn't run into any issues. And of course, this guide will not show you how to obtain any paid software illegally. We're going to start off by formatting our storage devices. No matter what your setup, if you're doing an SD card and hard drive like me, they both need to be formatted as FAT32. So go ahead and insert your SD card and open up your file explorer. This is a very important part. Each device has its own letter and yours is going to be different than mine.
Well, it could be the same, but it's not necessarily the same. So my SD card is 64 GB, conveniently named Hit Like, but it the drive letter is what we want to take note of. Mine is drive F. So make sure you know what drive letter your SD card is. This also goes for your hard drive. And if you right-click it and go to properties, my current format is exFAT and that is not something that the Homebrew Channel can read. So that's why we're formatting it first.
If it had already says FAT32, you're good to go. You can skip this part, but let's go ahead and format it. If your SD card or USB drive is 32 GB or less, you can actually do it through Windows. Right-click and hit format and you'll be able to choose FAT32 here, but since mine is greater than 32 GB, I need to use a different program, which I have a link in the Doc for FAT32 format. So if yours is also greater than 32 GB, you have to use this as well.
So let's head there. It'll take us to this RidgeCorp page. Click on the image and it'll download the file. Mine says insecure download block, but I've used this tons of times. Just press keep, you're all good. Go over into your downloads and just double-click to run guiformat. Hit yes if Windows prompts you and this should pop up. So this is where your drive letter matters very much. You can choose it here. Mine was F, but make sure you have the proper drive letter selected.
I can't emphasize that enough cuz you don't want to wipe the wrong drive. So make sure your drive letter is selected. 32,000 allocation unit size is what we want and then go ahead and press start. It'll give you a warning, all data will be lost. Do you really want to format? Press okay. Our first error. Just press okay, go to your file explorer. If you have it open, just close and try again. That time it worked. So now my SD card should be formatted as FAT32.
If you got an error again, I would suggest restarting your computer. Don't open anything except for your FAT32 format and then try. And that should take away any errors. And I'm going to format my HDD the same way. So with that step out of the way, we're ready to get the Homebrew Channel and install BootMii as well. And as I mentioned earlier, there's two ways to get it and I'll start by showing you the internet method first.
So if you cannot connect your Wii to the internet or if the first method just doesn't end up working for you, you can skip ahead to the timestamp on the screen. But for those of us with an internet connection, take out your SD card and head over to the Wii. And before inserting your SD card, make sure that small plastic tab on the top left of it is pushed up. And while this method doesn't require an SD card, it's the installation of BootMii that does.
So that's why we inserted it. So once you're on here, go into your Wii options, then Wii settings. Before moving forward, make sure the version is 4.3. The letter is just your region, that one doesn't matter. If it's not 4.3, you can go to the third page and do a quick system update and it should update to 4.3 no problem, but you do need the internet, of course. And now we're going to go to our internet settings, connection settings.
If you don't have a connection already set up, go ahead and do that. I have a wired connection using a USB to ethernet adapter. Some internets are too modern for the Wii to connect to them, so you can even use a hotspot on your phone as well. That's a that's an option. I'll show you quick, I'll clear that setting and start a new one, wired connection. It'll initiate a test. It was successful. I don't need to perform an update.
I'm on 4.3. But once your connection is set up, we're going to go change settings. Go over one, two, three times to where it says auto-obtain DNS and click no. Advanced settings. And now we're going to change the primary DNS. So click on that and go ahead and type this number in. But press okay. This is the str8 to hax method and sometimes the DNS number will change. It's very rare. So if you're watching this video far down the line, check the pinned comment to make sure that it's still this number or if there was an update.
But just confirm, save, press okay, and it'll run a connection test. Connection was successful. Press no, we don't need to update it. And now that's set, hit back once, back again, and click user agreements. Just press yes. It will load to this screen. Hit next and if it's all good, we should see the str8 to hax page. And here we go. Do not click I accept or I do not accept. We're just going to let it sit here until it loads into the hackmii installer.
And there we go, it's running into the hackmii installer. Don't worry, all this text is normal. Loading in and we should get a disclaimer here. And we just have to wait 30 seconds before we can press one to continue. There we go, we can press one. And here is the hackmii installer. So at this point, I'm going to show everyone who doesn't have an internet connection how to get here. So once you're here, you can skip to this timestamp where we can continue with the guide.
So for those of you that do not have an internet connection or the first one did not work for you, on the Doc, go to this Wilcom brand link. If you've heard of letterbomb, this is the updated version. So click there. If you also run a VPN, it might block it. You just got to bypass it. Don't worry, it's safe. It'll take us to this page and now we need to go and find our MAC address. Leave your SD card in your computer for now.
Turn on your Wii. Go to your Wii options, Wii settings. First thing to do is go to your calendar and make sure your date and time are correct and confirm it. Once that's good, here in the top right, the number 4.3 is the version. If yours is not 4.3, Wilcom brand does work from 3.0 up to 4.3, unlike letterbomb. But I would suggest updating it to 4.3 anyway. The letter is your region. You do need to take note of this for this method.
So mine's U for North America, but just make sure you remember which one yours is. But to get your MAC address, go to the second page, internet, console information, and here is the MAC address. But you can leave this up on the screen or take a picture, write it down, whatever you want. But go back to the Wilcom brand site as I have up here and just type it in. And once you have it typed in, make sure you have your system menu version and region.
So that's good. Make sure bundle the hackmii installer for me is checked. Click I am a human. We have to prove that now. Just click one of the cut the wire buttons. We'll do the green, but it doesn't matter. And then in the bottom left, click download your zip. And it should download the console specific zip file. Open up your downloads. You should see it here. Open up the zip and now open another file explorer window for your SD card.
Again, this is only possible with an SD card, it doesn't work with a USB drive or a hard drive. I'm going to highlight the private folder and boot.elf and drag it onto my SD card. And now you can eject your SD card and place it into your Wii and go back to the Wii menu. So back to the Wii menu. And when inserting your SD card, before you do so, make sure the small plastic tab on the left-hand side of it is pushed up.
Otherwise, it'll cause issues. And now we're going to go to our message board. But try going back a couple or go forward a couple. Oh, and there it is. This is what we're looking for. Just click on it and you should see this disclaimer for the HackMii Installer. If you got a black screen, don't worry. Took me three tries. So just keep trying and as long as you put your MAC address and have the region in properly, it should work.
But just wait 30 seconds before you can click one. There we go. Press one to continue and we are now in the HackMii Installer. So now whether you did the first or second method, we should be at the same page. And now it's time to get the Homebrew Channel. So press continue. Go all the way up to install the Homebrew Channel. Yes, continue. And it should be pretty quick. It's that easy. Success. Continue. And now go to BootMii and select that one.
This is where you need the SD card to install BootMii. So if you didn't end up using one, then you can't do this. But we'll start off by installing BootMii as IOS. Yes, continue. And then yes, continue once more and it'll install it as an IOS. And now if you have the option, I don't on this Wii, it depends on your version, but if you have the option to install it as boot2, go ahead and do that as well. That'll give you extra protection.
But once you have that, return to the main menu and exit. We are good to go. It should take us to the Homebrew Channel. And now that we have the Homebrew Channel and BootMii, press the home button and now we can launch BootMii to backup our NAND. So press A there. And this is BootMii. Now your Wii remote will not work at this page. We have to use the buttons on the Wii. But we're going to navigate to the gears by pressing the power button on your console three times and then press the reset button to select.
We're going to select the green arrow icon. So press reset on that. And now it'll start backing up our NAND. This is your internal storage. So if anything happens to your Wii, leaving it unusable, you can re-upload this NAND backup in order to fix it. It'll take a few minutes and it'll take up about 512 megabytes of space, about half a gigabyte. All right, it's just about finished and then it will go through and do a verification.
And don't worry if you get bad blocks, it's not a big deal. This time it'll go faster. All the bad blocks are done. They're good and verify succeeded. Just hit the power button and now we can use the power button on the Wii. Go to the arrow here. Hit reset. And then just hit reset on Wii. And this will take us to the Wii menu. And now our backup is complete. We can turn off our console, take your SD card out and place it back in your computer.
And this is what your SD card should look like now. These two files, nand.bin and keys.bin, that is your NAND backup. So what I would suggest doing is creating a folder somewhere on your computer and call it NAND backup. You can even put a date. It's always a good idea to redo this after you make some changes to your Wii. And just grab these two files and put them inside. And you can keep them on your SD card, but if you have them over in a safe place, you can delete them if if you want.
It's really up to you. It's only half a gigabyte it takes up, but I will delete mine. And installer.log, you can also delete that. This private folder is from the Wilbrand exploit, so that was only for non-internet users, but you can keep it if you want, but it's not necessary. And same goes for the boot.elf. We can delete that one as well. So you'll be left with BootMii. And if you could only install it as IOS, you can skip this step.
But for those of you who installed it as boot2, right now your Wii will load directly into BootMii instead of the Wii menu. So if you don't want it to do that, we need to make a small adjustment. So go into this BootMii folder, right click on bootmii.ini, go to open with Notepad, take away the hashtag sign in auto boot equals system menu, and then boot delay, take away the hashtag sign there and change the five into a one.
Once you have that, hit file, save, and exit. And now your Wii will boot directly into the Wii menu. And you'll still be able to access BootMii through the Homebrew Channel or Preloader, or you can revert these changes and it will load directly to BootMii that way as well. So that's why boot2 is better protection. There's a lot more options for loading it. Now let's head back to the dock and get everything set up. So now we're going to download everything we need starting with USB Loader GX.
So click on the GitHub, head over to this page, scroll down. Under installation, forwarder channel highlighted, just click on that. We'll get the forwarder channel wad. Scroll back up and then on the right side is the latest release, so click on that. USB Loader GX was made by Wii Dev, otherwise known as Black Box. But here is where you get the actual app. So grab this zip file. And once that's downloaded, we can exit out.
Moving on to Nintendont. It'll take us to the Open Shop Channel page. We're going to play our GameCube games through USB Loader GX, but we still need Nintendont to run it. So grab this zip file here. Download file. Once you have that, you can exit out. Next up is Preloader. Go to that link. It'll also be the Open Shop Channel. Scroll down and grab the zip file right here. Back on the dock, next is the Load Preloader app.
Same thing. Download the zip. Exit out. YUMe. Head over there. Download the file. Exit out. Custom IOS wads. It'll take you to this Google Drive page. Download these. Head on back. And lastly for the files, Open Shop Channel. Scroll down and get the Homebrew Browser zip right here. So that was the last file for SD card. The last download is going to be for game setup. So we're going to go to TinyWii Backup Manager, the link here on GitHub.
This was made by MQ1 and Encounter. And this is going to replace the Wii Backup Manager, which was Windows only previously. But here, go to the releases page and you'll see there is a ton of different options, but MQ1 made it really simple. There's recommended downloads. The installer for Windows installs it to your computer, whereas the standalone is a portable application, so it doesn't actually install. So I'm going to go with the standalone.
You can choose. And then if you're on Mac or Linux, grab the corresponding file there as well. Sometimes this file does get flagged, so you might have to allow it with your firewall, but it is safe. But now, exit out. That is everything for our downloads. And just so you are aware, the USB compatibility list is right here. If we go over there, really big list of all sorts of different brands and types of USB drives and if they work or not.
And this info isn't guaranteed because manufacturers change the way they make their products or there's updates in USB Loader GX that may affect the testing that was previously done. But it is a good reference point worth checking. If you want USB drives that work for sure, the two I have in the description, I do use. I've tested them. But if you have one laying around, feel free to look it up here. You can go control F and search it up.
PNY. Use the arrows. And then you can browse through. So I'll leave you with that. But now, let's set up our SD card. So open up your downloads, those on the left, and then your SD card on the right. But before we set the files up, I'll quickly explain that these are the three options for your storage. You can have it all on your SD card if you'd like, or all on your USB drive, or you can have a combination. You can have your apps on your SD card and your games on USB drive.
It's totally up to you. I'm personally going to have all of my games separate on a hard drive. Windows does have a built-in extraction software, but I like to use 7-Zip. It's free. Starting off with USB Loader GX, open up the zip file. There should be an apps folder. We're just going to drag that onto the root of your SD card. And dragging it on, it gets extracted in that process, so we're good. We can go back and delete the zip file to keep your computer clean.
And this app folder on the root is where you're going to put any Homebrew app going forward. Let's move on to Nintendont. Open that one up. Highlight apps and controllers. Drag it onto the root. Go back. Delete the zip file. It's going to be pretty repetitive, but just make sure you don't miss anything and you'll be good. Move on to Preloader. Drag the apps folder onto the root. Go back and delete. If you're wondering why I don't do an all-in-one download package, it's because doing it this way makes sure you get the latest version of each app, even if you're watching this in the future.
Open up Load Preloader. Drag the apps folder to the root. Go back. Delete. Now YUMe. Drag the apps folder on again. Go back and delete. And the last Homebrew app is the Homebrew Browser. You don't have to drag the guide and help, but feel free to browse it if you'd like. But grab the apps folder and drag it on. Go back and you can delete it. And inside your apps folder, you now have all of those apps ready to go. Next up is our wads.
So go make a new folder on your SD card and just call it wad. Grab the USB Loader GX forwarder wad. Drag it inside. Hit yes if Windows prompts you. And then custom IOS wads. Here you go into this first folder where you see these four wads. Highlight them all and drag them into your wad folder. Go back and delete it and you should be left with TinyWii Backup Manager. We can exit out of your SD card. And let's set up TinyWii Backup Manager.
So here, just right click. If you're on Windows, you can press extract all, but I'm going to use 7-Zip. Show more options. 7-Zip. Extract to. We should have a TinyWii Backup Manager folder. You can delete the zip. You can place this program wherever you want, but inside is our EXE file. So go ahead and run that. And here is TinyWii Backup Manager. Make sure whatever storage device that you're putting your games on is plugged in.
Just a reminder, I'm setting my games up on my external hard drive. So I've plugged that one in. Now click this icon here. Select drive and go and find it. Smack like. It'll detect the drive [music] and now we're ready to add files. So, there's two different ways to add games. You can add an entire folder if you use this icon, or you can add individual files if you do the plus icon. So, click on that, and then navigate to where you have your games.
When it comes to Wii games, you can use WBFS, RVZ, or ISO. And for GameCube games, you can use .ISO, .CIS, or RVZ. So, this program has much better compatibility versus the previous one, Wii Backup Manager. Select individual ones, or you can just highlight everything, click open. It'll detect all the games. Are you sure you want to continue? Hit yes. And then it'll begin adding them to your hard drive. The more games you have, the longer it'll take, so I'll meet you when it's done.
There we go, they are all transferred over, and if I open up my hard drive, I now have a games and a WBFS folder. So, my GameCube games are set up in here, they're all set up properly, and my Wii games are in the WBFS folder, all set up ready to go. So, that's game set up, but I'll also show you how you can get game covers from this program. You can also get them on your Wii in USB Loader GX if you have an internet connection, but this is the offline way, and it's it's pretty easy, so I'll show you quick.
So, to do that, go over to this icon, click download all covers, which is under USB Loader GX, and then once you see finished downloading covers, over on the storage device that your games are on, so in my case, on my hard drive, where there was not an apps folder before, there is one now, and [music] there's USB Loader GX and an images folder. And inside here, it's going to have all of your images. Now, this images folder has to be with your USB Loader GX [music] app.
So, what I need to do is transfer the apps folder that was just downloaded over to my SD card where I have my USB Loader GX app. If you have everything on the same storage device, you don't have to do this step, but I'll do that quickly. So, I'm going to cut it, go over to my SD card, where I already have my apps folder, and paste. And now inside of my USB Loader GX app, it is everything, including the images. So, now we have all of our files set up and our games, it's time to head over to the Wii.
When you're plugging in your USB storage device, if you're using one, it does have to be plugged into the port on the bottom if the Wii is flat, or if the Wii is standing up on the right side. But once you have it in, load up the Homebrew Channel, and your apps should automatically load. If they do not, press one on the Wii remote, and you'll be able to select the device you have your apps folder on, but they should automatically show up.
Fun fact, you can also pop the bubbles in the background, which is a a fun little trick. But let's get started with the modding process. We'll start off with Preloader Installer, so load that. And this is a big part of brick protection. Once you see this, just press plus, and it will install Preloader. Press A to exit back to the loader. And now that it's installed, you can load it via this app, load Preloader, or in the event of a brick, if you can't load into the Homebrew Channel, I'll show you the backup method as well.
So, I'll turn my Wii off, and then right when you press the power button, hold reset. So, power and hold reset, and you're going to hold it until you see the Preloader menu. And there we go. And you can use your Wii remote now. So, as you can see, you can load into BootMii from Preloader as well. It loads Preloader before the Wii menu when you do that. That's why it is really good brick protection to have. But what we're going to do is go down to system menu hacks.
The main thing we want is block disk updates. So, it's the top option right now. Press A on it, so it says enabled. I also suggest blocking online updates, enable that as well. You can even move the disk channel if you want. Those two top ones are the main things we want, because we don't want to get prompts to update our games. To save them, scroll to the bottom, hit save settings, press B, and then go up and select the Homebrew Channel.
So, Preloader is all set up and ready to go. Now, we're going to install WADs. So, load up YUM ModMii Edition. So, this will load up. It'll tell you if you have Preloader installed, which is fantastic. It tells you your system menu version and everything. Select your source device, which is where your WAD folder is. Mine are on my SD card, so press A. And it should load directly into your WAD folder. So, the top four are the custom IOSs that we need to install in order for games to actually work.
You can install them one at a time, but for the sake of efficiency, just press the plus button on all four cIOSs. We'll do the USB Loader one after. Press A, and you can install all at the same time. Press A to proceed. Just about done. All four of them succeeded, we're good to go. If any failed, you do need to make sure they are installed successfully, so just try again. But once succeeded, press A to continue. And so you guys are aware, this second one, cIOS 249, this is the main one that most games use.
And since we're here already, we will install the USB Loader GX forwarder channel, which is also a WAD, so go ahead and install that one, too. It's basically a shortcut to the app. Press any button, but once you're done, press the home button. It'll take us back to the Homebrew Channel. And before we go set up Wii and GameCube games, I'm quickly going to show you how to set up the Homebrew Browser. So, let's load it up.
And you do need an internet connection for this. Don't worry, if you don't have an internet connection or you can't connect, then you can still get everything on your computer and put it on your SD card that way. But we'll let it run through. And we're loaded in. So, here you can get Homebrew games. As you can see, there's tons. You can get emulators, utilities, but there are tons of different things you can get. So, if we want to get Snake Wii, click on it and press download.
It's literally that simple. It's fantastic. So, that's how you get Homebrew apps and games as well, and then you can return to the Wii menu or the loader. We'll do that. And there's Snake Wii. So, now it's time to play our Wii and GameCube games. And the first step for that is to load Nintendont one time. So, let's load in there, and this is going to generate a file that is needed for your GameCube games to work. You can obviously play your games from Nintendont, but it looks much nicer in USB Loader GX.
But a quick rundown of Nintendont, you just select your source device, my games are on my USB, your GameCube games will show up, and you just press A to play. But now that we ran it once, we're going to hit the home button, go back to the Homebrew Channel, and now we can load up USB Loader GX. So, you can of course load it from here, but I am going to go to the Wii menu and show you your new forwarder. So, there it is.
We can load directly into USB Loader GX from here. So, let's go ahead and do that. It'll load through this screen. If you have your games on an SD card, it may prompt you to press A to turn on SD mode. If it got stuck on reinitializing devices while loading, then that most likely means that your USB drive is not compatible. And that also goes if you load into USB Loader GX, it looks corrupt, or it's just a blank white screen, or if it says USB device not initialized, switching to channel list mode, then again, you may have to find a different USB drive.
But you load it in, if you do not see your games, if they're on your SD card and you didn't press A to switch to SD while loading, you can toggle SD mode right here. Otherwise, the first thing to check if your games didn't show up is this icon in the bottom right, select game sources, make sure that Wii and GameCube are checked. And personal preference, I prefer to hide the NAND channels. If your GameCube games are also not showing up right now, let's go and change that.
So, go into your settings, go over one to custom paths, go down until you see main GameCube path, and there's SD GameCube path. So, we're just going to change this. Make sure it's directed to your games folder that have your GameCube games inside. Press okay. Path changed. If your GameCube games are on an SD, you can change both if you want. Sometimes that might be needed, but that's how you change the path. So, let's go back, and now there's my GameCube games.
If you also got your game covers from Tiny Wii Backup Manager, they should already be showing up. But if you chose to wait, you can simply press one on your Wii remote, press okay to cover download, download missing files, yes, and then it'll download them. But of course, you need the internet for this. There we go, 10 files not found, we should be all good. Press okay, and you should have all your covers. And because you got them online, it even downloads covers for Mii Channel, Netflix, Homebrew Channel.
So, it looks a bit cooler now if you want to keep NAND channels on. But that's up to you. I still leave them off. Now that we have our games all showing up, let me show you some other features of USB Loader GX. So, this icon, you can change how your games are displayed. There's a few different options. There's this one. I really like this one. And then if for some reason you didn't feel like downloading your covers, this one looks just like the Wii menu, and it's pretty cool.
And I'm sure you can see that the GameCube games look much better here. So, you can pick whatever display you want. And Black Box put a pretty cool feature in. If you don't know what a button does, you can simply hover over it, and it will tell you what it will do. So, we got a few different options in the hot bar. You can power off your Wii. You can go back to the Homebrew Launcher with this one. You can also do that by pressing the home button and Homebrew Channel.
And if you have a physical copy that you want to back up to your SD or USB, wherever you're holding your games, you can insert it now, or you can press this plus button to install the game. Unfortunately, the Wii I'm using has a broken disk drive, so I can't do this. I'll show a quick clip of another Wii that I have. It's really simple, it'll detect the game, and then it'll install it to wherever your WBFS folder is.
And that's a really cool thing about modding your Wii. You could have a broken disk drive, but you can still play all these games. And then the last icon here, if you want to play your physical copy, you can just mount it from here. And before hopping into a game, making sure they work, I'll go into the settings and show you how to change GameCube settings. So, over in loader settings, scroll down, you'll see GameCube settings, but keep scrolling and you'll see Nintendont settings.
This is where you can change things. So, you can change video deflicker. The most important one is memory card emulation. Just make sure that's on individual or multi. If it's off, you won't be able to save your games unless you have an actual GameCube memory card that you have plugged in. So, make sure it's on. You want to be able to save your game. If you're curious about the controller configurations or what you can even play with, I'll have a link in the description for more information.
But, you can use a Wii remote and nunchuk, classic controller, GameCube controller. Obviously, the last two will give you a better experience. If you want a more in-depth guide on GameCube games, that one is linked on the doc. It has the forwarder channels and all that. If you don't want to play from USB Loader GX, but back on the main page, let's go ahead and test a game. You load in the exact same way. Perfect. You get to that screen, you know it works.
If it sent you back to the Homebrew Channel, well, your custom IOSs might not be installed properly. So, you should go and retry those. And if it froze on a black screen, then it might be your actual game file itself. You might have to find a different source. But, hit the home button right now. If we click the Wii menu button, it'll take us back to the Wii menu. Big surprise, right? I know. But, we can actually change it so it sends us to the USB Loader GX menu.
So, if you want to do that, let's go back into USB Loader GX. All right, we're back. You can go into the settings, go to loader settings, and scroll down until we see return to. Click on this one and just select UNEO USB Loader GX. That's our forwarder channel. Go back. And now when you're in a game, if you click the home button, it'll take you back here. And of course, I'll quickly show you that the GameCube games will work.
As you can see, it loads through Nintendont and then into the game. But, there we go. Everything is good on this end. So, that's everything I'm going to show you in today's video. If you ran into any issues, check out the troubleshooting section coming up next or join my Discord server for assistance. I have tons of great helpers in there. Make sure to check out what you can do next with your modded Wii on the Google Doc and I hope you guys have a fantastic time playing your games.
Thank you for the support and I'll see you on the next one. Stay funky and happy modding, guys. So, if you're having issues, welcome to the troubleshooting section. It is at the bottom of my doc, but I'm going to go through it right now. If the DNS setting exploit straight to hacks is not working for you, most of the times when this happens, it takes you to the actual user agreement for the Wii. That is because some internet providers block the ISP, so it stops the exploit from working, sadly.
Rogers, Xfinity, and Spectrum are known providers where this issue is very common. But, if you have a phone and you have data, you can try to use the hotspot if you still want to use this method without an SD card. If the Wii brand letter does not show up in your messages, double-check that you have the proper date and time. Yes, year matters. And make sure you go back and forth a few days to look for that letter. But, usually it's the date and time that are the most important.
If USB Loader GX freezes while loading on reinitializing devices, that means your USB device is most likely not compatible, sadly. Likewise, if it gets stuck on waiting for HDD, first make sure your USB storage device is plugged into port zero, which is if the Wii is flat, it is the bottom port. If it's standing up, vertical, it is the port on the right-hand side. Again, this could also be a compatibility issue as well.
And continuing with that, if USB Loader GX loads as a white screen, then again, your USB storage device is not compatible. It's recommended to use a hard drive formatted as FAT32. Other formats have a lot more issues, so FAT32 is the recommended one. Or of course, you can try a different flash drive. Make sure you check the compatibility list or I do have two that work for sure linked in my video. Those ones work for me, so I haven't really tried any other ones personally.
If your games do not show up, double-check select game sources in the bottom right and make sure Wii and GameCube games are checked. When it comes to the format of games, you shouldn't have an issue there because we use Tiny Wii Backup Manager. But, just for clarification, your Wii games should look just like this. They'll be a folder with the title ID and then inside is a WBFS file named as the title ID. So, if by chance they look any different than this, some games will have two files.
Those are the larger ones that were automatically split, but that's how Wii games are supposed to look. And for GameCube games, they are similar. They have the name and the title ID and then the ISO file named as game. They are all named games. That's why they're in their separate folders. But, that is how they're supposed to be set up with Tiny Wii Backup Manager. If it's not the format, make sure your USB storage device is FAT32 as mentioned earlier.
And lastly, again, your USB device may not be compatible. I'm telling you guys that is the most common issue with USB Loader GX. It's unfortunate that that's the reality, but it's just the way it is. If you start a game and it sends you back to the Homebrew Channel, that means your custom IOSs are not installed correctly or at all. Go back to that section and make sure you install those custom IOS WADs using Yaw Mod Mee Edition.
And if you did that already, try reinstalling them and make sure that they are installed successfully. If your games load into a black screen, that is usually a problem with the actual game file itself. So, I would suggest using a different download source. And if you're having an issue that wasn't in this troubleshooting section, feel free to join my Discord server. There's helpers there that can give you a hand. Just make sure to treat them with respect and you can always search previous messages for the issues that you're having as we have had tons of people come in for help.
But, hopefully this video helped you get everything set up and I'll see you on the next guide. Stay funky and happy modding, guys.
The words are the caption track's own and nothing is reworded or re-transcribed. Paragraph breaks are placed between sentences so the text reads as prose.
Free tools for your own script. No signup, no login.
Paste your draft and see where viewers are likely to drop off, with a rewrite for each weak line.
Paste the first 30 seconds of your own draft for a hook score and rewrites.
Check your draft against YouTube's advertiser-friendly guidelines before you record it.
Read this channel's public videos and transcripts, and download a writing brief for it.
Most replayed moment #1
22:182.2x the video's typical replay level
the Homebrew Channel, and your apps should automatically load. If they do not, press one on the Wii remote, and you'll be able to select the device you have your apps folder on, but they should automatically show up. Fun fact, you can also pop the bubbles in
Said at 22:11
Most replayed moment #2
19:472.1x the video's typical replay level
Just a reminder, I'm setting my games up on my external hard drive. So I've plugged that one in. Now click this icon here. Select drive and go and find it. Smack like. It'll detect the drive [music] and now we're ready to add files. So, there's two different ways to add games. You can add an entire folder
Said at 19:39
Most replayed moment #3
17:162.0x the video's typical replay level
your SD card if you'd like, or all on your USB drive, or you can have a combination. You can have your apps on your SD card and your games on USB drive. It's totally up to you. I'm personally going to have all of my games separate on a hard drive. Windows does
Said at 17:10
The graph counts replays. It does not show where viewers stopped watching.
Sentence shape
| Measure | This transcript |
|---|---|
| Sentences | 597 |
| Average words per sentence | 12.3 |
| Longest sentence | 67 words |
| Questions asked | 3 |
| Sentences containing a number | 34 |
Most used terms
Filler phrases
25 in total: like 15 · actually 4 · basically 2 · you know 2 · literally 1 · right? 1.
A literal whole-word count of the same phrase list the Prepublish browser extension uses, so a phrase inside another word is not counted and a phrase used in its ordinary sense still is. It is a count and not a judgement.