Getting the transcript
Reading the captions from YouTube. A video nobody has opened here before takes 10 to 30 seconds; this page fills in on its own.
Getting the transcript
Reading the captions from YouTube. A video nobody has opened here before takes 10 to 30 seconds; this page fills in on its own.
Zubair Trabzada | AI Workshop · @AI-GPTWorkshop
This video has no Most replayed graph yet: YouTube shows one only once a video has enough views. These are the moments viewers replayed most in Zubair Trabzada | AI Workshop's most watched videos.
Most replayed moment at 9:02
4.9x that video's typical replay level
July 7th on your plans on your cloud plans. So, go ahead and take advantage of that because after that it's going to get pretty expensive and move to usage. I've been building non-stop. So, I recently built my personal assistant and my second brain I updated with cloud Fable 5 and it's absolutely incredible.
Said at 8:55
Most replayed moment at 13:13
2.9x that video's typical replay level
capturing the humor uh so you can play around with this prompt on whatever character you're uh creating for your own use case so afterwards after that that comment is generated then I'm outputting this and this is where I'm utilizing this HTTP request tool to grab
Said at 13:06
Most replayed moment at 21:31
5.4x that video's typical replay level
you if you scroll down to the bottom, you'll see that I have built Jarvis AI assistant prompt. So I've given you this prompt back before this was back when I built Jarvis. So you can have access to that so that way you can build a version of Jarvis for yourself. And then afterwards at the bottom, you're also going to
Said at 21:23
The graph counts replays. It does not show where viewers stopped watching.
Words
3,028
Runtime
14:44
Speaking pace
206wpm
Reading time
13min
206 words per minute, above the 201 75th percentile of 349 measured videos. That distribution comes from the 349-video hook study.
Opening (first 30 seconds)
GPT-6 Astra and the Higgsfield Blender plugin just completely changed how we create videos and 3D models. Now, we all know that video models like C-Dance 2.5 are amazing, but they're incredibly expensive. So, you want to make sure you're not burning credits on generations that come out wrong. And that's exactly what this workflow gives you. You control the camera movement, you set the scene in the environment, you lock in your angles all before you spend a single credit. So, in this video, I'm going to show you step-by-step how to use this so that way all you do is just
103 words, the words spoken in the first 30 seconds at 206 words per minute.
Free, no signup. See how the first 30 seconds hold attention, with rewrites.
Sentence shape
| Measure | This transcript |
|---|---|
| Sentences | 165 |
| Average words per sentence | 18.4 |
| Longest sentence | 71 words |
| Questions asked | 21 |
| Sentences containing a number | 34 |
Most used terms
Filler phrases
119 in total: like 33 · uh 27 · kind of 23 · right? 20 · um 6 · actually 4 · basically 2 · literally 2 · you know 2.
A literal whole-word count of the same phrase list the Prepublish browser extension uses, so a phrase inside another word is not counted and a phrase used in its ordinary sense still is. It is a count and not a judgement.
Free, no account. See where attention is likely to drop, with a rewrite for each weak line. The free check shows the scores and the one issue costing the most. Or run it on the words above first.
Free · No login · See a sample audit first if you prefer.
What this transcript is
Every word below is the caption track YouTube publishes for this video, pulled from the video itself and reproduced unchanged. It is not Prepublish's writing, not a summary, and not a re-transcription: it is the video's own published captions. English captions, generated automatically by YouTube, in the video’s original language. Source: the video on YouTube. A channel that would rather this page did not exist can ask for its removal through the contact page, and it is removed.
GPT-6 Astra and the Higgsfield Blender plugin just completely changed how we create videos and 3D models. Now, we all know that video models like C-Dance 2.5 are amazing, but they're incredibly expensive. So, you want to make sure you're not burning credits on generations that come out wrong. And that's exactly what this workflow gives you. You control the camera movement, you set the scene in the environment, you lock in your angles all before you spend a single credit.
So, in this video, I'm going to show you step-by-step how to use this so that way all you do is just follow me along. All right, let's jump right in. All right, so we're going to be using the GPT-6 Astra model inside our Higgsfield plugin or inside our Higgsfield Blender plugin inside our Blender. Now, again, don't worry if you don't know any of these. I'm going to explain everything. I'm going to show you how you can install the software, everything.
All right, so first of all, this is Blender. Now, Blender's an open-source platform. You can think of Blender as one of the most popular ways to create 3D models, animation, visual effects, and other assets for video generation and 3D modeling. Again, this is completely open-source and free. So, all you have to do is just head over to Blender blender.org and go to download and you can download Blender here. So, once you have Blender downloaded and you click on open, this is what it's going to look like.
Again, it might look scary, but don't worry about it. We're not going to actually use Blender or any of its features. Like I said, we're going to let our GPT-6 Astra do all of the heavy lifting for us. All we're going to do is just give it a couple of prompts. All right. So, in order to install the Higgsfield Blender plugin inside our Blender, all you have to do is just head over to higgsfield.ai/plugins/blender. Now, again, Higgsfield has a plugin for a bunch of different softwares.
You got to make sure you are downloading the Blender one, right? Once you click on download, this is going to download a zip file and all you have to do is then come inside your Blender software and just literally drag that Higgsfield Blender plugin inside this particular window screen. And then afterwards, all you have to do is just click okay, and this is going to go ahead and download the software for you. And then afterwards, you just click on sign in, and it's going to have you authenticate and ask you to allow uh your Higgs Field plugin to be able to uh operate inside Blender.
And that's literally all you have to do. Once you do that, this thing this little chat window is going to show up. So, as you can see, on top right here, you have the option to create an entire scene, which is the scene builder. You can create 3D models, character animations, images, videos, and a bunch of other stuff. But like I said, we're going to let uh our Chat GPT Astra or GPT-6 Astra uh do all the heavy lifting for us.
So, you want to make sure you are on the scene builder right here. And then afterwards, you want to make sure you come to the bottom right here, and you select the GPT-6 Astra model. Again, uh you can use other models in there as well, but of course, GPT-6 Astra is the best model right now, so uh make sure you're selecting that. So, you want to be careful as far as prompting this because, like I said, uh the point of all of this is to make sure that we're staying as efficient as possible and not wasting any kind of credit.
So, therefore, having a good prompt to start with uh makes a huge difference there. So, I'm going to put the link in the description for a bunch of prompts that I'm going to use in this video, so you guys can just basically copy-paste this. Okay, so before we get to generation, let me show you an example of what this looks like, so that way you can see the output of the Blender, and then also adding a reference image or some kind of a reference, so that way the output actually looks like a finished product or the finished video with the different camera movements and angles that we're going to be looking at.
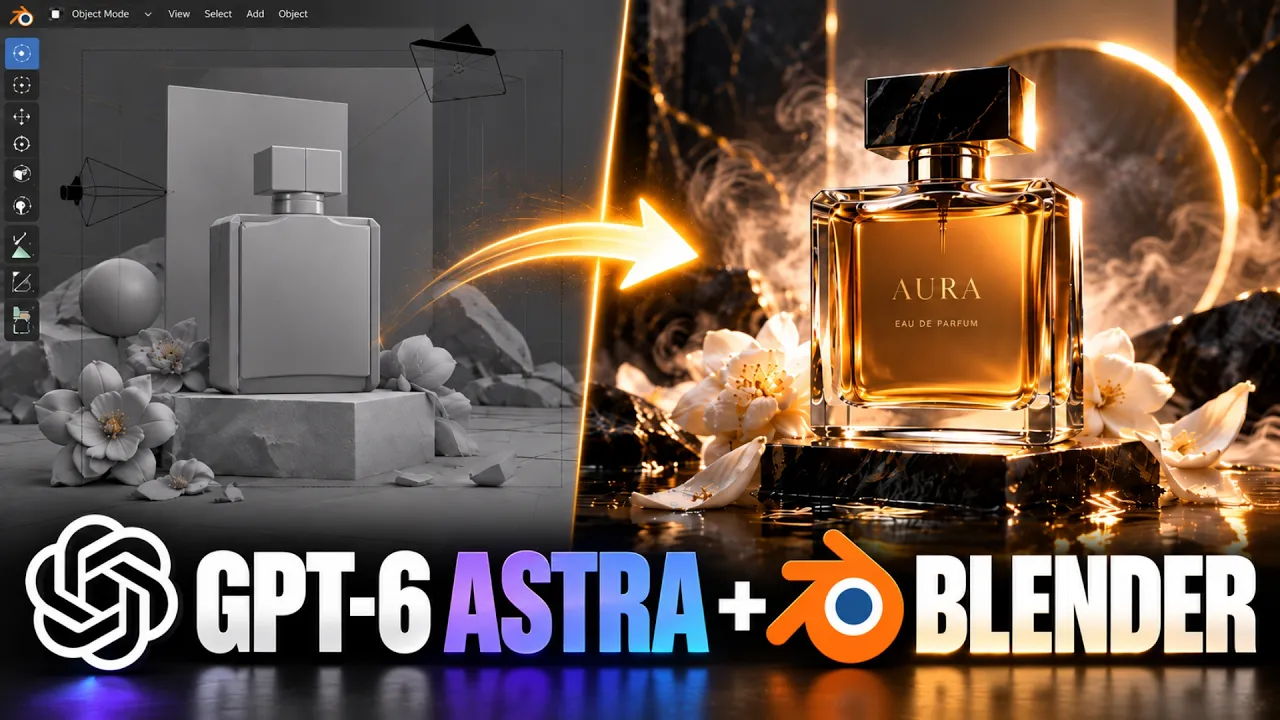
So, for instance, this is uh on the left-hand side the output from a Blender, and then on the right-hand side, this is the finished video we're going to be using C Dance 2.5 model. So, let's take a look at the this example first, and then I'm going to come back and talk about the details here. >> All right. So, as you can see, let me just play this in the background. So, on the left-hand side, this is the output from the Blender.
So, you can see all of the camera movements, the 3D object object, the focus of camera, where it's going to, kind of different scenes. All of that is completely controlled by our Blender output. And therefore, on the right-hand side, when we upload our reference image of this car, then it follows everything, the scene, the environment, all of it is kind of put together in exactly the the way the output from the Blender uh has shown us, right?
So, that's how much control you can have over the movements, the camera angle, and everything uh from for your final uh video because of the output of this Blender. So, that I just wanted to show you before we jump into generation, so you see exactly why this is so important to create these different angles and movements before we jump into a model like C dance 2.5 or any other popular video model to create the final product here.
So, that's going to be essentially the end product of the file that's going to come out of the GPT-6 Astra using the Blender um plugin here. Okay? So, let's go ahead and now give this a prompt. So, again, make sure you're in the scene builder and GPT-6 Astra. So, we're going to use something like a product ad, for instance, right? So, I'm going to go ahead and actually show you guys something that output that's going to look something similar to this.
We're going to use uh this perfume, right? To set up the scenes, a product advertisement, essentially. Uh so, it's going to look something like this, right? So, as you can see, the camera kind of starts by zooming into the product and goes from a different angle and kind of showcases the kind of vertical side as well. And in the end result will be pushing into the product itself, showcasing all of the details of the brand and everything like like that.
All right. So, that's going to be kind of the final output exactly not this but similar to this. So, So now inside our blender all we have to do is just copy this prompt. So I'm going to go ahead and like I said copy and paste this prompt right here. Again, this is going to be in the description of the video so you guys can just kind of use this as a reference as well. But essentially we're just letting GPT-6 Astra direct all of the creations inside blender using this particular prompt.
So I'm just saying build an 18-second multi-shot gray box previews for a product and in blender 24 FPS 432 frames per second 920 by 1080. Again, I'm just giving it the description. So now if I click on generate, so now what's going to happen is now GPT-6 Astra is going to take a look at this prompt that we gave it and based on that figure out everything that needs to happen inside our blender then order to generate the output based on that prompt.
Again, with the different angles and the environments and output and everything else. So again, like I said, you and I don't have to do anything. All we're doing is just interacting with GPT-6 Astra and letting it handle everything inside our blender here, right? Using this particular plugin. So now this is going to take a couple of minutes, right? So while this is being generated, what you can do is also if you're just watching this blender right here as this generates, you'll see kind of the different aspect of it being built kind of section by section.
So while this is generating, I'm also going to show you guys how you can actually use this inside Claude as well if you choose to. So I'm inside Claude. Again, this is just based on preference. So if you want to use like a stable 5.1 model and kind of compare to your GPT-6 Astra, you can do that as well. I'm going to show you how to do this very easily. So in order to kind of direct our blender from our Claude, all we have to do is install our Hicksfield bridge plugin here or bridge connector here.
The way to do that is very simple. You're just going to head over to your connectors inside your Clod or Clod code. You're going to click on add custom connector and you're just going to name it something like Higgs Field Bridge, right? And then to get the remote MCP URL, head over to your Higgs Field and go to uh MCP and CLI, go to Clod, and you're just going to copy this MCP as well, but we could just going to use the bridge.
So, all you have to do is go back here and you just put this link, which is bridge.higsfield.ai/mcp. That's very simple. All you have to do is just click on continue now and it's going to go ahead and add this. Obviously, mine's not going to add because it says a connector with this URL already exists, right? So, cuz I already have this Higgs Field Bridge added. So, now all you have to do is just go back to your Clod and put the same exact prompt and it will do the same exact thing from your Clod as well because it has the connection to your Blender through that uh um um Higgs Field Blender MCP, right?
So, that's how simple it could be. So, you can see now it's starting to build out the environment, the scene, and everything else. And you can always, while this is working, you can just uh press play here, so you can see exactly what's going on. There you go. Kind of you can see the angle and the movement of camera kind of coming in from afar, uh looking at the different sides of the product itself, and then zooming in, zoom out, the camera moving from top, bottom, everything else.
Like I said, I didn't do any of this. All of this is being generated by GPT-6 Astra with this prompt that we gave it, right? So, after this thing is done, so let's go ahead and give this a couple of minutes. All right, so after a couple of minutes, now this thing is complete. So, in order to export this particular file, all you have to do is just come to the right-hand side right here, click on output here, and you want to make sure that your um um pixels are, sorry, I meant the resolution to be 1920 by 1080, right?
Because we want to generate this into a 16x9 aspect ratio, right? Unless you're, like I said, you if you're using this for short form, then that's a different story. But for long form, this is what it kind of looks like. Frame rate, you're going to leave it at 24 FPS. And then afterwards, make sure your media type is video, right? And then you're going to leave it as RBG. So then afterwards, you're going to head over to your view right here, and you're going to click on render play bass.
So this is now what just got generated. So now you can download this, and then afterwards, so we're going to go to our our Higgsfield here, and what we're going to do is go to video, and then click on C dance 2.5 because obviously we're going to use this particular model to generate the final output. So now, what we need to do is we need to attach that reference output or the output of the blender that we just exported.
Again, the output is this render that we just generated from our blender there, right? So it's kind of like a cinematic shot or sorry, the angles and the environment and view and everything like that that we generated through that prompt with GPT-6 Astra for this particular product view. So you can see this is what it looks like. So I'm just going to go ahead and I already uploaded this. So then I'm just going to click on this.
You'll see that it gets uploaded here. And then also an image of this perfume. Again, I just used GPT image to create the perfume. So feel free to use whatever model you want to do. So now another thing is obviously we want to create a prompt here. So I have these other generations that are going in the background, but don't worry about it. So what I'm going to do is say use the attached video, and this is where we can reference this particular video here.
So Higgsfield already kind of named it as video one, but so you all you have to do is just select that as a strict camera and staging reference. Copy its camera motion framing cut points and position of every object exactly. Do not copy its look and it's and it's an textured gray blackout. Right? So we're just saying copy all of the movements, the camera, the cut points, the framing, the motion, all of it, but just don't copy the you know, things that are inside the video, right?
Because it's just kind of gray boxes and stuff like that. And then we're saying use the image reference, right? So, the product image stays completely locked, the reference camera moves, the product never does, and we're giving that image one as the reference. So, all you have to do is Oops, I shouldn't have created that. I forgot in the bottom we got to scroll to make sure that we're using I think it's 18 seconds. So, I want to make sure I put this up to 18 seconds and then everything else we're going to leave the same.
Make sure it's 16 by 9 and 1080p. So, I'm going to click on generate. Now, this is going to go ahead and generate. Let me get rid of this one cuz that's not what I That's 4-second one that was being generated. All right. So, there you go. So, now you can see on the right-hand side we have this video one as the strict camera staging reference copies camera motion. Again, this is the Blender output and then the reference image is our product right here.
So, let's just go ahead and give this a couple of minutes because this is going to take a little bit of time to generate and then we're going to come back and take a look at it. All right. So, after a couple of minutes it looks like it generated. As you can see on the right-hand side we have that reference image and the output from Blender and this is the final product. So, let's go ahead and play this. >> [music] >> Very cool.
So, you can see it kind of followed all of the details of the camera environment or the camera angles and kind of zoom in and zoom out and the top view, the kind of like motion towards the product at the end and everything that was related to or everything that was exactly pointed out and shown on that Blender output. So, that's how much you can control this. Obviously, like I said, this is just a simple example, but you can use this method to generate anything, right?
Whether it's uh you know, architecture view, uh any kind of game environment, all of that stuff is possible with this MCP, like I said, with this Astra uh or the GPT-6 Astra inside your um Blender and Hex Field, you can generate anything you want. You don't have to know any of the Blender skills or anything like that, right? So, all of this stuff is now possible for you to generate it just with prompts here. Like I said, it's up to you if you want to use GPT-6 Astra or Claude.
It basically works pretty much similar, but GPT-6 Astra is a little better at understanding and generating everything for you because I feel like it's a better model, at least for this that I was testing here. So, anyways, hopefully you guys found this helpful. Take a look at the prompts, like I said, use the prompts to your own liking. You can use uh GPT-6 Astra to change the prompts to whatever uh fits your particular needs.
So, if you're building something or if you're creating a 3D uh as model or a 3D scene for a particular uh scenario that you're using, then you can just have it uh regenerate or redo the prompt to uh fit to your own liking. Anyways, hopefully you guys found this helpful. All of the like I said, all of the links are going to be in the description. Thanks for watching. Make sure you like, subscribe, and I'll see you on the next one.
The words are the caption track's own and nothing is reworded or re-transcribed. Paragraph breaks are placed between sentences so the text reads as prose.
Free tools for your own script: paste a draft and see where it stands before you record it.
Paste your draft and see where viewers are likely to drop off, with a rewrite for each weak line.
Paste the first 30 seconds of your own draft for a hook score and rewrites.
Check your draft against YouTube's advertiser-friendly guidelines before you record it.
Read this channel's public videos and transcripts, and download a writing brief for it.